

Irresistible Chocolate Mini Egg Easter Cookies: The Ultimate Holiday Treat!
As Easter approaches, the joy of baking fills our kitchens with delightful aromas. If you’re searching for a truly special treat that combines classic festive flavors with an unexpected gourmet twist, look no further than these spectacular Easter mini egg cookies. Imagine a cookie that’s perfectly crispy on the edges, wonderfully soft and chewy in the center, and generously studded with vibrant, crunchy chocolate mini eggs. What if we told you these delectable cookies are ready in under 30 minutes, require minimal cleanup with just one bowl, need no fancy equipment, and remarkably, no chilling of the dough?
These aren’t just any mini egg cookies; they’re an experience. We’ve taken a beloved holiday classic and elevated it to new heights with two secret ingredients: **brown butter** and **miso paste**. This powerful duo transforms a simple chocolate chip cookie into a sophisticated dessert, offering layers of caramelly depth and a perfectly balanced sweetness that will leave everyone asking for the recipe. Get ready to impress your family and friends this Easter with a batch of cookies that are as easy to make as they are delicious to devour.

Why These Mini Egg Cookies Will Become Your New Easter Favorite
Is there anything better than biting into a cookie that boasts a golden-crisp exterior and a gloriously soft, gooey center, brimming with delightful chocolatey pockets? For many, it’s the pinnacle of cookie perfection! Easter, with its abundance of sweet treats, presents the perfect opportunity to indulge, and these cookies are truly exceptional. Even if you don’t have an overwhelming sweet tooth, these cookies are designed to captivate your palate, thanks to two truly game-changing elements in this recipe: the incredible depth of **brown butter** and the savory intrigue of **miso paste**.
The Magic Duo: Brown Butter & Miso
Let’s talk about these unique additions. Miso might initially sound unconventional for a sweet baking recipe, but trust us, it’s a revelation. This fermented soybean paste introduces a complex umami flavor that expertly cuts through the richness and sweetness of the sugar and chocolate, creating a perfectly balanced cookie. The result is a captivating sweet and subtly salty flavor combination that is utterly addictive. It’s this unexpected savory note from the miso paste that elevates these cookies from delicious to unforgettable.
And then there’s the brown butter. While it adds a small extra step to the preparation, it is unequivocally 100% worth the effort. The process of browning butter transforms it, developing a deep, nutty, and exquisitely caramelly flavor that is simply unbeatable. This richness permeates every bite of the cookie, adding a layer of sophisticated flavor that a regular butter cookie simply cannot achieve. Together, brown butter and miso create a symphony of flavors that will truly surprise and delight.
Effortless Perfection: Quick & Easy Baking
Beyond their gourmet taste, these mini egg cookies offer unparalleled convenience. They take **less than 30 minutes** from start to finish, making them ideal for last-minute Easter baking or satisfying an instant craving. The dough is incredibly forgiving and mixed entirely in **one bowl**, significantly reducing cleanup. You’ll also be pleased to know you need **no special equipment** – just standard kitchen tools. And perhaps the best part for impatient bakers? There’s absolutely **no need to chill the dough** before you bake, meaning you can go from mixing bowl to warm cookies in record time!
Feeling extra indulgent? Take your chocolate obsession even further by transforming these into gorgeously gooey, Easter egg stuffed cookies. Imagine a whole, molten Easter egg surprise hidden inside each cookie – pure bliss!
Essential Ingredients for Your Mini Egg Masterpiece
Crafting the perfect mini egg cookie begins with understanding each ingredient and its role. Here’s a detailed look at what you’ll need to create these truly special treats:
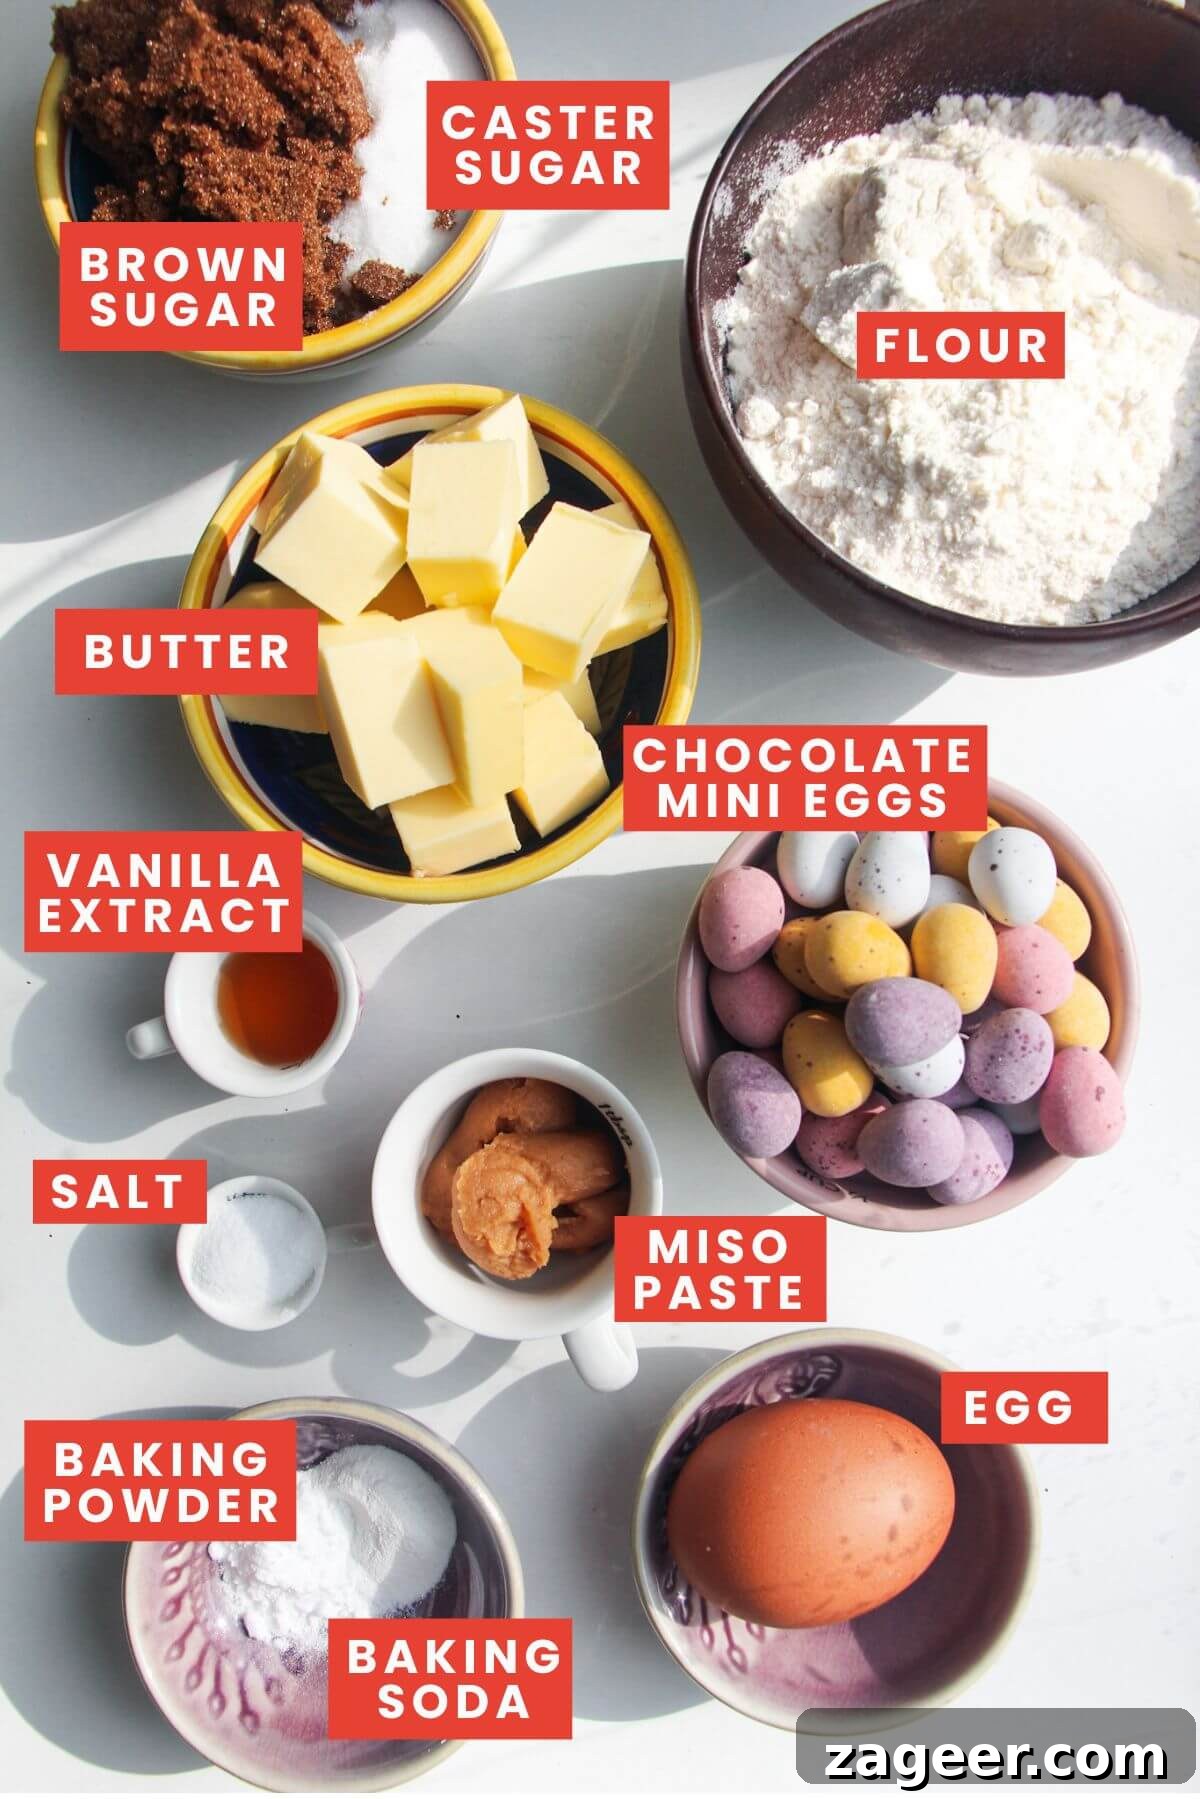
- Mini Eggs: We typically use Cadbury Mini Eggs for their iconic milk chocolate core and delightful crispy, pastel-colored sugar coating, which are a festive mainstay in the UK and widely available during Easter. However, feel free to use any miniature Easter eggs you can find. If mini eggs are out of season or unavailable, regular chocolate chips, chocolate chunks, or even a roughly chopped block of your favorite chocolate will work beautifully. The key is to have those delightful pockets of chocolate throughout the cookie.
- Butter: Unsalted butter is highly recommended here, as it gives you precise control over the overall saltiness of your cookies, especially when combined with miso. If salted butter is your only option, simply reduce the added salt slightly. The true game-changer is **browning the butter** – this simple, yet transformative step is the secret to unlocking that rich, deep, nutty, and caramelly flavor that makes these cookies so extraordinary. It adds an incredible depth of flavor that cannot be replicated.
- Sugar: This recipe calls for a blend of both brown sugar and caster (superfine) sugar. Brown sugar is crucial for imparting a lovely caramel note and contributing to the soft, fudgy texture of the cookies. Caster sugar, with its finer granules, dissolves more easily, contributing to the cookie’s delicate crumb. If caster sugar isn’t available, standard granulated sugar will work perfectly fine as a substitute, though the texture might be slightly different.
- Miso Paste: As mentioned, miso paste might seem like an unusual addition to a sweet baking recipe, but it is an absolute revelation. We strongly recommend using white miso paste for its milder, slightly sweeter, and less intensely salty profile compared to darker varieties. It introduces a gorgeous, deep umami flavor that harmonizes perfectly with the sweet chocolate and the nutty notes of the brown butter. This savory depth prevents the cookies from being overly sweet and adds an addictive complexity. Please do give it a try – it truly elevates the recipe! If you absolutely cannot find miso paste, an extra teaspoon of salt can provide a somewhat similar balancing effect, but it won’t replicate the unique umami depth.
- Vanilla Extract: Essential for any good cookie recipe, vanilla extract adds a warm, aromatic note that enhances the overall flavor profile and complements the chocolate and caramel. Use good quality pure vanilla extract for the best results.
- Egg: A single large egg acts as a binder, helping to emulsify the ingredients and provide structure, richness, and moisture to the cookies, contributing to their signature chewy texture.
- Plain Flour: All-purpose flour provides the main structure for the cookies. Ensure it’s spooned and leveled for accurate measurement to prevent tough cookies.
- Baking Powder & Baking Soda: These leavening agents work in tandem to give the cookies their ideal rise and texture. Baking soda reacts with the acidic brown sugar and miso to create a soft, chewy interior, while baking powder contributes to a slight lift.
- Salt: A pinch of salt is vital in any sweet recipe. It balances the flavors, enhances the sweetness of the chocolate and sugar, and brings out the nutty notes of the brown butter.
Step-by-Step Guide to Baking Perfect Mini Egg Cookies
Creating these heavenly mini egg cookies is a straightforward process, designed for efficiency and delicious results. Follow these simple steps to ensure your cookies turn out perfectly every time:
1. The Art of Browning Butter: Unlocking Flavor
Begin by browning your butter. This foundational step is simpler than it sounds but yields incredible flavor. Place your diced unsalted butter into a small, light-colored saucepan – a light-colored pan allows you to better observe the color change. Set it over medium heat. Allow the butter to melt completely, then continue to cook, whisking or stirring constantly with a silicone spatula. The butter will foam, then subside, and eventually, you’ll see small, golden-brown specks forming at the bottom of the pan. It will also emit a distinctly rich, nutty, and caramelly aroma. This usually takes just a few minutes. As soon as you see these brown specks and smell that beautiful nutty fragrance, immediately remove the pan from the heat to prevent burning. The residual heat will continue to cook it slightly. Pour the browned butter (including the delicious brown bits) into your large mixing bowl and set aside to cool slightly.

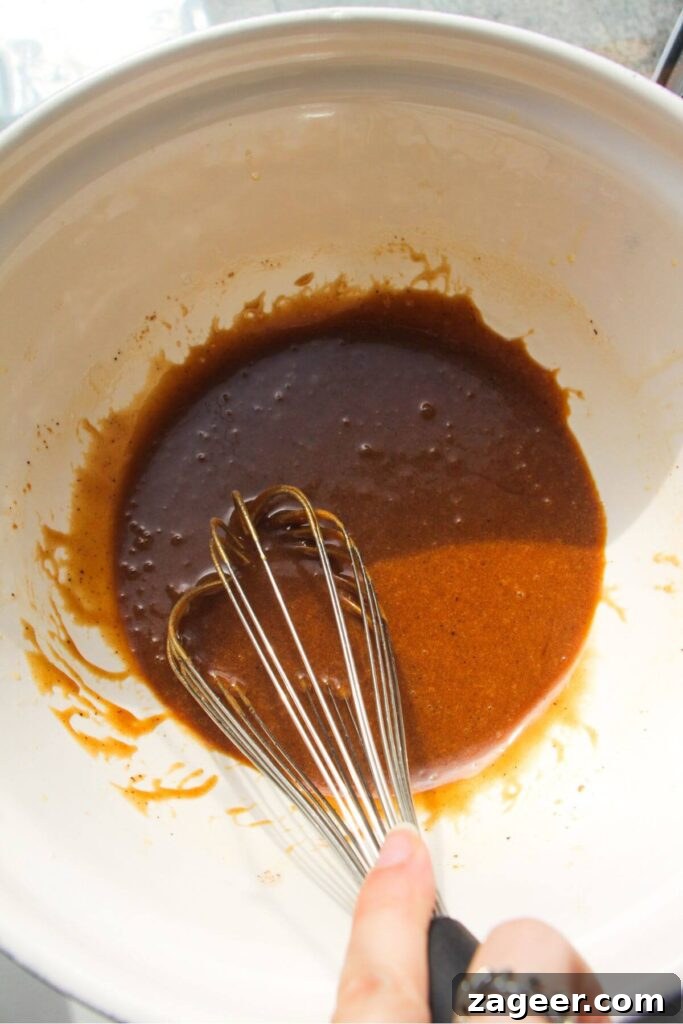
2. Combining Wet Ingredients for a Rich Base
Once your browned butter has cooled slightly (you want it warm, not sizzling hot, to avoid scrambling the egg), add the brown sugar, caster sugar, vanilla extract, miso paste, and salt to the same mixing bowl. Use a whisk or a sturdy fork to mix these ingredients vigorously until they are well combined and the mixture is smooth and glossy. Allow this mixture to sit for about 5 minutes. This brief resting period helps the butter cool down further and allows the sugars to begin dissolving, creating a smoother base and preventing the egg from cooking when added.
3. Incorporating the Egg & Dry Ingredients
After the 5-minute rest, crack in your egg. Whisk the mixture vigorously for at least 1-2 minutes until it transforms into a lovely, thick, and lighter-colored batter. This vigorous whisking incorporates air, which contributes to the cookies’ light and chewy texture. Next, add the plain flour, baking powder, and baking soda. Using a silicone spatula or wooden spoon, gently fold these dry ingredients into the dough. Stop mixing when there are still a few floury streaks visible. This is a crucial “pro tip” to prevent overmixing the dough. Overmixing develops the gluten in the flour too much, which can lead to tough, cakey cookies instead of soft and chewy ones.
4. Folding in the Mini Eggs & Forming the Dough Balls
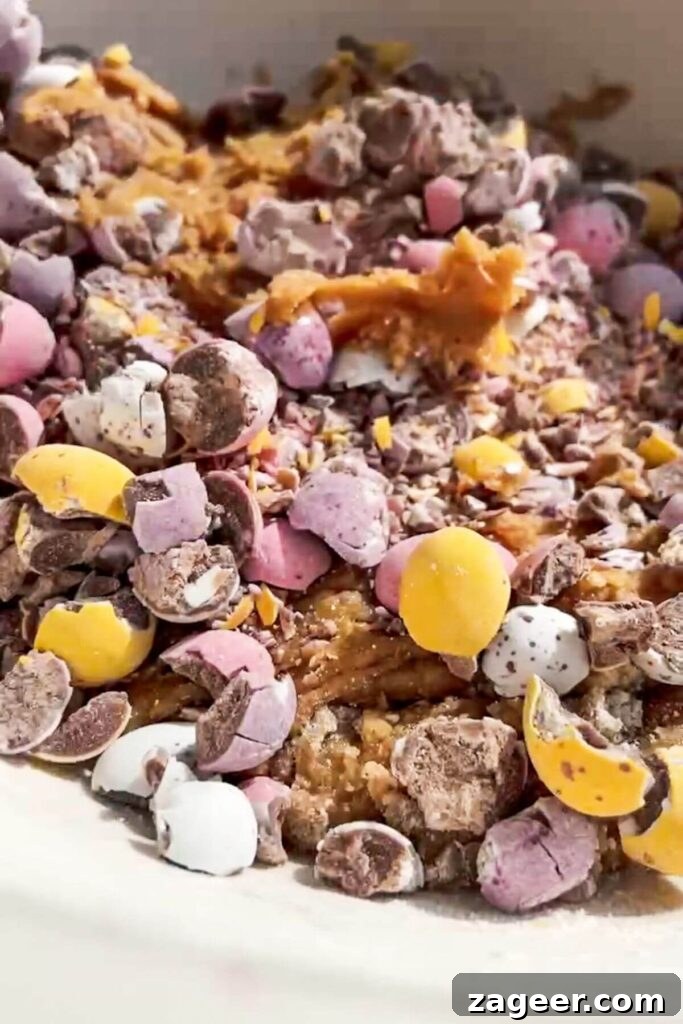
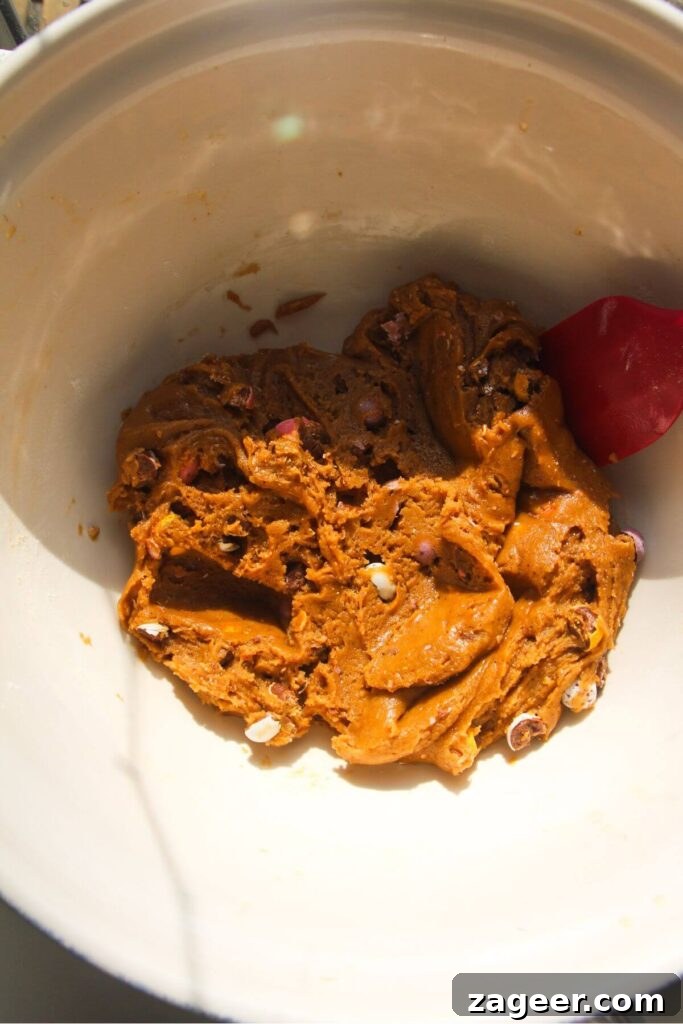
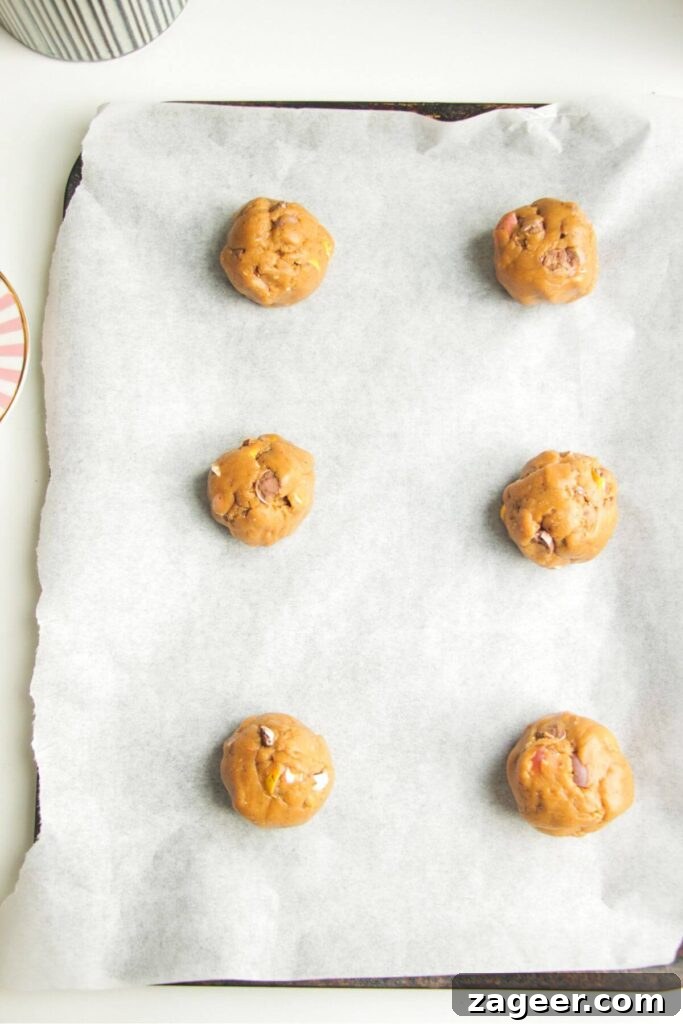
Now, it’s time for the stars of the show! Gently fold in your crushed mini Easter eggs. Continue to mix just until the floury streaks disappear and the mini eggs are evenly distributed throughout the cookie dough. Be careful not to overmix at this stage either. Once combined, scoop up golf ball-sized portions of the cookie dough and roll them into neat balls between your palms. Arrange these dough balls on your prepared baking trays, ensuring you leave ample space (about 2 inches) between each cookie to allow for proper spreading in the oven. This recipe typically yields about 12 large, generously sized cookies, but you can make them slightly smaller if you prefer, adjusting the baking time accordingly.
5. Baking to Golden Perfection
Preheat your oven to 360°F (180°C) fan-assisted, and line two baking trays with parchment paper. Transfer the trays with your perfectly portioned cookie dough balls into the preheated oven. Bake for approximately 11 minutes. At this point, the cookies should be lightly golden around the edges but still appear wonderfully soft and slightly underbaked in the very center. This baking time is crucial for achieving that coveted combination of crispy edges and a delightfully soft, gooey middle. If you prefer your cookies to be on the crispier side, simply leave them in the oven for an additional one to two minutes, but be careful not to overbake, as they can quickly become dry.
Once baked, allow the cookies to cool on the baking trays for about 5-10 minutes. This resting period allows them to firm up slightly and continue baking gently from the residual heat. After this, transfer them carefully to a wire rack to cool completely. For perfectly circular cookies, a clever “pro tip” is to use a large cookie cutter or a glass slightly larger than your cookie. Immediately after removing the cookies from the oven, place the cutter/glass around a warm cookie and gently swirl it to “scoot” the edges into a perfectly round shape. This trick works wonders for achieving bakery-quality aesthetics.



How to Make Easter Egg Stuffed Cookies: An Extra Special Treat
For an unparalleled chocolatey surprise and an even more decadent Easter experience, consider stuffing your cookies with a whole, small Easter egg! This adds an incredible gooey center that’s simply irresistible when warm.
The key to success here is choosing the right kind of mini Easter egg. We highly recommend using eggs with a soft, gooey, or flowing center, such as Creme Eggs, caramel-filled eggs, or even hazelnut praline eggs. These melt beautifully inside the cookie, creating a luscious, molten core. While you can certainly use solid chocolate mini eggs, the gooey-centered varieties offer that extra ‘wow’ factor.
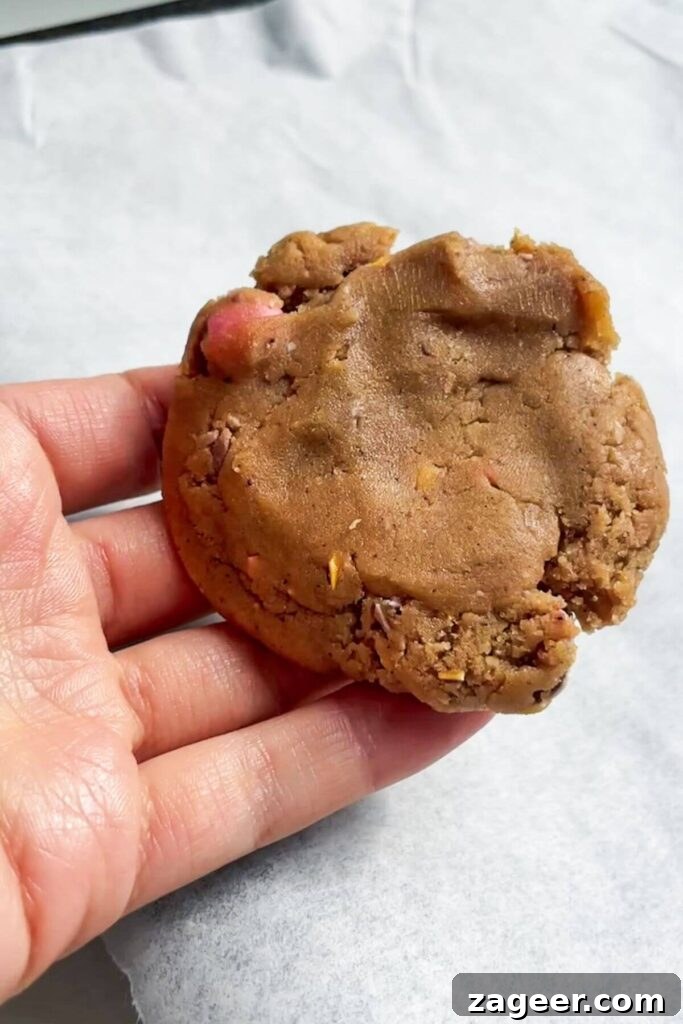
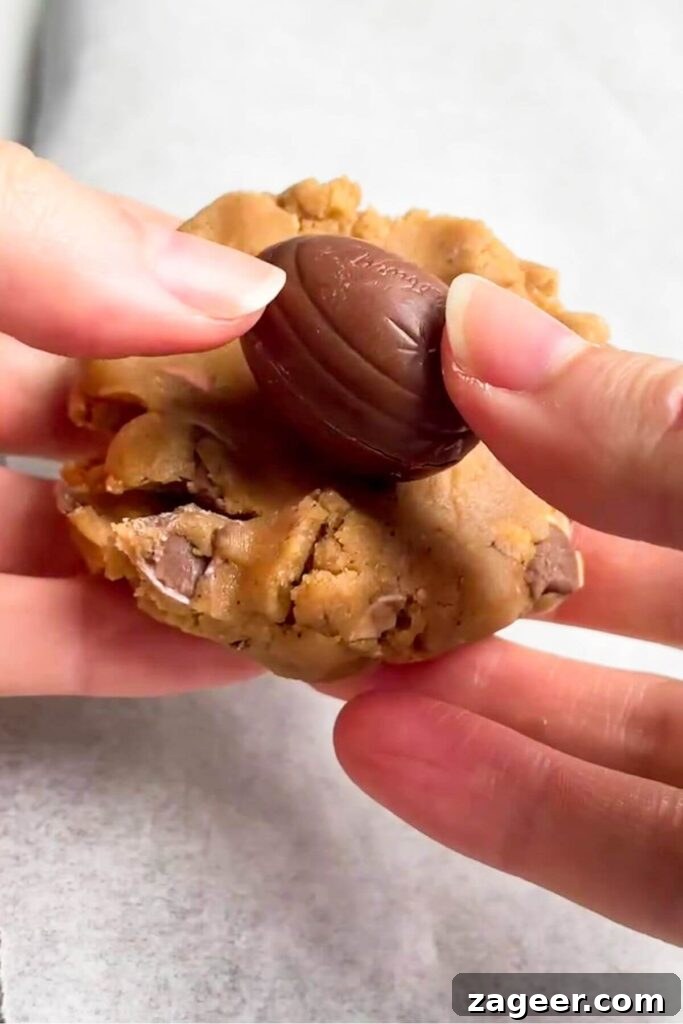
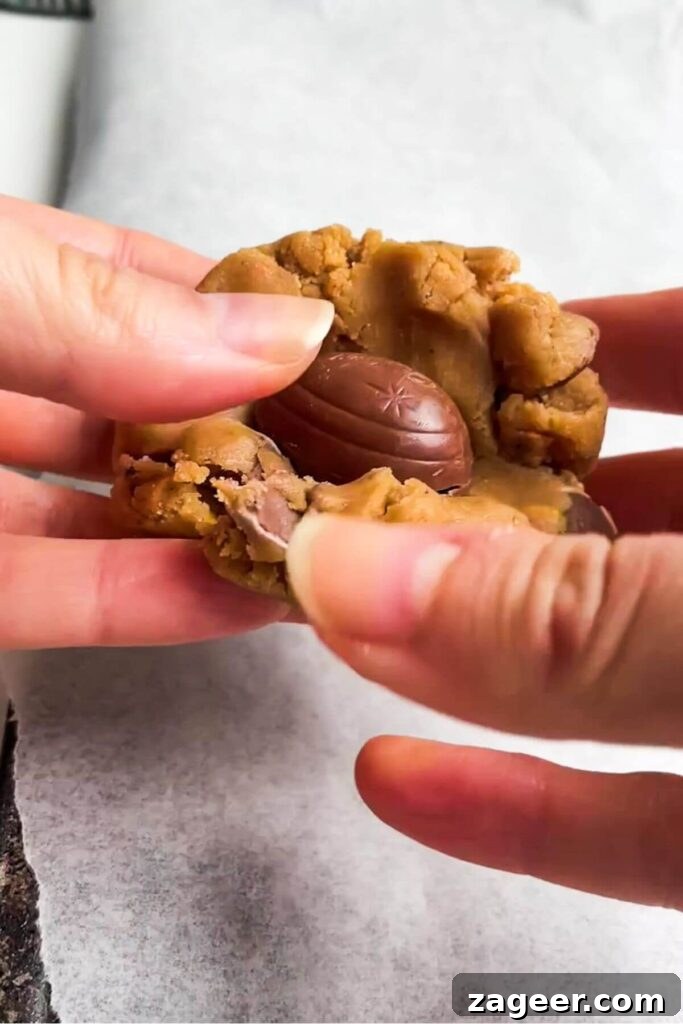
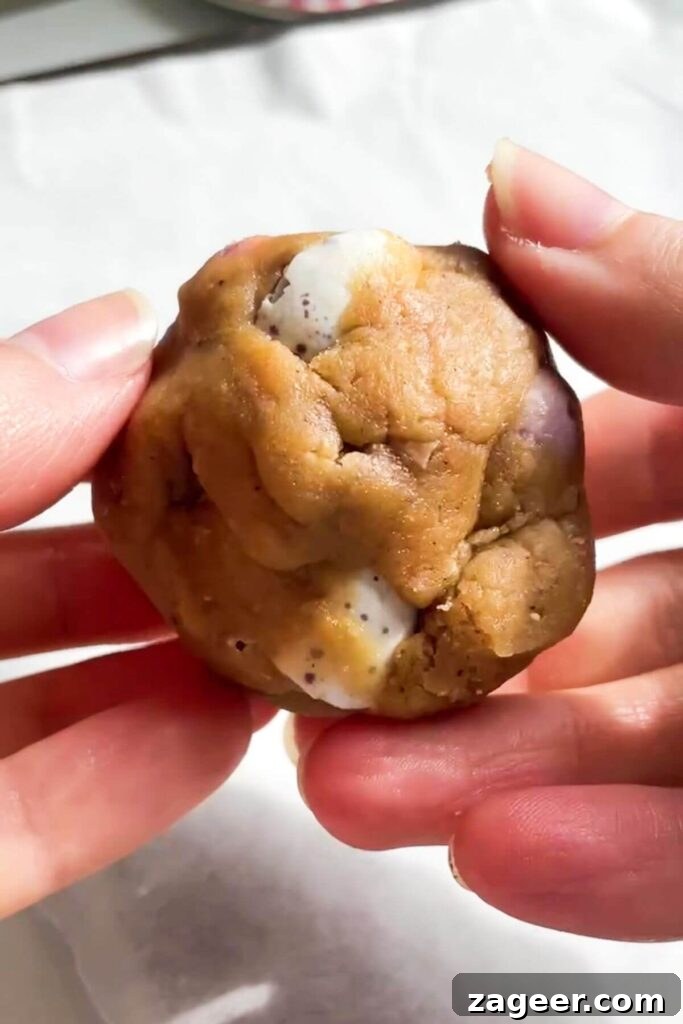
To create these stuffed delights, first take a roughly golf ball-sized piece of your prepared cookie dough. Gently press and flatten it into a small, even circle, ensuring it’s wide enough to enclose your chosen Easter egg. Place the mini Easter egg directly in the center of the flattened dough. Carefully gather the edges of the cookie dough around the egg, folding them up and pinching them together until the egg is completely encased within the dough. Roll the dough ball gently between your palms to ensure a smooth, sealed surface. Once the egg is fully hidden, place the stuffed cookie dough ball on your prepared baking tray and bake as per the standard recipe instructions below. The result is a truly magical cookie, revealing a delicious, molten Easter egg center with every bite!
Frequently Asked Questions About Mini Egg Cookies
For these mini egg cookies, classic chocolate mini eggs with a crispy pastel-colored shell (like Cadbury Mini Eggs) are ideal for their festive appearance and delightful crunch. However, you have plenty of flexibility! Any brand of small chocolate Easter eggs will work perfectly. If you can’t find mini eggs, or if it’s not Easter season, feel free to use regular chocolate chips (milk, dark, or white), chopped chocolate bars, or even M&M’s for a similar pop of color and chocolatey goodness. For the stuffed cookie variation, we highly recommend gooey-centered eggs like Creme Eggs or caramel-filled eggs for the best molten surprise.
These delicious mini egg cookies will stay fresh and soft for about 5 days when stored in an airtight container at room temperature. For an extra treat, pop a leftover cookie into the microwave for about 15-20 seconds to warm it through and achieve a wonderfully gooey, melted chocolate center again. Beyond baked cookies, you can also freeze the unbaked cookie dough for future enjoyment! Simply roll your dough into individual balls, place them on a parchment-lined tray, and freeze until solid. Once frozen, transfer the dough balls to a freezer-safe ziplock bag or airtight container for long-term storage (up to 3 months). When a craving strikes, you can bake them straight from frozen – just add an extra 2-3 minutes to the recommended baking time.
No, that’s one of the fantastic advantages of this recipe! Thanks to the precise ratio of ingredients and the texture-enhancing brown butter, this cookie dough is designed to be baked immediately. You don’t need to chill it before baking, and your cookies will still hold their shape beautifully in the oven without excessive spreading. While chilling the dough for 30 minutes to an hour can sometimes intensify flavors and further prevent spreading, it’s absolutely not necessary for this recipe, making it perfect for quick baking when time is of the essence. Feel free to chill it if you prefer, but rest assured, skipping this step won’t compromise the quality of these delicious cookies.
While this specific recipe is not formulated to be gluten-free or dairy-free, you may be able to adapt it with substitutions. For gluten-free, you could try using a 1:1 gluten-free all-purpose flour blend that contains xanthan gum. Be aware that the texture might be slightly different. For dairy-free, replacing the butter with a high-quality plant-based butter alternative (one that browns well) might work, but the brown butter flavor profile might not be as intense. You would also need to ensure your mini eggs are dairy-free. Always test a small batch first when making significant substitutions.
Using miso paste in sweet recipes is a popular technique in modern baking to add complexity and balance. White miso paste, specifically, has a milder, slightly sweet, and umami-rich flavor profile, rather than being overtly salty. When combined with brown butter and sweet chocolate, it creates an incredible depth of flavor that is often described as “salted caramel” or “buttery toast” with a hint of savory complexity. It doesn’t make the cookies taste savory in a dinner-like way, but rather enhances and rounds out the sweet flavors, making them less one-dimensional and more addictive. It’s an unexpected secret ingredient that truly sets these cookies apart!
Love These Cookies? Explore More Easter Baking Ideas!
If you’ve fallen for the charm of these mini egg cookies, then you’re sure to enjoy our other festive Easter recipes. From classic hot cross buns with a twist to comforting puddings, there’s something to make your holiday baking extra special. Dive into these delightful creations:

If you embark on the delightful journey of making this recipe, we would **absolutely love** to hear from you! Please consider leaving a **recipe rating** and a **comment** below to share your experience and any delicious twists you added. And don’t forget to tag @DishedByKate on Instagram, Facebook, and TikTok if you’ve created one of our recipes. Seeing your beautiful recreations genuinely brightens our day and inspires us to keep sharing more delicious content! Happy baking!
Print Recipe

Chocolate Mini Egg Easter Cookies
5 Stars 4 Stars 3 Stars 2 Stars 1 Star
No reviews
Author: Kate Phillips
Total Time: 26 minutes
Yield: 12 cookies
Diet: Vegetarian
Description
Make the most of your Easter chocolate and whip up a batch of these gorgeously gooey mini egg cookies. Elevated with the nutty depth of brown butter and a balancing hint of savory miso paste, these cookies offer an irresistible combination of crispy edges and a soft, chewy center. They take less than 30 minutes from start to finish, are mixed in one bowl with no special equipment, and there’s no need to chill the dough before baking. A truly effortless and delicious holiday treat!
Ingredients
Units
Scale
For the cookies –
- 150g butter, diced (ideally unsalted butter, but salted will be fine – reduce added salt if using salted)
- 75g brown sugar
- 75g caster (superfine) sugar (granulated sugar is an acceptable substitute)
- 1 tablespoon white miso paste (highly recommended for depth of flavor; if unavailable, add an extra teaspoon of salt)
- 2 teaspoons vanilla extract
- 1/2 teaspoon salt (adjust if using salted butter)
- 1 large egg
- 200g plain flour (all-purpose flour)
- 1/2 teaspoon baking powder
- 1/2 teaspoon baking soda
- 160g mini Easter eggs (Cadbury Mini Eggs or similar; chocolate chips or chopped chocolate can be used as alternatives)
Optional, for stuffed cookies –
- 12 small Easter eggs, with a gooey center (Creme eggs or caramel filled eggs work wonderfully for a molten surprise)
Instructions
- Prepare your oven and trays. Start by lining two baking trays with parchment paper. Preheat your oven to 360°F (180°C) on the fan-assisted setting.
- Crush the mini eggs. The easiest and most satisfying way to do this is by placing the mini eggs in a sturdy ziplock bag and using a rolling pin to gently bash them. Aim for a mix of smaller chunks and some finer crumbs; this ensures a great texture throughout the cookies.
- Brown the butter. In a small, light-colored saucepan, melt the diced butter over medium heat. Continue to cook, stirring frequently with a whisk or silicone spatula. The butter will foam, then the foam will subside, and eventually, small golden-brown flecks will appear at the bottom of the pan. Simultaneously, a rich, nutty, and caramelly aroma will emerge. This process typically takes about 2-4 minutes. As soon as you notice these signs, immediately remove the pan from the heat and pour the browned butter (including the browned bits) into a large mixing bowl. Allow it to cool for 5 minutes.
- Combine sugars and flavorings. To the slightly cooled brown butter, add the brown sugar, caster sugar (or granulated), vanilla extract, salt, and miso paste. Whisk vigorously until all ingredients are well combined and the mixture is smooth and glossy. Let this mixture sit for another 5 minutes to ensure the butter has cooled sufficiently before adding the egg.
- Whisk in the egg. After the brief rest, crack the egg into the bowl. Whisk the entire mixture vigorously for 1-2 minutes until it becomes noticeably thicker and lighter in color. This step incorporates air, contributing to a chewy cookie texture.
- Incorporate dry ingredients. Add the plain flour, baking powder, and baking soda to the wet mixture. Using a silicone spatula, gently fold these dry ingredients into the dough until just combined. Stop when there are still a few visible streaks of flour. This ‘under-mixing’ is a crucial pro tip to prevent gluten overdevelopment, which can result in tough, cakey cookies.
- Add mini eggs and form dough balls. Gently fold in all the crushed chocolate mini eggs until they are evenly distributed throughout the dough, ensuring no flour streaks remain. Scoop out golf ball-sized portions of cookie dough and roll them into smooth balls with your hands. Arrange these on your prepared baking trays, leaving approximately 2 inches (5 cm) between each cookie to allow for spreading. You should get about 12 large cookies from this batch.
- Bake and cool. Transfer the trays to your preheated oven and bake for 11 minutes. The cookies should be lightly golden brown around the edges but still appear soft and slightly underbaked in the very center. For crispier cookies, you may bake for an additional 1-2 minutes. Once baked, allow the cookies to cool on the baking trays for at least 5-10 minutes to set. Then, carefully transfer them to a wire rack to cool completely. For perfectly circular cookies, gently ‘scoot’ them into shape with a large cookie cutter or glass immediately after they come out of the oven.
Notes
HOW TO MAKE EASTER EGG STUFFED COOKIES: For an utterly decadent Easter treat, consider stuffing these cookies with a whole, mini Easter egg. We highly recommend using eggs with a gooey center, such as Creme eggs or caramel-filled eggs, as they melt beautifully to create a luscious, molten core. To prepare them, lightly flatten your golf-ball sized piece of cookie dough, then place the chosen Easter egg in the center. Carefully wrap the dough around the egg, sealing it completely, and roll it into a neat ball. Place on your prepared tray and bake according to the main recipe instructions.
STORAGE INSTRUCTIONS: Your freshly baked mini egg cookies will maintain their wonderful texture and flavor for approximately 5 days. Store them in an airtight container at room temperature to preserve their freshness. To revive a day-old cookie and enjoy that delightful gooey, melty chocolate center, simply pop it into the microwave for about 15-20 seconds. They are delicious at any temperature, but warm is truly magical!
FREEZING INSTRUCTIONS: Freezing cookie dough is a fantastic way to enjoy homemade cookies anytime a craving strikes. To freeze this dough, first roll your cookie dough into individual balls as if preparing to bake. Place these balls on a parchment-lined baking tray and freeze until completely solid (this prevents them from sticking together). Once frozen, transfer the solid dough balls to a freezer-safe ziplock bag or an airtight container. They can be stored in the freezer for up to 3 months. When you’re ready to bake, there’s no need to thaw! Simply place the frozen cookie dough balls on a prepared baking sheet and add an extra 2-3 minutes to the standard baking time to ensure they cook through evenly.
INGREDIENT NOTES & SUBSTITUTIONS: While Cadbury Mini Eggs are fantastic for their festive appeal, any type of chocolate mini Easter eggs will work well. If Easter eggs are unavailable, feel free to substitute with an equal amount of chocolate chips (milk, dark, or white), chopped chocolate, or even M&M’s for a different color pop. Miso paste is a key ingredient for the unique, balanced flavor profile of these cookies, adding a wonderful umami depth that cuts through sweetness. We highly recommend using white miso. If you absolutely cannot find it, adding an extra teaspoon of salt can somewhat mimic the balancing effect, but it won’t fully replicate the complex umami notes that miso brings. For the butter, unsalted is preferred for control, but if using salted, slightly reduce the added salt. Similarly, granulated sugar can replace superfine (caster) sugar if needed.
- Prep Time: 15
- Cook Time: 11
- Category: baking
- Method: oven
- Cuisine: american
Nutrition
(Nutritional information is an estimate based on a single serving (1 cookie) and may vary depending on specific ingredients and preparation methods. These values are provided for general guidance only.)
- Serving Size: 1 cookie
- Calories: 492
- Sugar: 32.4g
- Sodium: 518.2mg
- Fat: 25.8g
- Saturated Fat: 15.4g
- Unsaturated Fat: 7.4g
- Trans Fat: 0g
- Carbohydrates: 60.2g
- Fiber: 2g
- Protein: 6.5g
- Cholesterol: 100.3mg