
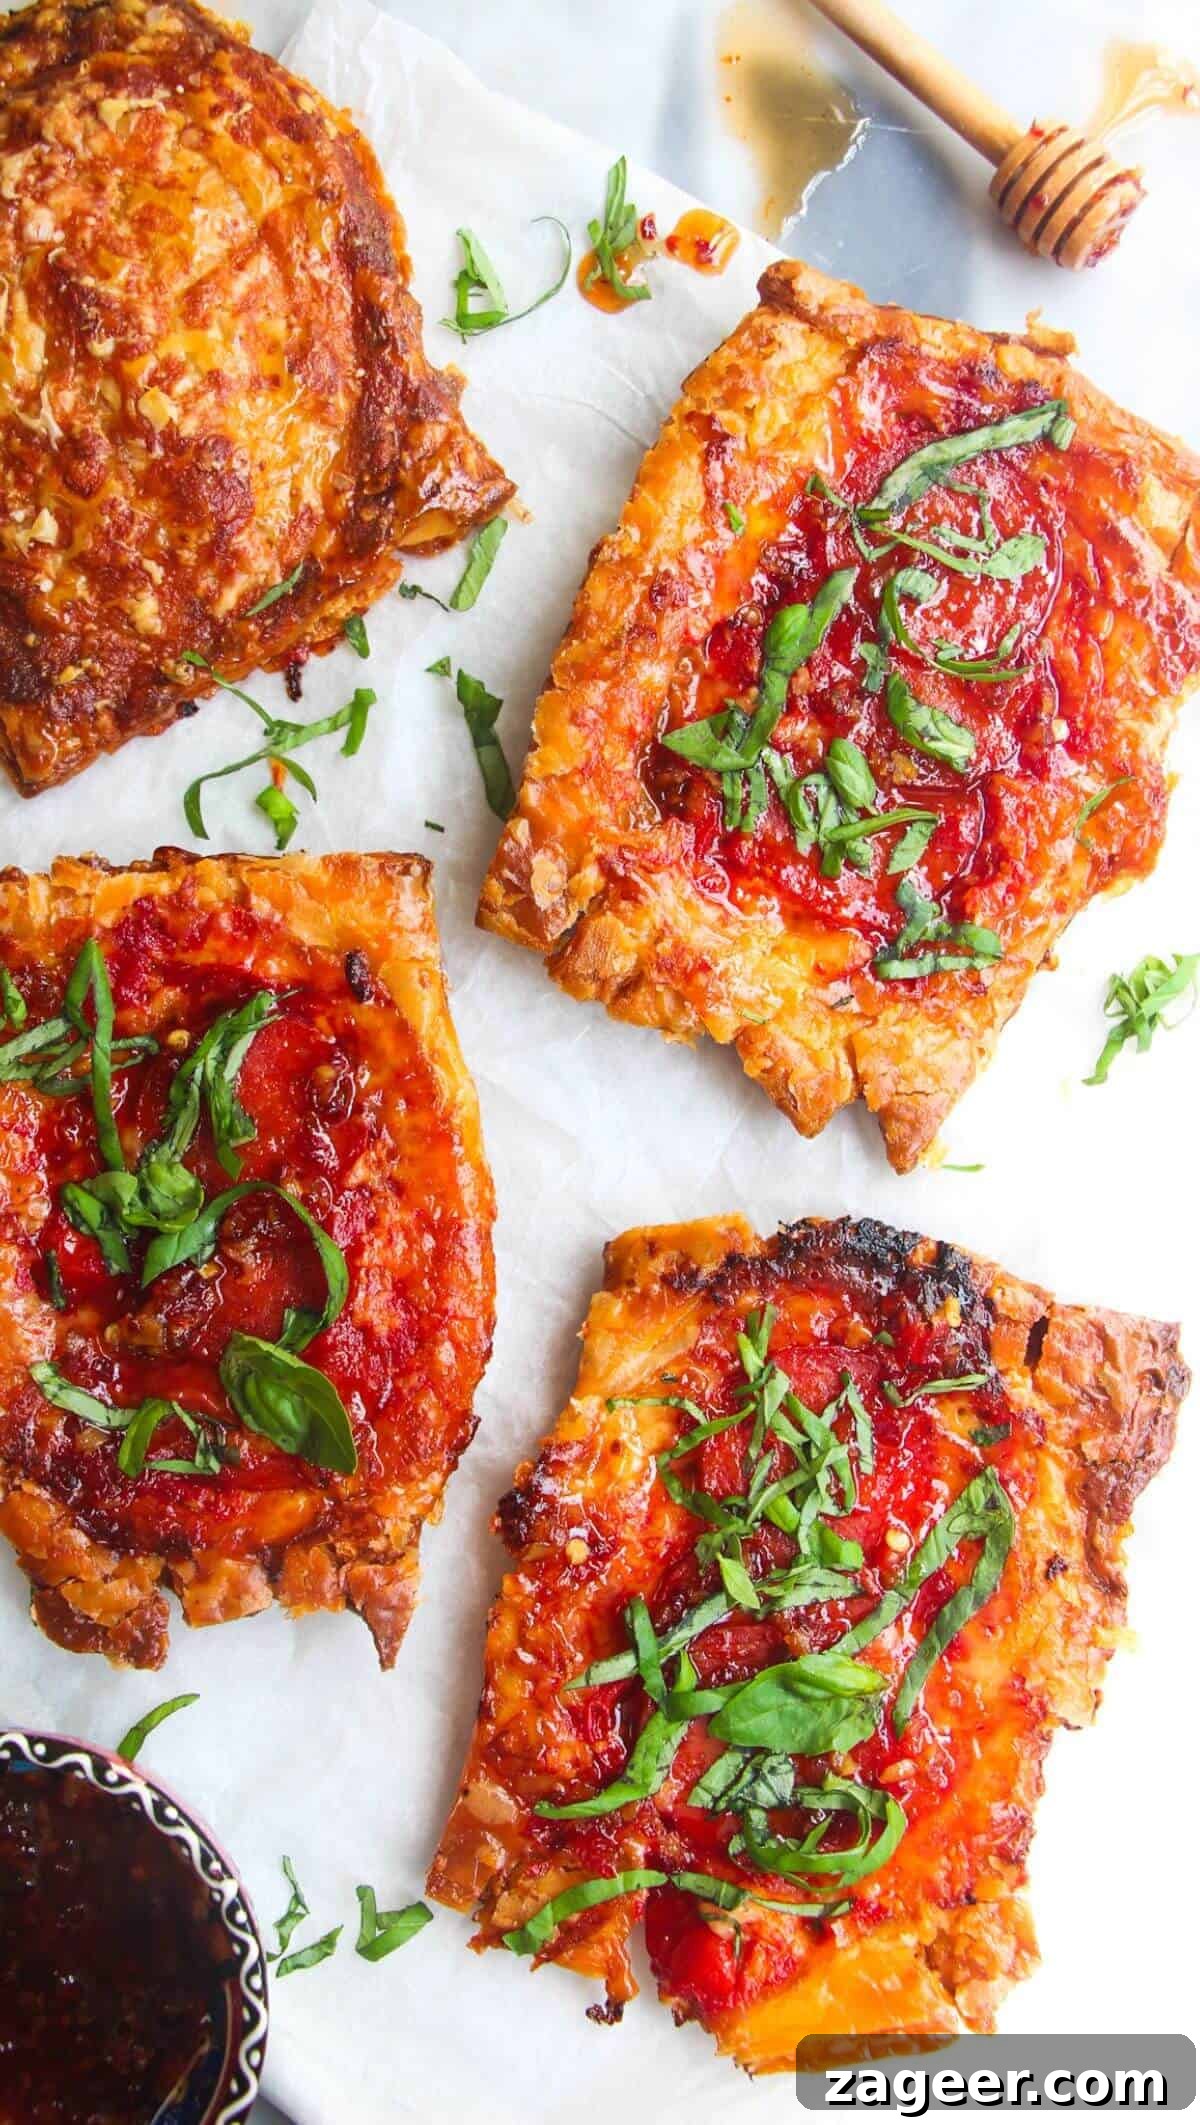
Say goodbye to soggy-bottomed pastry forever with these incredibly clever and utterly delicious upside-down puff pastry tarts. Imagine the irresistible flavors of your favorite pepperoni pizza, but elevated to a new level of crispy perfection. These tarts are not only quick and deceptively simple to prepare, but they also make an ideal party snack, a satisfying lunch, or a crowd-pleasing appetizer that everyone, from casual eaters to culinary connoisseurs, will absolutely adore.
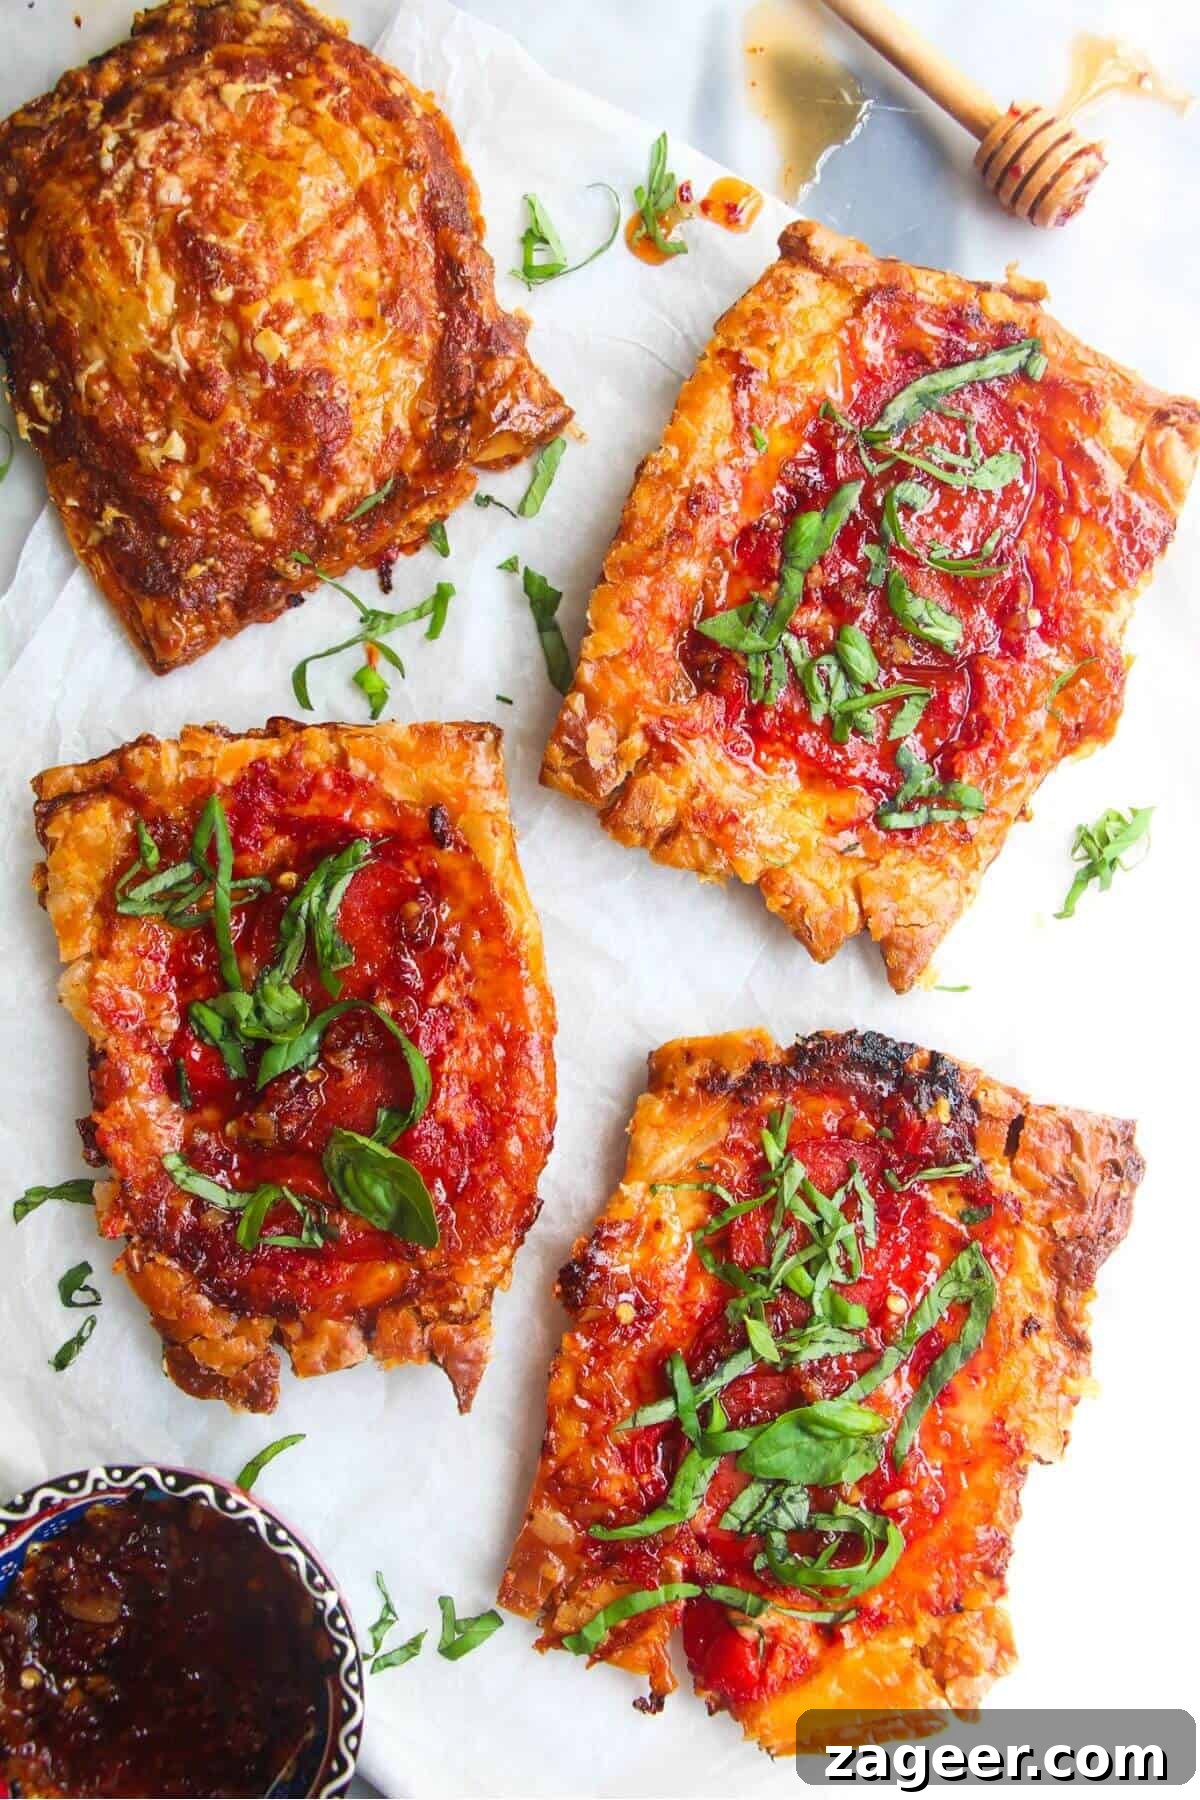
The Genius Behind Upside Down Puff Pastry Pizza Tarts: Crispy Perfection Every Time
You might be wondering, “Why on earth make these pizza tarts upside down?” Honestly, that was my exact thought when I first encountered this ingenious technique making waves across the culinary world. It initially struck me as a bit of a kitchen gimmick, perhaps needlessly complicated. However, after trying it, I can confidently declare it nothing short of genius. This method is a game-changer for anyone who has ever wrestled with the frustration of a beautiful tart emerging from the oven with a perfectly golden top but a disappointingly soft, undercooked, or even soggy base.
The true brilliance of this upside-down baking approach lies in its ability to deliver consistent results: flawlessly golden, unbelievably crispy pastry paired with a sumptuously soft, gooey, and perfectly cooked filling. If you were to bake these tarts the conventional way, with the pastry on the bottom, you would constantly run the risk of the delicious filling burning or drying out long before the pastry has the chance to achieve that desired crispness. Flipping the entire arrangement on its head means the tender filling is entirely shielded from the harsh direct heat of the oven, allowing it to gently cook and melt into a luscious state. Meanwhile, the pastry, now exposed on top during the initial bake, gets to truly shine, puffing up beautifully and developing an irresistible, flaky crust. Moreover, and perhaps most importantly, this technique guarantees you’ll 100% avoid the dreaded soggy-bottomed pastry scenario, ensuring every bite is a delightful combination of textures and flavors.
The Magic Behind the Method: Why Upside Down Works Best
Understanding the science of baking helps explain why the upside-down technique is so effective. When you bake tarts conventionally, the filling sits directly on the pastry. As the filling heats up, it releases moisture. This moisture can steam the pastry underneath, preventing it from crisping properly. The pastry might also bake unevenly, with the exposed edges browning too quickly while the center remains pale and doughy.
By placing the filling *below* the pastry, we create a protective barrier. The direct heat of the oven first hits the pastry, encouraging it to puff, laminate, and turn golden brown. The filling, insulated by the pastry, cooks more gently. Once flipped, the previously shielded, perfectly cooked filling is revealed, bubbling and vibrant, while the pastry, now on the bottom, maintains its structural integrity and delightful crunch. This method allows each component to reach its optimal state simultaneously, creating a harmonious and utterly delicious result.
Essential Ingredients for Your Pizza Tarts
For this recipe, we’re drawing inspiration directly from the beloved flavors of classic pepperoni pizza, with a delightful twist: a drizzle of sweet chili jam after baking. This addition introduces a fantastic sweet and spicy finish that beautifully complements the savory notes of the pepperoni and cheese. Gathering your ingredients is the first step to creating these incredible tarts.
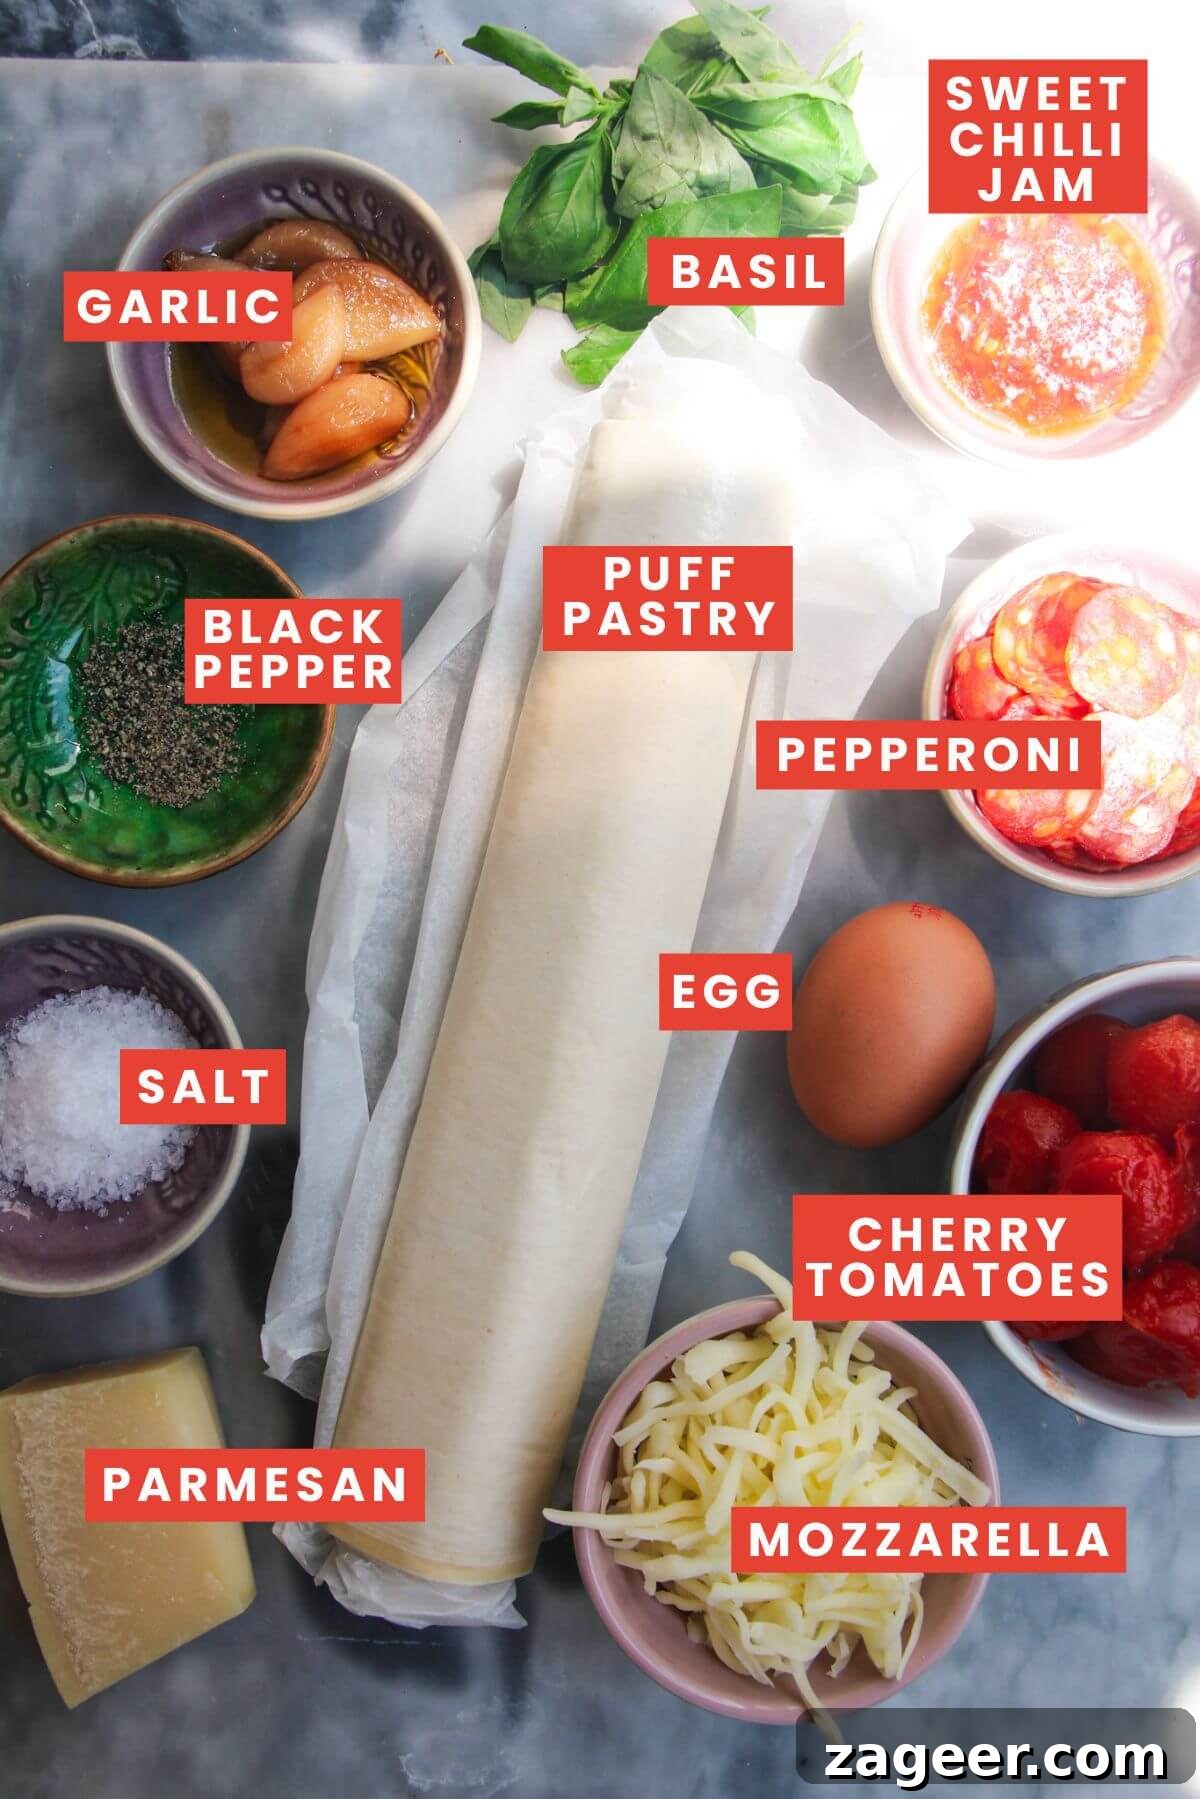
- Puff Pastry: The Foundation of Flakiness. To ensure maximum ease and minimal fuss, opt for ready-rolled puff pastry. There’s absolutely no need for additional rolling, saving you precious time. For a truly luxurious flavor and superior texture, an all-butter puff pastry is highly recommended. Its rich flavor will elevate your tarts significantly.
- Tomatoes: The Heart of the Pizza Flavor. My personal preference here leans towards tinned cherry tomatoes, lightly mashed and seasoned with a touch of salt and pepper. I find their chunkier texture adds a wonderful dimension to these tarts. However, for a smoother, more traditional pizza experience, a high-quality pizza sauce can be used. For all things tomato, Mutti is an excellent brand known for its vibrant flavor.
- Mozzarella: The Gooey Goodness. Pre-grated mozzarella is perfectly acceptable and what I typically use for convenience. If you’re looking to enhance the creaminess and indulgence, fresh buffalo mozzarella, gently torn, would also be a fantastic choice, melting into delightful pockets of cheesiness.
- Parmesan: The Crispy, Salty Boost. To introduce an additional layer of crispiness and a savory, nutty depth, we’ll sprinkle grated Parmesan cheese directly onto the puff pastry before baking. This step is entirely optional, but I genuinely believe it adds a magnificent extra dimension of flavor and texture, creating a beautiful golden crust.
- Pepperoni: The Star Topping. Classic pepperoni provides that iconic pizza flavor and a wonderful spicy kick. However, feel free to get creative with your protein! Excellent alternatives include spicy chorizo, rich ‘nduja for a fiery spreadable kick, delicate prosciutto, or even crispy cooked bacon for a smoky flavor profile.
- Sweet Chilli Jam: The Secret Weapon. I am a huge advocate for drizzling a little sweet chili jam (or even a homemade hot honey sauce) over pizza tarts after they’ve come out of the oven. It introduces a complex balance of sweetness, heat, and tang that truly elevates the overall flavor profile. If you haven’t tried it before, I wholeheartedly recommend giving this simple yet impactful garnish a go. It might just become your new favorite pizza topping!
- Optional: Confit Garlic. While crushed fresh garlic works perfectly, consider using confit garlic for an unbelievably soft, sweet, and aromatic garlic flavor that takes these tarts to an gourmet level.
Step-by-Step Guide: Crafting Your Upside Down Pizza Tarts
The beauty of this recipe lies in its unconventional order. You’re essentially building your tarts backward, starting with what you ultimately want to see as the top layer once flipped. This strategic layering ensures every component cooks perfectly and contributes to an incredible texture. Let’s walk through the process:
- Prepare Your Baking Surface and Oven: Preheat your oven to 200°C (400°F) fan-assisted. Line a large baking tray with parchment paper. This is crucial for easy flipping and prevents sticking.
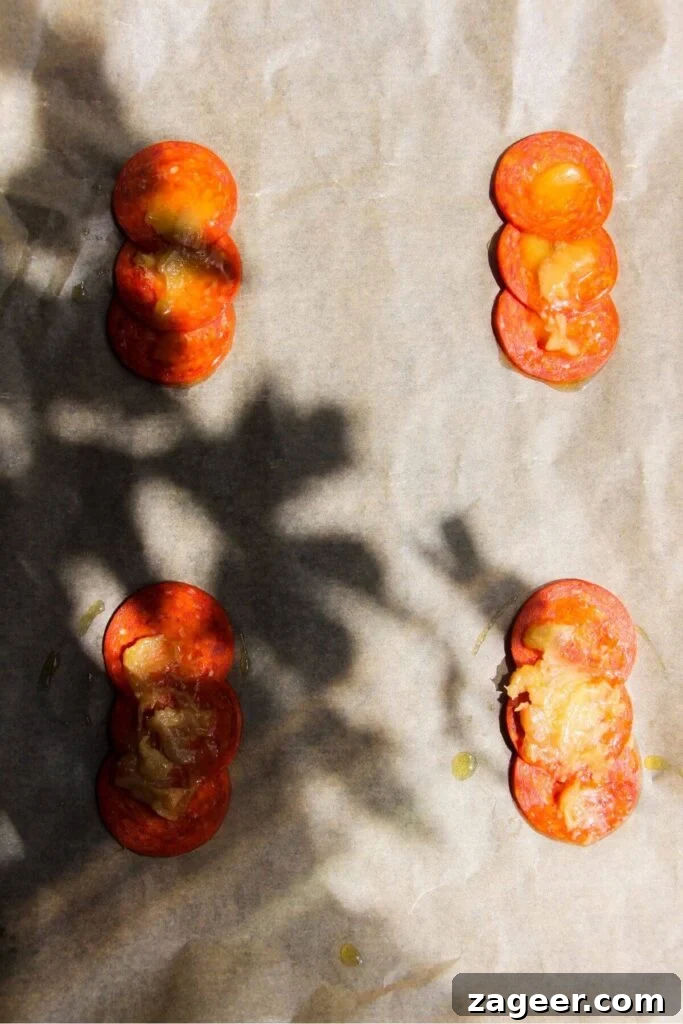
- Lay the Foundation: Pepperoni and Garlic. Begin by arranging your pepperoni slices directly onto the lined baking tray. I like to overlap the slices slightly to create a fuller base for each tart. Distribute 1 crushed garlic clove (or a confit garlic clove for a milder, sweeter flavor) on top of each pepperoni pile.
- Add the Tomato Base: If using tinned crushed tomatoes, mix them with 1 teaspoon of salt and a generous grind of black pepper. Spoon your seasoned pizza sauce or crushed tomatoes evenly over the pepperoni and garlic bases. Ensure a good spread without making them too watery.
- Sprinkle with Mozzarella: Generously scatter the grated mozzarella over the tomato layer. This will melt into a luscious, gooey topping once baked.
- Prepare and Place the Puff Pastry: Unroll your sheet of puff pastry. Carefully slice it into six equal rectangles. Before slicing, quickly check that each rectangle will comfortably cover and encase one of your prepared filling mounds on the tray. Once sliced, gently place each pastry rectangle on top of its corresponding filling mound. Use your fingertips to lightly press down around the edges of the pastry, sealing it to the parchment paper and subtly encasing the filling. This helps prevent the filling from oozing out during baking.
- The Golden Finish: Egg Wash and Parmesan. In a small bowl or mug, whisk one egg until smooth. Using a pastry brush, gently brush the whisked egg all over the exposed puff pastry. This egg wash is key to achieving that beautiful golden-brown color and glossy finish. Immediately sprinkle the grated Parmesan cheese evenly over the egg-washed pastry.
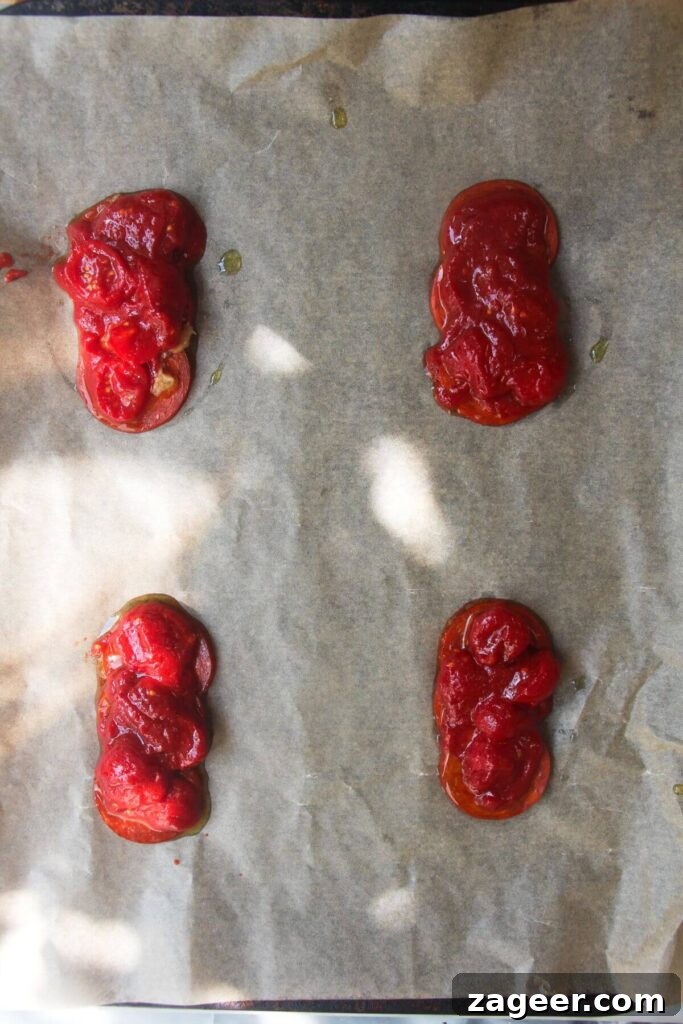
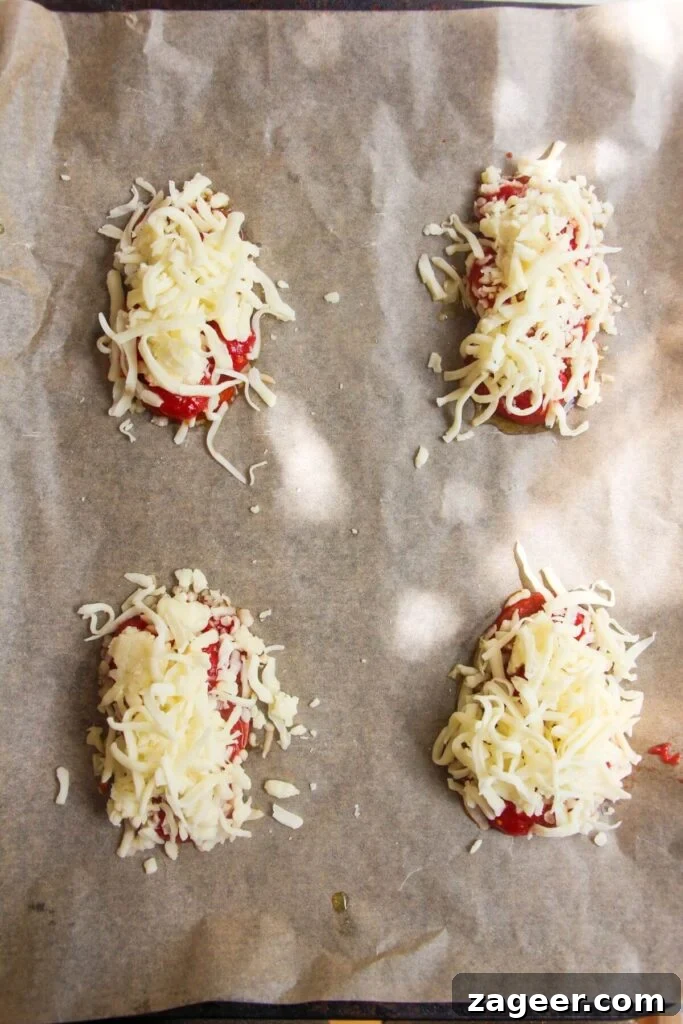
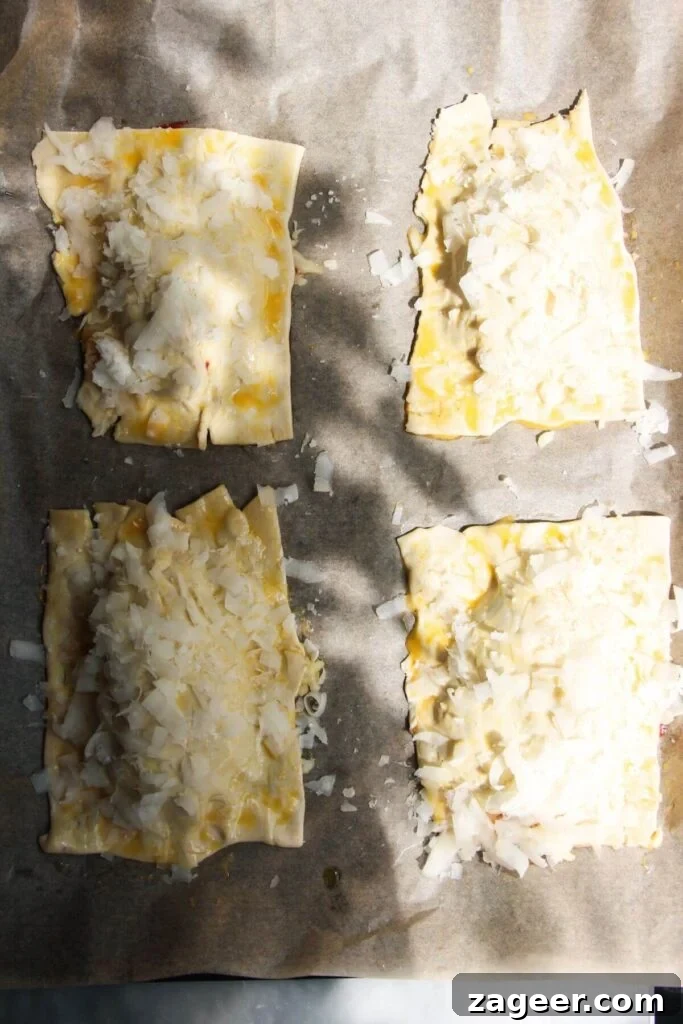
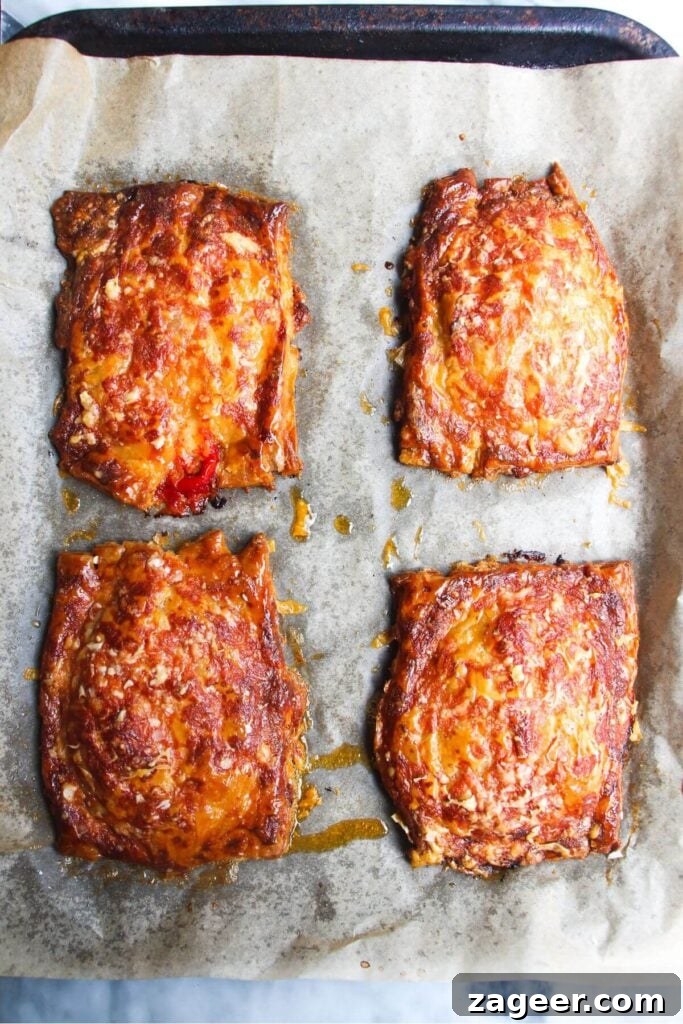
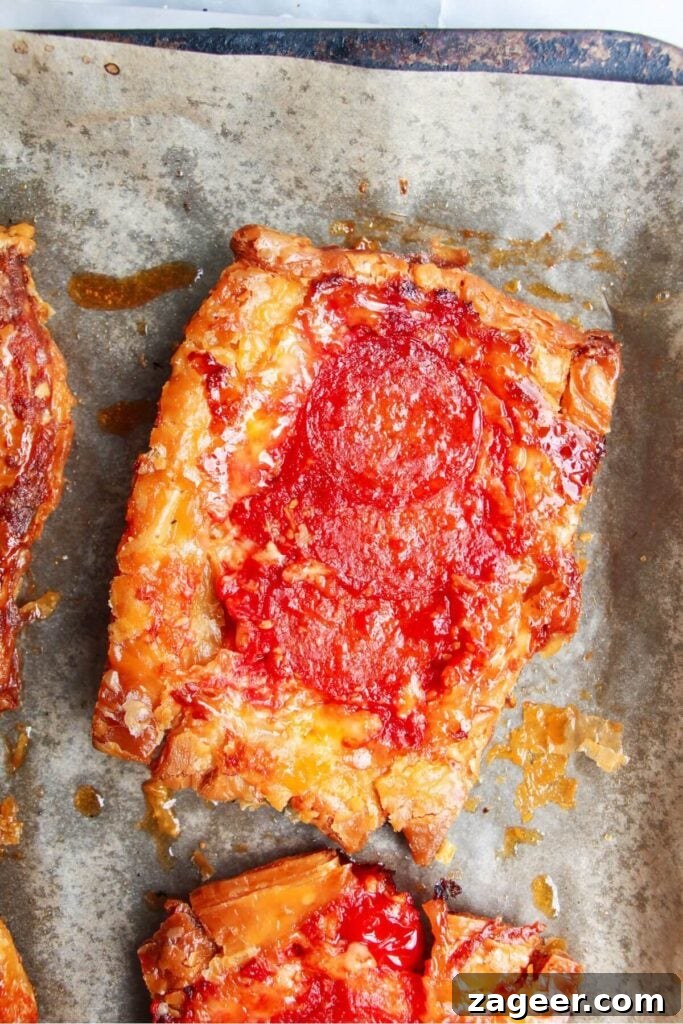
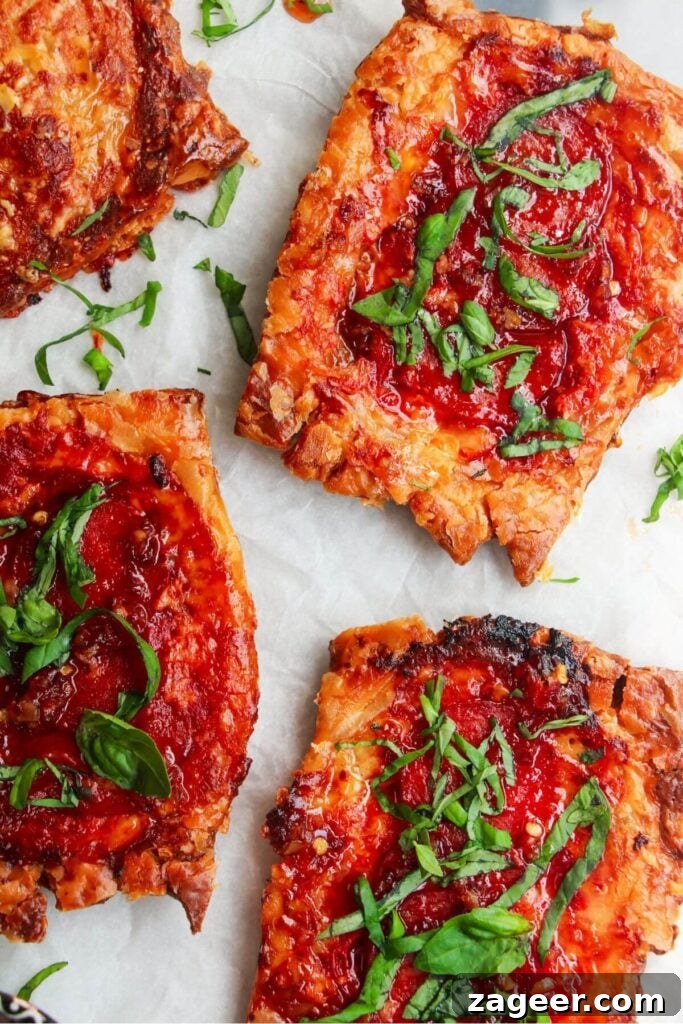
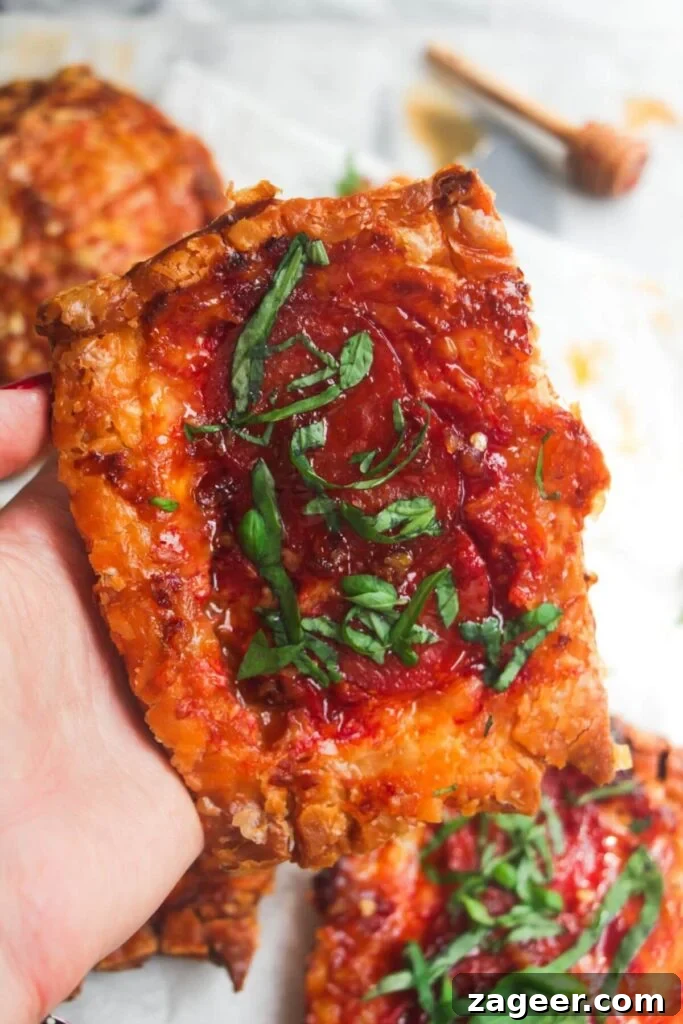
Now, it’s time for the magic to happen in the oven! Bake for approximately 20 minutes, or until the pastry is puffed, beautifully golden, and incredibly crispy all over. The Parmesan on top will also have crisped up, adding another layer of texture. Once baked, carefully remove the tray from the oven. The most satisfying part comes next: using a spatula or fish slice, gently yet confidently flip each tart over onto the baking paper. You’ll be greeted with a perfectly gooey, bubbling pizza topping and a wonderfully flaky pastry base. Drizzle generously with the sweet chili jam and garnish with fresh basil leaves for a pop of color and freshness. Serve your gorgeous upside-down pizza tarts immediately to enjoy them at their absolute best – hot, crispy, and delightfully gooey.
Pro Tips for Perfect Pizza Tarts
Achieving bakery-quality puff pastry tarts is easier than you think with a few simple tricks:
- Keep Pastry Cold: Always work with cold puff pastry. This helps prevent it from becoming sticky and ensures maximum flakiness when baked. If it starts to get too warm, pop it back in the fridge for a few minutes.
- Don’t Overfill: While tempting, too much filling can make the tarts heavy and difficult to flip, and may also prevent the pastry from cooking through properly. Stick to the recommended amounts for best results.
- Press Edges Firmly: Gently pressing around the pastry edges helps seal the filling and ensures a neat, contained tart once flipped.
- Monitor Your Oven: All ovens vary. Keep an eye on your tarts, especially towards the end of the baking time, to prevent over-browning. The pastry should be deep golden, not burnt.
- Serve Immediately: For the ultimate experience, enjoy these tarts fresh out of the oven when the pastry is at its crispiest and the cheese is wonderfully molten.
Frequently Asked Questions About Upside Down Pizza Tarts
These upside-down pizza tarts are undeniably at their absolute best when enjoyed right after baking. At this point, the pastry is delightfully crispy, and the pizza filling is hot, gloriously gooey, and wonderfully molten. While they are still delicious cold and can be stored in the fridge for up to two days, please note that you will lose some of that exquisite crispiness if you attempt to reheat them. For optimal texture, fresh is always best!
The beauty of these tarts lies in their versatility! You can truly unleash your culinary creativity and customize them to your heart’s content. Simply think about your favorite pizza combinations and let that inspire you. For fantastic inspiration, consider adapting toppings from recipes like this spicy Hawaiian pizza (think ham and pineapple), a unique peach and blue cheese pizza (for a gourmet twist), or a hearty spinach and sausage pizza. Other great ideas include sliced mushrooms, bell peppers, olives, crumbled feta, sun-dried tomatoes, or even cooked chicken pieces.
I often enjoy serving them with an extra bowl of sweet chili jam on the side, perfect for dipping! They are a sensational addition to any party spread or appetizer platter. Consider pairing them with your favorite creamy dips, a rustic chilli cheese focaccia, delightful halloumi bites, or elegant prosciutto filo bites for a truly impressive spread. They also make a fantastic light lunch served alongside a fresh green salad.
More Party Favorites You’ll Love
If these upside-down puff pastry pizza tarts hit the spot for your gatherings, you’ll be thrilled to explore more of our top-rated party recipes and appetizers. These dishes are designed to be easy, impressive, and utterly delicious, ensuring your next get-together is a culinary success.
I genuinely hope you try this incredibly satisfying recipe and discover the magic of upside-down puff pastry tarts for yourself. If you make them, I would absolutely love to hear from you! Please feel free to leave me a comment below with your thoughts, experiences, or any creative twists you added. Happy baking!
Print Recipe

Upside Down Puff Pastry Pizza Tarts
5 Stars 4 Stars 3 Stars 2 Stars 1 Star
No reviews
Author: Kate Alexandra
Total Time: 30 minutes
Yield: 6 servings 1x
Description
Never suffer from soggy pastry again with these genius upside-down puff pastry tarts. Loaded with the flavours of your favourite pepperoni pizza, they make a quick and deceptively simple party snack, lunch or appetizer everyone will love.
Ingredients
Scale
For the pizza tarts –
- 18 slices pepperoni
- 6 garlic cloves, crushed (or use confit garlic)
- 3/4 cup pizza sauce (or crushed tinned tomatoes)
- 1 teaspoon salt
- Good grind of black pepper
- 1 cup grated mozzarella
- 1 sheet of ready-rolled puff pastry
- 1/4 cup grated parmesan
To serve –
- A handful of fresh basil leaves, chopped
- 1 tablespoon sweet chilli jam
Instructions
- Arrange your toppings. Begin by preheating your oven to 200C/400F (fan-assisted) and lining an oven tray with baking paper. Divide the pepperoni into six portions (three slices per tart) and arrange them in six distinct spots on the tray. If necessary, use two trays to avoid overcrowding. Place one crushed garlic clove (or a confit garlic clove for a milder taste) on top of each pepperoni pile. If using tinned crushed tomatoes, mix them with 1 teaspoon of salt and a generous grind of black pepper before spooning over the pepperoni. Finally, scatter the mozzarella evenly over the tomato layer.
- Layer on the pastry. Unroll your sheet of puff pastry. Slice it into six equal rectangles, ensuring each piece is large enough to cover your prepared filling mounds. Carefully place each pastry rectangle on top of its respective filling, then gently press down around the edges with your fingers to seal the filling within.
- Egg wash the pastry. In a small bowl or mug, whisk one egg until smooth. Using a pastry brush, evenly coat the top surface of each puff pastry rectangle with the egg wash. Immediately sprinkle the grated parmesan all over the egg-washed pastry. Transfer the prepared tray(s) to the preheated oven and bake for 20 minutes, or until the pastry is beautifully puffed, deeply golden, and wonderfully crispy.
- Garnish and serve. After 20 minutes, the tarts should have achieved a gorgeous golden-brown hue and a perfect crispness. Carefully remove the tray from the oven. Using a spatula or fish slice, gently flip each tart over to reveal the bubbling, perfectly cooked pizza topping. Drizzle generously with sweet chilli jam and scatter fresh basil leaves on top. Serve immediately to enjoy them hot, crispy, oozy, and absolutely delicious.
Notes
STORAGE INSTRUCTIONS: For peak crispiness and gooey cheesiness, these tarts are best enjoyed immediately after baking. However, you can store any leftovers in an airtight container in the fridge for up to 2 days. Be aware that reheating them may result in a softer pastry texture.
INGREDIENT NOTES: This recipe is wonderfully adaptable! Feel free to experiment with your favorite fillings. Swap out pepperoni for other cured meats like prosciutto, sopressata, or even cooked crispy bacon or cooked chicken (a fantastic way to use up leftovers!). For a vegetarian option, load them up with sun-dried tomatoes, roasted bell peppers, jarred artichokes, spinach, or crumbled goat cheese.
- Prep Time: 10
- Cook Time: 20
- Category: snacks
- Method: oven
- Cuisine: american
Nutrition
- Serving Size: 1 tart