
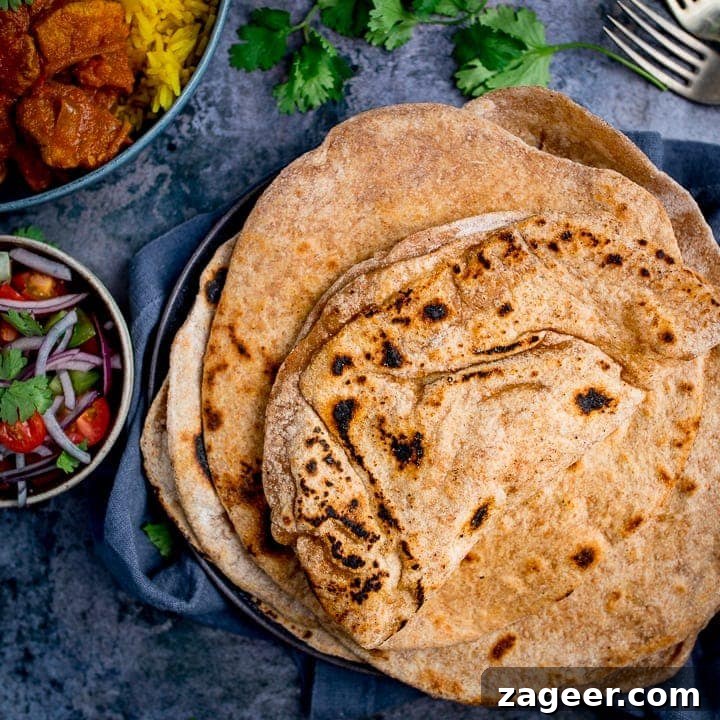
The Essence of Homemade Chapati: Soft, Warm, and Perfectly Charred
Discover the joy of crafting warm, soft, and lightly charred **chapati** right in your own kitchen. This quick and easy recipe ensures fresh, delicious Indian flatbreads are ready in just **40 minutes**. It’s the perfect accompaniment to any curry, ideal for **mopping up every last drop of that flavorful sauce**.
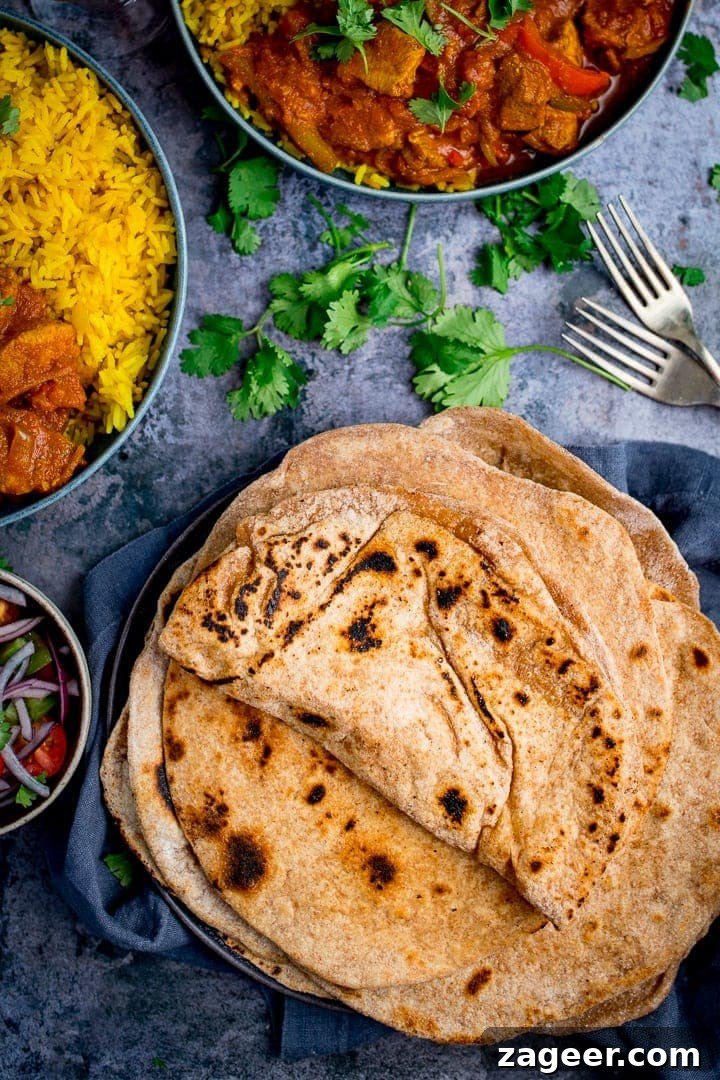
There’s a unique satisfaction that comes with making bread from scratch, and chapati offers one of the most therapeutic experiences. From the rhythmic kneading of the dough to the satisfying sight of it puffing up on the hot pan, it’s a culinary journey that doesn’t require patience for rising. Unlike many other bread recipes, chapati doesn’t need to prove, meaning you can go straight from mixing to cooking, delivering warm, fresh bread in a surprisingly short amount of time.
What I love most about this recipe is its undeniable simplicity and minimal time commitment. Yet, despite its straightforward nature, the announcement that homemade chapatis are on the menu always sparks excitement. This recipe yields 10 delectable chapatis, a quantity our family of four effortlessly enjoys, even when accompanied by rice. It’s a testament to their irresistible appeal; these soft flatbreads truly elevate any meal, making a simple dinner feel like a special occasion.
📋 What You’ll Need: Key Ingredients for Authentic Chapati
Crafting perfect chapatis requires only a handful of staple ingredients, each playing a crucial role in achieving the desired texture and flavor. Understanding the purpose of each ingredient can help you master this simple yet rewarding bread.
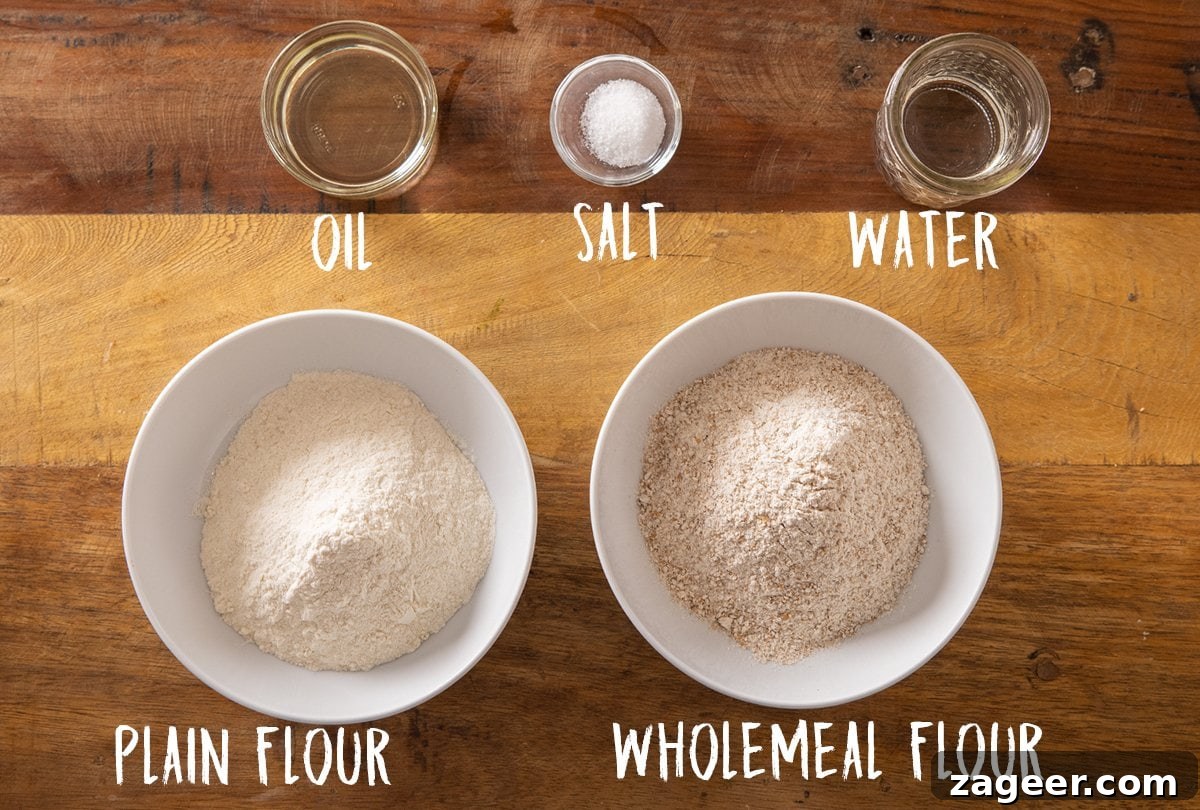
At the heart of chapati are two types of flour: wholewheat and plain (all-purpose) flour. The wholewheat flour, also known as atta flour in Indian cuisine, provides a nutty flavor and a denser, more wholesome texture characteristic of traditional chapatis. Combining it with plain flour helps to lighten the dough, resulting in a softer, more pliable flatbread that is easier to roll and more tender to eat. This blend strikes a perfect balance, offering the best of both worlds.
Salt is essential for enhancing the flavor of the chapatis, bringing out the natural sweetness of the wheat and ensuring the bread isn’t bland. A touch of oil is incorporated into the dough, which is key for maintaining its softness and pliability, preventing it from drying out too quickly during cooking and storage. Neutral oils like avocado, sunflower, or canola are excellent choices as they won’t impart any strong flavors that might detract from the chapati. Finally, hot water is used to bring the dough together. The warmth of the water helps to activate the gluten in the flour more quickly and effectively, making the dough easier to knead and contributing to the overall softness of the finished chapati. With these simple ingredients, you’re well on your way to creating authentic, delicious homemade flatbreads.
🔪 How to Master Homemade Chapati: A Step-by-Step Guide
Crafting perfect chapati is a straightforward process that becomes second nature with a little practice. The beauty of this recipe lies in its simplicity and the satisfaction of creating fresh, warm bread for your table. For a truly immersive experience, including precise measurements and detailed instructions, refer to the comprehensive recipe card at the very end of this post.
We begin by combining the wholewheat flour, plain (all-purpose) flour, and salt in a spacious mixing bowl. This initial dry mix ensures all ingredients are evenly distributed before liquid is introduced. Next, a small amount of oil is stirred in, followed by hot water. The hot water is added gradually, allowing you to gauge the dough’s consistency. You want to achieve a soft, cohesive dough that pulls away from the sides of the bowl without being too sticky or too dry. It’s a process of intuition; add just enough water until the dough forms a shaggy mass.
Once the dough comes together, it’s time for the crucial kneading stage. Kneading for 8-10 minutes is essential to develop the gluten, transforming the rough dough into a smooth, elastic, and pliable ball. This can be done by hand on a lightly floured surface, or effortlessly with a dough hook on a stand mixer. The result should be a silky-smooth dough that springs back when gently pressed. After kneading, the dough is divided into equal portions, typically 10 for this recipe, and each portion is rolled into a neat ball, ready for shaping.
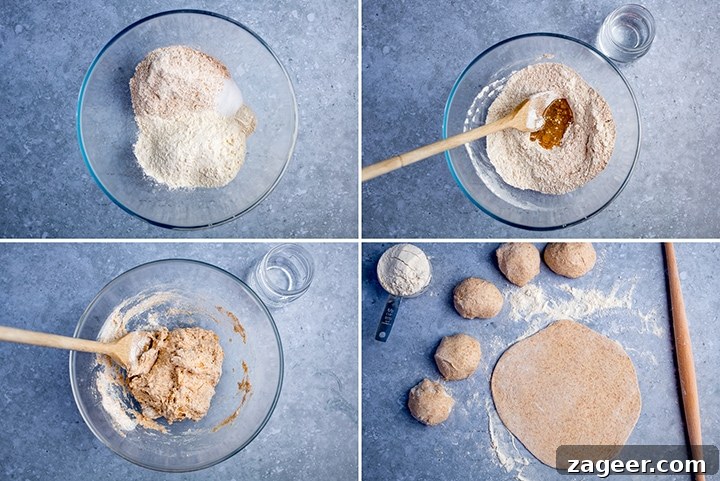
Each dough ball is then rolled out thinly on a lightly floured surface, aiming for a consistent, tortilla-like thickness. The goal is to achieve a round shape, which comes with practice, but don’t worry if your first few aren’t perfectly circular – they’ll still taste amazing! To make transferring to the hot pan easier and prevent sticking, I recommend placing each rolled chapati on a piece of baking parchment.
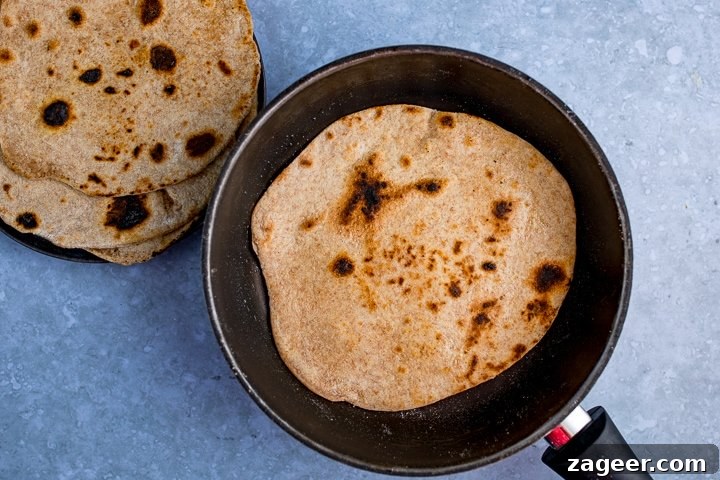
The final step is cooking. Heat a large frying pan or flat griddle over a very high heat until it’s smoking hot. Lightly brush the pan with a little of the reserved oil before placing a chapati on it. Cook for about 30-60 seconds on one side until beautiful charred brown spots begin to appear, indicating that it’s cooking through and developing flavor. Flip the chapati and cook the other side until similar spots emerge. The high heat is crucial for achieving that characteristic light char and puffiness. Once cooked, transfer the warm chapati to a plate and keep it warm in a low oven or plate warming drawer while you cook the remaining chapatis. Remember to brush the pan with a touch more oil for each new chapati to prevent sticking and ensure even cooking.
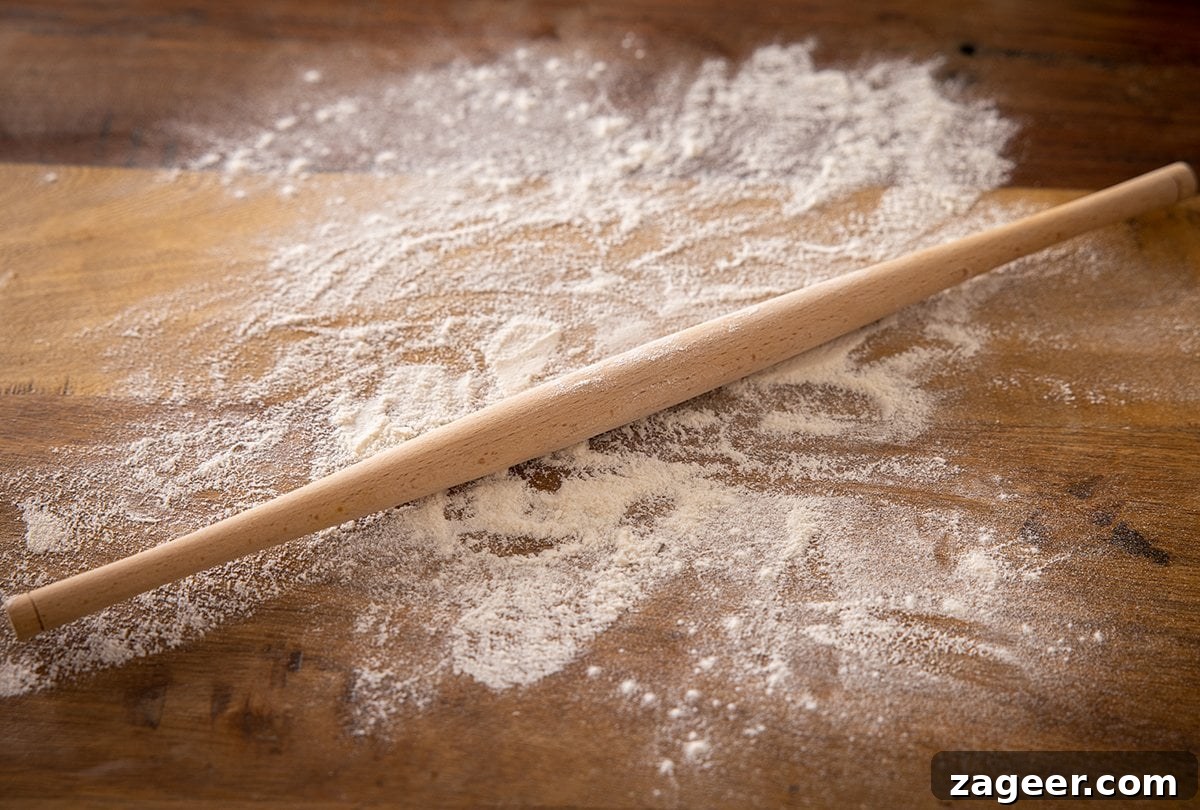
👩🍳PRO TIP: While a regular rolling pin works perfectly fine, for ultimate ease and traditional shaping, consider investing in a dedicated chapati rolling pin (<– affiliate link to a similar one to mine). These are often lighter and designed for the specific motion needed to roll out thin, round chapatis efficiently. Its subtle tapering allows for effortless maneuvering, helping you achieve that desirable circular form with greater ease and consistency.
That’s all it takes – just **five simple ingredients** and a rewarding cooking process lead to a delicious plateful of freshly made chapatis. The minimal effort for such a fantastic result is truly unbeatable.
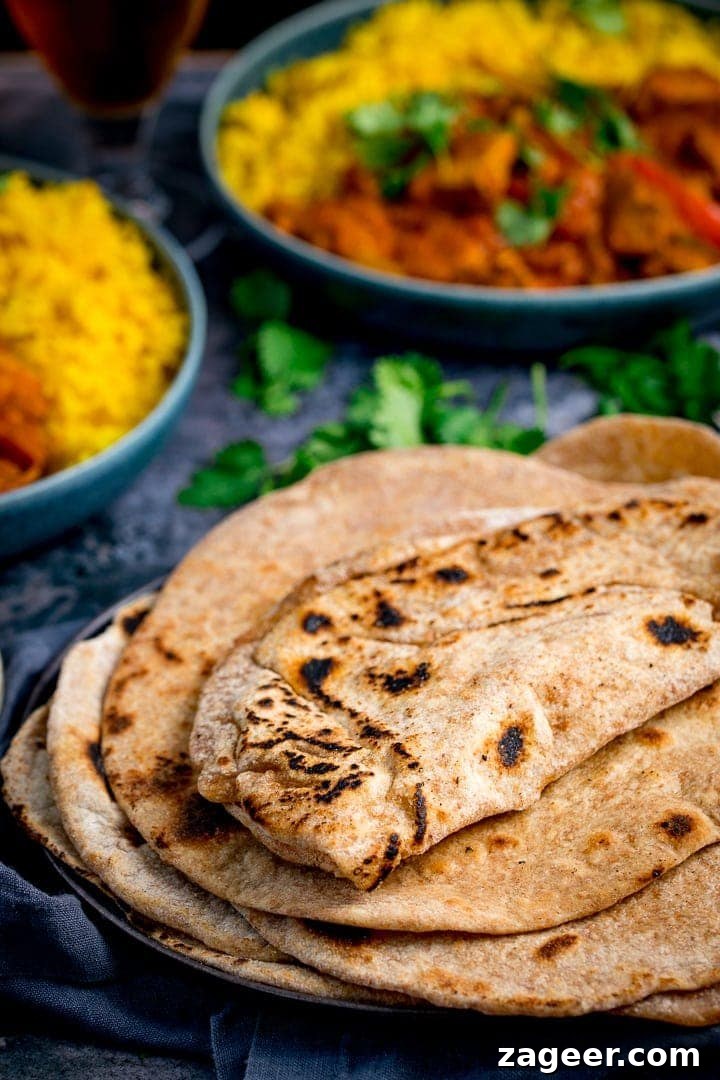
🍽️ Serving Suggestions: Why Not Serve with a Delicious Curry!
Chapati is more than just a side dish; it’s an integral part of many meals, acting as a versatile vehicle for flavors. While it’s famously paired with a delicious curry, its uses extend far beyond. I often time my chapati making so that they are fresh off the griddle just as my main curry dish finishes bubbling away, ensuring everything is ready to be enjoyed together in perfect harmony. This makes for one of the easiest and most satisfying bread recipes you can whip up, promising a perfectly tender, chewy, and utterly “carb-elicious” addition to your meal.
Beyond curries, chapatis are fantastic with a variety of dishes. Use them to scoop up rich stews, creamy lentil dals, or even simple vegetable preparations. They can also be enjoyed with a dollop of yogurt, a spoonful of pickle, or even a spread of butter or ghee for a comforting snack. For a light breakfast, you might find them served with scrambled eggs or a spicy potato hash. The possibilities are endless, making chapati a truly adaptable flatbread for any occasion.
Curries
Easy Chicken Korma
Curries
Lamb Bhuna
Curries
Butter Chicken
Curries
Chicken Pasanda
Curries
Chicken Madras
Skinny Recipes
Lighter Slow Cooked Spicy Beef Curry
Why Oil Makes All the Difference in Chapati Dough
The inclusion of oil in your chapati dough isn’t just an optional step; it’s a fundamental technique that significantly impacts the final texture and quality of your flatbreads. While it might seem like a small detail, the oil plays a vital role in the dough’s chemistry, contributing to a truly superior chapati.
Primarily, oil helps the dough stay remarkably soft and pliable. This characteristic is essential for chapatis, as it makes the dough easier to knead and roll out thinly without tearing. A well-oiled dough will stretch more readily, allowing you to achieve that ideal, uniform thickness that cooks evenly and quickly on the griddle. Beyond workability, this pliability translates directly into the finished product, giving you that delightful chewy texture that is so coveted in fresh chapati.
While you can certainly omit the oil from the dough, or even cook chapatis in a completely dry pan, be prepared for a noticeable difference. Chapatis made without oil tend to be slightly firmer and have a greater tendency to crisp up quickly at the edges, losing some of that desirable softness and chewiness. The oil acts as a tenderizer and helps to retain moisture, ensuring your chapatis remain soft and flexible, even after they’ve cooled slightly. So, for the best, most authentic experience, don’t skip that spoonful of neutral oil!
Chapati vs Roti: Understanding the Distinction
When discussing Indian flatbreads, the terms “chapati” and “roti” are often used interchangeably, leading to some confusion. However, it’s helpful to understand their nuanced relationship. Technically, chapati is a specific type of roti, making roti the broader, more encompassing term for a diverse category of unleavened flatbreads popular across Southern and Central Asia.
Roti literally means “bread” in many Indian languages, and it refers to any flatbread made from flour, water, and often salt, cooked on a tawa (griddle). The beauty of roti lies in its incredible variety, with each region and culinary tradition boasting its unique rendition. Chapati, specifically, is a thin, unleavened flatbread typically made from wholewheat flour (atta), water, and salt, and is known for its soft texture and slight puffiness when cooked on high heat. It’s often brushed with ghee or butter after cooking.
Beyond chapati, the world of roti offers a fascinating array of textures and flavors. For example, there’s dhalpuri, a savory roti stuffed with a spiced lentil or pea mixture, popular in Caribbean cuisine. Paratha is another beloved type, often made from plain flour, rolled and folded multiple times with layers of ghee or oil to create a flaky, multi-layered texture. Then you have aloo roti, a comforting potato-based flatbread, where mashed potatoes are incorporated into the dough or used as a filling. Other variations include makki di roti (cornmeal flatbread) from Punjab, and many more, each with its distinct preparation and regional preference. So, while all chapatis are rotis, not all rotis are chapatis, highlighting the rich diversity of this essential culinary staple.
📺 Watch How to Make It: Your Visual Guide to Chapati
Sometimes, seeing is believing, especially when it comes to mastering a new culinary technique. This video guide will walk you through each step of the chapati-making process, from combining the flours to rolling out the perfect circles and achieving that satisfying puff on the griddle. Follow along to ensure your homemade chapatis are soft, pliable, and absolutely delicious.
🍲 More Fantastic From-Scratch Dough & Bread-Based Recipes
If you’ve enjoyed the rewarding experience of making homemade chapati, you might be inspired to explore more incredible bread and dough recipes from scratch. There’s a whole world of culinary creations waiting for you to discover, each offering its own unique flavors and textures. From fluffy buns to artisanal loaves, expanding your baking skills is a delicious adventure.
- Bao Buns with sticky pork belly – Master the art of soft, pillowy steamed buns.
- Soft and fluffy Brioche Buns – Perfect for burgers or simply enjoyed with butter.
- Dough balls with spinach and bacon dip – An irresistible appetizer or snack.
- Homemade Artisan Bread – Discover the satisfaction of baking a rustic, crusty loaf.
- Flatbread pizza with basil garlic butter – A quick and customizable weeknight meal.
Stay updated with new recipes! Don’t miss out on more delicious culinary adventures and baking tips.
Subscribe to the newsletter to hear when I post a new recipe. You can also find me on YouTubefor new videos every week and Instagramfor behind-the-scenes stories and beautiful food photos.
Click the stars to rate or comment
Chapati Recipe
20 minutes
20 minutes
Ingredients
- 150 g (1 1/4 cups) wholemeal flour
- 150 g (1 1/4 cups) plain (all-purpose) flour plus 4 tbsp extra for kneading and rolling
- 1 tsp salt
- 3 tbsp oil I use avocado oil, but other neutral oils such as sunflower or canola work too.
- 210 ml (3/4 cup + 2 tbsp) hot water
Instructions
-
Place the wholemeal flour, plain (all-purpose) flour, and salt in a large bowl (or stand mixer bowl if you’re kneading using a stand mixer) and mix together thoroughly until well combined.150 g (1 1/4 cups) wholemeal flour, 150 g (1 1/4 cups) plain (all-purpose) flour, 1 tsp salt
-
Add 2 tbsp of the oil to the dry ingredients. Gradually pour in three-quarters of the hot water, mixing with a spoon or your hands. Continue adding more water, a tablespoon at a time, until a soft, shaggy dough forms and comes together in the bowl. Be careful not to add too much water; the dough should be pliable but not overly sticky.3 tbsp oil, 210 ml (3/4 cup + 2 tbsp) hot water
-
Transfer the dough to a lightly floured surface and knead for a solid 8-10 minutes. This extensive kneading is crucial for developing the gluten, resulting in a soft, smooth, and highly elastic dough that springs back when poked. Alternatively, if you have a stand mixer, use the dough hook attachment for the same duration.
-
Once the dough is perfectly smooth, divide it into 10 equal pieces. Roll each piece into a neat, uniform ball between your palms.
-
Take each dough ball and roll it out on a lightly floured surface using a rolling pin. Aim for a thin, consistent thickness, similar to a tortilla. To simplify transferring the delicate, rolled chapatis to the hot pan, place each one on a separate piece of baking parchment.
-
Prepare your cooking surface by brushing a large frying pan or flat griddle with a small amount of the reserved oil. Heat the pan over a very high heat until it begins to smoke slightly, indicating it’s reached the ideal temperature for cooking chapatis.
-
Carefully place one rolled chapati onto the hot pan. Cook for 30-60 seconds on the first side, or until delightful charred brown spots appear on the surface. Using tongs, turn the chapati over and cook the other side until similar charred spots develop and the chapati begins to puff up.
-
Once cooked, immediately transfer the hot chapati to a plate. To keep them warm while you cook the rest, place the plate in the oven on its lowest setting (around 170°F/80°C) or in a plate warming drawer, if available.
-
Continue this process with the remaining chapati dough balls. Remember to brush the pan with a little oil before cooking each new chapati to prevent sticking and ensure a beautiful finish.
-
Serve the chapatis warm, either immediately or from the warmed oven, to enjoy their soft texture and fresh flavor.
Video
Notes and Tips for Perfect Chapati
Can I make chapatis using only wholemeal flour?
Absolutely! While this recipe uses a blend of wholemeal and plain flour for a softer texture, traditional chapatis are often made entirely with wholemeal (atta) flour. If you choose to use only wholemeal flour, you may find that the dough absorbs slightly more water, so be prepared to adjust the liquid amount accordingly, adding a little extra water until you achieve a soft, pliable dough.
The primary difference you’ll notice is in the final texture. Using only wholemeal flour will result in a chapati that is slightly denser and has a more pronounced nutty flavor. However, it will still be incredibly delicious and a wonderful, wholesome accompaniment to your meal.
Can I leave out the oil?
Yes, you can omit the oil from the dough. Some traditional recipes do not include oil, or they use a minimal amount. You can even cook chapatis in a completely dry pan, without brushing any oil on the surface.
However, be aware that leaving out the oil will affect the texture. Chapatis made without oil in the dough tend to be less soft and pliable, and they may crisp up at the edges more quickly during cooking. They might also feel a little drier. While still edible and enjoyable, they won’t have the same tender, chewy consistency that the oil helps to achieve.
Can I make chapatis ahead of time?
Yes, chapatis can be prepared in advance using a few different methods, depending on how far ahead you’re planning:
- Prepare the dough in advance: Mix and knead the dough as instructed, then transfer it to a covered bowl and refrigerate for up to 24 hours. When ready to cook, remove the dough from the fridge and let it come to room temperature for at least an hour before dividing, rolling, and cooking. This step makes the dough more relaxed and easier to work with.
- Par-cook the chapatis: Lightly fry the chapatis in the pan until they are very lightly browned on both sides, but do not cook them fully. Let them cool completely, then wrap them tightly in foil or place them in an airtight container and refrigerate for up to 3 days. To finish cooking, heat them individually in a hot frying pan over high heat until they develop charred spots and puff up. This method is great for quick weeknight meals.
- Cook chapatis completely and reheat: Fully cook the chapatis according to the recipe instructions. Once cooled, stack them in small piles of 2-3, wrap them tightly in foil, or place them in a sealed container, and refrigerate for up to 3 days. To reheat, place the foil-wrapped piles (2-3 chapatis per packet) in a preheated oven at approximately 170°C (375°F) for about 6-8 minutes. It’s important to reheat them in small piles so the heat can penetrate evenly, ensuring they warm through and soften without drying out.
Nutritional Information provided is per chapati.
Nutrition
Nutrition information is automatically calculated, so should only be used as an approximation.
Save This Recipe!
Just enter your email below to get this recipe sent straight to your inbox!
We believe in simple, delicious cooking and sending you great recipes!
Like this recipe? Leave a comment below!
This recipe was first published in July 2019, and has been comprehensively updated in June 2021 with an instructional video, additional helpful information, and general housekeeping to ensure the best possible experience for our readers.
Some of the links in this post may be affiliate links – which means if you buy the product I get a small commission (at no extra cost to you). If you do buy, then thank you! That’s what helps us to keep Kitchen Sanctuary running. The nutritional information provided is approximate and can vary depending on several factors. For more information please see our Terms & Conditions.