
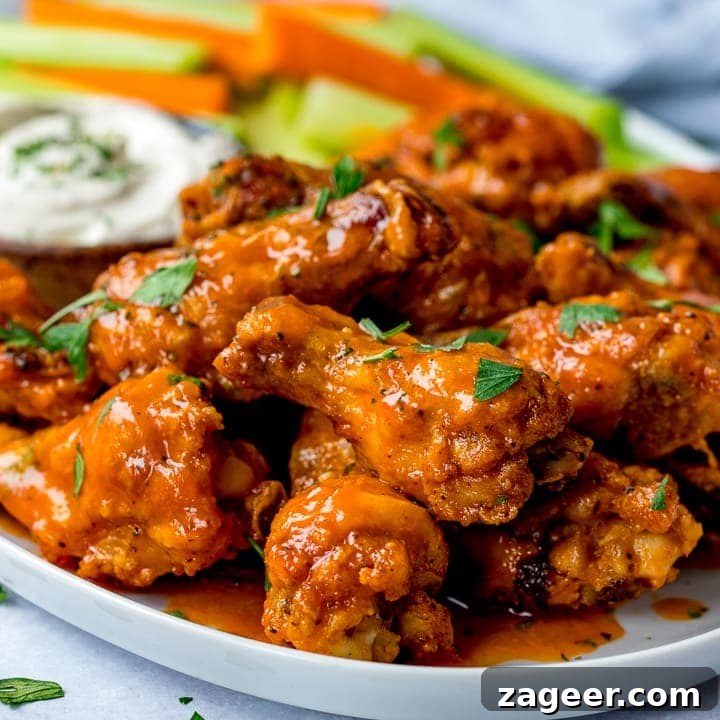
Ultimate Crispy Baked Buffalo Wings with Homemade Blue Cheese Dip
Prepare for the ultimate crowd-pleaser! These oven-baked Buffalo wings emerge from the oven remarkably crisp, then get generously coated in a vibrant, tangy, and lusciously buttery Buffalo sauce that adheres to every single crevice. Incredibly simple to make, they are guaranteed to be an absolute smash hit for any party table, game day gathering, or casual weeknight feast!
Serve them alongside classic crunchy celery and carrot sticks, complemented by our irresistible bonus blue cheese dip recipe, ensuring everyone’s fingers stay delightfully busy and satisfied.
“Turned out really good. Easy and recommend everyone to try it.”
– Csilla
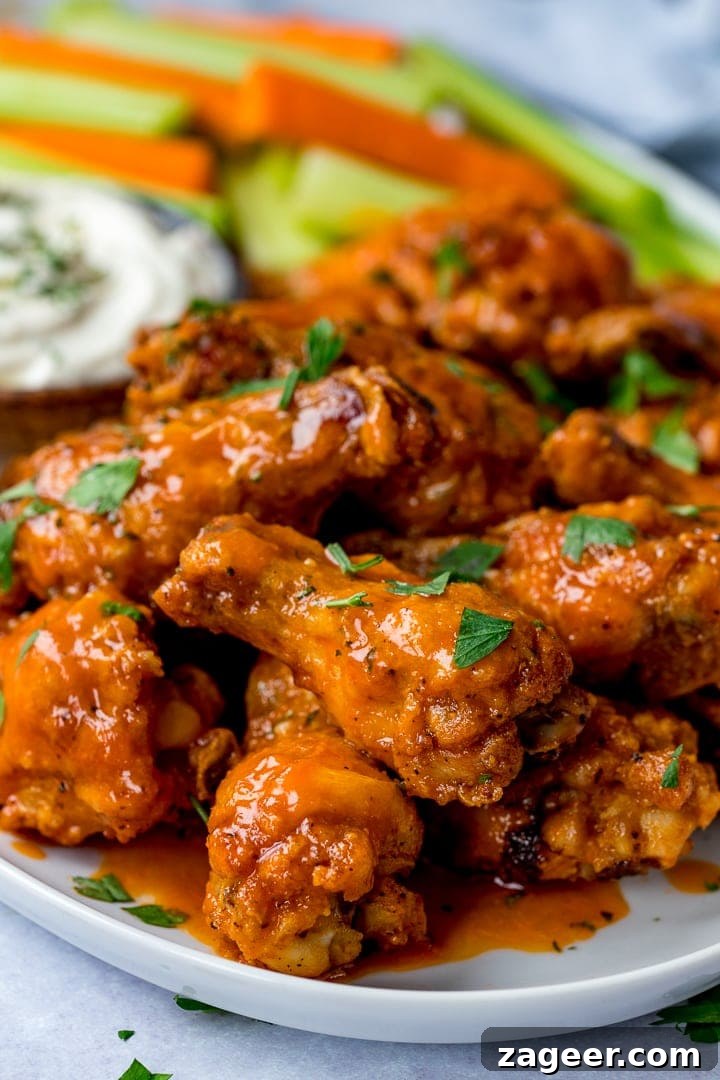
Chef’s Insights for Perfect Buffalo Wings

My quest for the ultimate crispy, oven-baked Buffalo wing led me to a few essential techniques. First, I meticulously dry the chicken wings, ensuring every trace of moisture is removed. This step is critical for achieving that coveted crackly skin. Next, I toss them with a light, even sprinkle of aluminum-free baking powder. This ingenious ingredient, not baking soda, is key to drawing out moisture and promoting superior crispiness without the need for deep-frying.
The wings are then baked on a wire rack, allowing hot air to circulate evenly and fat to render away, resulting in truly crispy baked Buffalo wings. Finally, they’re tossed in a warm, zesty Frank’s-and-butter sauce, enhanced with a splash of cider vinegar for that signature tang. Serve immediately with refreshing celery and carrot sticks and a cool, creamy blue cheese dip for a balanced, indulgent treat.
These wings aren’t just good; they’re outstanding. Here’s why:
- Are they the first thing to vanish from the buffet table? Absolutely!
- Are they easy to prepare in advance and finish later? You bet!
- Do they use affordable and accessible ingredients? Yes!
- Are they unbelievably delicious? Without a doubt!
Table of Contents
- Chef’s Insights for Perfect Buffalo Wings
- Preparing Your Chicken Wings
- The Baking Process for Ultimate Crispiness
- Crafting the Authentic Buffalo Sauce
- Bonus: Creamy Blue Cheese Dip Recipe
- Why Are They Called Buffalo Wings?
- Crispy Baked Buffalo Wings Video Tutorial
- Full Recipe Card: Crispy Baked Buffalo Wings
- More Delicious Finger Foods & Appetizers
Now that we’ve covered the basics, let’s dive right into the detailed crispy baked Buffalo chicken wings recipe!
Preparing Your Chicken Wings: Slicing and Drying
Before baking, it’s crucial to properly prepare your chicken wings. Locate the joint that connects the drumette to the wingette. Using a sharp, sturdy knife, carefully cut through this joint to separate each whole wing into two distinct pieces: the drumette (which resembles a miniature drumstick) and the flat wingette. Make sure to trim off the wingtips, as they contain very little meat and tend to burn in the oven. These can be discarded or saved for making chicken stock.
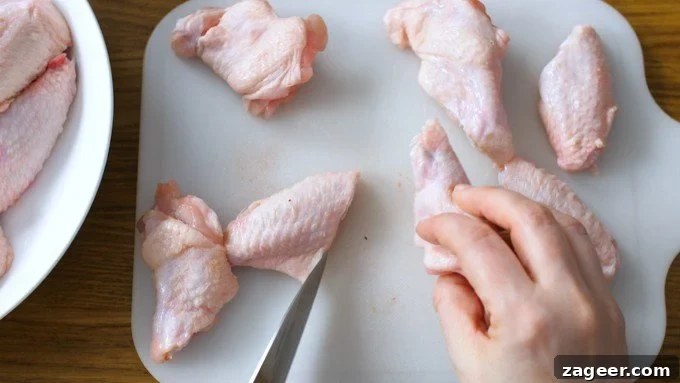
Once your wings are sectioned, the next vital step for crispiness is thoroughly drying them. Pat each piece extensively with kitchen paper towels. This removes surface moisture, allowing the baking powder to work more effectively and preventing the wings from steaming in the oven. The drier the wings, the crispier they will become!
The Baking Process for Ultimate Crispiness
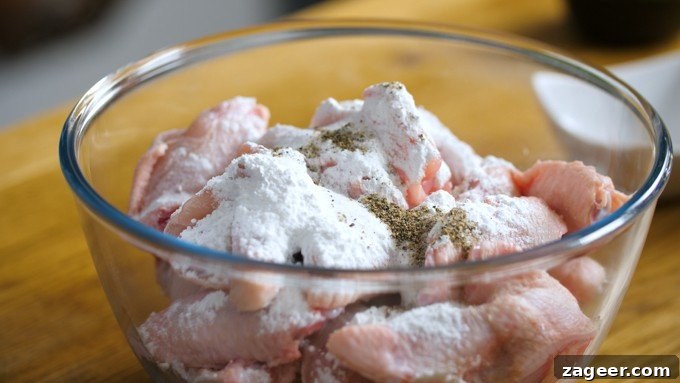
After your chicken wing pieces are perfectly dried, transfer them to a large mixing bowl. Here’s where the magic ingredient comes in: baking powder (and yes, it HAS to be baking powder, NOT baking soda). Add the measured baking powder along with salt and freshly ground black pepper. Toss everything together until each wing piece is lightly and evenly coated. While the amount of baking powder might seem substantial, it’s specifically designed to react with the chicken’s skin, drawing out moisture and creating that incredible, crunchy texture.
Arrange the seasoned wings in a single layer on a wire rack set over a large baking tray. This setup allows air to circulate around all sides of the wings, promoting even cooking and maximum crispness. Initially, they are cooked at a lower temperature to slowly render out the fat, allowing the skin to crisp up without burning. Then, the oven temperature is increased significantly, finishing the wings until they are beautifully golden brown and irresistibly crunchy.
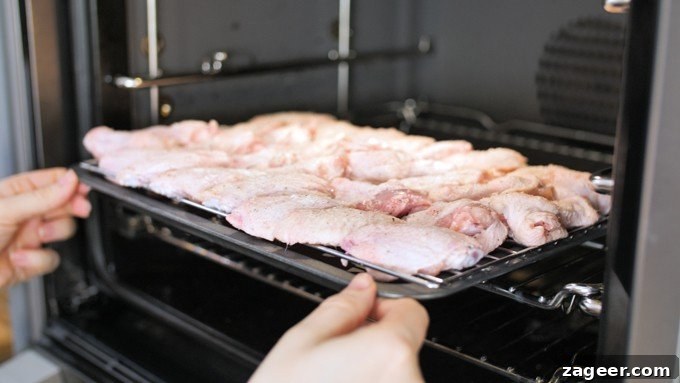
Approximately 10-15 minutes before the chicken wings are fully cooked and ready to come out of the oven, it’s the perfect time to start preparing the vibrant Buffalo wing sauce. This timing ensures your sauce is warm and ready to coat the hot, crispy wings immediately.
Crafting the Authentic Tangy Buffalo Sauce
The quintessential Buffalo sauce is remarkably straightforward to create, requiring just a handful of ingredients to achieve that classic balance of heat, tang, and richness. In a saucepan, combine your chosen hot sauce (Frank’s RedHot Original is traditionally used for that authentic Buffalo flavor profile), unsalted butter, a splash of cider vinegar for brightness, Worcestershire sauce for umami depth, minced garlic for aromatic kick, a touch of honey to balance the heat, and a pinch of salt.
Gently heat this mixture over medium-high heat, stirring continuously until it comes to a gentle simmer and the butter is fully melted and incorporated. As soon as it simmers, remove the pan from the heat. That’s it – your homemade Buffalo sauce is complete!
NOTE: While cooking, the sauce might have a pungent (hot and vinegary) aroma and appear quite thin. Do not be alarmed; this is perfectly normal. The flavor and aroma will mellow significantly once it coats the warm chicken wings. If you prefer a slightly thicker sauce, you can let it cool for about 10 minutes, as it will naturally thicken as the butter cools. If you do this, remember to whisk it thoroughly before pouring over the wings to re-emulsify any separated butter.
Once the wings are out of the oven and slightly cooled, pour the warm Buffalo sauce over them. Toss the wings gently but thoroughly to ensure every piece is beautifully coated in the glossy, spicy sauce. This step transforms the crispy chicken into the iconic, mouth-watering Buffalo wings everyone loves.
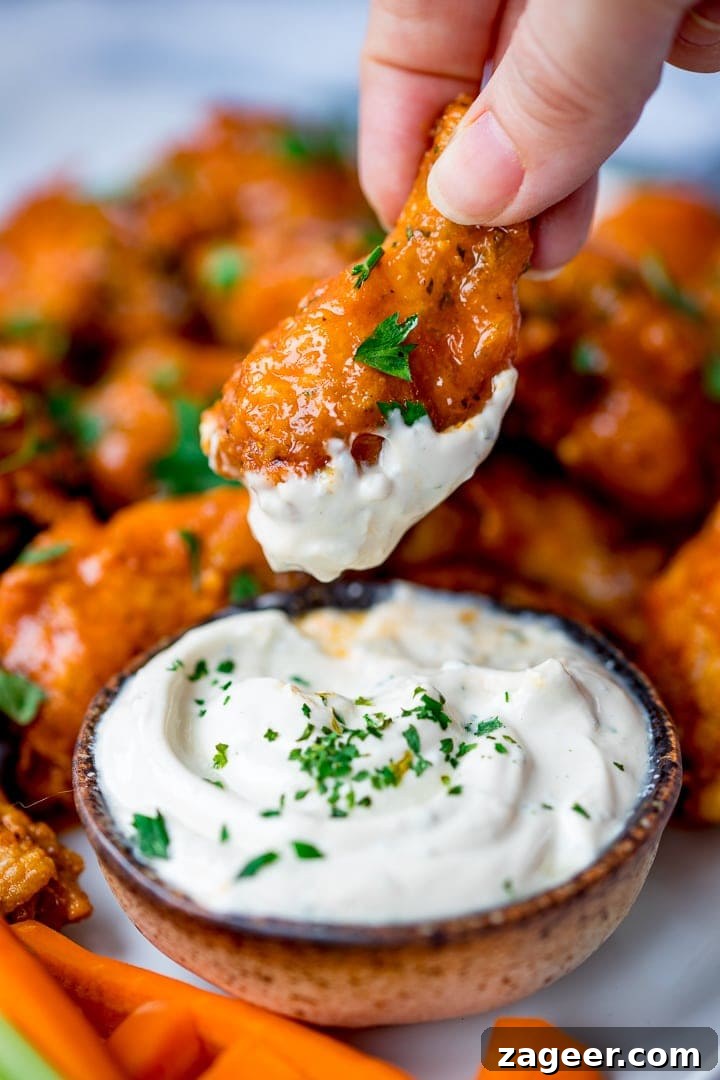
Traditional Buffalo wings are almost always served with a cool, creamy blue cheese dip, along with crisp carrot and celery sticks. The vegetables offer a refreshing palate cleanser and a delightful crunch, perfectly contrasting the rich, spicy wings. Our blue cheese dip recipe is simple to make and adds an essential layer of flavor to the experience.
Bonus: Creamy Blue Cheese Dip Recipe
This simple, yet flavorful blue cheese dip provides the perfect cooling counterpoint to the spicy Buffalo wings. Mix together the following ingredients in a bowl until perfectly smooth and creamy:
- 1/2 cup (120g) sour cream
- 3 tbsp mayonnaise
- 1/3 cup (75g) soft blue cheese (Roquefort offers a robust flavor, or try Saint Agur blue crème for a milder taste)
- 1/2 tbsp cider vinegar
- 1/2 tsp Worcestershire sauce
- A generous pinch of dried parsley
Taste and adjust seasoning if needed. You can also add a dash of black pepper for extra zing.
These oven-baked spicy chicken wings are truly SERIOUSLY crispy – a testament to the baking powder technique. But don’t worry, the crispiness is all on the outside; the meat itself remains incredibly tender and juicy, making for a perfectly balanced bite.
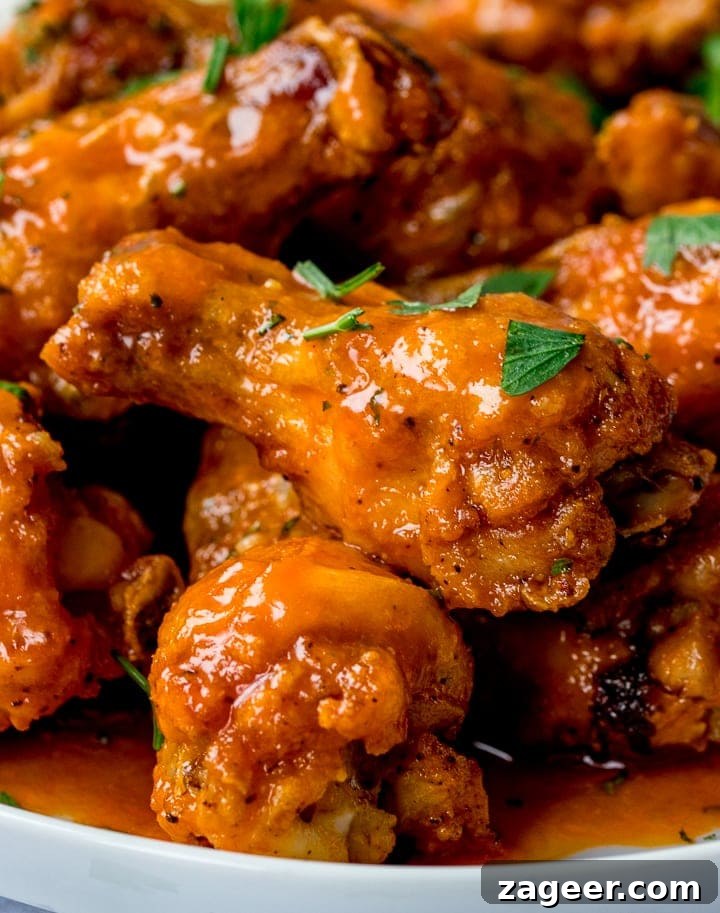
Whenever I make these for dinner or a party, they are an absolute sensation. While they do have a kick, even my kids, Lewis included, adore them. In fact, Lewis often manages to quietly set aside a few for his lunchbox the next day – a true testament to their deliciousness!
Why Are They Called Buffalo Wings? A Brief History
The origin of Buffalo wings is a fun culinary tale! According to the National Chicken Council, these iconic wings were first invented in Buffalo, New York. Specifically, they are credited to Teressa Bellissimo, co-owner of the Anchor Bar in Buffalo, who reputedly whipped up a batch of fried chicken wings with a special sauce for her son and his friends one late night in 1964. The dish was an instant hit, and the name “Buffalo wings” simply refers to their birthplace – no actual buffalos or bison were ever involved!
Crispy Baked Buffalo Wings Video Tutorial
Watch this space for our upcoming video tutorial showing you exactly how to achieve perfectly crispy baked Buffalo wings!
Save Recipe
Pin Recipe
Print Recipe
Click the stars to rate or comment
Crispy Baked Buffalo Wings Recipe
Nicky Corbishley
Perfectly crispy baked chicken wings smothered in an easy homemade Buffalo sauce. So simple to make – they’ll be a total hit for any party table!
10 mins
1 hr 30 mins
1 hr 40 mins
40 wings
Appetizer, Party Food
American
Ingredients
Crispy Chicken Wings:
- 1 kg (2.2 lbs) chicken wings, separated into drumettes and wingettes, tips discarded
- 2 level tbsp aluminum-free baking powder (It must be baking powder, NOT baking soda – see notes below for details)
- ½ tsp salt (ensure it’s regular table salt)
- ½ tsp freshly ground black pepper
Buffalo Wings Sauce:
- 150 ml (2/3 cup) Frank’s RedHot Original Sauce
- 120 g (1/2 cup) unsalted butter, cut into cubes
- 1 tbsp cider vinegar
- 1 tsp Worcestershire sauce
- 2 cloves garlic, peeled and minced
- 1 tbsp honey
- ¼ tsp salt
Blue Cheese Sauce:
- 120 g (1/2 cup) sour cream
- 3 tbsp mayonnaise
- 75 g (1/3 cup) soft blue cheese (use Roquefort for strong flavor, or Saint Agur blue crème for milder)
- ½ tbsp cider vinegar
- ½ tsp Worcestershire sauce
- A pinch of dried parsley
To Serve:
- 2 medium carrots, peeled and cut into 2-inch (5 cm) sticks
- 2 sticks celery, cut into 2-inch (5 cm) sticks
Instructions
- Preheat Oven & Prepare Tray: Preheat your oven to 120°C (250°F) fan-assisted. Place a wire rack over a large baking tray.
- Prepare Wings: Cut each chicken wing at the joint to separate them into drumettes and wingettes, discarding the tips. Thoroughly pat all wing pieces dry with paper towels to remove excess moisture. Transfer them to a large bowl, add the baking powder, salt, and pepper. Toss well to ensure a light, even coating on all pieces. Discard any remaining dry coating.
- First Bake: Arrange the coated wings in a single layer on the wire rack, skin side up. It’s fine if they are touching slightly. Place the tray on the lower shelf of the preheated oven and bake for 30 minutes. This low-temperature initial bake helps render fat and begin the crisping process.
- Second Bake for Crispiness: After 30 minutes, increase the oven temperature to 220°C (425°F) fan-assisted. Rotate the baking tray for even cooking. Continue baking for another 45-50 minutes, or until the wings are deep golden brown, significantly crispy, and fully cooked through. Remove from the oven and let them cool slightly while you prepare the sauce.
- Make Buffalo Sauce: In a medium saucepan, combine the Frank’s RedHot sauce, unsalted butter, cider vinegar, Worcestershire sauce, minced garlic, honey, and ¼ tsp salt. Place over medium-high heat and bring to a gentle simmer, stirring occasionally until the butter is completely melted and the sauce is well combined. Turn off the heat immediately.
- Prepare Blue Cheese Dip: While the wings are baking, mix all the blue cheese sauce ingredients (sour cream, mayonnaise, soft blue cheese, cider vinegar, Worcestershire sauce, dried parsley) in a small bowl until smooth and creamy. Cover and refrigerate until ready to serve.
- Toss & Serve: Transfer the slightly cooled crispy wings to a large bowl. Pour the warm Buffalo sauce over the wings and toss thoroughly until every wing piece is evenly coated. Serve immediately with the prepared blue cheese dip, fresh carrot sticks, and celery sticks.
Recipe Notes & Tips
Note on Baking Powder:
Many recipes, including my other crispy wing recipes, rely on baking powder for extra crispiness. However, it’s essential to understand its role and potential impact. Baking powder (not baking soda) is crucial here. The specific chemical reaction helps dry out the chicken skin and create tiny air bubbles, resulting in that desirable crunch. If you’ve ever experienced a slightly bitter taste from baked goods that use baking powder, you might be sensitive to sodium aluminum sulfate, an ingredient found in some conventional baking powders. This sensitivity can be more noticeable in recipes like wings, where a larger quantity of baking powder is used.
To ensure the best flavor and avoid any bitterness:
- Dry Wings Thoroughly: Always pat the chicken wings extremely dry before dusting them with baking powder. This allows for a light, even coating.
- Measure Precisely: Use the exact amount of baking powder specified and discard any excess left in the bowl after coating the wings.
- Choose Aluminum-Free: Opt for an aluminum-free baking powder. These are widely available and prevent any metallic or bitter aftertaste. Check the ingredients list to confirm it does not contain sodium aluminum sulfate.
Can I make Buffalo wings ahead?
While I believe these wings are at their absolute best served fresh out of the oven, you can certainly prepare them in advance. Bake the wings as per the instructions, but do not add the Buffalo sauce. Allow them to cool completely, then cover and refrigerate for up to 24 hours. To reheat, arrange them on a wire rack over a baking tray and bake at 200°C (400°F) for about 5-8 minutes, or until they are hot and crisp again. Then, toss with freshly made warm Buffalo sauce.
The Buffalo sauce can also be made ahead. Prepare the sauce mixture, then cover and refrigerate (uncooked) for up to 3 days. When ready to serve, simply pour it into a saucepan, bring to a gentle boil, and proceed with tossing the reheated wings.
The blue cheese dip is also a fantastic make-ahead component. Prepare it, cover, and refrigerate for up to a day. Give the dip a good stir before serving, as some separation might occur in the refrigerator.
How do I make boneless Buffalo wings instead?
If boneless wings are more your style, you can easily adapt this recipe. For the crispy base, I recommend using either my Crispy Buttermilk Chicken Tenders recipe or, for an oven-baked option, my Oven-Baked Chicken Tenders. Once your chosen tenders are perfectly crispy, prepare the Buffalo sauce exactly as described in this recipe card and toss them together for a fantastic boneless version.
Can I make Buffalo wings in the air fryer?
Absolutely! The air fryer is an excellent tool for making incredibly crispy chicken wings. I have a dedicated recipe for making these wings in the air fryer here: Air Fryer Buffalo Wings. It streamlines the process and delivers exceptional results.
Nutritional information is approximate and calculated per wing (based on approximately 40 wings in this recipe), with a small serving (i.e., a 1/40th serving) of blue cheese dip.
Nutrition
Nutrition information is automatically calculated and should only be used as an approximation. Factors such as exact ingredient brands, preparation methods, and serving sizes can affect the actual nutritional content.
Your feedback helps us create more delicious recipes for you.
This recipe was originally published in October 2019 and has since been updated with enhanced instructions, additional tips, and improved clarity for housekeeping purposes.
The foundational technique for achieving exceptionally crispy baked chicken wings was inspired by Nagi’s recipe (from Recipe Tin Eats). I’ve made a few minor adjustments, and truly, her method yields the best results! Nagi herself adapted the original recipe from Cook’s Illustrated “Meat Book” cookbook – a fantastic resource that I highly recommend for anyone looking to master meat preparation.
More Delicious Finger Foods & Appetizers
Appetizers
Sticky AND Crispy Asian Chicken Wings
Appetizers
Baked Cauliflower Wings – Asian Style
Asian
Korean Fried Chicken
Appetizers
Bang Bang Shrimp
Appetizers
Easy Sausage Rolls Recipe
Appetizers
Sesame Prawn Toast Recipe
Or for a sweet ending to your meal, consider these delightful dessert bites:
- Salted Caramel Banoffee Bites – An Easy Party Food!
- Chocolate Cheesecake Stuffed Strawberries
Some of the links in this post may be affiliate links – which means if you buy the product I get a small commission (at no extra cost to you). If you do buy, then thank you! That’s what helps us to keep Kitchen Sanctuary running. The nutritional information provided is approximate and can vary depending on several factors. For more information please see our Terms & Conditions.