
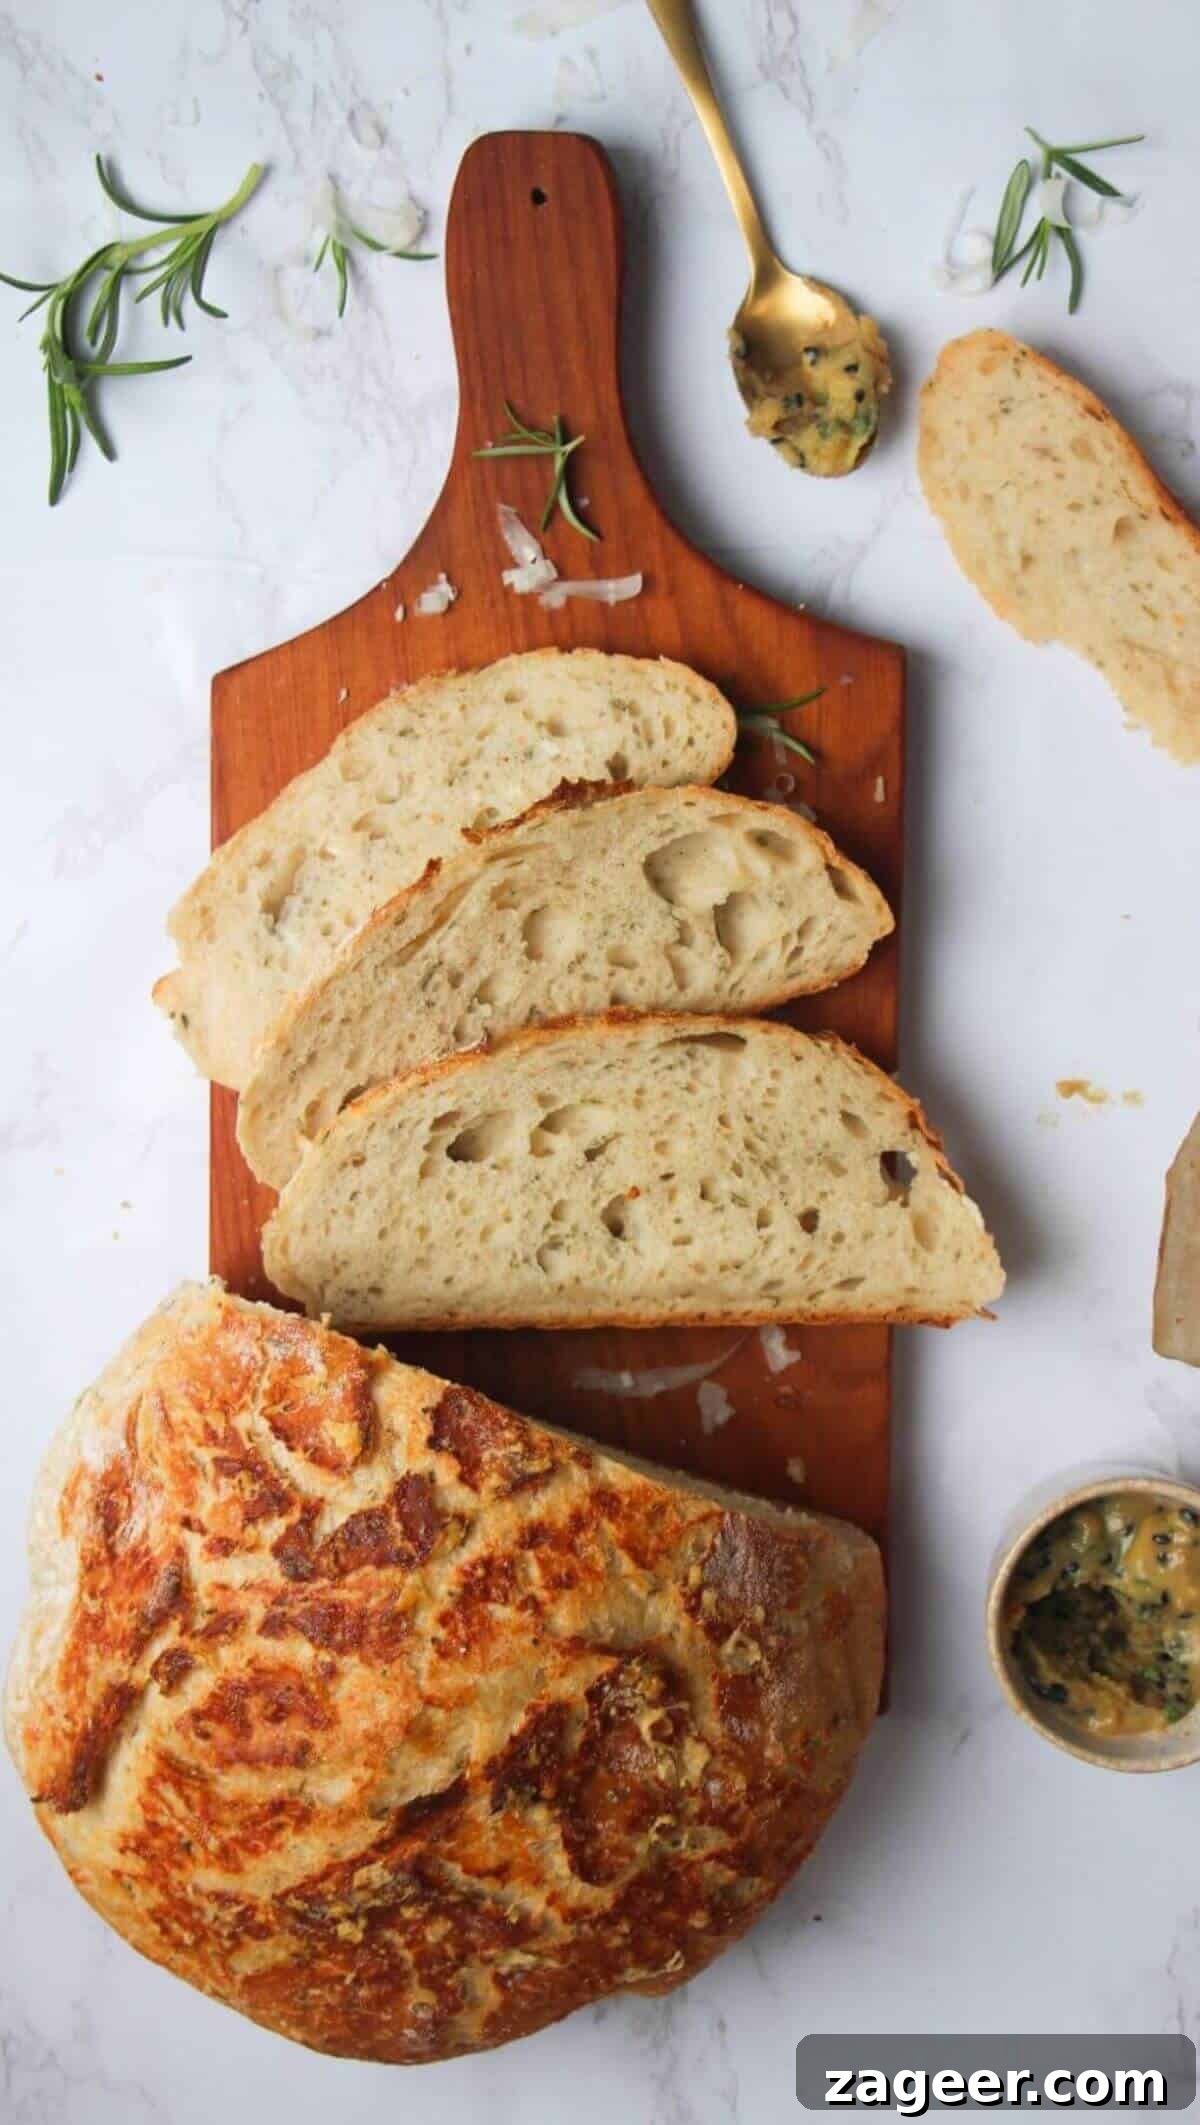
The Ultimate No-Knead Rosemary Parmesan Bread: Effortlessly Delicious
Prepare to be amazed by this incredibly fragrant and savory Rosemary Parmesan Bread, quite possibly the simplest bread recipe you’ll ever master. Forget about laborious kneading sessions or lengthy overnight proofs – with this method, you simply mix, let it rise until doubled, and bake. The result is a truly golden, wonderfully crispy, and delightfully airy loaf that will quickly become a household favorite.
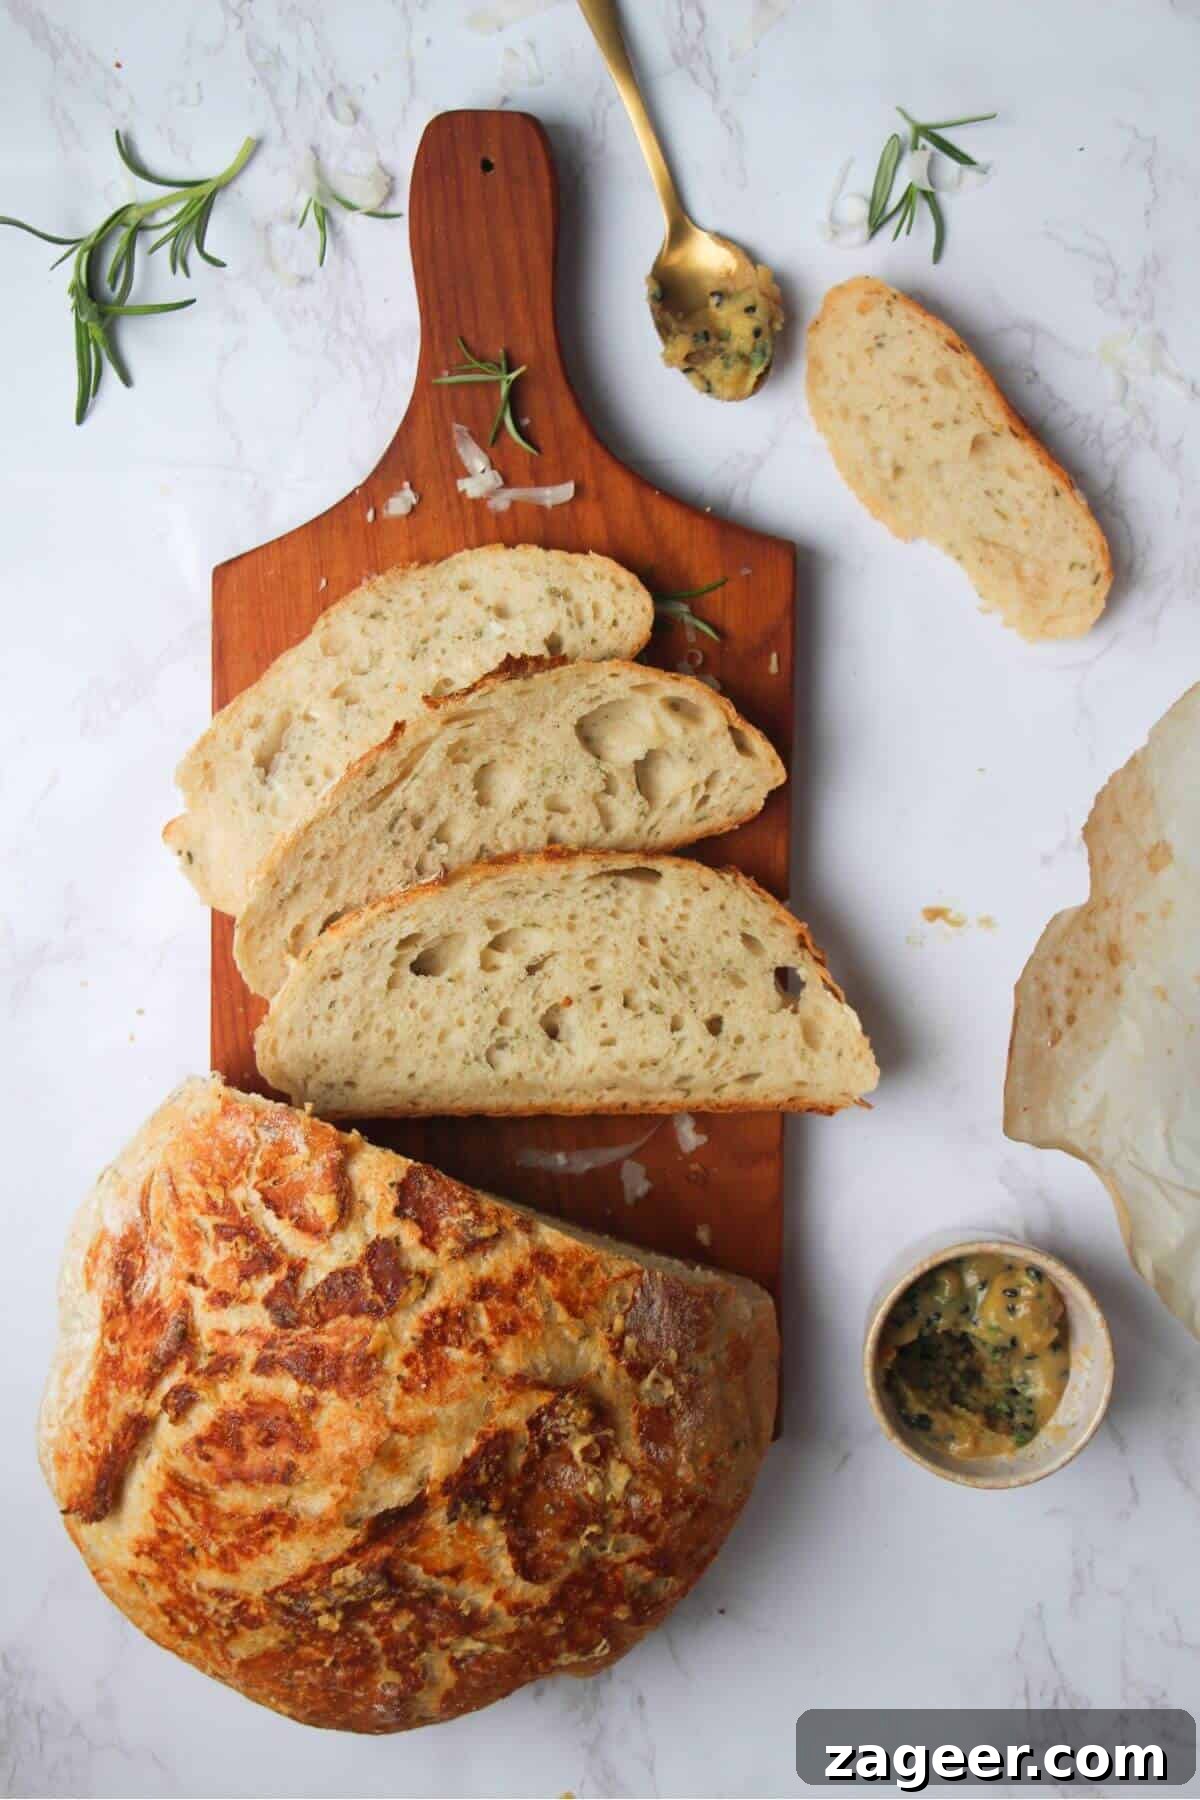
For many, the thought of baking homemade bread can be daunting, often perceived as a complex, time-consuming endeavor. However, this no-knead bread technique completely demystifies the process, serving as an ideal gateway for aspiring bakers. If you’ve ever felt intimidated by bread making, I genuinely encourage you to try this recipe. It truly is remarkably easy, transforming a seemingly complicated task into an enjoyable and rewarding experience. This revolutionary technique is inspired by Jim Lahey’s groundbreaking recipe, a method that has become a serious game-changer in home baking.
While many traditional no-knead bread recipes call for extended rising times—often an entire day or even overnight—to develop complex flavors, there are certainly times when you desire fresh, warm bread without the wait. This particular recipe stands out because it delivers exceptional results in a fraction of that time. You could begin preparing this dough in the late afternoon and have a glorious loaf of fresh bread ready to complement your dinner that very evening. It’s an absolute dream as a dipping bread for various soups; imagine pairing its robust flavor and crusty texture with a hearty roasted tomato and red pepper soup, a comforting carrot and coriander soup, or a rich roasted cauliflower cheese soup. Beyond soups, it’s equally perfect for lighter, summery meals, like a delectable burrata toast with hot honey. For an ultimate indulgence, generously slathering slices with homemade roasted garlic butter comes highly, highly recommended.
The beauty of this recipe lies in its simplicity. All you need to do is combine your ingredients to form a shaggy dough, allow it ample time to rise until doubled, then give it a quick, rustic shape before baking it to perfection in the oven. The only part that might feel slightly challenging, especially for newcomers, is the shaping itself. However, please don’t be deterred! Even if your dough looks a bit flat or imperfect when it goes into the oven, the magic of baking will take over. It will rise beautifully into a gloriously golden, irresistibly crusty loaf, leaving you utterly amazed at how effortlessly you created such a masterpiece.
What truly elevates this particular no-knead bread is its exceptional flavor profile. It’s generously infused with the aromatic freshness of rosemary and the deep, savory notes of Parmesan cheese. This harmonious combination enhances the bread’s natural goodness, making each bite an experience to savor. And if you’re anything like me, resisting the urge to reach for just one more slice will prove to be an delightful challenge!
Essential Ingredients for Your Rosemary Parmesan Loaf
Crafting this magnificent bread requires a mere six ingredients, each playing a vital role in its flavor and texture. Quality ingredients truly make a difference, so let’s explore what you’ll need.
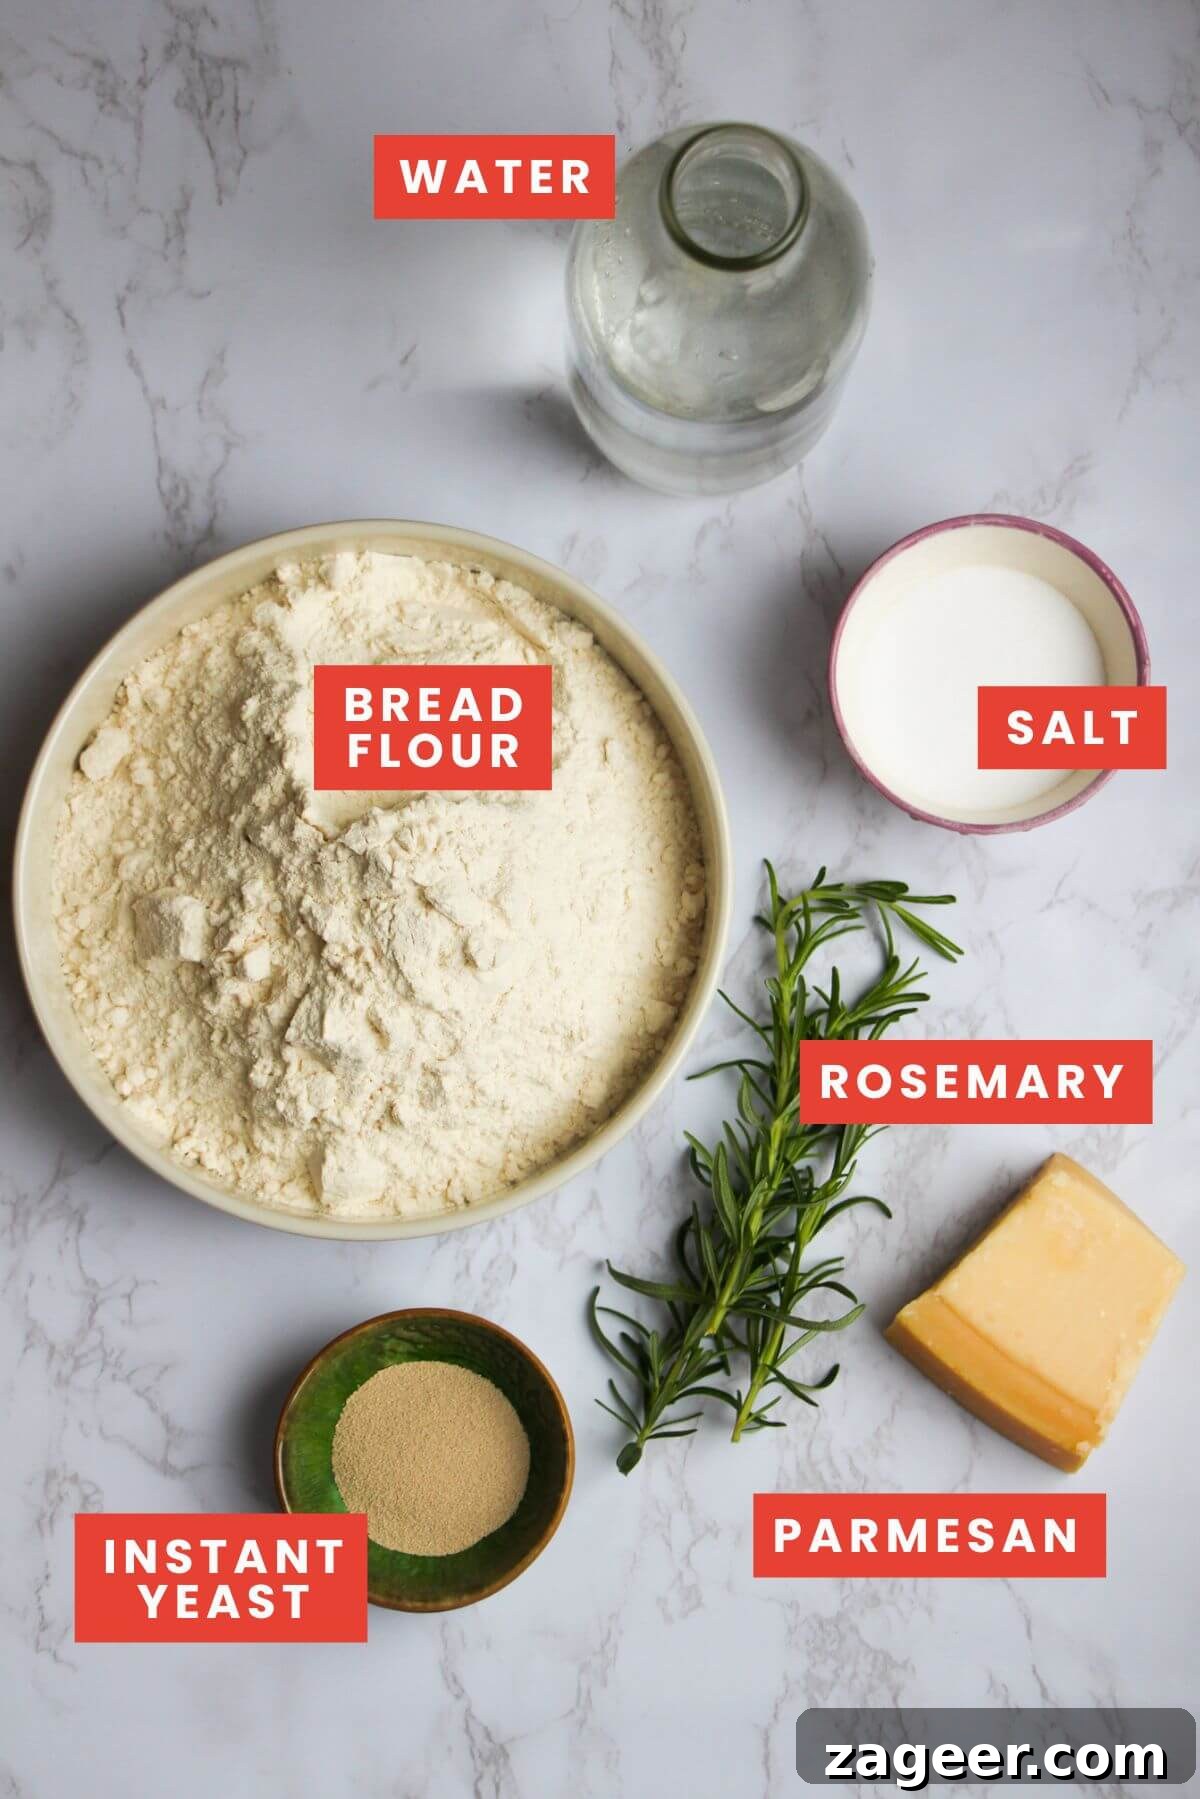
The Core Six Ingredients:
- Bread Flour: For the ultimate texture in your finished loaf—think light, airy, and wonderfully chewy—bread flour is the ideal choice due to its higher protein content. This protein develops strong gluten, which gives bread its characteristic structure. However, if bread flour isn’t readily available, standard all-purpose (plain) flour will certainly work well. Just be aware that the final loaf might not achieve quite the same level of lightness and airiness, though it will still be incredibly delicious.
- Instant Yeast: My preference for this recipe is instant yeast because of its incredible convenience. It can be added directly to your dry ingredients without any prior activation, saving you time and an extra step. If you only have active dry yeast on hand, don’t worry—it can definitely be used. However, you’ll need to activate it first. Simply sprinkle it over your lukewarm water (around 105-115°F or 40-46°C) and let it sit for about 10 minutes. You’ll observe it foaming up slightly, which is a clear indication that the yeast is alive and active. After this activation period, proceed with the recipe, mixing the yeast-water mixture with the rest of your ingredients.
- Salt: A fundamental ingredient in bread making, salt isn’t just for flavor. It also plays a crucial role in regulating yeast activity and strengthening the gluten structure, contributing to a better crumb and crust.
- Grated Parmesan Cheese: This is where a significant part of the savory magic happens. Freshly grated Parmesan cheese infuses the dough with its distinct salty, umami-rich flavor. A generous amount is incorporated into the dough, with an additional tablespoon reserved for sprinkling on top before baking, creating a beautiful, golden-brown crust with irresistible cheesy notes.
- Fresh Rosemary: The aromatic hero of this bread. Fresh rosemary, finely chopped, provides a vibrant, piney, and slightly peppery fragrance that perfectly complements the rich Parmesan. If fresh rosemary isn’t accessible, dried rosemary is a perfectly acceptable substitute. Alternatively, feel free to experiment with other savory herbs like thyme, marjoram, or oregano for a different, yet equally delightful, twist.
- Lukewarm Water: The liquid component that brings everything together and activates the yeast. The water should be lukewarm (not hot, which can kill the yeast, and not cold, which slows down activation) to ensure the yeast begins its work effectively, leading to a perfect rise.
Key Equipment for Perfect Results:
To achieve that coveted crispy crust and beautifully risen loaf, the right baking vessel makes a difference. You’ll ideally need either a sturdy Dutch oven or a regular large, oven-safe stock pot with a lid. These enclosed environments trap steam during the initial baking phase, which is crucial for creating a lovely, shatteringly crispy crust. If a Dutch oven or lidded pot isn’t available, you can still achieve fantastic results using a pizza stone, a pizza steel, or even a standard oven tray/sheet pan. We’ll cover alternatives to the Dutch oven in more detail below to ensure everyone can enjoy this bread!
Step-by-Step Guide: How to Bake Rosemary Parmesan Bread
This section provides a visual overview of the baking process. Full, detailed instructions and precise ingredient quantities are conveniently located in the recipe card at the bottom of this page. Follow these steps for an enjoyable baking experience.
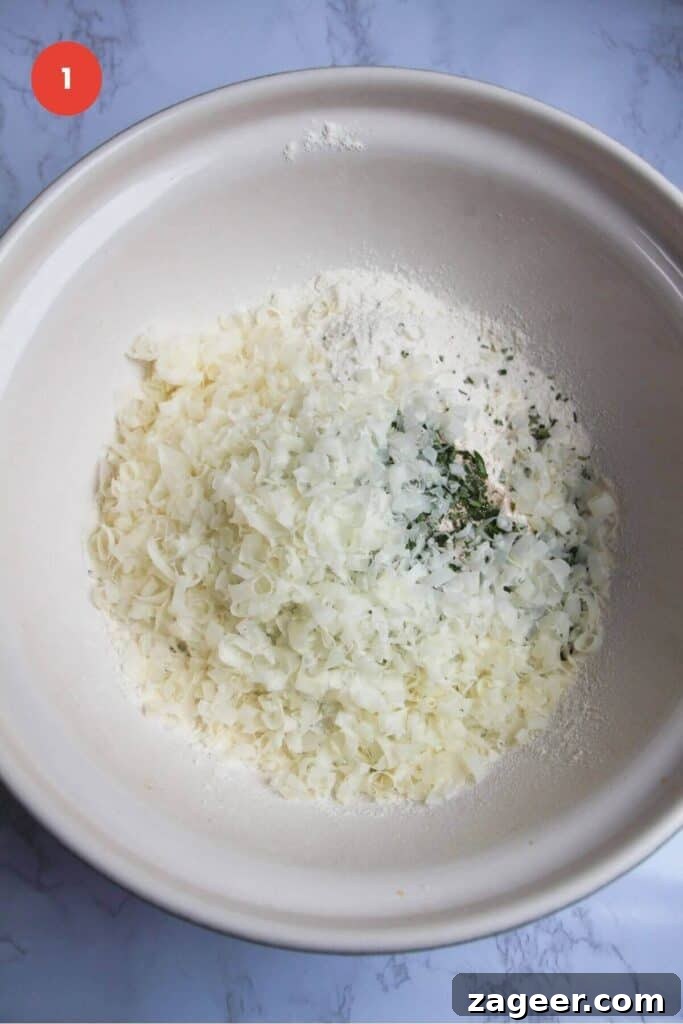
1. Combine Dry Ingredients: In a large mixing bowl, add your bread flour, instant yeast, salt, grated Parmesan cheese, and finely chopped rosemary. Give all the dry ingredients a good mix to ensure they are evenly distributed before adding any liquid.
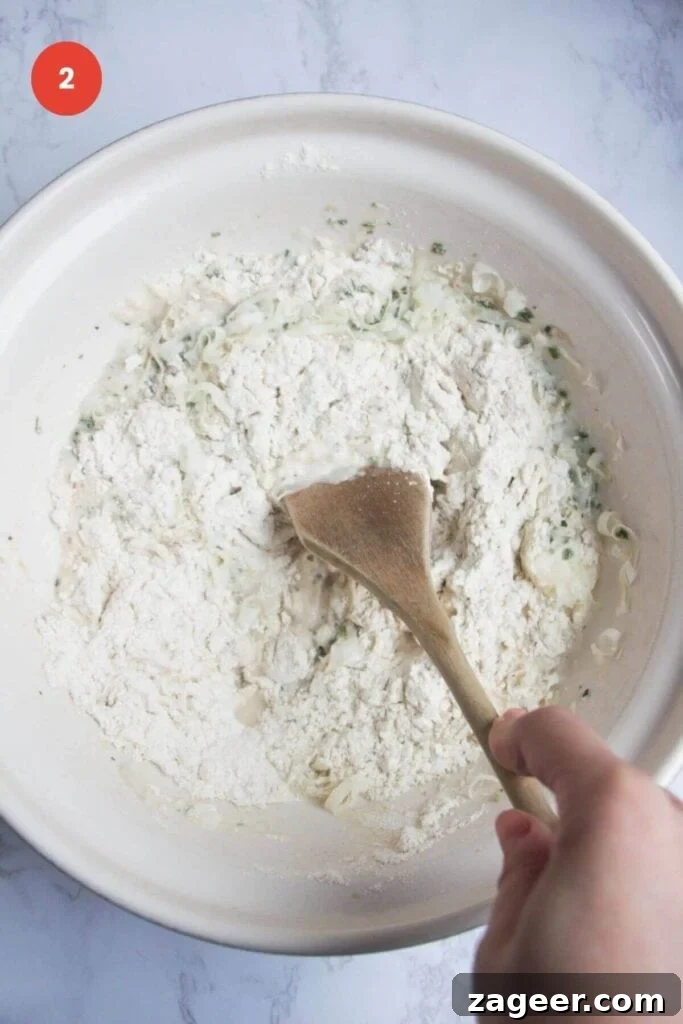
2. Add Water and Mix: Pour in the lukewarm water. Using a sturdy wooden spoon or a spatula, mix the ingredients thoroughly. Continue mixing until a “shaggy” dough forms, meaning it looks somewhat rough and sticky, and crucially, there are no dry streaks of flour remaining in the bowl.
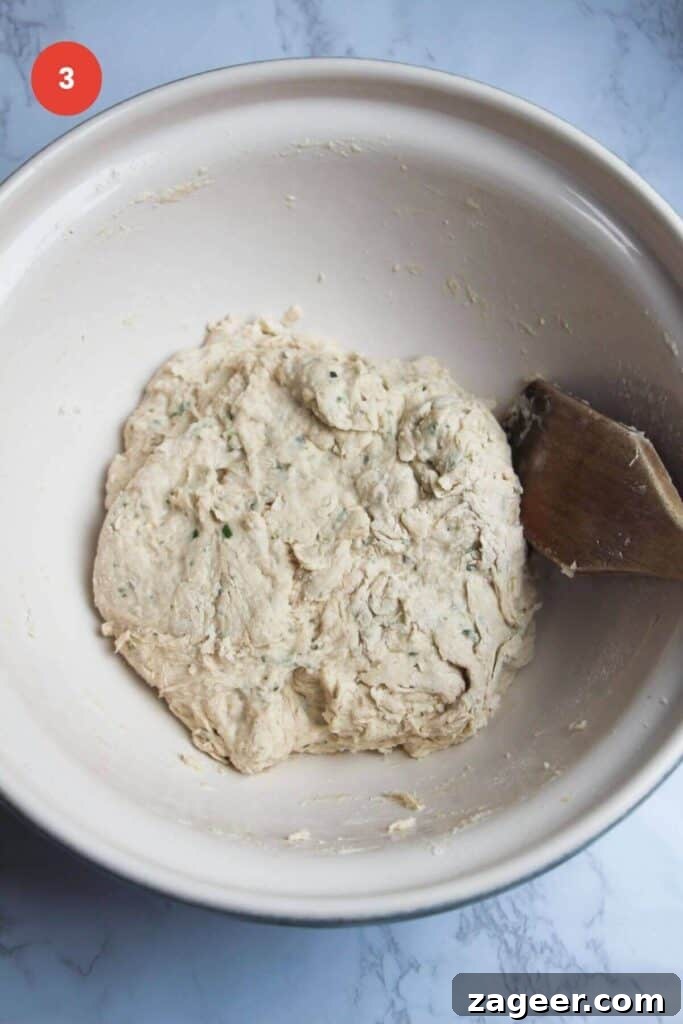
3. First Rise: Once the dough is cohesive, cover the mixing bowl tightly with cling film (plastic wrap). Place the bowl in a warm spot in your kitchen and let the dough rise until it has visibly doubled in size. At this point, it should look wonderfully wobbly and display numerous small bubbles on its surface, indicating active yeast. This initial rise is essential for developing flavor and texture.
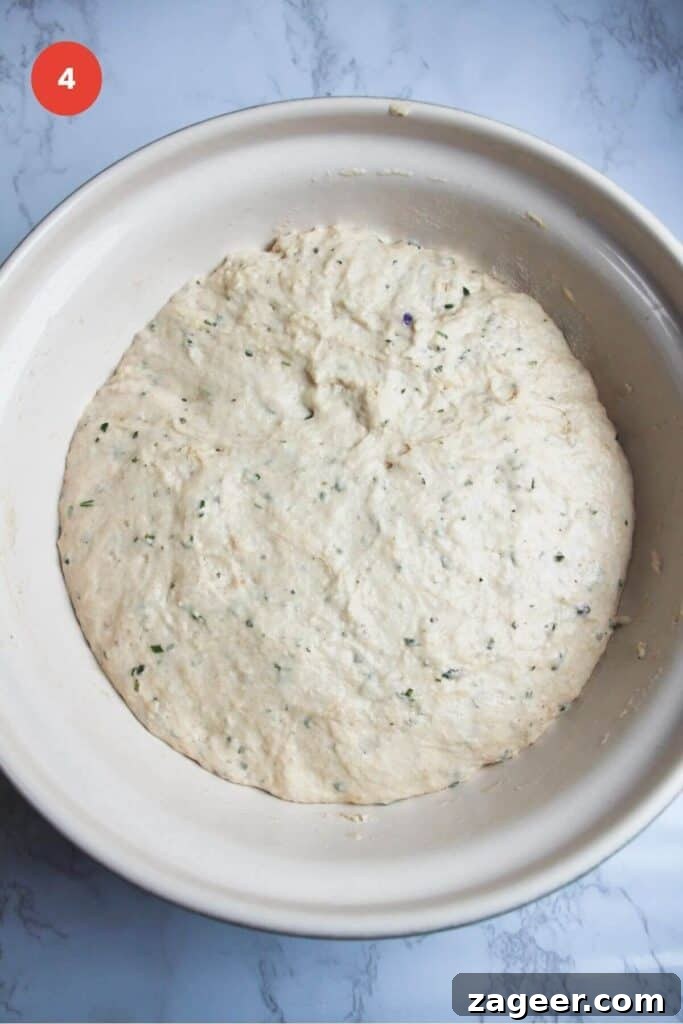
4. Monitor the Rise: The duration of the rising process can vary significantly, largely depending on the ambient temperature and humidity of your kitchen. In warmer conditions, such as during summer, the dough might double in as little as 45 minutes. Conversely, in colder winter environments, it could take up to 2 hours. A helpful tip is to take a quick photo of your dough immediately after covering it. This allows you to easily compare its progress and accurately determine when it has fully doubled, rather than strictly relying on a clock.
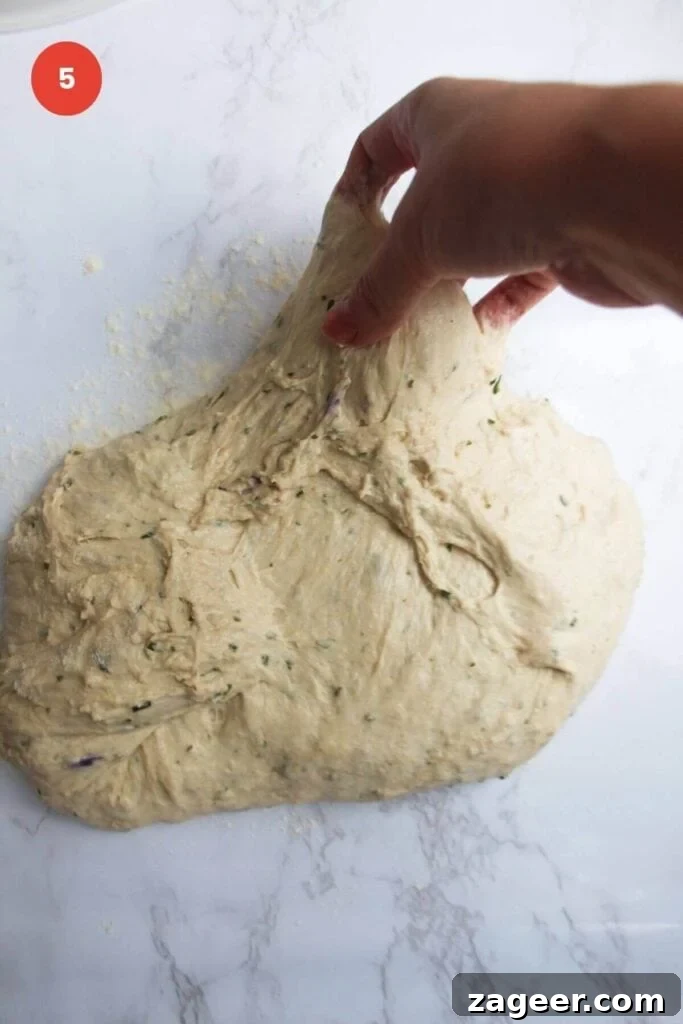
5. Prepare for Shaping: Once the dough has successfully risen, gently turn it out onto a lightly floured clean surface. This is where you’ll give the dough a rough shape and begin to build some internal structure. With flour-dusted hands, carefully pull up a section of the dough from the edges and fold it back towards the center of the mass. This motion helps to create tension on the surface.
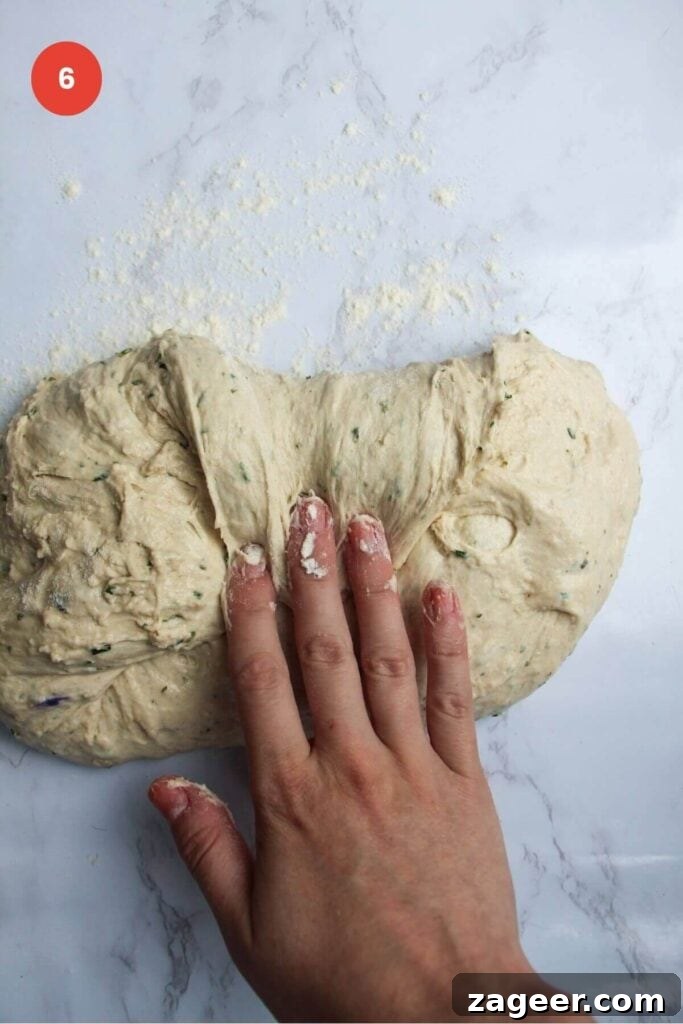
6. Fold and Build Structure: Continue this stretching and folding motion, working your way around all sides of the dough. Imagine gently gathering the edges towards the center, helping to create a tighter, more uniform ball. This process doesn’t require kneading; it’s simply about developing surface tension.
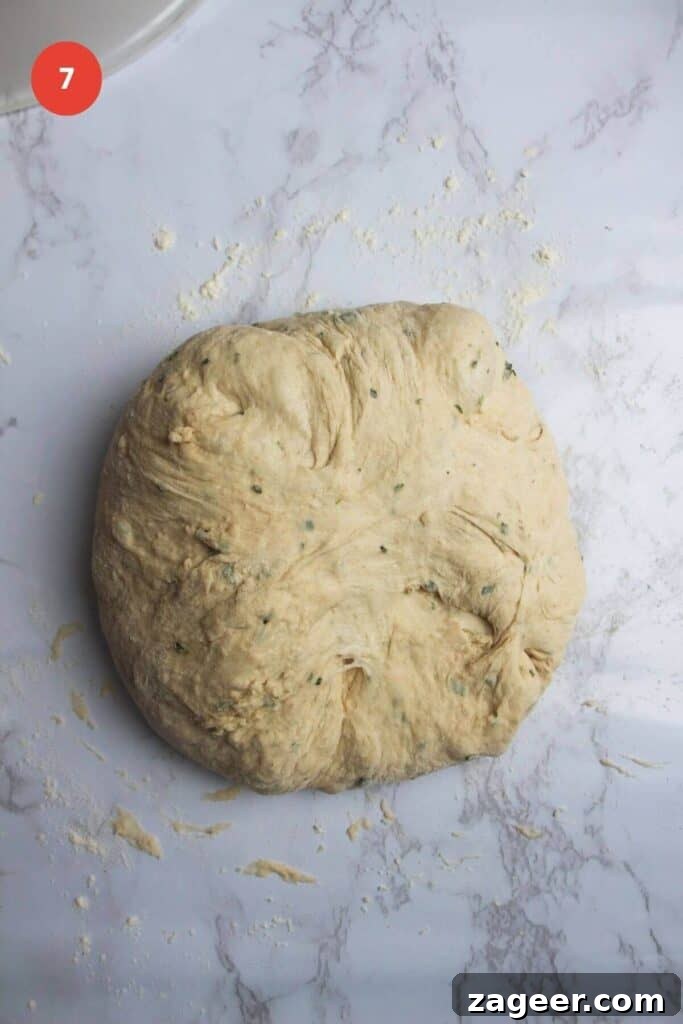
7. Form a Rustic Circle: Keep folding the various sides of the dough into each other until you achieve a roughly shaped circle. The aim is not perfection but a fairly compact, rounded form. Don’t stress if it looks a bit “rustic” – that’s part of its charm!
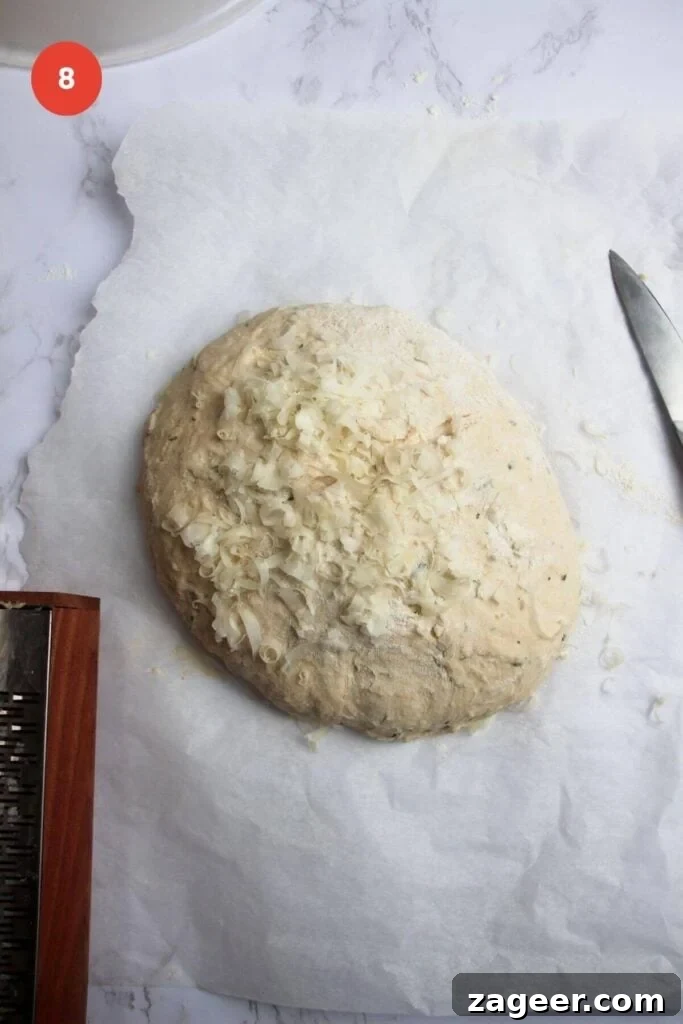
8. Final Shape and Topping: Carefully flip the shaped dough onto a piece of baking paper. Using floured hands, gently arrange it into a slightly tighter ball. Again, perfection isn’t the goal; a somewhat messy, rustic look is absolutely fine and expected. If desired, you can sprinkle a tablespoon of grated Parmesan cheese over the top for an extra burst of flavor and a beautiful golden crust.
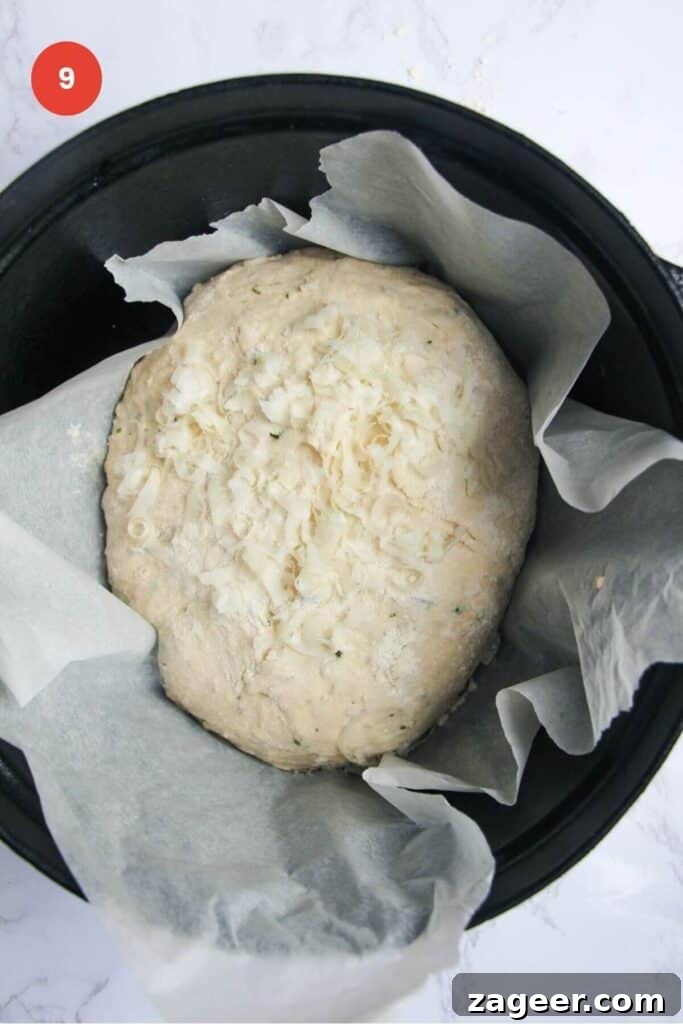
9. Transfer to Baking Vessel: Now, carefully transfer the dough (still on its baking paper) into your preheated Dutch oven, a large pot with a lid, or onto your pizza stone/steel, or even a sheet pan. Be mindful of the hot vessel if you’re using a preheated one.
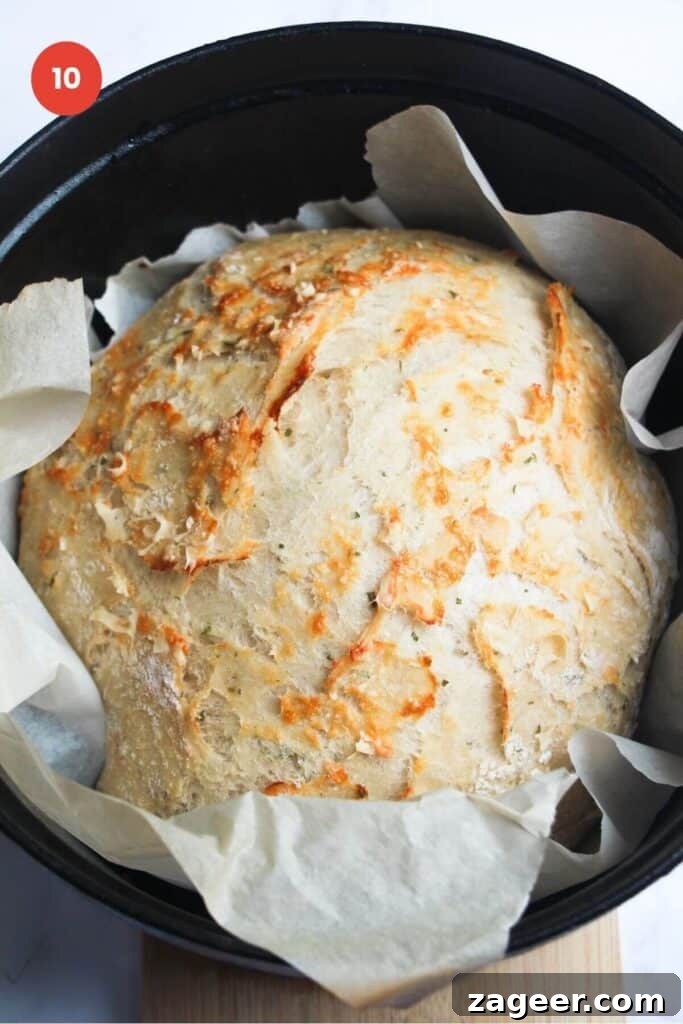
10. Initial Bake: Place the lid on your Dutch oven or pot (or cover with foil/another tray if using alternatives). Bake for an initial 30 minutes. This covered period creates a steamy environment, crucial for a soft interior and a thin, crispy crust. After 30 minutes, remove the lid and continue baking for another 15 minutes.
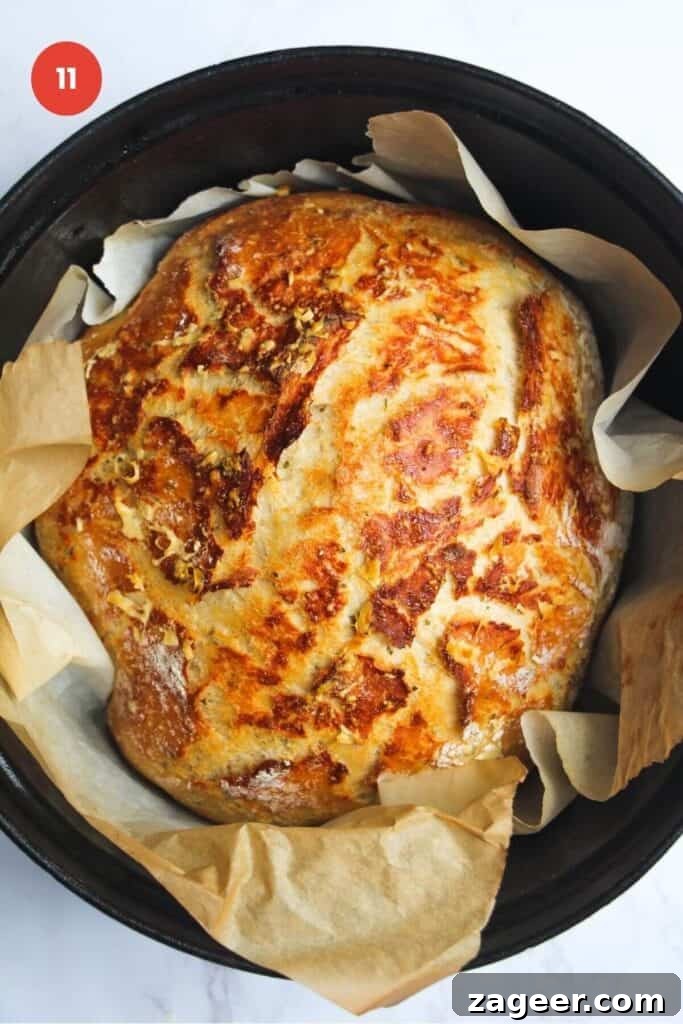
11. Golden Perfection: By the end of the baking time, your bread should have transformed into a truly gorgeous, deeply golden-brown loaf with an irresistible crispy crust. It will fill your kitchen with an incredible aroma, a sure sign of its deliciousness.
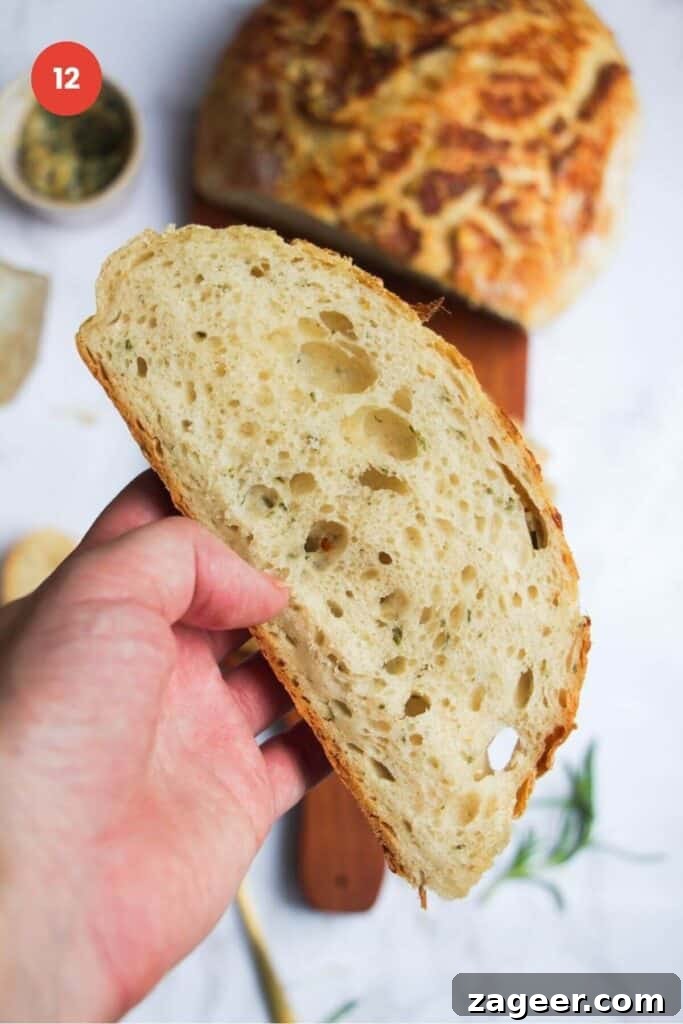
12. Cool and Serve: The hardest part! Allow the bread to cool on a wire rack for at least 15-20 minutes (if you can resist!) before slicing into it. Cooling allows the internal structure to set properly. Then, slice generously and devour, ideally with a generous dollop of homemade roasted garlic butter.
No Dutch Oven? No Problem! Proven Alternatives for a Crispy Crust
While a Dutch oven is often recommended for its ability to create a perfectly steamy environment, you can absolutely achieve a fantastic, crispy-crusted loaf of rosemary parmesan bread without one. Here are two effective alternatives:
- Use a Regular, Large Oven-Safe Stock Pot: Many home kitchens have a large stock pot that is oven-proof. This works just as well as a Dutch oven! Ensure your pot can withstand high oven temperatures. If it comes with a lid, that’s excellent – use it for the initial baking phase. If your pot doesn’t have a lid, you can improvisationally cover it tightly with a baking tray/sheet pan or several layers of heavy-duty aluminum foil to trap the steam. A crucial distinction: unlike a Dutch oven, you generally won’t need to preheat a regular stock pot. They tend to heat up very quickly, and preheating can sometimes lead to the bottom of your bread burning before the rest is cooked through. Place the dough into the cold pot and then put it in the hot oven.
- Utilize a Pizza Stone, Pizza Steel, or Standard Oven Tray/Sheet Pan with a Water Bath: To replicate the steam-filled environment that’s vital for developing a wonderfully crispy crust, you’ll employ a simple trick: a water bath. Place your dough (on baking paper) onto a preheated pizza stone or pizza steel. If using a regular sheet pan or oven tray, you do not need to preheat it – simply place the dough onto the cold tray before putting it in the oven (similar to the regular stock pot, preheating can cause burning). Regardless of your main baking surface, you will also need a small, oven-proof dish filled with approximately 1 cup of water. Position this dish on a rack underneath the bread for the first 30 minutes of baking. The water will evaporate, creating steam around your bread, mimicking the effect of a lidded pot. After 30 minutes, carefully remove the dish of water for the remaining 15 minutes of baking, allowing the crust to fully crisp up and brown.
Plan Ahead: Making Rosemary Parmesan Bread Work for Your Schedule
This no-knead rosemary parmesan bread recipe is wonderfully flexible and forgiving, making it incredibly adaptable to even the busiest schedules. Its versatility allows you to prepare parts of it in advance, ensuring fresh, homemade bread is always within reach.
Once you’ve mixed your shaggy dough, instead of letting it rise immediately at room temperature, you can cover the bowl tightly with cling film and place it directly into the refrigerator. The cold environment significantly slows down the yeast activity, allowing the dough to cold-proof for up to 2 days. This extended, slow rise not only fits perfectly into your schedule but also contributes to a deeper, more complex flavor in the final bread. Whenever you’re ready to bake, simply retrieve the dough from the fridge.
Similarly, if you’ve started the initial rise at room temperature and suddenly realize your plans have changed and you won’t have time to bake that day, don’t fret! You can simply pop the partially risen dough (covered) into the refrigerator. This halts the rising process, allowing you to pick up where you left off at a more convenient time.
When you’re ready to bake after cold-proofing, take the dough out of the refrigerator approximately 45 minutes before you plan to put it in the oven. Use this time to preheat your oven and Dutch oven (if using). This brief period at room temperature helps to take the chill out of the dough, ensuring a more even and robust rise during baking. The slightly warmer dough reacts better to the oven’s heat, resulting in a beautifully airy crumb.
Frequently Asked Questions (FAQs) About No-Knead Rosemary Parmesan Bread
Here are some common questions to help you master this delicious recipe:
Can I use dried rosemary in the rosemary parmesan bread?
Absolutely! Dried rosemary is perfectly fine for this recipe. If you don’t have fresh, using dried will still infuse your bread with its wonderful fragrance. You can also experiment with other dried herbs like thyme, marjoram, or oregano for a different flavor profile.
Can I use regular all-purpose flour to make the rosemary parmesan bread?
Yes, all-purpose (plain) flour works well in this recipe. While bread flour, with its higher protein content, typically yields a slightly lighter and airier texture, using all-purpose flour will still result in a wonderfully delicious loaf. The difference in texture will be subtle but noticeable to a connoisseur.
I only have active dry yeast; is that okay to use?
Active dry yeast is totally acceptable! The key difference is that it needs to be activated before mixing it with the dry ingredients. To do this, simply sprinkle the active dry yeast on top of your lukewarm water (around 105-115°F or 40-46°C) and let it sit undisturbed for about 10 minutes. You’ll know it’s active and ready when you see a foamy layer forming on the surface. After 10 minutes, stir the yeast-water mixture and proceed with the recipe as directed.
How do I store the rosemary parmesan bread to keep it fresh?
This bread keeps beautifully for about 3 days when stored at room temperature. For optimal freshness and to maintain its crust, store it in a bread bag or an airtight container. Keep in mind that the crust will naturally soften a bit after the first day. To refresh slices, a quick toast in the toaster works wonders, bringing back some of that lovely crispness. This bread also freezes exceptionally well. I recommend slicing the cooled loaf first, then placing the slices into freezer-safe zip-lock bags. This way, you can easily pull out just a few slices as needed and defrost them directly in the toaster for a quick and fresh treat.
What is the ideal water temperature for activating yeast or mixing dough?
For instant yeast, lukewarm tap water is usually sufficient, around 100-110°F (38-43°C). If using active dry yeast that requires activation, aim for slightly warmer water, between 105-115°F (40-46°C). Water that’s too hot will kill the yeast, rendering it inactive, while water that’s too cold will drastically slow down or prevent activation. A good rule of thumb is water that feels comfortably warm to the touch, but not hot.
Can I add other mix-ins to this no-knead bread?
Absolutely! This recipe is highly adaptable. Feel free to add other complementary ingredients. Sun-dried tomatoes, black olives, chopped roasted garlic, or even a sprinkle of red pepper flakes could add interesting layers of flavor. Just be mindful not to overcrowd the dough, as too many additions can affect its rise.
The Science of Precision: Why Weighing Ingredients Matters in Baking
In the world of baking, precision often reigns supreme, and while this no-knead recipe is quite flexible, you’ll consistently achieve the best possible results by weighing your ingredients rather than relying on volumetric cup measurements. This recommendation isn’t just a suggestion; it’s a fundamental principle for successful baking, especially when it comes to flour.
The primary reason for this emphasis on weighing is the inherent inconsistency of cup measurements. The amount of flour that fits into a cup can vary dramatically depending on how it’s scooped and packed. One baker might lightly spoon flour into a cup, resulting in a significantly different weight than another who firmly packs it down. This discrepancy can lead to varying dough consistencies, which in turn affects the final texture and rise of your bread. A few grams too much flour can make your dough stiff and dense, while too little can leave it overly sticky and difficult to handle.
By contrast, weighing ingredients using a digital kitchen scale provides an exact, reproducible measurement every single time. 500 grams of flour is always 500 grams of flour, regardless of how it’s handled. This accuracy eliminates guesswork and ensures that your dough has the ideal hydration level, leading to a consistently light, airy, and beautifully textured loaf.
Investing in a digital kitchen scale is a small step that yields significant improvements in your baking results. You don’t need an expensive model; there are numerous affordable and reliable options available. I use a simple digital scale I found on Amazon, and you’ll find plenty of cheap yet effective options online.
Explore More Delicious Baking Adventures
If you’ve enjoyed the simplicity and incredible flavor of this no-knead rosemary parmesan bread, you might be interested in exploring other delightful baking ideas. Here are a few more recipes that promise ease and delicious results:
If you embark on making this delightful Rosemary Parmesan Bread, I would absolutely love to hear about your experience! Please feel free to leave a recipe rating and a comment below to share your thoughts and tips. And don’t forget to tag @DishedByKate on Instagram, Facebook, and TikTok if you post photos of your homemade creations. Seeing your recreations truly brightens my day and inspires me to share more delicious recipes!
The EASIEST No Knead Rosemary Parmesan Bread

This super fragrant, super savory rosemary parmesan bread is truly the easiest bread recipe you’ll ever make. No kneading, no long or overnight rise here – just mix, let rise until doubled and bake. It’s golden, crispy, airy, and light deliciousness you’ll love.
You’ll need either a Dutch oven, a regular large stock pot or a pizza stone, pizza steel, a regular sheet pan or a baking tray to bake your bread on.
Recipe Details
- Author: Kate Phillips
- Total Time: 1 hour 50 minutes
- Yield: 1 large loaf
- Diet: Vegetarian
Ingredients
- 500g white bread flour (or use all-purpose flour) + more for shaping
- 2 teaspoons instant yeast
- 1 tablespoon salt
- 1 cup grated parmesan cheese + 1 tablespoon to top
- 2 tablespoons rosemary, finely chopped
- 375g lukewarm water
Instructions
- Mix the dough. Add 500g bread flour, 2 teaspoons instant yeast, 1 tablespoon salt, 1 cup grated parmesan, and 2 tablespoons of finely chopped rosemary to a large mixing bowl. Give it a mix to combine, then pour in 375g lukewarm water. Mix with a wooden spoon or spatula until a shaggy dough forms, making sure there are no streaks of unmixed flour. Cover the bowl with cling film and let it rise in a warm place until it’s doubled in size, and looks super bubbly and wobbly. This can take anywhere from 45 minutes, if you’re in a hot climate, to 2 hours if you’re somewhere cooler. Take a photo of the dough as you cover it so you can easily check to see how it’s going – watch the dough, rather than the clock. PRO TIP: You can put the dough in the fridge at this point for up to 2 days. Then just remove it about 45 minutes before you’re ready to bake and proceed with the recipe.
- Heat your oven. Once the dough has increased in size by about 50%, heat your oven to 480°F (250°C) fan and place your Dutch oven or pizza stone/steel inside. PRO TIP: If you’re using a regular aluminum pot or regular sheet pan/oven tray, you don’t need to preheat them.
- Shape the dough. Lightly flour a clean, flat surface and turn the risen dough out onto it. Scatter another tablespoon of flour on top, then, using a bench scraper or with floured hands, pick up each edge of the dough and fold it back onto itself to form a very rough ball. Set a piece of baking paper that fits inside your Dutch oven, next to the dough, then turn the dough onto it, so the seam side is down. Use both hands to rotate the dough and form it into a rough ball. Don’t worry if it’s not perfect or looks a little flat – this is rustic bread! Make a cross slash in the top of the dough, then sprinkle the extra tablespoon of grated parmesan on top.
- Bake the bread. Carefully remove your pre-heated Dutch oven from the oven, then transfer the dough, still on the baking paper, into the pot and put the lid on (or use a sheet pan/aluminum foil if your pot has no lid). Bake for 30 minutes, then remove the lid and bake for another 15 minutes, until the top is golden brown and the bread smells gorgeous. Transfer it to a wire rack to cool for about 15 minutes, then slice and devour. PRO TIP: If you’re using a pizza stone, steel or baking tray, place the dough on the baking paper onto it in the oven, then set a small oven-proof dish filled with 1 cup of water underneath it. Bake for 30 minutes, then take out the dish with the water in it for the last 15 minutes.
Notes
INGREDIENT NOTES: It’s SUPER important you use instant yeast when following this recipe as written. If you only have active yeast, that’s fine, but you will need to sprinkle it on top of the lukewarm water and let it sit for 10 minutes first, before adding it to the flour mix. This is going to activate the yeast. If you try adding active yeast straight into the bowl, you’ll end up with strange grainy yeasty bits throughout your bread and it won’t rise as well. Using bread flour gives the bread a lovely, light, airy result, but you can use regular plain flour in this recipe too.
SUBSTITUTIONS: You can use dried rosemary here (or another herb like thyme, marjoram or oregano) if you don’t have any fresh rosemary.
NO DUTCH OVEN? No problem. You can use a regular, large stock pot (just make sure it’s oven-safe!) that has a lid. If it doesn’t have a lid, just use an oven tray/sheet pan or use aluminum foil. If you use a regular pot, you don’t need to preheat it. You can also use a pizza stone, steel or a regular baking tray/sheet pan and a small oven-proof dish with water in it to mimic the result you get from a pot. The key to the crackling, crispy crust of the bread is the steam that’s produced by a dutch oven, so this is a way you can get that result without a pot. Preheat the pizza stone or steel, then set the dish of water in the tray underneath in the oven when you put the dough in. Remove the water dish for the last 15 minutes of baking.
MAKE AHEAD: This is a very flexible recipe. You can mix the dough, then cover the bowl and pop it in the fridge for up to 2 days, then continue with the recipe when you’re ready. Bring the dough out of the fridge as you’re pre-heating your oven, to allow some of the fridge chill to come off it. I love to mix the dough in the evening, pop into the fridge and then bake it the next morning!
Additional Details
- Prep Time: 5 minutes
- Rising time: 60 minutes (can vary based on temperature)
- Cook Time: 45 minutes
- Category: baking
- Method: oven
- Cuisine: mediterranean
Nutrition
- Serving Size: 2 slices