
Ultimate Chicken Teriyaki Rice Bowls: Quick, Easy, and Better Than Takeout
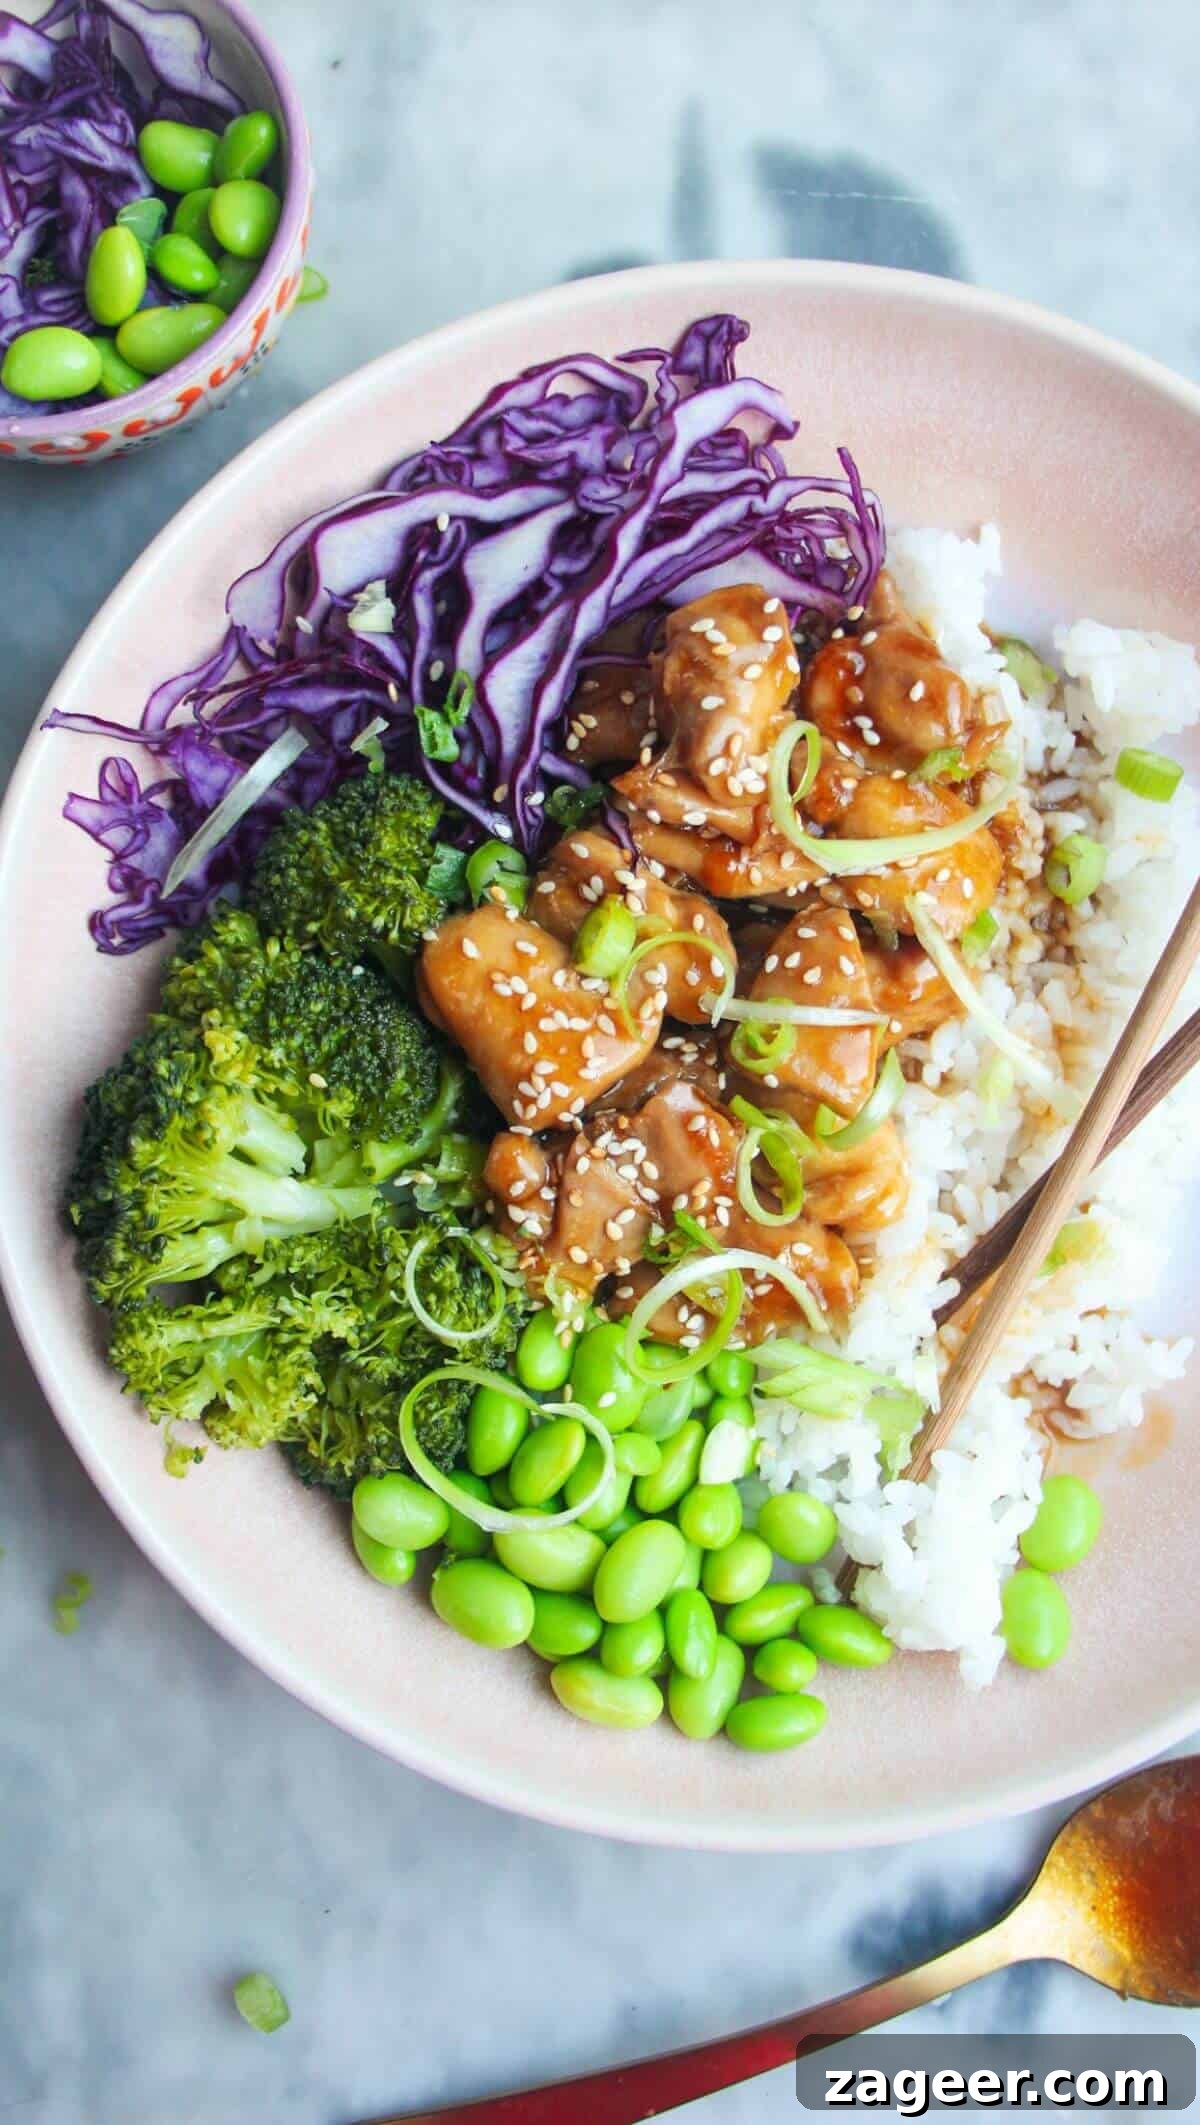
Craving that irresistible sticky, sweet, and savory goodness of teriyaki chicken? Look no further! Our ultimate chicken teriyaki rice bowls bring the magic of your favorite takeout classic right to your kitchen, in less than 30 minutes. Picture perfectly glazed chicken piled high on soft, fluffy rice, complemented by a vibrant medley of crunchy vegetables. This recipe is not just super easy to make; it’s also incredibly versatile and perfect for a satisfying weeknight meal or efficient meal prep.

Chicken teriyaki stands as a timeless culinary classic, adored for its rich flavors and comforting appeal. The harmonious blend of a glistening, deeply savory sauce and succulent chicken pieces creates an utterly perfect pairing that’s far simpler to achieve at home than you might imagine. Our homemade teriyaki sauce relies on readily available pantry staples, comes together in a flash, and delivers an unparalleled glossy finish and layers of irresistible flavor.
This recipe is designed to be a complete, balanced meal, serving the juicy teriyaki chicken over a bed of steamed rice with an assortment of crisp, fresh vegetables on the side. For those extra busy evenings, feel free to expedite the process by using a high-quality store-bought teriyaki sauce. Alternatively, get creative and transform your chicken into delectable bites by stuffing it into fluffy steamed bao buns or adding it to an Asian-style slaw for a lighter option.
Why You’ll Fall in Love with This Easy Teriyaki Recipe
Beyond its delicious taste, there are numerous reasons why this chicken teriyaki bowl will become a staple in your kitchen:
- Lightning Quick & Effortless: From start to finish, you’re looking at under 30 minutes. It’s the ultimate solution for those busy weeknights when you crave something wholesome and flavorful without the fuss.
- Excellent for Meal Prep: Prepare the chicken, rice, and chop your veggies in advance, then store them separately. Assemble fresh bowls throughout the week for healthy, grab-and-go lunches or dinners.
- Savor Takeout Quality at Home: Skip the delivery fee and questionable ingredients. This recipe rivals your favorite restaurant teriyaki, giving you control over freshness and flavor, often for a fraction of the cost.
- Infinitely Adaptable: This recipe is a canvas for your culinary creativity. Easily add more of your favorite vegetables, switch up the protein with beef or tofu, or even experiment with different grains.
- Healthier Home Cooked Version: By making it yourself, you can control the amount of sugar and sodium, making it a healthier alternative to many store-bought or restaurant versions.
- Budget-Friendly: Utilizing common pantry ingredients and affordable chicken thighs, this recipe offers a delicious meal without breaking the bank.
Essential Ingredients for Your Teriyaki Bowls
One of the beauties of this recipe is its reliance on simple, accessible ingredients. You likely have most, if not all, of these items already in your pantry and fridge, making spontaneous cooking a breeze.
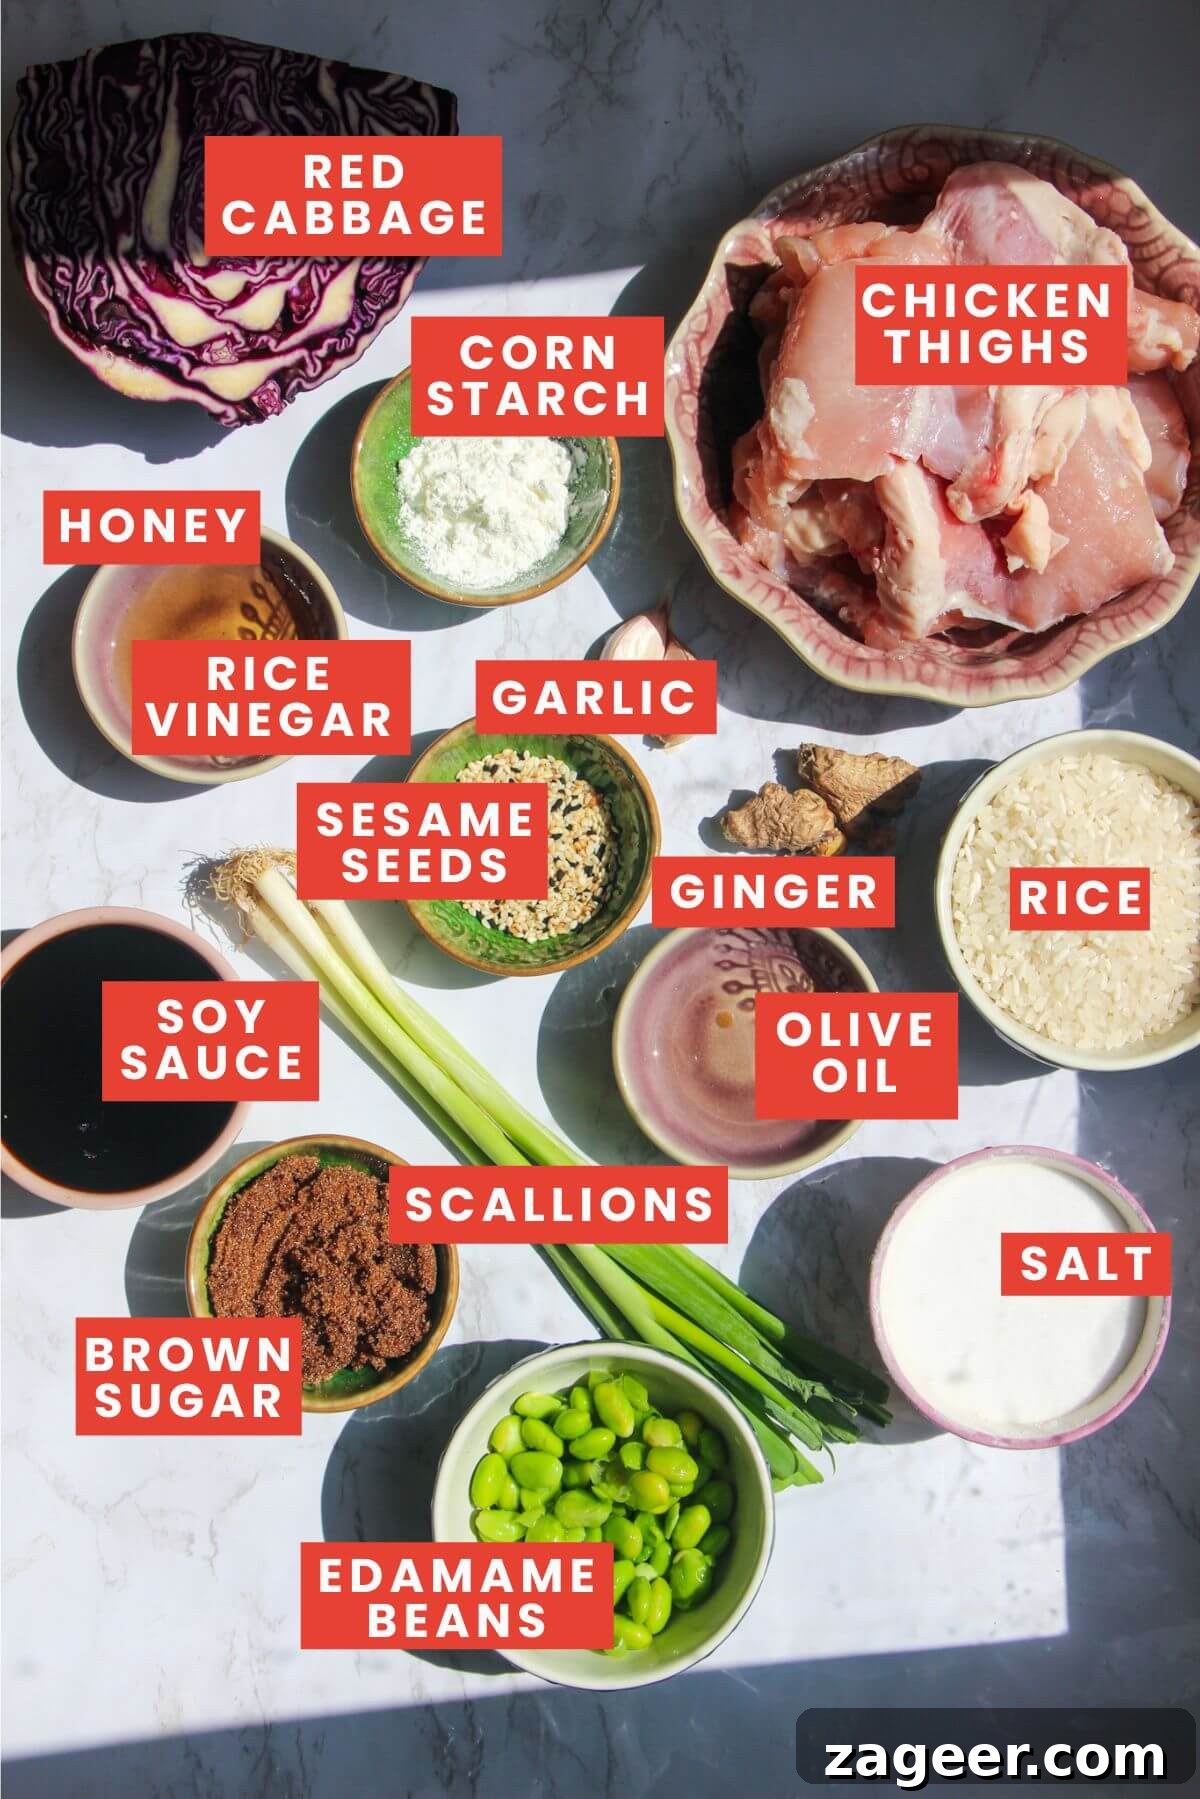
- The Star Protein: Chicken Thighs. For this recipe, we highly recommend using boneless, skinless, free-range chicken thighs. Their slightly higher fat content ensures they remain incredibly juicy and tender throughout the cooking process, unlike chicken breasts which can sometimes dry out. However, if chicken breast or tenderloin is your preference, they can certainly be used – just be mindful of cooking times to prevent overcooking. Slice them into even, bite-sized pieces for quick and consistent cooking.
- The Glorious Sauce: Homemade Teriyaki Blend. The heart of any great teriyaki bowl is its sauce, and our homemade version is truly exceptional. You’ll need:
- Soy Sauce: The umami base. Opt for a low-sodium variety to better control the saltiness.
- Brown Sugar & Honey: These provide the signature sweetness and contribute to that desirable sticky, glossy texture. Brown sugar adds a deeper, molasses note, while honey offers a floral sweetness.
- Rice Vinegar: A touch of acidity balances the sweetness and richness, adding a bright, authentic Japanese flavor profile. White vinegar or apple cider vinegar can be substituted in a pinch.
- Fresh Garlic & Ginger: Essential aromatics that infuse the sauce with warmth and pungent depth. Freshly grated is always best for maximum flavor, but ginger and garlic paste or even powdered versions (use 1 tsp each) will work if that’s what you have on hand.
- Cornstarch (Cornflour): The secret to that beautiful thick, glossy consistency. It helps the sauce cling perfectly to the chicken. Ensure it’s mixed with water thoroughly before adding to prevent lumps.
- Water: To achieve the perfect sauce consistency and help dissolve the cornstarch.
- The Crunchy Toppings: Fresh Veggies & Garnish. This is where you can truly get creative and utilize any lingering vegetables in your fridge. We love the vibrant colors and delightful crunch of shredded red cabbage, sweet edamame beans, and finely sliced scallions. Other fantastic additions include crisp cucumber, colorful red bell peppers, steamed broccoli florets, or tender bok choy. Don’t forget a sprinkle of sesame seeds for an added layer of nutty flavor and visual appeal!
Step-by-Step Guide: Crafting Your Perfect Teriyaki Bowls
Creating these delicious teriyaki bowls is a straightforward process. Follow these simple steps for a truly rewarding culinary experience.
Prepare Your Teriyaki Sauce
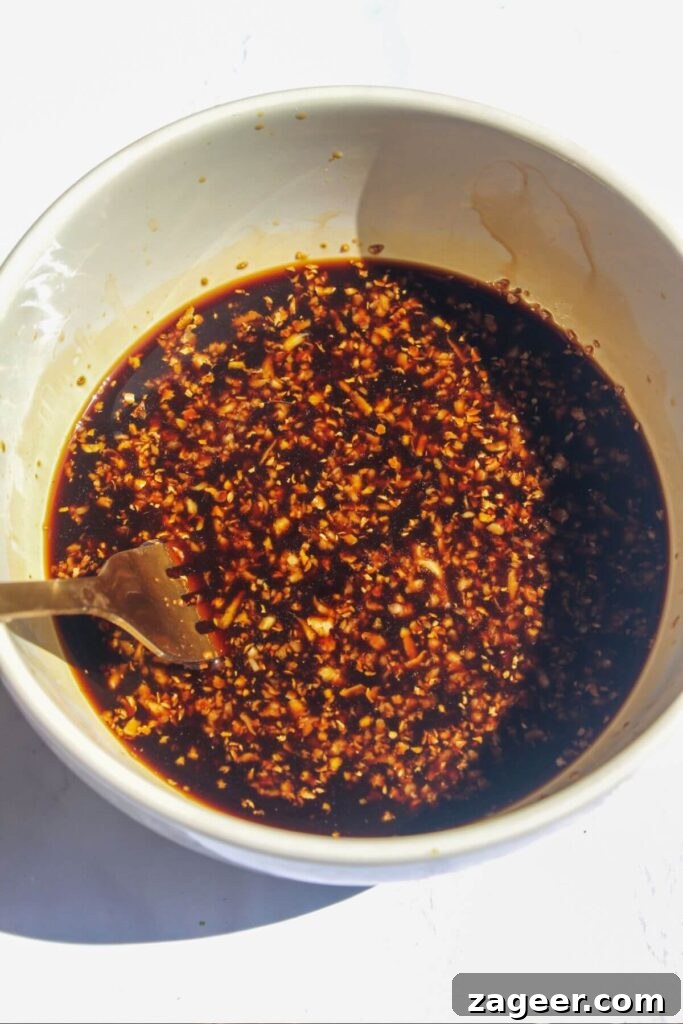
Begin by whisking together all the teriyaki sauce ingredients – soy sauce, brown sugar, honey, rice vinegar, crushed garlic, and grated ginger – in a small bowl. The key here is to mix the cornstarch with a bit of water in a separate small mug or bowl *before* adding it to the main sauce mixture. This crucial step ensures the cornstarch dissolves smoothly, preventing any unsightly lumps and guaranteeing a silky-smooth sauce. Set this vibrant, aromatic mixture aside while you cook your chicken.
Cook the Chicken to Golden Perfection
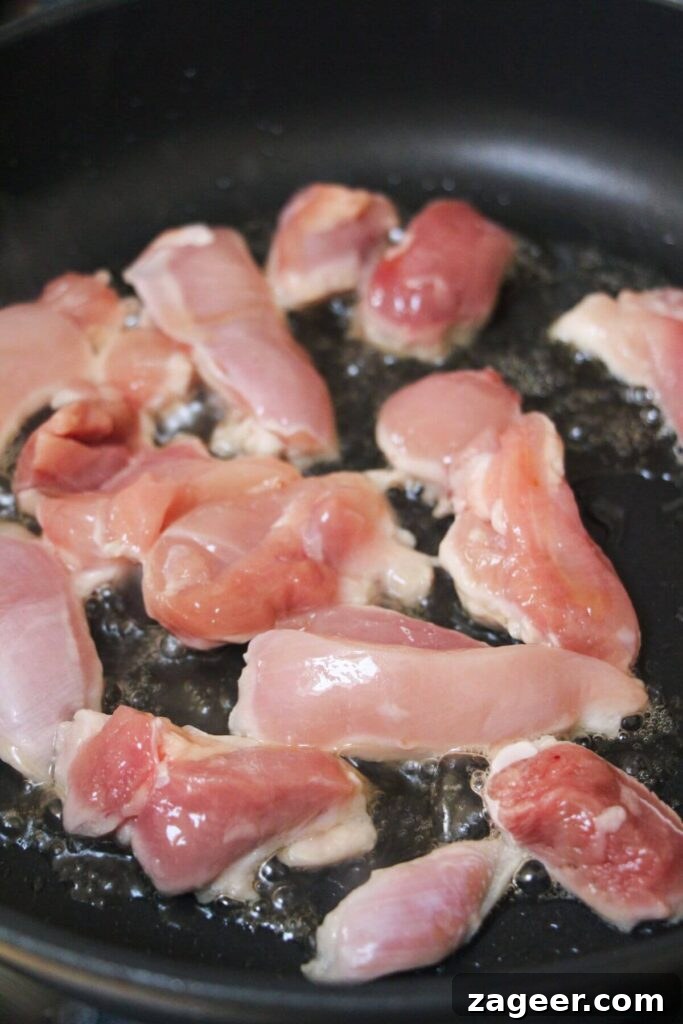
Heat a tablespoon of olive oil in a large frying pan or skillet over medium-high heat. Once shimmering, add your sliced chicken thighs, spreading them out into a single layer if possible. Resist the urge to stir immediately! Allow the chicken to cook undisturbed for about 5 minutes until it develops a beautiful golden-brown, slightly charred crust on one side. This caramelization adds incredible depth of flavor. Flip the pieces over and cook for another 5 minutes on the other side until fully cooked through and golden.
Glaze the Chicken with Teriyaki Goodness
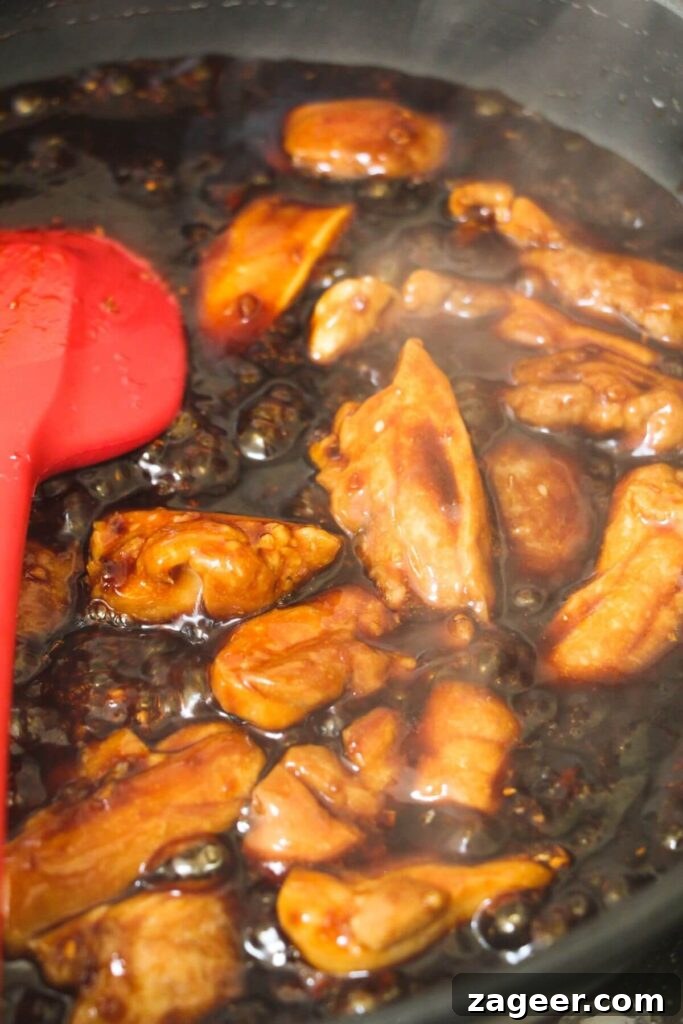
Before adding, give your reserved teriyaki sauce a quick stir to ensure the cornstarch hasn’t settled at the bottom. Pour the entire sauce mixture directly into the pan with your browned chicken. Stir continuously, tossing the chicken pieces to ensure they are thoroughly coated in the sauce. Continue to cook for another couple of minutes as the sauce begins to bubble, thicken, and transform into that signature super glossy finish. Once the sauce has reached your desired consistency, remove the pan from the heat immediately to prevent overcooking the chicken.
Assemble Your Vibrant Bowls
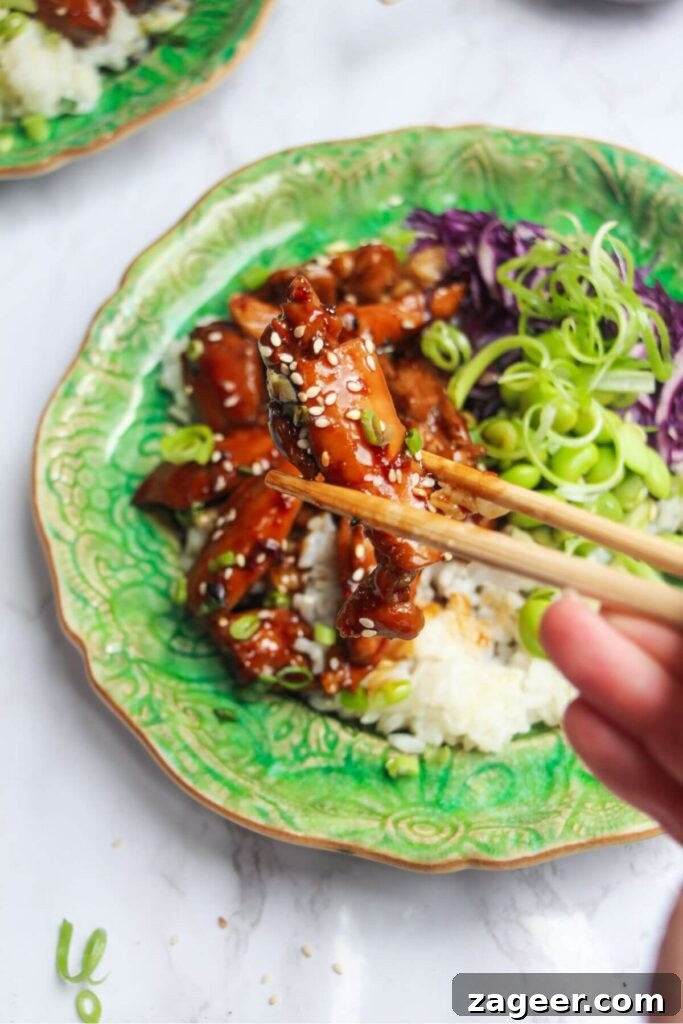
Now for the exciting part – assembly! Divide your freshly cooked, fluffy rice among individual serving bowls. Generously top the rice with the perfectly glazed teriyaki chicken and a few extra spoonfuls of that luscious sauce. Arrange your colorful, crunchy veggies – the shredded red cabbage, vibrant edamame beans, and fresh scallions – artfully around the chicken. Finish each bowl with a sprinkle of toasted sesame seeds for an extra touch of flavor and elegance. Serve immediately and enjoy your homemade masterpiece!
Expert Tips for Crafting the Perfect Teriyaki
Elevate your chicken teriyaki bowls from great to extraordinary with these helpful tips:
- Don’t Rush the Sear: Allowing the chicken to cook undisturbed for a few minutes on each side creates a beautiful crust and locks in moisture, adding depth of flavor that quick stirring won’t achieve.
- Whisk Cornstarch Thoroughly: Always mix cornstarch with cold water separately before adding it to the main sauce. This prevents lumps and ensures a smooth, glossy sauce.
- Control the Sweetness: Taste your sauce before adding it to the chicken. If you prefer it less sweet, reduce the brown sugar or honey slightly. For more sweetness, add a touch more honey.
- Evenly Sliced Chicken: Ensure your chicken pieces are cut into roughly equal sizes. This promotes even cooking, preventing some pieces from being undercooked or overcooked.
- Monitor Sauce Thickness: The sauce will thicken rapidly once the cornstarch activates. Cook just until it reaches your desired glossy, coating consistency, then remove from heat to avoid it becoming too thick or gummy.
- Fresh Aromatics Make a Difference: While pastes work, fresh garlic and ginger provide a brighter, more pungent flavor that truly shines in homemade teriyaki.
- Meal Prep for Success: Store cooked chicken, rice, and chopped raw vegetables in separate airtight containers in the fridge. This keeps everything fresh and allows for quick assembly when you’re ready to eat.
Creative Variations & Customizations
This teriyaki bowl recipe is incredibly flexible, allowing you to easily adapt it to your preferences or what you have on hand:
- Protein Power:
- Beef Teriyaki: Thinly slice flank steak or sirloin against the grain and cook quickly.
- Shrimp Teriyaki: Cook peeled and deveined shrimp for just a few minutes until pink before adding the sauce.
- Tofu Teriyaki: For a vegetarian option, press extra-firm tofu, cut it into cubes, pan-fry until golden, then toss with the sauce.
- Pork Teriyaki: Thinly sliced pork loin or tenderloin works wonderfully.
- Vegetable Medley: Experiment with a wide array of vegetables.
- Steamed or Stir-fried: Broccoli, snap peas, snow peas, sliced carrots, bell peppers, mushrooms, asparagus, or baby bok choy are all excellent additions. Add them to the pan with the chicken towards the end, or steam separately.
- Fresh & Crunchy: Diced cucumber, shredded carrots, or thinly sliced radishes add freshness and texture.
- Grain & Carb Alternatives:
- Noodles: Swap rice for a bed of ramen, udon, soba, or vermicelli noodles.
- Low-Carb Options: Serve over cauliflower rice, zoodles (zucchini noodles), or a generous bed of mixed leafy greens for a lighter meal.
- Brown Rice or Quinoa: For extra fiber and nutrients, use brown rice or quinoa instead of white rice.
- Spice It Up: Add a pinch of red pepper flakes to the sauce for a subtle kick, or drizzle with sriracha before serving for bolder heat.
- Garnish Galore: Beyond sesame seeds, consider chopped cilantro, a squeeze of fresh lime juice, or a dollop of creamy egg-free garlic aioli for an extra layer of flavor.
Your Teriyaki Questions Answered
What do you serve with chicken teriyaki?
This recipe focuses on serving teriyaki chicken with steamed rice and a medley of crunchy vegetables. However, the possibilities are vast! You could easily swap the rice for noodles (udon or vermicelli are delightful choices), cauliflower rice for a low-carb alternative, or serve it atop a refreshing Asian-style slaw. For a unique twist, pile the chicken onto speedy 2-ingredient dough flatbreads, stuff it into bao buns, or incorporate it into a vibrant poke bowl.
What’s the best chicken for teriyaki?
While chicken breast or tenderloin can certainly be used, I highly recommend using skinless, boneless chicken thighs. Their natural fat content ensures they remain incredibly juicy and flavorful during cooking, standing up well to the rich teriyaki glaze without drying out. They’re a forgiving cut, making them ideal for quick cooking.
Can I make this teriyaki chicken in advance?
Absolutely! This chicken teriyaki recipe is fantastic for meal prepping. Once cooked, the teriyaki chicken itself will store beautifully for up to 4 days in an airtight container in the fridge. For best results, cook the chicken and rice separately, then chop your fresh vegetables. Keep these three components in individual containers in the fridge, ready to be assembled into fresh bowls whenever you’re ready to eat. Reheat the chicken and rice gently on the stovetop or in the microwave.
How do I achieve that super glossy teriyaki sauce?
The secret to a truly glossy teriyaki sauce lies in a few key steps: First, ensure you use cornstarch (or cornflour) as the thickening agent, always dissolving it in cold water *before* adding it to the hot pan. Second, allow the sauce to simmer gently for a couple of minutes once added to the chicken; this gives the cornstarch time to activate and thicken. Third, ensure a good balance of sugar and honey in your sauce, as these ingredients contribute to the beautiful shine and stickiness. Finally, don’t overcook it – once it thickens and coats the chicken, remove it from the heat.
Is this recipe gluten-free?
The original recipe uses regular soy sauce, which contains wheat. To make this recipe gluten-free, simply substitute regular soy sauce with tamari, which is a gluten-free alternative that offers a similar savory flavor. Always double-check labels on other ingredients like rice vinegar to ensure they are certified gluten-free if strict dietary requirements are necessary.
Craving More? Explore These Better-Than-Takeout Ideas!
If you loved this chicken teriyaki recipe, you’re in for a treat! We have a whole collection of easy, flavorful dishes that let you enjoy your favorite restaurant meals right in your home. Say goodbye to expensive delivery and hello to delicious homemade classics:
Grilled Chicken Poke Bowls
Honey Sesame Chicken
Charred Chicken Shawarma Wraps
Crispy Chicken Katsu Curry
If you try this delightful recipe, I’d love to hear about your experience! Please consider leaving a recipe rating and a comment below to share your thoughts and tips. And don’t forget to tag @DishedByKate on Instagram, Facebook, and TikTok when you recreate one of my recipes. Seeing your delicious creations always makes my day! 😊

Chicken Teriyaki Rice Bowls
5 from 1 review
-
Author:
Kate Phillips -
Total Time:
30 minutes -
Yield:
4 servings -
Diet:
Low Calorie
Description
Sticky, sweet, glossy teriyaki glazed chicken is piled onto soft, fluffy rice and paired with crunchy veggies to make a super easy weeknight meal. It takes less than 30 minutes, is easy to adapt and is a fab way to enjoy a takeout classic at home.
Ingredients
For the bowls:
- 1 1/2 cups long-grain white rice, rinsed
- 1 teaspoon salt
- 1 lb (500g) boneless, skinless chicken thighs
- 1 tablespoon of olive oil
- 2 scallions (spring onions), finely sliced
- 1/4 red cabbage, shredded
- 1/2 cup frozen, podded edamame beans (defrost by soaking in warm water for a few minutes)
- 1 tablespoon sesame seeds, for garnish
For the teriyaki sauce:
- 1/3 cup soy sauce (use tamari for gluten-free)
- 1 tablespoon brown sugar
- 2 tablespoons honey
- 2 garlic cloves, crushed or minced
- 1-inch piece of fresh ginger, grated (or 1 teaspoon ginger paste/ground ginger)
- 2 teaspoons rice vinegar (or white wine vinegar/apple cider vinegar)
- 2 teaspoons cornstarch (corn flour)
- 1/4 cup water
Instructions
- Prepare your rice. Add 1 1/2 cups of rinsed long-grain white rice to a pot with a tight-fitting lid. Stir in 1 teaspoon of salt and 3 cups of cold water. Place the pot over medium-high heat. Once foamy bubbles appear on the surface, immediately cover the pot with the lid. Reduce the heat to the lowest setting and let it simmer for 12 minutes. After this time, remove the pot from the heat but keep the lid on for an additional 10 minutes (or until you are ready to serve) to allow the rice to steam perfectly.
- Mix your teriyaki sauce. In a small bowl, combine 1/3 cup soy sauce, 1 tablespoon brown sugar, 2 tablespoons honey, 2 teaspoons rice vinegar, the crushed garlic, and grated ginger. Whisk thoroughly to combine. In a separate small mug or bowl, mix 2 teaspoons of cornstarch with 1/4 cup of cold water until smooth. Add this cornstarch slurry to the main sauce mixture and whisk again until fully incorporated. Set the sauce aside.
- Cook your chicken. Slice your chicken thighs into even, bite-sized chunks. Place a large frying pan or skillet over medium-high heat and add 1 tablespoon of olive oil. Once the oil is hot and shimmering, add the chicken pieces, spreading them out into a single layer as much as possible. Let the chicken cook undisturbed for approximately 5 minutes until one side is beautifully golden-brown and slightly charred. Flip the chicken pieces and cook for another 5 minutes on the other side until cooked through.
- Add the sauce and glaze. Give the prepared teriyaki sauce a quick stir (to ensure the cornstarch hasn’t settled at the bottom). Pour the entire sauce mixture directly into the pan with the browned chicken. Toss and stir the chicken pieces constantly to ensure they are evenly coated with the sauce. Continue to cook for another 2-3 minutes, stirring, as the sauce will begin to bubble vigorously, thicken, and become wonderfully glossy. Once the sauce has reached your desired consistency, remove the pan from the heat immediately.
- Assemble and serve your bowls. Divide the fluffy cooked rice among individual serving bowls. Generously top each bowl with the glistening teriyaki chicken and spoon over any remaining luscious sauce from the pan. Artfully arrange the shredded red cabbage, defrosted edamame beans, and finely sliced scallions around the chicken. Finish with a sprinkle of toasted sesame seeds for added flavor and visual appeal. Serve immediately and savor your homemade chicken teriyaki rice bowls!
Notes
INGREDIENT NOTES: I prefer using boneless, skinless chicken thighs for their juiciness, but chicken breast or tenderloin can be used as an alternative – just be careful not to overcook them. If you don’t have rice vinegar, white wine vinegar or apple cider vinegar are suitable substitutes. For convenience, you can substitute fresh garlic and ginger with 1 teaspoon each of garlic powder and ground ginger (or ginger and garlic paste).
SUBSTITUTIONS & VARIATIONS: This recipe is incredibly versatile! Feel free to add more vegetables like diced cucumber, bell pepper, carrots, steamed broccoli, or bok choy. For a low-carb option, serve the teriyaki chicken over leafy greens or cauliflower rice instead of white rice. You can also swap the protein: thinly sliced beef, firm tofu, or even shrimp (prawns) would be delicious with this sauce.
STORAGE INSTRUCTIONS: Cooked chicken teriyaki can be stored in an airtight container in the fridge for up to 4 days. It’s excellent for meal prepping; simply store the cooked chicken, cooked rice, and chopped raw vegetables in separate containers to maintain freshness, then assemble and reheat as needed.
-
Prep Time:
10 minutes -
Cook Time:
20 minutes -
Category:
Fakeaways, Dinner, Asian -
Method:
Stove Top -
Cuisine:
Japanese
Nutrition
(Nutritional information is approximate and can vary based on specific ingredients and serving sizes.)
- Serving Size: 350g
- Calories: 409
- Sugar: 11.5g
- Fat: 15.4g
- Saturated Fat: 3.9g
- Carbohydrates: 36.3g
- Fiber: 1.5g
- Protein: 25.4g
- Cholesterol: 99mg