
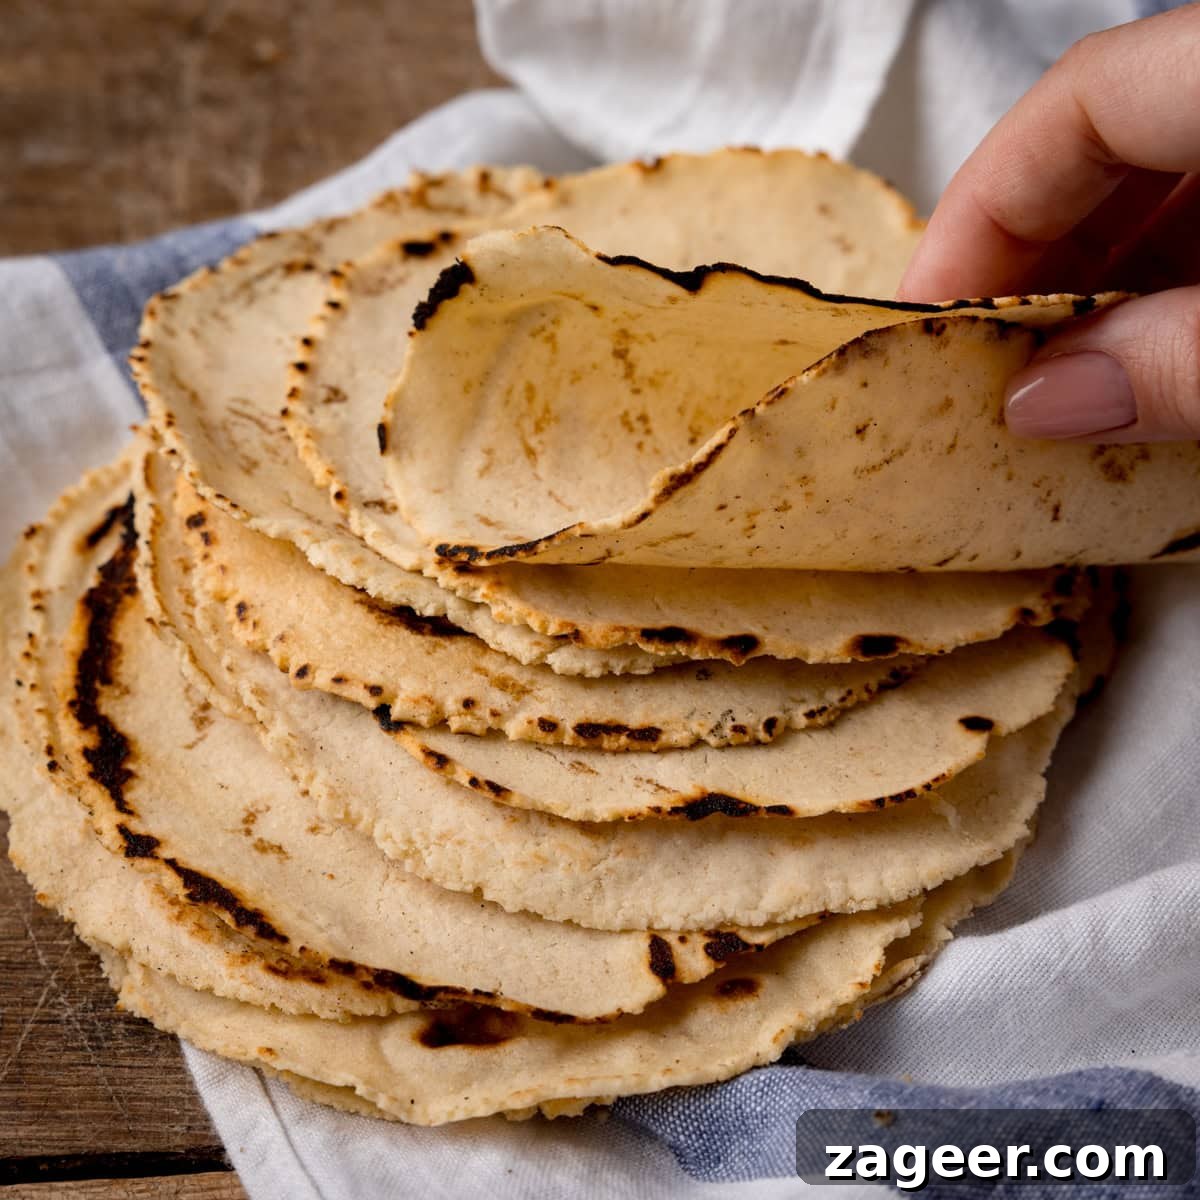
Unlock the true taste of Mexico right in your kitchen with this easy-to-follow recipe for authentic homemade corn tortillas. Whether you own a tortilla press or prefer to roll them by hand, this comprehensive guide will help you create perfectly soft, subtly sweet, and slightly smoky tortillas in about an hour, including crucial resting time.
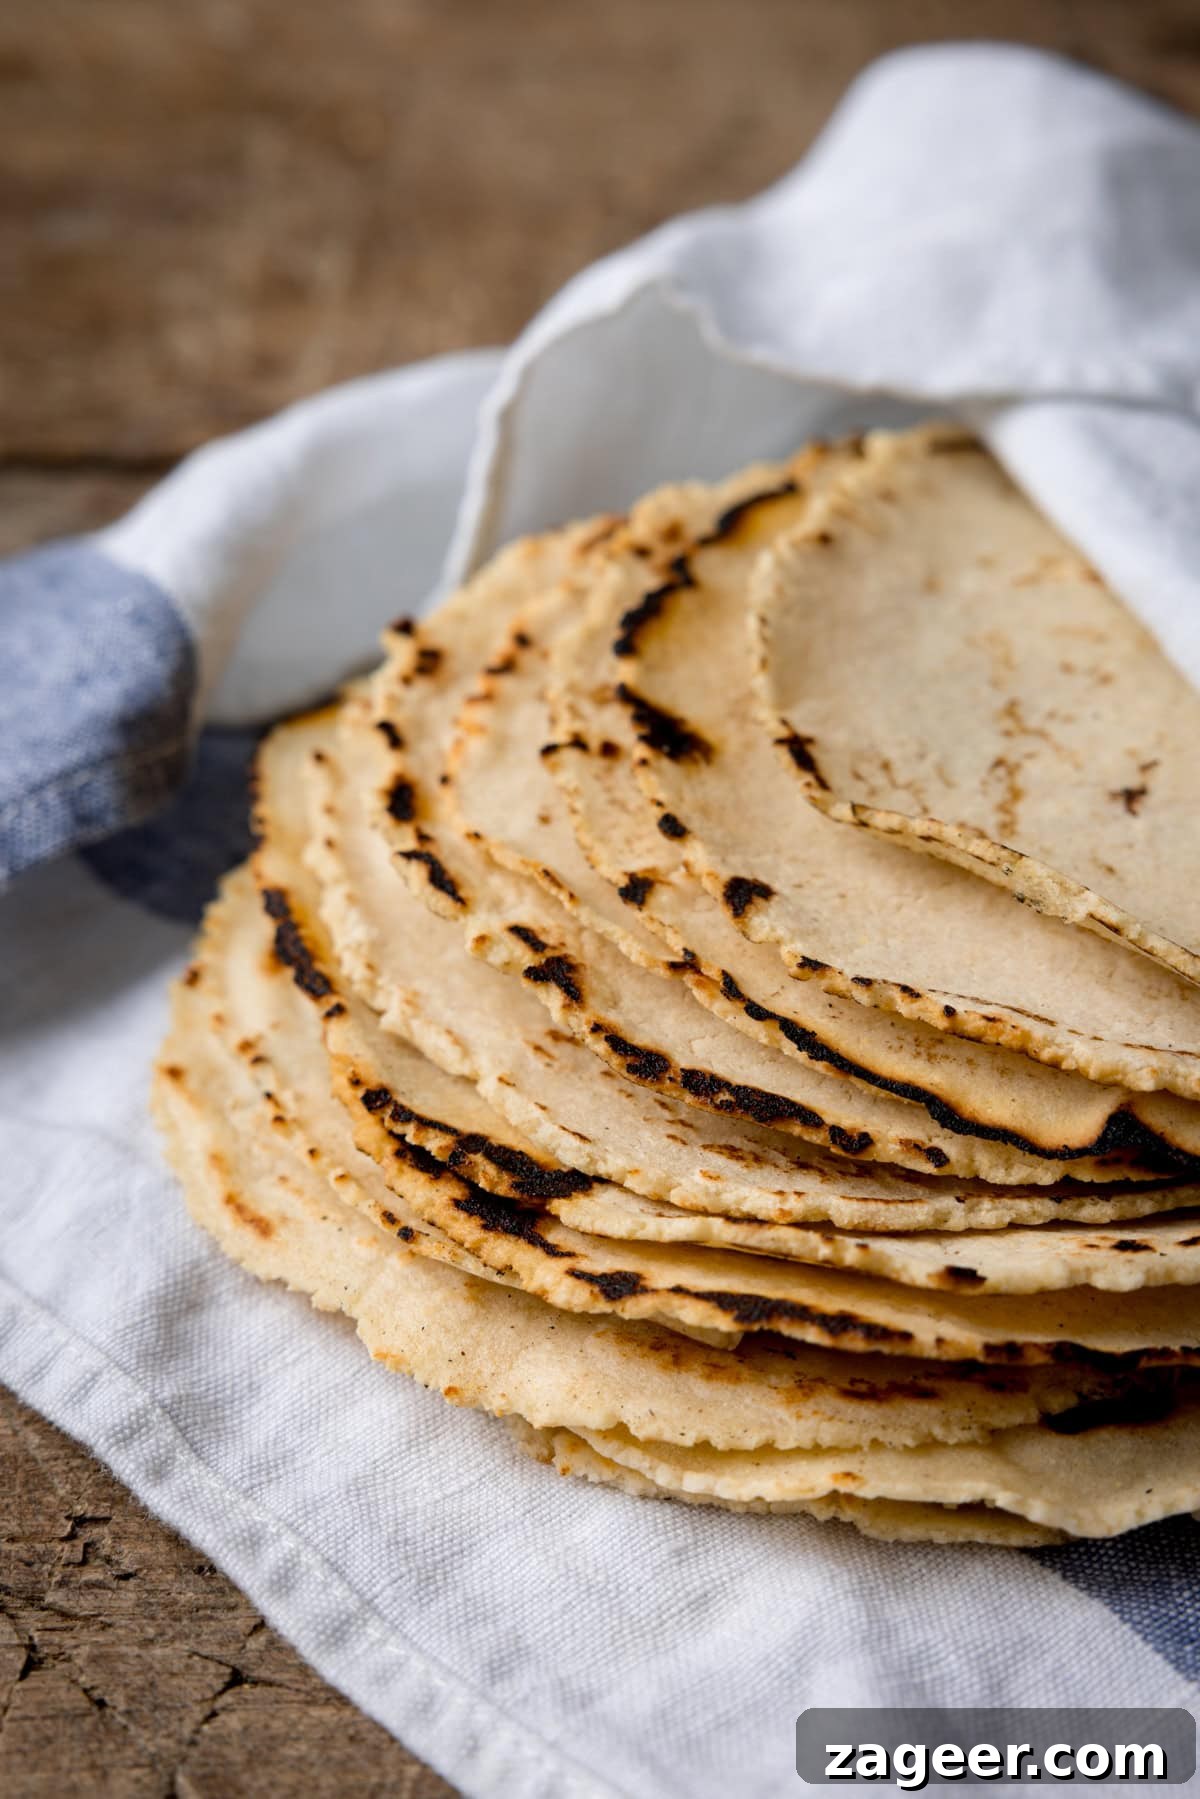
Prepare to elevate your Mexican culinary experience tenfold! These homemade corn tortillas are a revelation, offering a slightly smoky depth, a subtle sweetness, and a delightful chew that transforms any dish. Once you taste the difference, you’ll find it hard to go back to store-bought alternatives.
For years, I relied on the convenience of pre-packaged tortillas. It wasn’t until I experienced proper, fresh, homemade tacos at an incredible Mexican restaurant that my perspective completely shifted. The explosion of flavor, the tender yet resilient texture – it was an absolute game-changer! That very day, as we left the restaurant, I knew a tortilla press was an essential addition to my kitchen arsenal. This simple investment has since unlocked a world of authentic flavors and incredibly satisfying cooking.
Why Homemade Corn Tortillas Are a Must-Try
While store-bought tortillas are convenient, they often fall short in delivering the rich, authentic experience that fresh, homemade versions provide. Making your own corn tortillas is more than just a recipe; it’s an immersion into the heart of Mexican cuisine. Here’s why you should embark on this delicious journey:
- Unmatched Freshness: There’s simply no comparison to a tortilla pulled hot off the griddle, still warm and fragrant. Its aroma alone promises a superior dining experience.
- Superior Flavor Profile: Masa Harina, the special corn flour used, develops complex earthy, nutty, and slightly sweet notes that are far more pronounced and nuanced than anything you’ll find in a package.
- Perfect Texture Every Time: Achieve a delicate, yet resilient chewiness that provides the ideal foundation for any filling. Your tortillas will be soft and pliable, folding beautifully without cracking or tearing.
- Simple, Wholesome Ingredients: With just three basic components – Masa Harina, salt, and water – you create a product free from preservatives, artificial additives, or stabilizers. You control exactly what goes into your food.
- A Rewarding Culinary Experience: The process of transforming flour and water into these beautiful, golden discs is incredibly therapeutic and satisfying. It’s a skill that adds an extra layer of love and authenticity to every meal you prepare.
This recipe is crafted to be straightforward and approachable for cooks of all levels. In approximately one hour, including a crucial resting period for the dough, you’ll be savoring warm, flavorful tortillas that will undoubtedly become a staple in your home. Let’s gather our equipment and ingredients and dive into the satisfying art of tortilla making!
Table of Contents
- 🥣 Essential Equipment for Tortilla Making
- 📋 Key Ingredients for Authentic Flavor
- Step-by-Step Guide: Crafting Your Corn Tortillas
- 💡 Expert Tips for Mastering Your Tortillas
- 🍽️ Delicious Pairings for Your Homemade Tortillas
- 🍲 Discover More Fantastic Bread Recipes
- Complete Corn Tortilla Recipe Card
🥣 Essential Equipment for Tortilla Making
Having the right tools can significantly enhance your tortilla-making journey, making the process smoother and the results more consistent. While some items are highly recommended for efficiency, viable alternatives exist for every home cook.
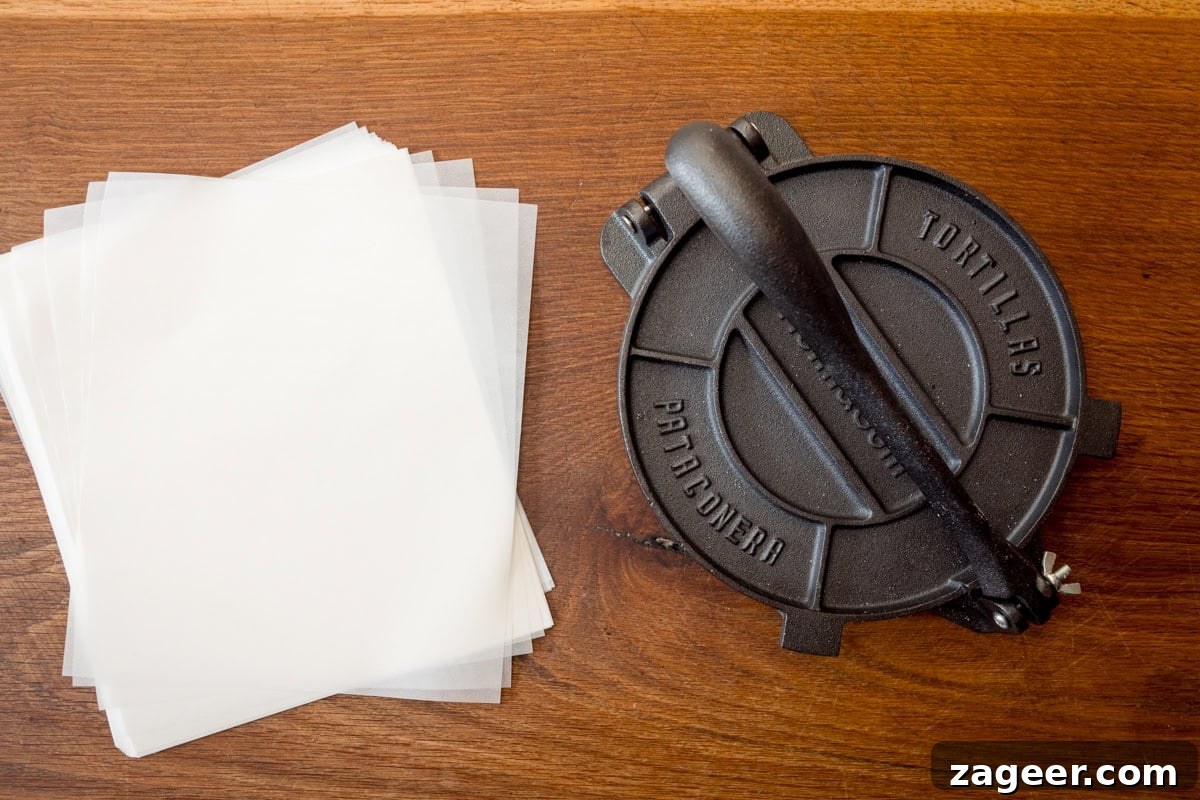
Tortilla Press – For uniformly thin and perfectly round tortillas, a dedicated tortilla press is truly invaluable. I wholeheartedly recommend investing in a cast iron tortilla press (affiliate link). Cast iron models, typically 8 inches in diameter, are sturdy, durable, and relatively inexpensive given their longevity and performance. The heavy weight of the cast iron provides consistent, even pressure, which is key to achieving a uniform thickness and preventing cracks in your tortillas. My personal press is a Helm & Som model, but the provided link will guide you to a similar, high-quality cast iron press that should be readily available in your country.
No Tortilla Press? No Worries! If you don’t own a press or prefer a more rustic approach, you can still craft fantastic tortillas by hand. The trick is to place your dough ball between two sheets of greaseproof paper (also known as parchment paper) and use a rolling pin. Apply firm, even pressure, rotating the dough frequently to create a round disc. While it might require a little more finesse to achieve perfect circles, the resulting flavor and freshness will be just as rewarding.
Cast Iron Skillet or Comal: A heavy-based pan is absolutely crucial for cooking your tortillas. A cast iron skillet is ideal because it retains heat exceptionally well and distributes it evenly, ensuring your tortillas cook through, develop a beautiful puff, and acquire those desirable slightly charred spots that add a depth of smoky flavor. If you have a traditional Mexican comal (a flat, round griddle), that is the most authentic choice for perfectly cooked tortillas.
Greaseproof Paper / Parchment Paper: These are indispensable for preventing the dough from sticking to your press or rolling pin and for easy transfer of the delicate pressed tortillas to the hot pan. Cut them into squares slightly larger than the size you intend your tortillas to be.
Mixing Bowl and Spatula: Standard kitchen tools for combining your ingredients and initially mixing the dough before kneading by hand.
📋 Key Ingredients for Authentic Corn Tortillas
The magic of this recipe lies in its elegant simplicity, relying on just three core ingredients. However, the quality and type of one particular ingredient are absolutely paramount for achieving that distinctive authentic Mexican taste and texture.
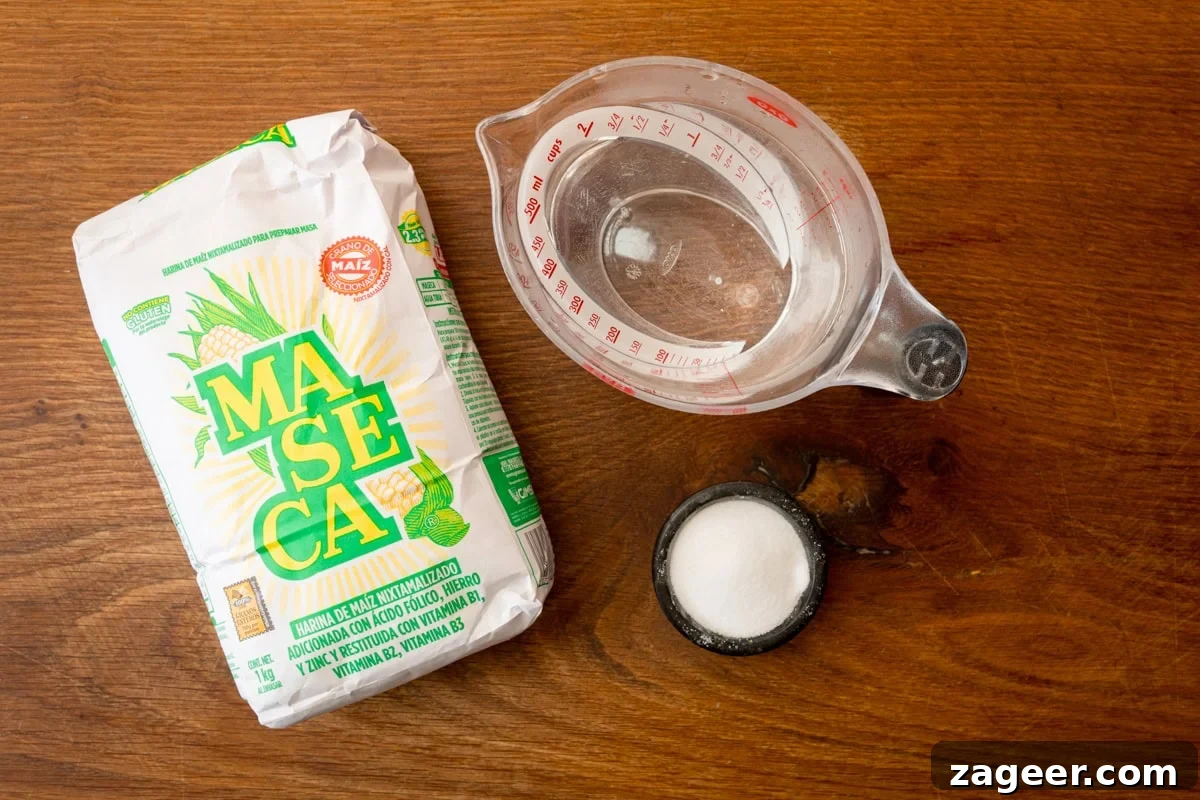
Masa Harina Flour – This is the unequivocal star of our recipe and cannot, under any circumstances, be substituted with regular cornflour (which is corn starch in the US) or standard cornmeal. Masa Harina, literally translating to “dough flour,” is a unique, gluten-free flour derived from corn that has undergone a traditional Mesoamerican process called nixtamalization. This ancient technique involves cooking and steeping corn kernels in an alkaline solution (typically limewater), which not only softens the corn and makes its nutrients more bioavailable but also dramatically enhances its flavor and aroma. The treated corn is then finely ground into this special flour, which is essential for creating the characteristic pliable texture and profound flavor required for authentic tortillas. Its unique properties allow the dough to form a cohesive, elastic consistency perfect for pressing and cooking into soft, flavorful tortillas that beautifully puff up on the griddle.
For the most authentic results, I highly recommend using Maseca (affiliate link). Maseca is the most popular and trusted Mexican brand of white corn flour, specifically engineered for making tortillas. You will typically find Masa Harina in the international or ethnic food aisle of larger supermarkets, or readily available at Latin American grocery stores.
- Salt: A small but critical amount of fine sea salt is added not just for seasoning, but to enhance and balance the natural sweetness and earthy notes of the corn. It truly makes the flavors pop and prevents the tortillas from tasting bland.
- Warm Water: The temperature of the water plays a significant role in dough consistency. Warm water helps the Masa Harina to hydrate efficiently and thoroughly, resulting in a smooth, pliable dough. Using cold water can make the dough stiffer and more challenging to work with. You may need to adjust the exact amount slightly; the goal is a dough that feels firm yet moist, never sticky or crumbly. Start with the recommended amount and add more a tablespoon at a time if the dough feels too dry.
Step-by-Step: How to Make Perfect Corn Tortillas:
Crafting homemade corn tortillas is a profoundly simple yet incredibly rewarding culinary endeavor. Follow these detailed instructions meticulously to achieve consistently excellent results every time. Remember, the journey is part of the joy, so don’t be discouraged if your initial attempts aren’t perfectly round masterpieces – they’ll still taste amazing!
***For exact measurements, a printable recipe card, and additional detailed notes, please scroll down to the end of this post.***
- Prepare the Dry Mix: In a generously sized mixing bowl, combine the Masa Harina flour and the fine sea salt. Use a whisk or a fork to mix them thoroughly, ensuring the salt is evenly distributed throughout the flour. This step guarantees a consistently seasoned dough.
- Form the Dough with Warm Water: Gradually pour the warm water into the dry flour and salt mixture. Begin by stirring with a sturdy spoon or spatula. As the mixture starts to come together and becomes shaggy, switch to using your hands. Knead the dough gently for approximately 1 to 2 minutes. The goal is a smooth, soft, and pliable dough that feels akin to play-dough – it should be firm but moist, and crucially, neither sticky nor crumbly. Adjust water sparingly if needed.
- Crucial Dough Resting Period: Once your dough is formed, cover the bowl with a clean, damp kitchen towel or plastic wrap. Allow the dough to rest at room temperature for a minimum of 15-20 minutes. This resting phase is absolutely vital; it provides the Masa Harina ample time to fully hydrate, resulting in a more cohesive and pliable dough that will press beautifully without cracking.
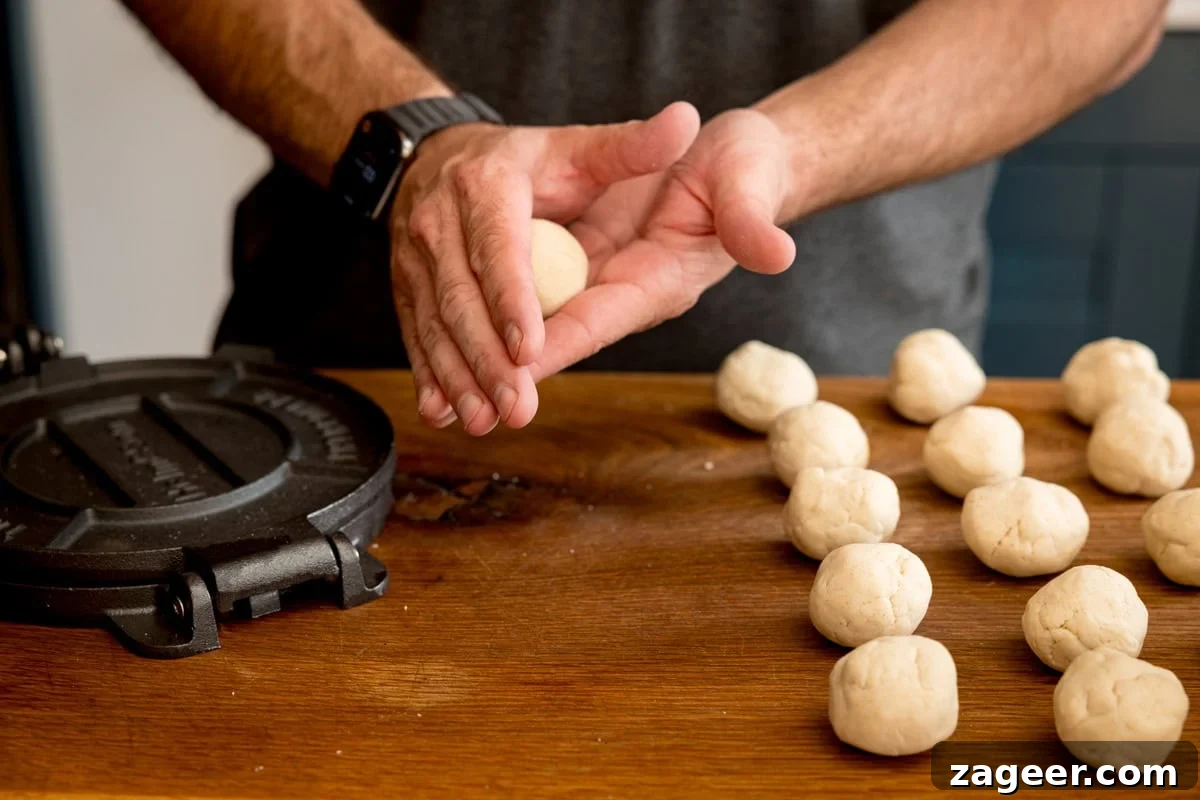
- Portion and Shape Dough Balls: After the dough has rested, uncover it. It should now be supple and easy to handle. Divide the dough into equal portions. For roughly 16 tortillas, aim for golf-ball-sized pieces, each weighing approximately 38 grams (about 1.3 ounces). Roll each portion between your palms to form smooth, uniform balls. This ensures even pressing and cooking.
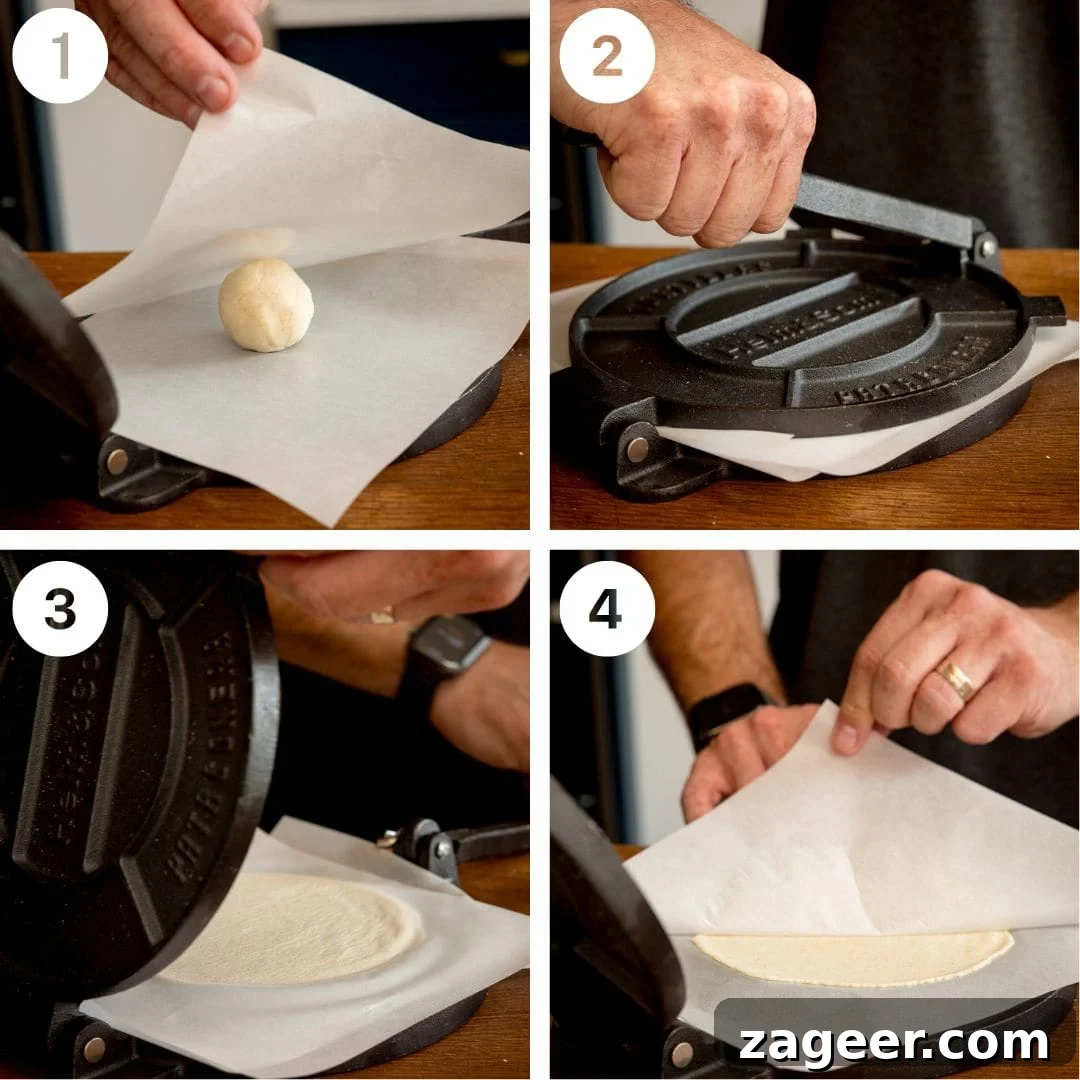
- Pressing the Tortillas: Take one dough ball and place it precisely between two sheets of greaseproof or parchment paper. Carefully center this assembly on your tortilla press. Gently close the press and apply firm, even pressure. Avoid pressing excessively hard, as this can lead to overly thin or uneven edges. Your aim is a disc approximately 2mm (about 1/16 inch) thick and around 12cm (5 inches) in diameter. If you are rolling by hand, use consistent, even pressure with your rolling pin, frequently rotating the dough to maintain a circular shape.
- Prepare All Discs: Continue the pressing process with all the remaining dough balls until you have a neat stack of raw tortilla discs. Carefully stack them with the parchment paper still separating each one to prevent any sticking. This ensures they are ready for efficient cooking.
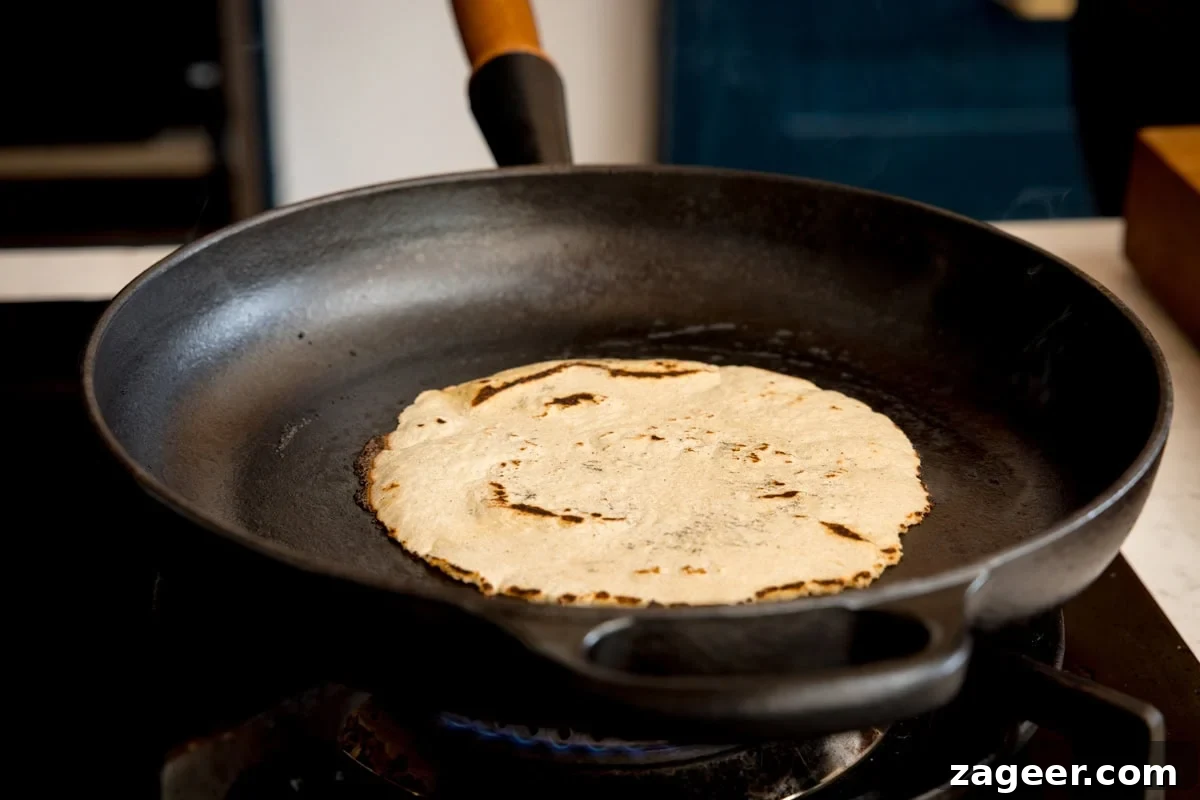
- Preheat the Pan: Heat a heavy-based cast iron skillet or comal over a medium-high flame. It’s crucial that the pan is hot but not smoking. You can test its readiness by flicking a few drops of water onto the surface; they should sizzle and evaporate almost instantly.
- First Cook: Gently peel a raw tortilla from its parchment paper. Carefully place it onto the dry, hot pan. Cook for approximately 15-20 seconds on the first side. You’ll notice the edges beginning to dry out and perhaps a few small bubbles appearing on the surface.
- First Flip and Puff: Using a spatula, flip the tortilla to its second side. Cook for about 1 minute. During this stage, you should observe the tortilla starting to puff up, and some light brown spots along with subtle charred edges will begin to form.
- Second Flip for Perfection: Flip the tortilla one last time for another 30-60 seconds. This final flip is often when the tortilla fully inflates, creating a beautiful pocket of steam within. This “puff” is an excellent indicator of a well-hydrated and properly cooked tortilla. Continue cooking until both sides display attractive speckled brown spots and the desired charred marks, which contribute significantly to the flavor.
- Keep Warm and Serve Immediately: As each tortilla finishes cooking, it’s imperative to immediately transfer it to a tortilla warmer, or wrap it snugly in a clean kitchen towel or aluminum foil. This step is absolutely critical for retaining heat, moisture, and pliability. Serve your fresh, warm tortillas right away with your favorite fillings!
💡 Expert Tips for Mastering Your Tortillas
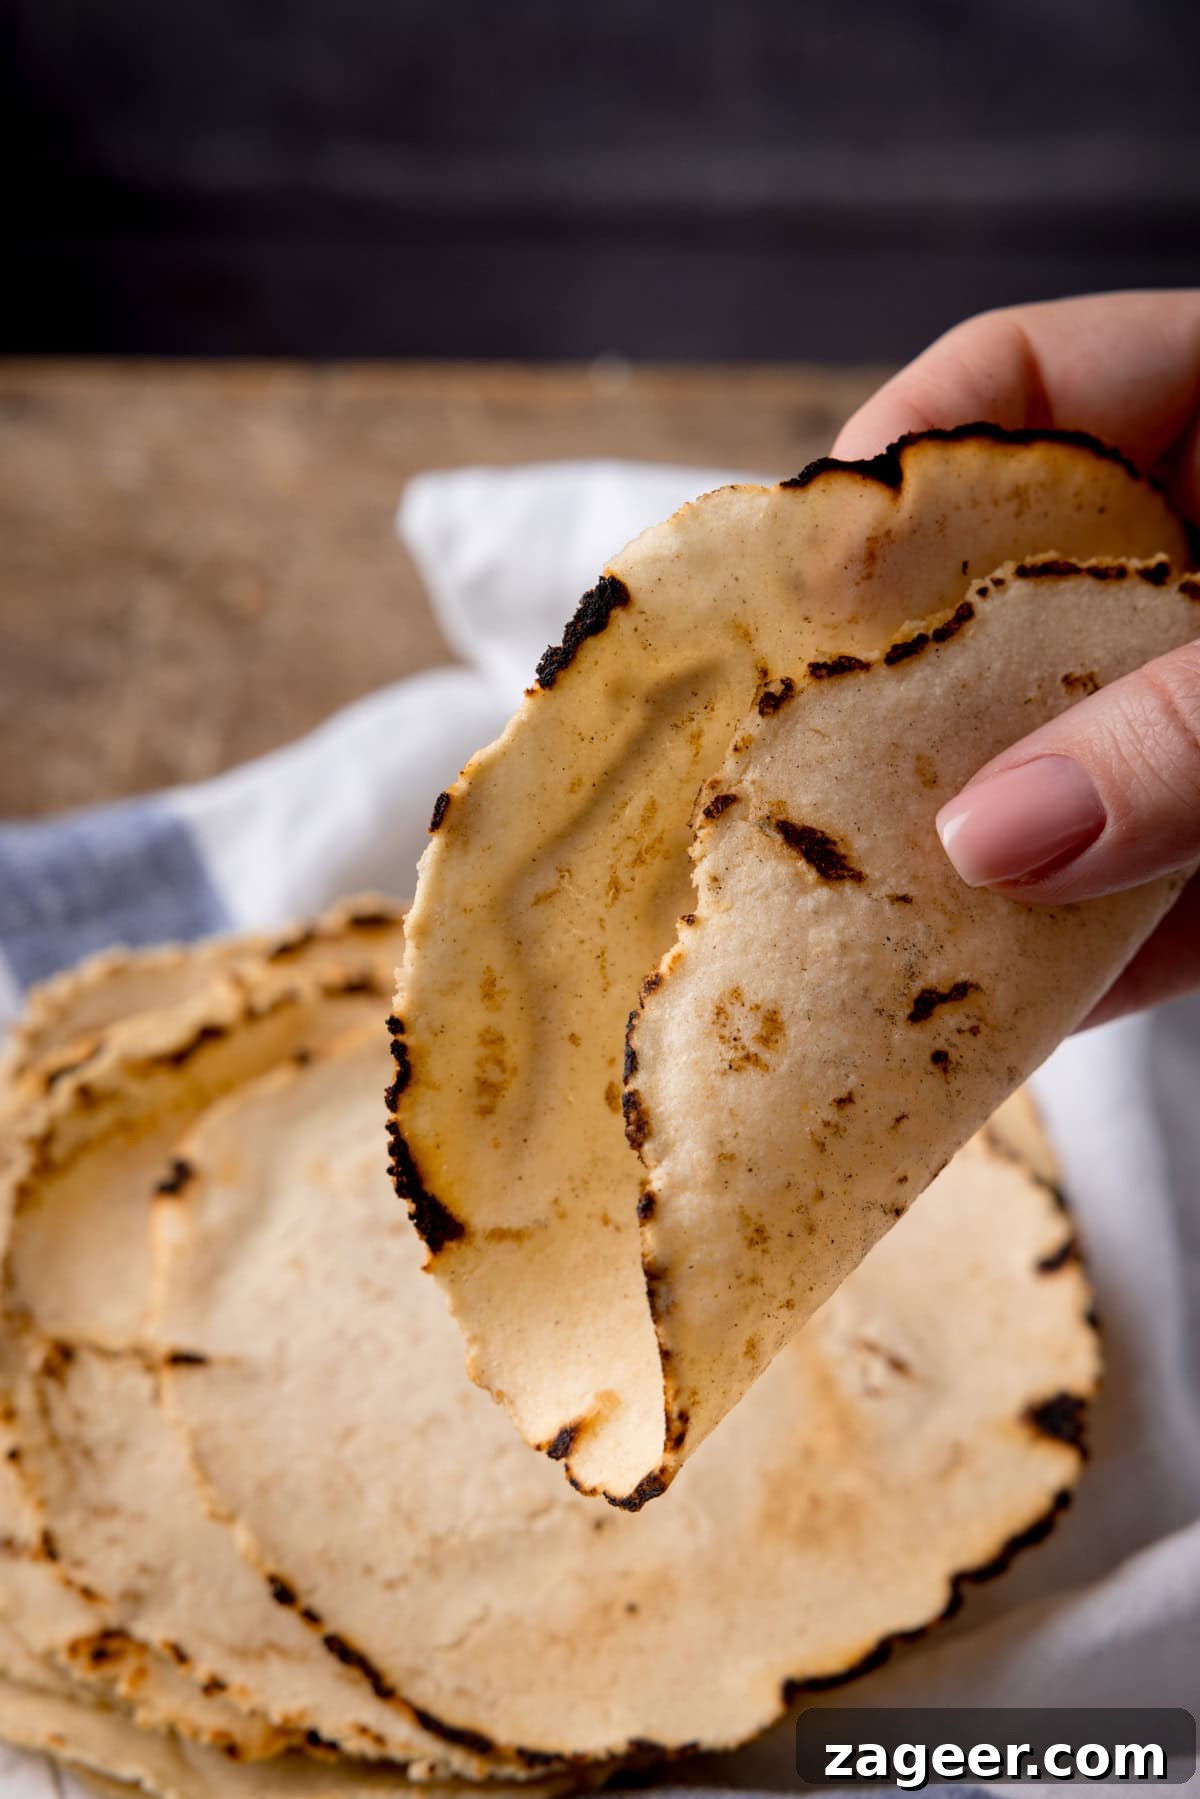
The Golden Rule: Keep Them Warm! This cannot be overemphasized. The moment a corn tortilla leaves the hot pan, it begins to cool and stiffen. To preserve their beautiful pliability and ensure they are perfect for folding and loading with delicious fillings, you absolutely MUST keep them warm. As each tortilla is cooked, immediately transfer it to a dedicated tortilla warmer, or wrap it tightly in a clean, damp kitchen towel inside a basket, or simply stack them inside a sheet of aluminum foil. The residual heat will gently steam them, maintaining their soft, flexible texture. This also allows the complex corn flavors to meld beautifully, making each bite truly irresistible.
Don’t Skip the Dough’s Resting Period: The 15-20 minute resting time for the Masa Harina dough is not merely a suggestion; it’s a critical step in the process. It allows the corn flour to fully absorb the water, ensuring an evenly hydrated and more pliable dough. A well-rested dough will be significantly smoother, easier to handle, and far less prone to cracking when pressed, which is key to perfectly formed and cooked tortillas.
Achieving the Perfect Pan Temperature: The temperature of your skillet or comal is vital for success. It needs to be hot enough to quickly cook the tortilla and promote those beautiful char spots, but not so scorching that it burns the dough before it cooks through. A consistent medium-high heat is typically ideal. You’ll know your pan is ready when a flick of water sizzles vigorously and evaporates almost instantly. If your tortillas are sticking or not puffing, carefully adjust the heat up or down.
Embrace the “Puff”: The moment a tortilla puffs up on the griddle is truly magical! This phenomenon occurs when moisture within the dough rapidly turns to steam, creating internal pressure that separates the layers. To encourage this desirable puff, ensure your dough is optimally hydrated, pressed to an even thickness, and cooked on a sufficiently hot surface. Resist the urge to press down on the tortilla once it’s on the pan; allow the natural steam to perform its work.
I genuinely love the additional dimension of flavor and the appealing visual contrast that the subtly charred edges bring to each and every homemade tortilla. It’s these small, authentic details that truly set them apart from any store-bought alternative.
Pin this now to find it later
Pin It
🍽️ What to Serve with Your Homemade Corn Tortillas
Once you’ve experienced the joy of crafting your own fresh corn tortillas, a world of delicious culinary possibilities opens up. These incredibly versatile wraps are the ultimate canvas for a vast array of Mexican and Latin American-inspired dishes. Their robust flavor and perfect texture make them ideal for a multitude of fillings and preparations. Here are some of my absolute favorite pairings and uses:
- Chicken Tinga: Succulent shredded chicken, slow-cooked in a rich, smoky, and subtly spicy chipotle sauce. The tender chicken and vibrant sauce find their perfect home nestled within soft corn tortillas.
- Lamb Barbacoa Carnitas: Indulge in rich, fall-apart tender lamb, slow-braised to perfection and bursting with savory, aromatic spices. This luxurious filling truly shines when paired with homemade corn tortillas.
- Morro Bay Fish Tacos: Whether crispy battered or perfectly grilled, delicate fish tacos become extraordinary with fresh tortillas, often complemented by a zesty cabbage slaw and a creamy, tangy sauce.
- Pork Carnitas: A true classic! These slow-cooked pork pieces are deliciously crispy on the outside and wonderfully juicy within. Serve them simply with fresh cilantro and finely diced onion for an authentic street taco experience.
- Breakfast Tacos: A fantastic start to any day. Fill warm tortillas with fluffy scrambled eggs, your favorite cheese, and a dollop of fresh salsa for a quick, satisfying, and utterly delicious breakfast.
- Enchiladas: Roll these pliable tortillas around a savory filling (chicken, cheese, beans, or vegetables), smother them generously with a rich enchilada sauce, sprinkle with cheese, and bake until bubbly and golden.
- Quesadillas: A simple yet satisfying meal. Fill the tortillas with your favorite cheeses and other ingredients like cooked vegetables or shredded chicken, then grill on the pan until the cheese is melted and gooey, and the tortilla is lightly crisped.
- As a Side Dish: Beyond being a vessel for fillings, homemade tortillas are wonderful on their own, perhaps lightly toasted, to accompany hearty stews, chili, or to scoop up savory beans and rice.
Their robust, authentic flavor holds up beautifully to bold sauces and rich proteins, ensuring every bite is a culinary delight and a true taste of traditional Mexican cooking.
While the initial effort required to craft these homemade corn tortillas might feel a little more involved than simply opening a packet from the grocery store, I assure you, the profound payoff in terms of taste, texture, and the sheer joy of a truly authentic dining experience is absolutely undeniable. Trust me, it’s a worthwhile investment in flavor that you will deeply appreciate!
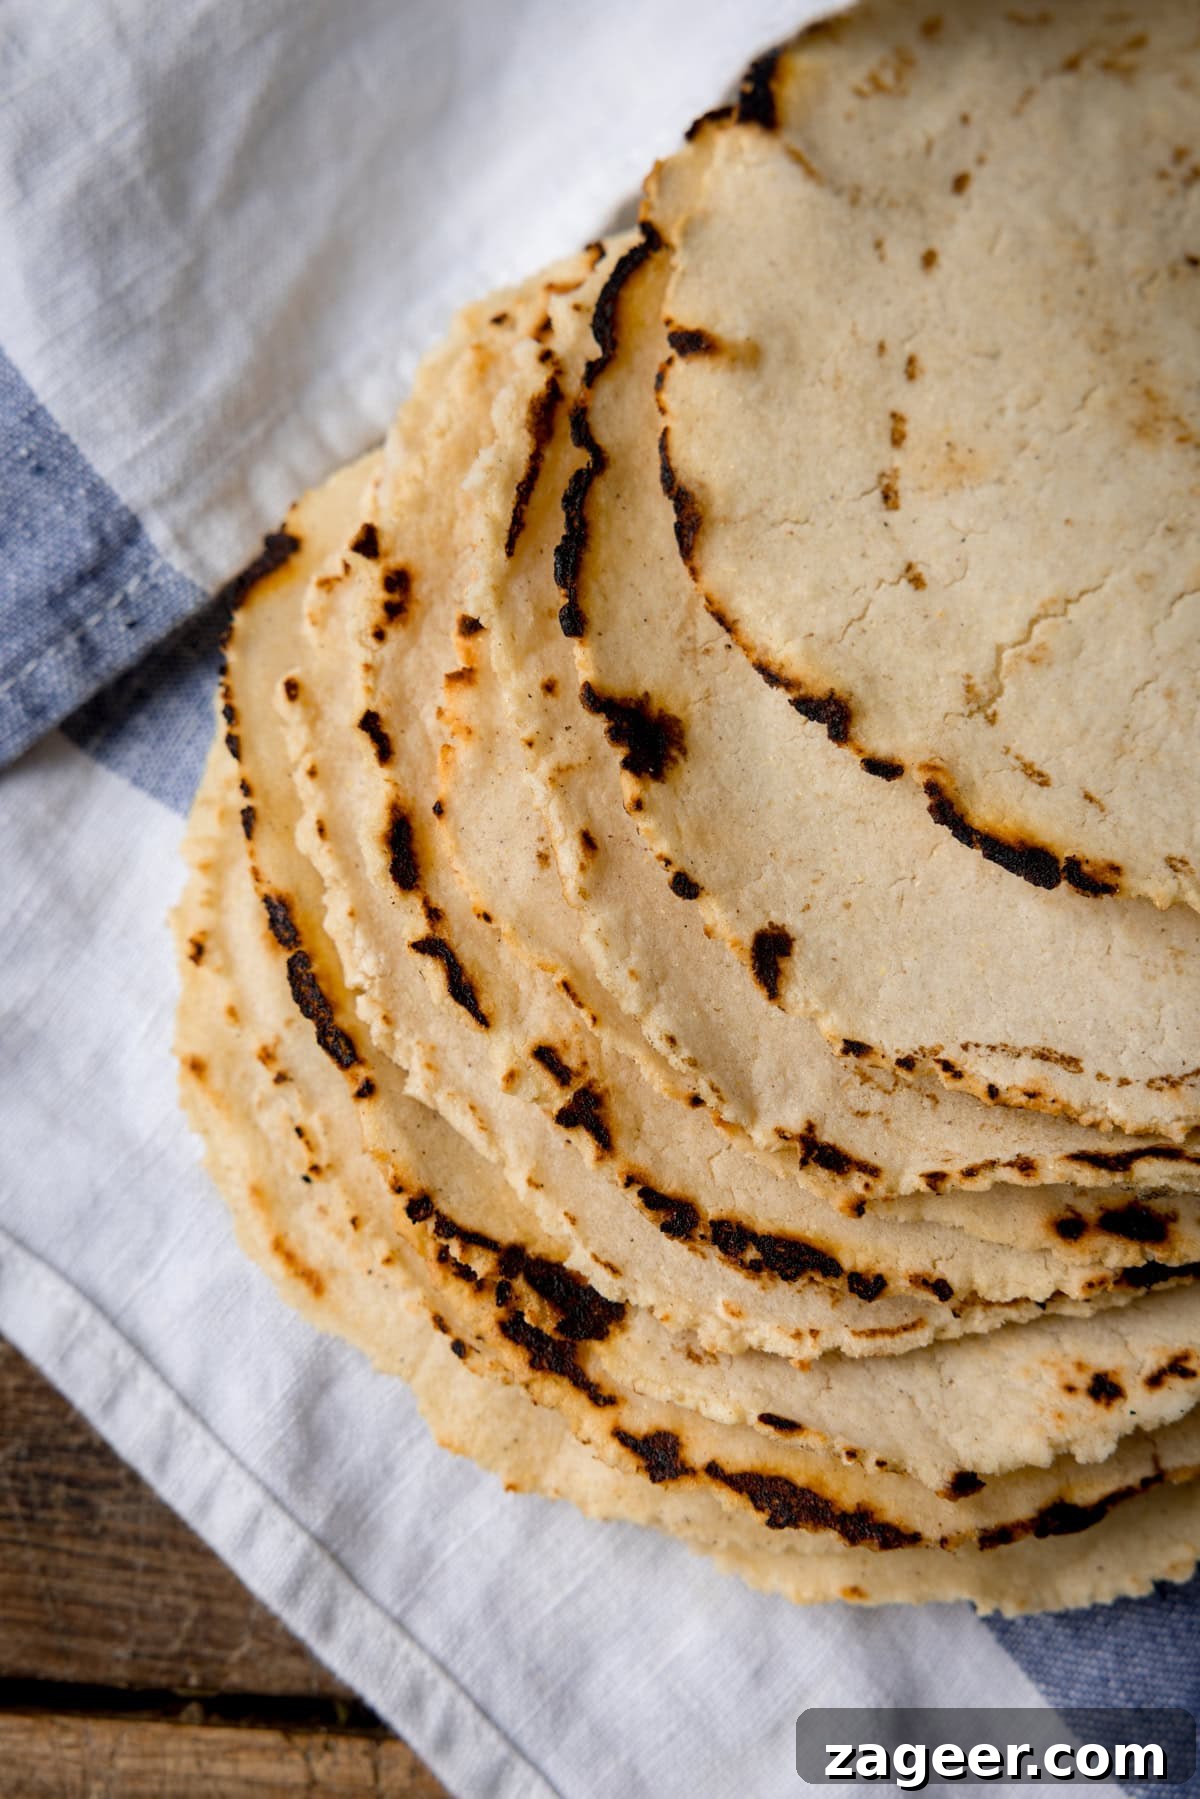
Once you’ve savored the fresh, subtle smoky notes, the inherent sweetness of the corn, and the wonderfully pliable texture of these tortillas, you’ll likely find it incredibly difficult to revert to the bland, often stiff, store-bought versions. This recipe will fundamentally transform your perception of Mexican food prepared at home.
🍲 Explore More Fantastic Homemade Bread Recipes
🍞 Breads
Homemade Flatbread Recipe
🍞 Breads
Artisan Bread Recipe
🍞 Breads
Garlic Naan Bread Recipe
🍞 Breads
Soft and Light Brioche Burger Buns
🍞 Breads
Bao Buns
🍞 Breads
Homemade Peshwari Naan Recipe
Frequently Asked Questions About Corn Tortillas
Since we’re already working in batches, it is incredibly simple to either increase or decrease the quantity of tortillas you wish to make. The key is to consistently maintain the exact ingredient ratios when preparing the dough. For instance, if you aim to double the yield, simply double all three ingredients proportionally. This ensures the dough’s consistency and the tortillas’ texture remain perfect, regardless of batch size.
No, Masa Harina is truly essential for crafting authentic corn tortillas and cannot be substituted with regular cornmeal or corn flour (which is corn starch in the US). Masa Harina undergoes a distinct nixtamalization process that alters the corn’s properties, making it uniquely pliable for tortillas and imbuing it with a characteristic flavor. Using other corn products will invariably result in a crumbly dough that won’t hold its shape and will yield a significantly different taste and texture. Stick to Masa Harina for genuine results.
Several factors can contribute to a tortilla not puffing as expected, which is a common concern:
- Dough Consistency: If your dough is too dry, it won’t generate sufficient steam internally to puff. Conversely, if it’s too wet, it might become sticky and fail to form the necessary internal layers. Ensure it’s pliable but not sticky.
- Insufficient Resting Time: A dough that hasn’t rested long enough (15-20 minutes) can lead to cracks during pressing and an uneven texture, both of which hinder puffing.
- Incorrect Pan Temperature: The skillet or comal must be hot enough (medium-high heat) to create immediate steam upon contact, but not so hot that it burns the tortilla before it can puff.
- Uneven Pressing: Ensure the tortilla is pressed to a uniform thickness. Thin spots can burn quickly, while overly thick areas may not cook through or puff properly.
- Overcooking the First Side: Only cook the first side for a brief 15-20 seconds. This sets the surface without excessively drying out the interior, preserving the moisture needed for steaming.
To effectively store cooked tortillas, first allow them to cool completely. Then, stack them neatly and place them in an airtight container or a resealable plastic bag. Stored this way, they will remain fresh in the refrigerator for 3 to 5 days. For reheating, gently warm them on a dry skillet over medium heat for about 30 seconds per side, in the microwave (covered with a damp paper towel for moisture) for 15-30 seconds, or wrapped tightly in aluminum foil in a preheated oven (around 300°F/150°C) for 5-10 minutes until soft and warm. While uncooked dough can be wrapped tightly in plastic wrap and stored in the refrigerator for up to 2 days, fresh is always the supreme choice!
Stay updated with new recipes and culinary inspiration!
Subscribe to our newsletter to receive exclusive updates whenever a new recipe is posted. Join our vibrant community on YouTube for exciting new videos every week, and follow us on Instagram for behind-the-scenes stories and stunning food photography.
📌Pin Recipe
🖨️Print Recipe
Click the stars to rate or comment
Authentic Homemade Corn Tortilla Recipe
5 minutes
35 minutes
20 minutes
1 hour
16 Tortillas
Ingredients
- 250 g Masa Harina (authentic Mexican white fine corn flour, e.g., Maseca)
- ¾ tsp fine sea salt
- 375 ml warm water (approximately, adjust as needed for dough consistency)
Instructions
-
In a large mixing bowl, thoroughly combine the Masa Harina flour and salt with a whisk or fork.
-
Gradually pour the warm water into the bowl, stirring continuously until the dough comes together. Knead by hand for 1-2 minutes until smooth, soft, and pliable (like play-dough – not sticky or crumbly).
-
Cover the bowl with a damp kitchen towel or plastic wrap and let the dough rest for 15-20 minutes at room temperature to hydrate fully.
-
Divide the rested dough into 16 equal, golf-ball-sized portions (approx. 38 grams each). Roll each portion into a smooth ball.
-
Place one dough ball between two sheets of greaseproof paper on a tortilla press. Press firmly but gently until you have a disc about 2mm thick and 12cm (5 inches) across. (See Note 2 for rolling by hand.)
-
Repeat the pressing process with the remaining dough balls until all 16 raw tortillas are formed.
-
Heat a heavy-based cast iron frying pan (skillet) or comal over medium-high heat until hot but not smoking.
-
Gently peel a tortilla from the parchment paper and place it onto the dry hot pan. Cook for 15-20 seconds on the first side.
-
Flip the tortilla and cook for approximately 1 minute on the second side, until it starts to puff and develops light brown spots/charred edges.
-
Flip it a final time and cook for another 30-60 seconds, until fully puffed and with desired char marks.
-
Immediately transfer each cooked tortilla to a tortilla warmer or wrap tightly in aluminum foil/clean kitchen towel to keep warm and pliable. Serve warm! (See Note 3 for detailed warming tips.)
Notes
Note 1: Develop the Dough for Optimal Texture
Allowing the dough to rest for 15-20 minutes is a critical step. During this time, the Masa Harina thoroughly absorbs the water, leading to an evenly hydrated and more pliable dough. This, combined with the initial kneading, ensures your tortillas will be smooth, flexible, and resistant to cracking when pressed, making them easy to work with and resulting in a superior final texture.
Note 2: Tortilla Press vs. Rolling Pin – Achieving the Perfect Shape
For consistent thinness and perfectly round tortillas, a cast iron tortilla press is highly recommended. My go-to is an 8-inch cast iron model, which offers excellent leverage and durability. If you don’t own one, don’t worry! You can achieve similar results using a rolling pin. Simply place the dough ball between two sheets of greaseproof or parchment paper and roll it out evenly. While it might take a bit more practice to get perfectly uniform circles, the effort is well worth it for the taste.
Note 3: The Importance of Keeping Tortillas Warm and Pliable
This is a golden rule for homemade tortillas! Cooked tortillas are at their best when served fresh and warm. Immediately wrapping them in foil or placing them in a tortilla warmer creates a steamy environment that keeps them soft, flexible, and prevents them from drying out and becoming brittle. This pliability is essential for loading them up with your favorite fillings without them tearing, ensuring a delightful eating experience.
(This is a static representation of a form. Actual submission requires JavaScript.)
Did you enjoy this recipe? We’d love to hear from you!Please leave a comment below and share your experience. Your feedback helps us and other home cooks.
Some of the links in this post may be affiliate links – which means if you buy the product I get a small commission (at no extra cost to you). If you do buy, then thank you! That’s what helps us to keep Kitchen Sanctuary running. The nutritional information provided is approximate and can vary depending on several factors. For more information please see our Terms & Conditions.