
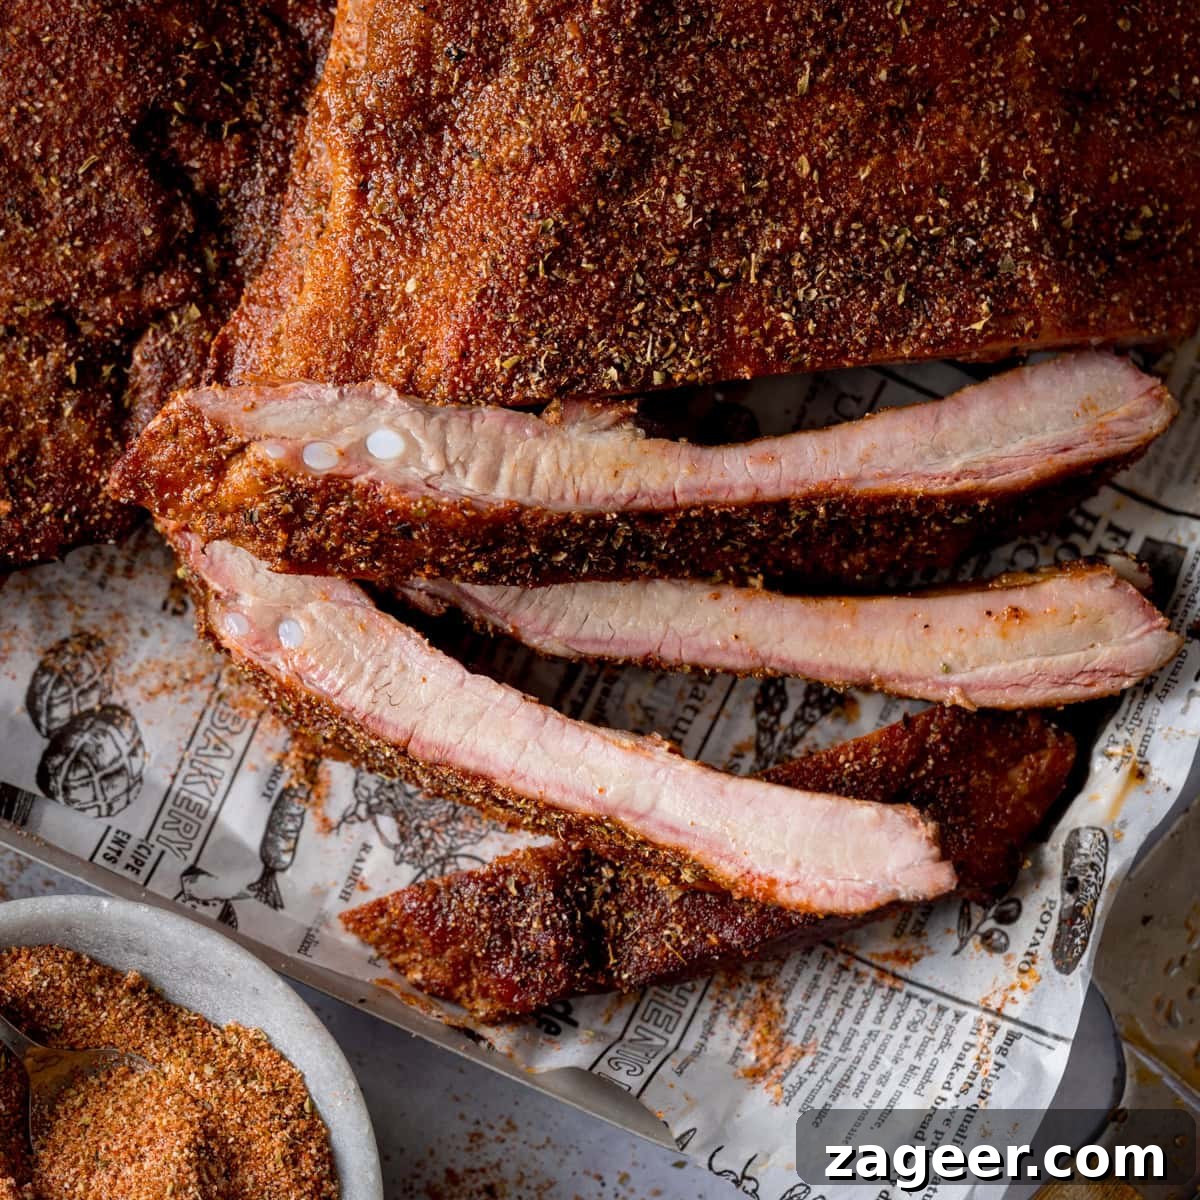
Ultimate BBQ Dry Rub Ribs: Perfectly Smoked, Tender, and Juicy
Indulge in the finest dry rub ribs: incredibly tender, bursting with juice, and infused with a sensational smoky bark from the barbecue. This recipe guides you through smoking, mopping, and wrapping for ultimate tenderness, all finished with our irresistible homemade dry rub.
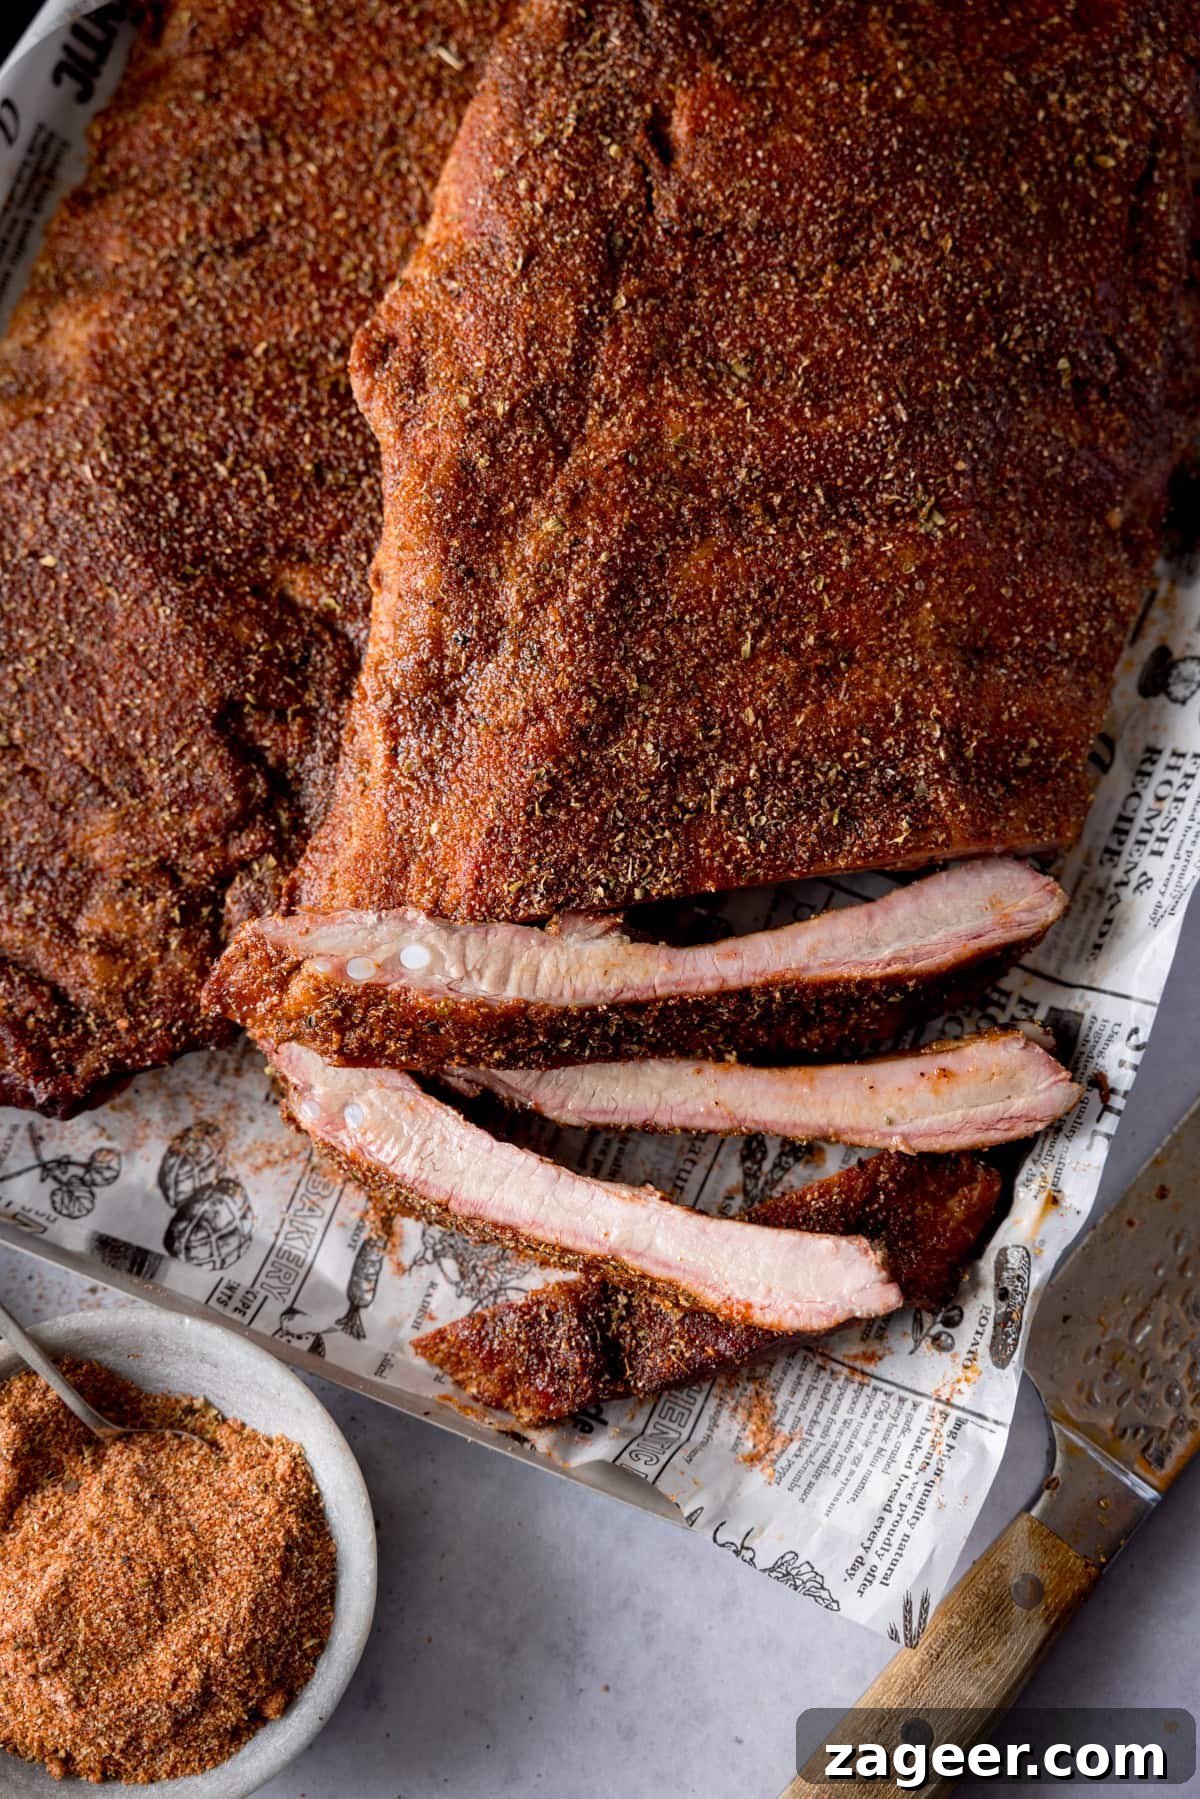
There’s nothing quite like the irresistible aroma and taste of perfectly smoked BBQ ribs. My husband, Chris, is a true barbecue aficionado, and his expertise in crafting tender, flavor-packed ribs is something we absolutely had to share. This recipe is a delightful treat, showcasing ribs so incredibly juicy and tender, with a tangy, spicy, and subtly sweet dry rub that’s simply addictive.
As the sunny days begin to grace us, it’s the perfect time to fire up the grill and enjoy more meals like this one outdoors. Imagine gathering friends and family around, the air filled with the scent of smoky goodness, as you present a platter of these exquisite dry rub ribs. It’s not just a meal; it’s an experience, a celebration of good food and great company.
Forget dry, tough ribs. Our method ensures every bite is a revelation – a smoky exterior giving way to succulent, fall-off-the-bone meat. We’ll walk you through each step, from preparing the ribs and crafting the ideal homemade dry rub, to the precise smoking, mopping, and wrapping techniques that guarantee barbecue perfection. Get ready to impress with ribs that taste like they came straight from a championship pitmaster.
Table of Contents
- Why Choose Dry Rub Ribs?
- 📋 Essential Ingredients
- 🧑🍳 Step-by-Step Guide: Crafting the Perfect BBQ Dry Rub Ribs
- 🔥 Pro Tips for Perfect Ribs
- 🍽️ What to Serve with Your Smoked Ribs
- 🍲 More Brilliant BBQ Recipes
- BBQ Dry Rib Recipe Card
Why Choose Dry Rub Ribs?
While many love a good saucy rib, dry rub ribs offer a distinctly different and equally rewarding experience. A quality dry rub creates a phenomenal “bark” – a flavorful, slightly crusty exterior that forms during the smoking process. This bark locks in moisture, infuses the meat with layers of complex flavor, and provides a delightful textural contrast to the tender meat underneath. It allows the natural taste of the pork and the smoky notes from your chosen wood to truly shine, without being overshadowed by a heavy sauce. Plus, for those who prefer to customize their sauce experience, dry rub ribs offer a versatile canvas for any finishing sauce you might desire, or they can be enjoyed simply as they are, relying solely on the incredible flavor of the rub and smoke.
📋 Essential Ingredients for Ultimate Smoked Ribs
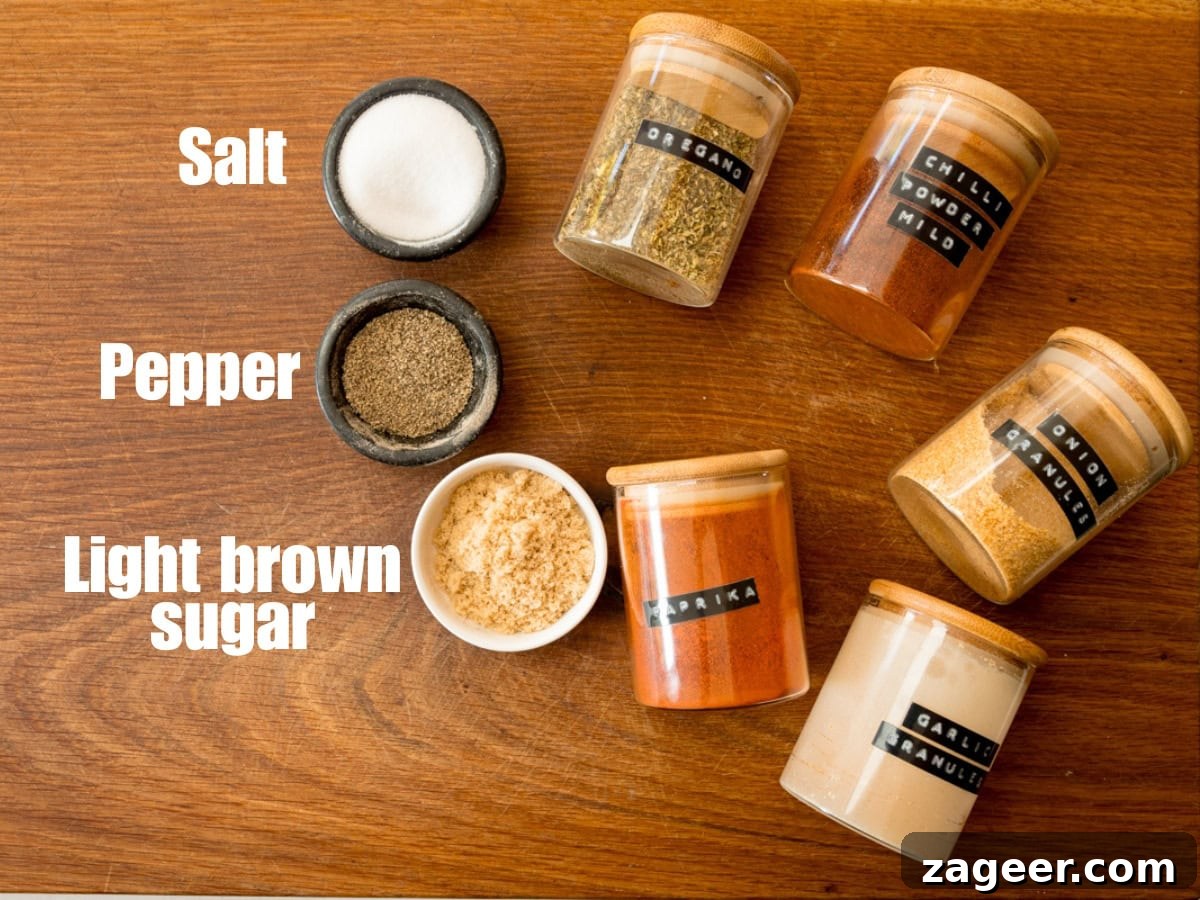
The foundation of truly exceptional BBQ dry rub ribs begins with selecting the right cuts and a perfectly balanced seasoning blend. We recommend starting with two racks of meaty pork ribs. For the best quality and ideal thickness, a visit to your local butcher is highly advised. They can provide excellent cuts that will yield the most tender and flavorful results.
Beyond the ribs, our homemade dry rub is surprisingly simple yet incredibly effective, requiring just a handful of staple spices. Each ingredient plays a crucial role in developing that signature tangy, spicy, and sweet flavor profile:
- Salt: Essential for seasoning and drawing out moisture, enhancing the pork’s natural flavor.
- Pepper: Adds a foundational hint of spice and aroma.
- Light Brown Sugar: The secret weapon for caramelization, creating that beautiful bark and adding a sweet counterpoint to the savory spices.
- Oregano: Provides an earthy, aromatic depth that complements the smoky flavors.
- Mild Chilli Powder: Delivers a gentle warmth without overwhelming the palate, making these ribs enjoyable for everyone.
- Onion Powder: Contributes a savory, umami richness.
- Garlic Powder: (Ensure it’s powder, not garlic salt) Offers a pungent, savory kick that rounds out the spice blend.
- Paprika: Adds vibrant color and a mild, sweet, peppery flavor.
In addition to the dry rub ingredients, you’ll need components for the essential “mop sauce,” which helps keep the ribs moist and adds another layer of flavor during cooking. Details for the mop are included in the full recipe card below. This combination of quality meat and a thoughtfully crafted rub is key to achieving that perfect barbecue experience.
🧑🍳 Step-by-Step Guide: Crafting the Perfect BBQ Dry Rub Ribs
For precise measurements and detailed ingredient breakdowns, please refer to the comprehensive recipe card at the end of this post. These steps provide an overview of the journey to perfect smoked ribs.
-
Preheat Your Barbecue for Indirect Smoking
Begin by preheating your barbecue or smoker to a consistent 120°C (250°F). It’s crucial to set up your BBQ for indirect cooking. This means creating a barrier between the heat source and the ribs, ensuring they cook slowly and evenly with hot air and smoke, rather than direct flame. Many smokers feature a ceramic plate for this purpose, or you can arrange coals to one side. We highly recommend using applewood for smoking pork ribs, as its subtle sweetness beautifully complements the pork and our dry rub, contributing to an incredible smoky flavor and a gorgeous bark.
-
Prepare the Ribs and Homemade Dry Rub
Approximately one hour before you plan to start cooking, remove your pork ribs from the refrigerator. This allows them to come closer to room temperature, promoting more even cooking. While the ribs rest, prepare your homemade dry rub. In a bowl, combine all the dry rub ingredients – light brown sugar, paprika, salt, black pepper, garlic powder, onion powder, mild chili powder, and dried oregano. Mix thoroughly until all spices are well combined and uniform. This aromatic blend is the heart of our tender, juicy ribs.

-
Remove the Membrane for Maximum Tenderness
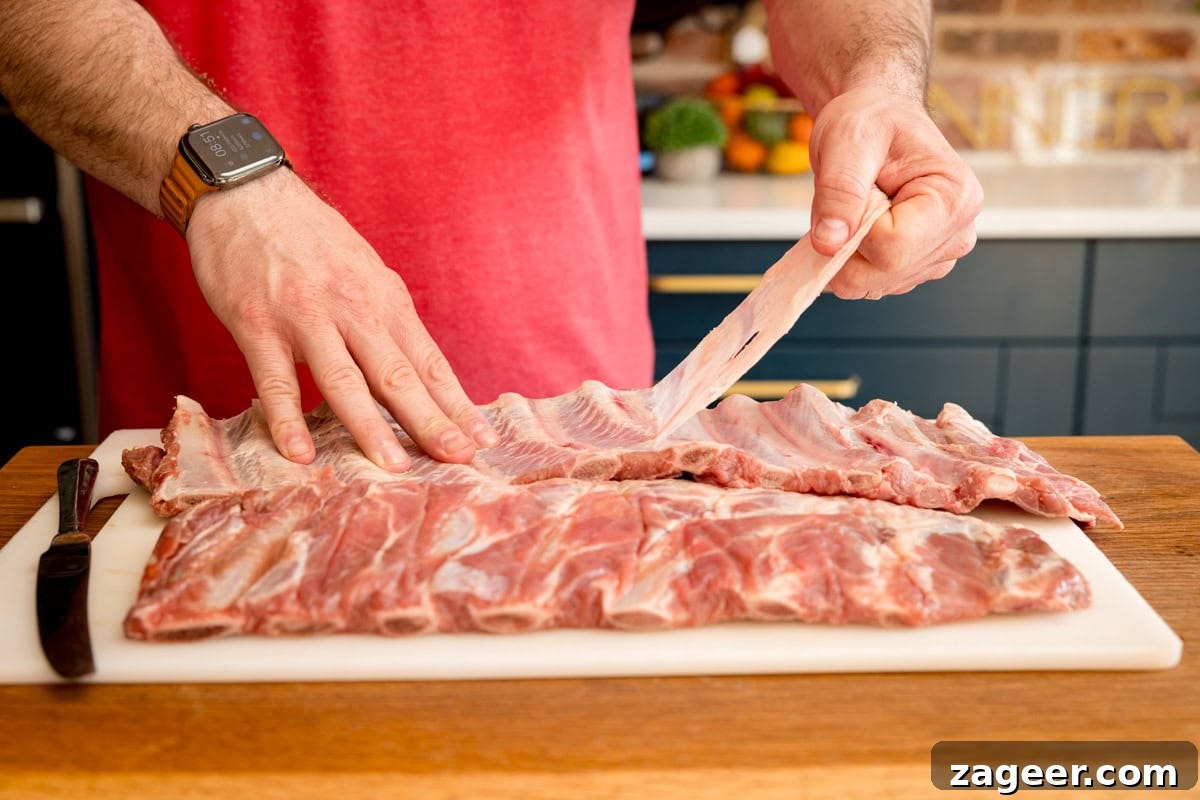
This is a critical step often overlooked but essential for truly tender, fall-off-the-bone ribs. Locate the thin, silverskin membrane on the concave side (bone-side) of each rack of ribs. Using a butter knife or the handle of a spoon, gently slide it under the membrane, between a bone and the membrane, to create a small gap. Once you have a grip, use a paper towel for extra traction and slowly pull the entire membrane away from the ribs and discard it. Removing this tough layer allows the rub to penetrate deeper and prevents the ribs from becoming chewy.
-
Season the Ribs Lightly with Dry Rub
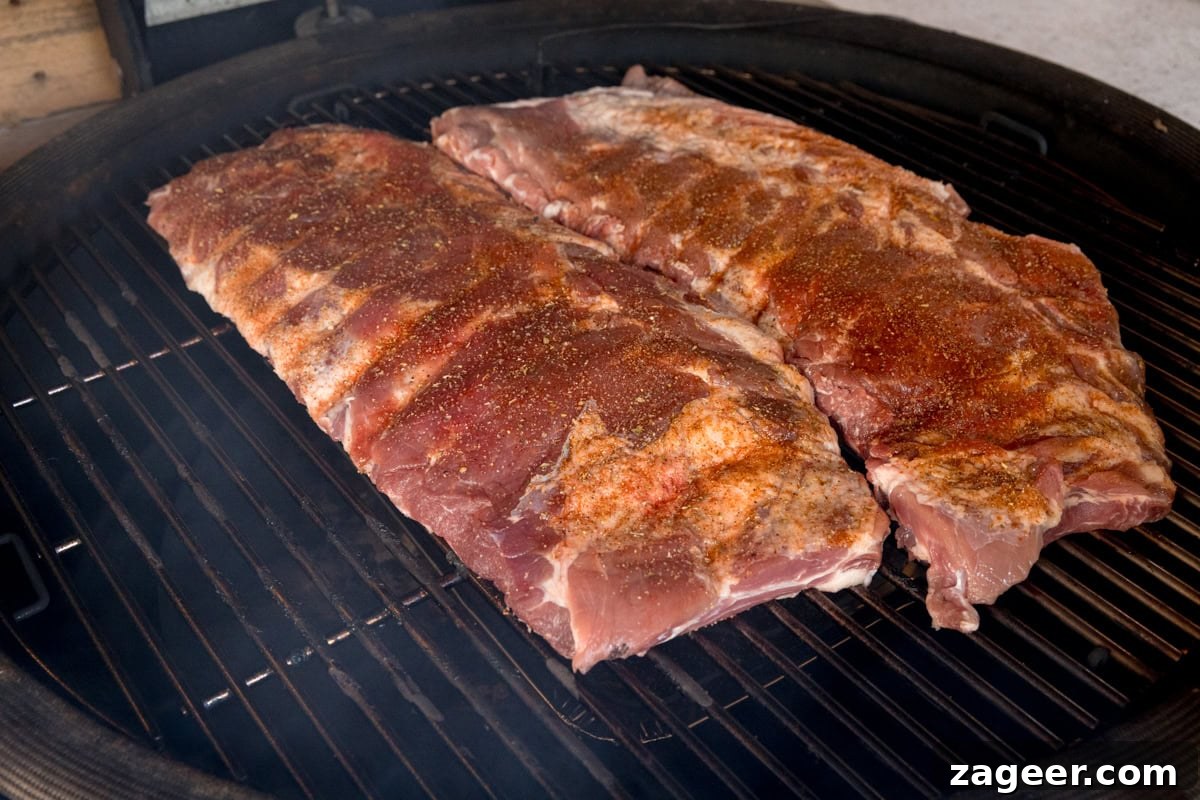
Pat the prepared ribs thoroughly dry with kitchen paper. This helps the rub adhere better and contributes to a superior bark. Sprinkle about 1 tablespoon of your homemade dry rub evenly over each rack of ribs. At this initial stage, we don’t want to over-season. The primary goal here is to establish a base layer of flavor that will meld with the smoke, creating a magnificent smoky bark. Save the bulk of the rub for later stages to build layers of flavor.
-
Set Up Your BBQ with a Water Pan
Once your BBQ reaches the target temperature of 120°C (250°F), place a pan or a foil tray directly underneath where the ribs will be positioned on the grill. Pour some water or a weak chicken stock into this tray. This creates a moist, steamy environment within the smoker, preventing the ribs from drying out during their long cook time and ensuring the meat remains incredibly juicy and succulent.
-
Begin the Initial Smoking Phase (2 Hours)
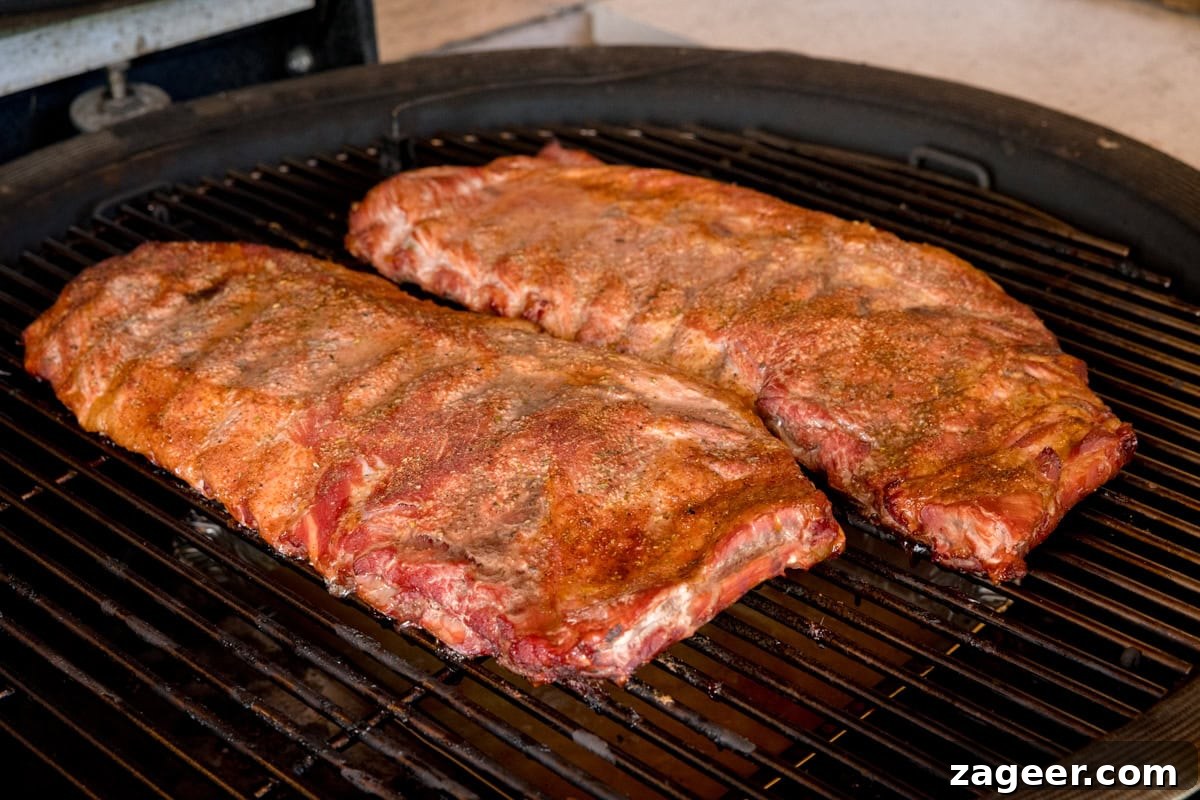
Carefully place the seasoned ribs directly over the water pan, ensuring they are not directly exposed to the heat source. Close the lid of your barbecue or smoker and let the ribs smoke undisturbed for the first 2 hours. During this critical phase, the ribs will absorb a significant amount of that fantastic smoky flavor from the applewood, and the dry rub will begin to form that desirable smoky bark. Resist the urge to open the lid frequently, as this releases heat and smoke, extending the cooking time.
-
Prepare the Mop Sauce
While the ribs are smoking, prepare your mop sauce. This thin liquid, typically applied with a brush, serves to keep the ribs moist, add flavor, and promote the formation of the bark. In a bowl, combine 1 tablespoon of your dry rub, 120 ml (1/2 cup) of chicken stock, and 60 ml (1/4 cup) of apple cider vinegar. Whisk until fully combined. This mixture will hydrate the ribs and add a delicious tang during the next phase.
-
Mop and Wrap for Ultimate Tenderness
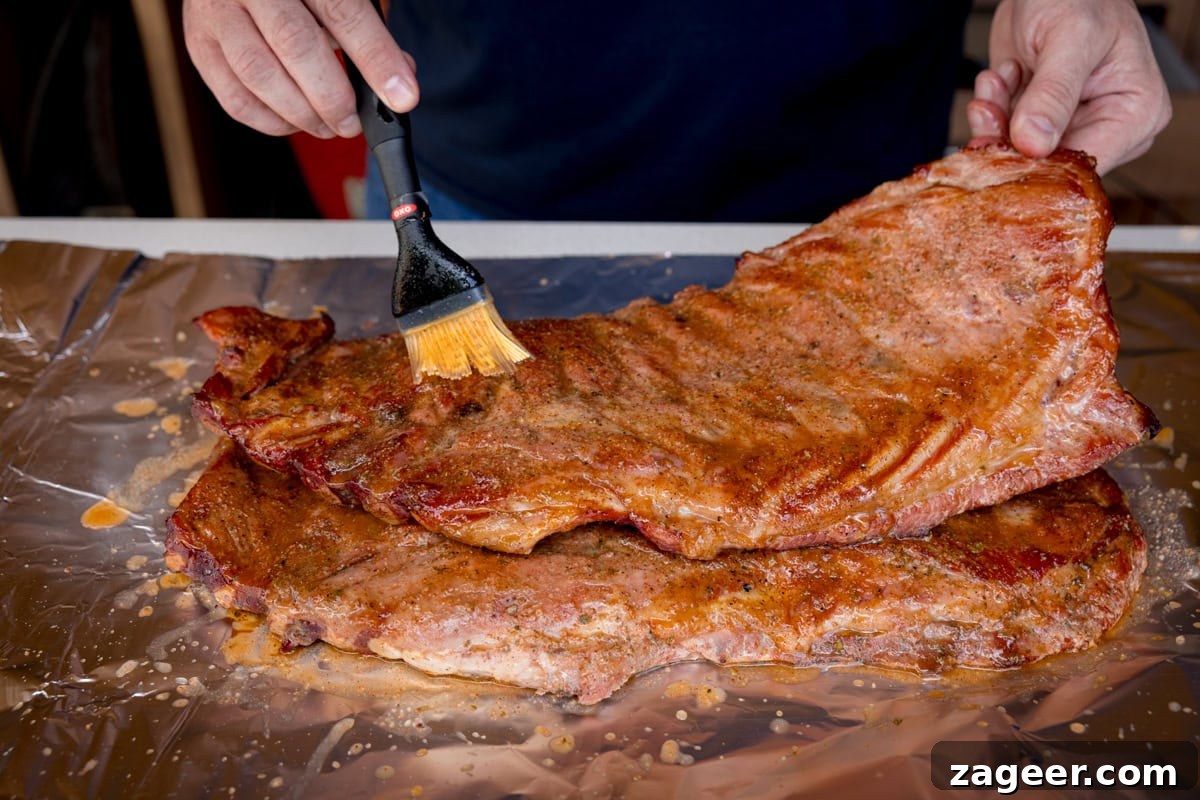
After the initial 2 hours of smoking, the ribs will have developed a beautiful color and absorbed a deep smoky essence. Carefully remove them from the BBQ. Using a basting brush, generously mop the ribs with your prepared mop sauce, ensuring they are thoroughly coated. This reintroduces moisture and flavor.
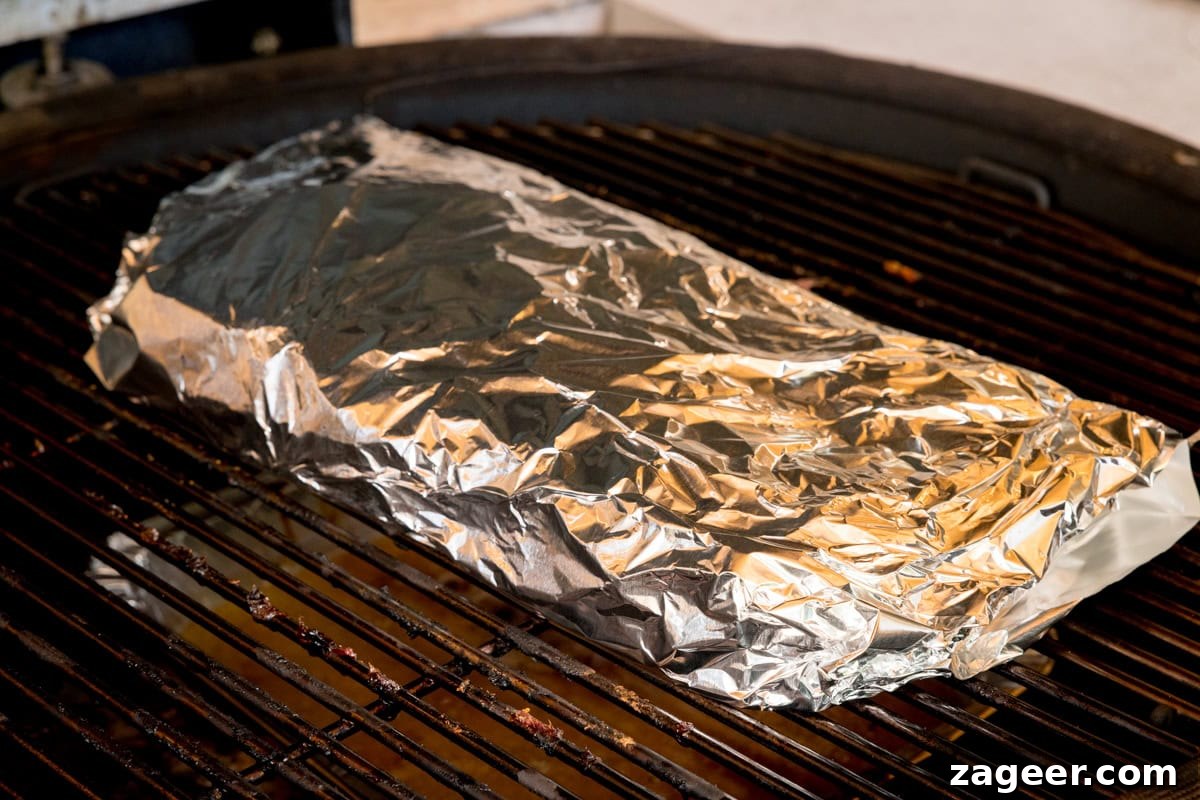
Next, tightly wrap each rack of ribs in heavy-duty aluminum foil. This technique, often called the “Texas Crutch,” is essential for breaking down tough connective tissues and achieving that desired fall-off-the-bone tenderness. The foil traps moisture, essentially braising the ribs in their own juices and the mop sauce.
-
Continue Cooking Until Fork-Tender (1-2 Hours)
Return the foil-wrapped ribs to the BBQ, maintaining the indirect heat and 120°C (250°F) temperature, for an additional 1 to 2 hours. The exact cooking time will depend on the thickness and meatiness of your ribs. Start checking them after 1 hour. The ribs are ready when the meat has visibly pulled back from the bones, and they feel incredibly tender – almost breaking apart when you gently lift them from the center with tongs. Avoid overcooking to prevent them from becoming mushy, but ensure they are cooked enough to be wonderfully tender.
-
Rest, Mop, and Serve
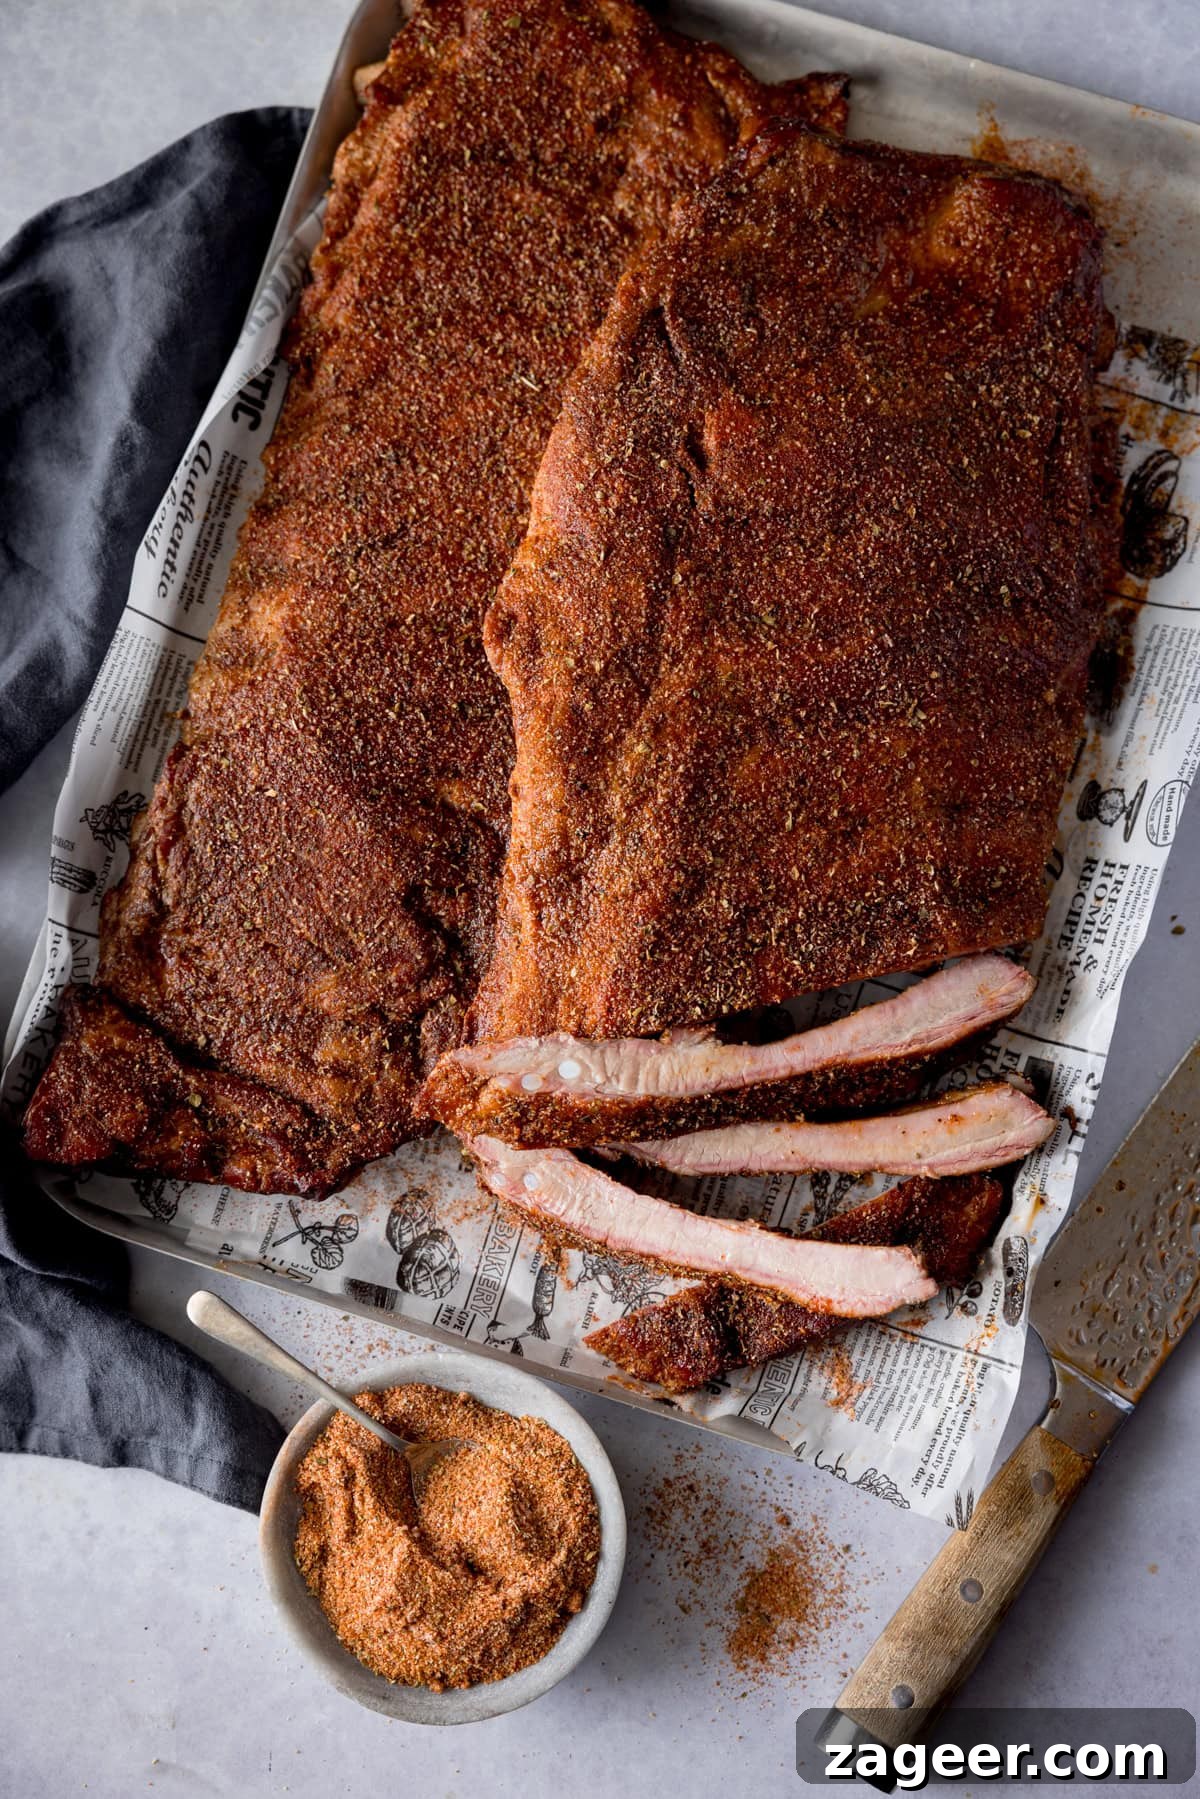
Once the ribs reach peak tenderness, remove them from the BBQ, still wrapped in foil, and allow them to rest for 20-30 minutes. This resting period is crucial for the juices to redistribute throughout the meat, resulting in maximum succulence. Just before serving, unwrap the ribs, give them another generous mop with any remaining mop sauce, and sprinkle them with an extra dusting of your homemade dry rub for a final burst of flavor and visual appeal. Slice them into individual ribs and prepare to devour these masterpieces!
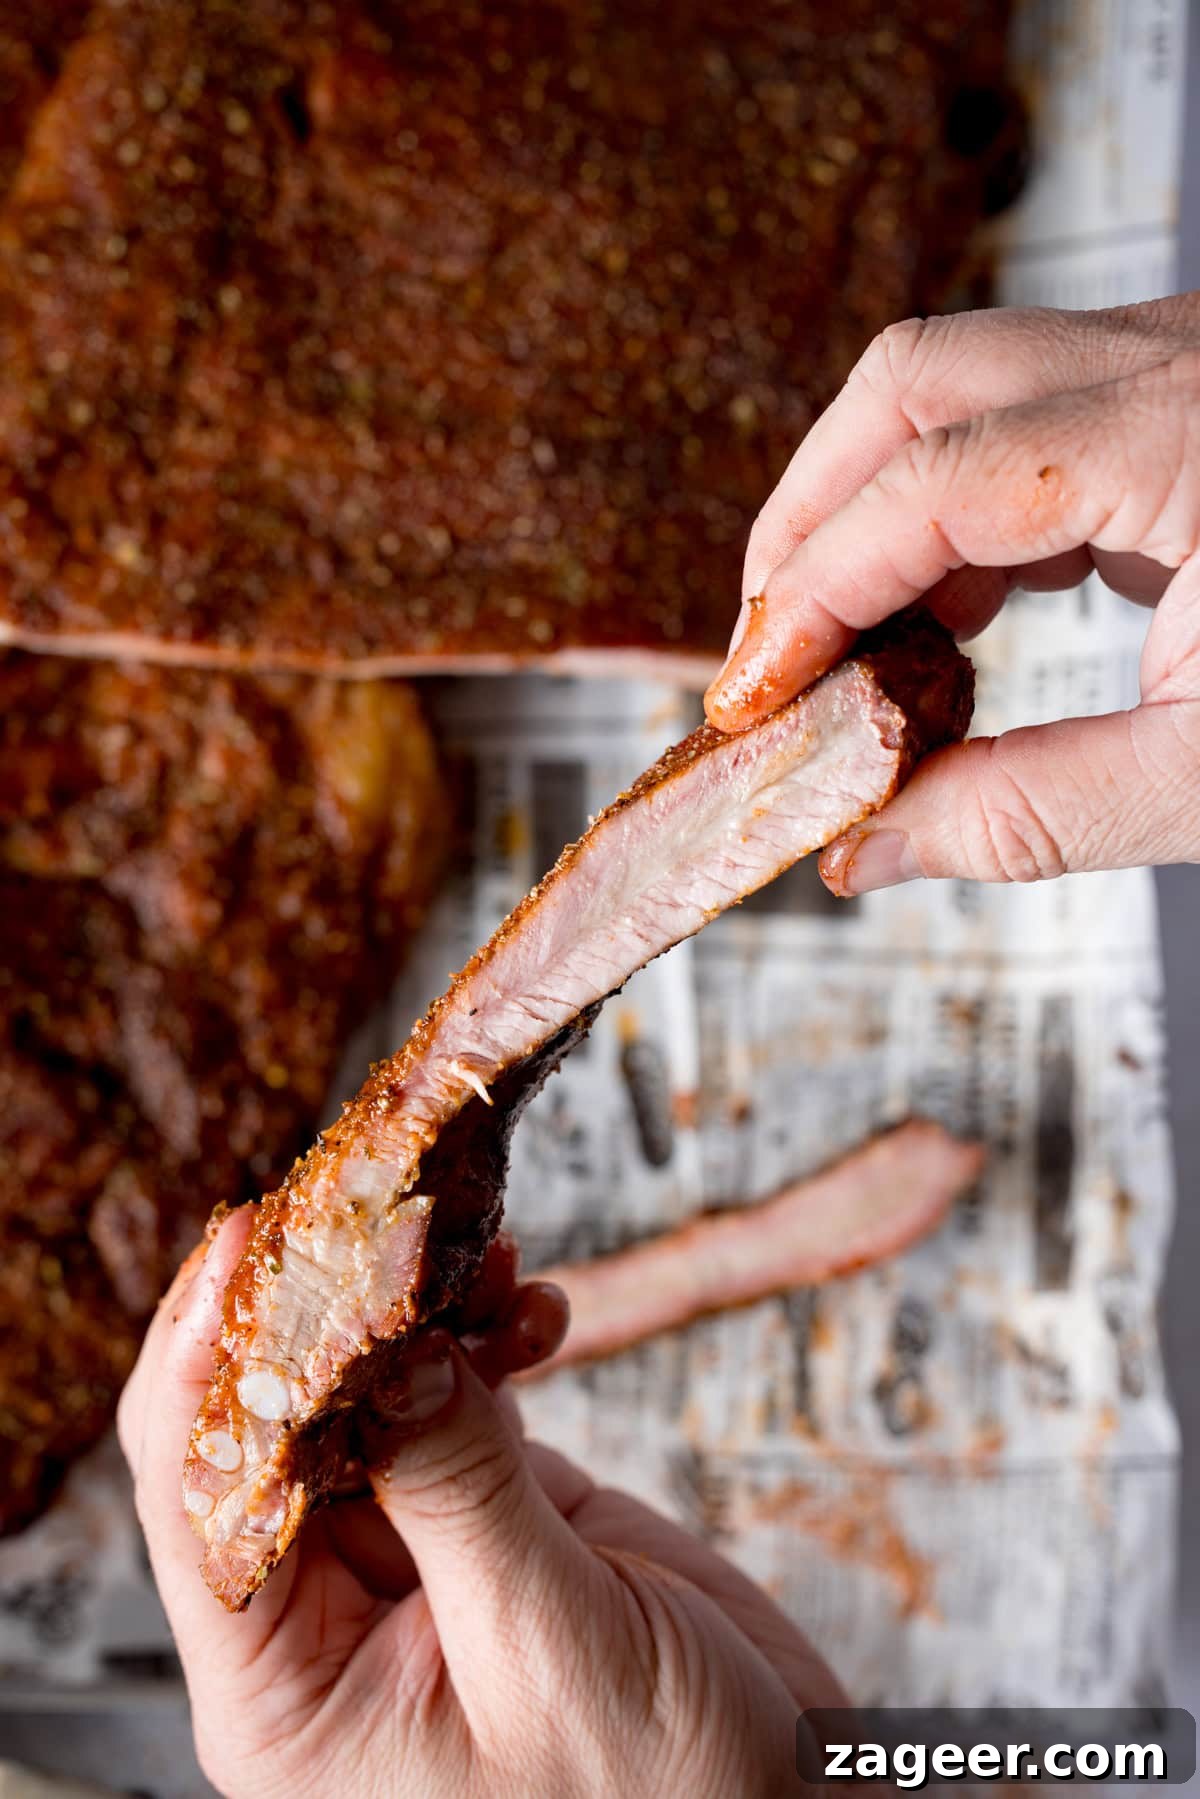
Observe that fantastic pink smoke ring, a hallmark of properly smoked meat, indicating deep flavor penetration.
Loved this recipe? Pin it now to save for later!
Pin It
🔥 Pro Tips for Perfect Ribs
- Wood Selection Matters: The type of wood used for smoking profoundly impacts the flavor of your ribs. As mentioned, applewood is fantastic for pork, offering a subtly sweet and fruity smoke. Other great options include hickory for a stronger, bacon-like flavor, or cherry for a mild, fruity smoke and a beautiful dark bark. Experiment to find your favorite!
- Maintain Consistent Temperature: Fluctuations in BBQ temperature can lead to uneven cooking and dry ribs. Invest in a reliable grill thermometer and try to keep the temperature steady at 120°C/250°F throughout the entire smoking process.
- Resist the Urge to Peek: Every time you open the BBQ lid, you lose heat and smoke, which extends cooking time and affects the flavor. Only open the lid when absolutely necessary for mopping or checking for doneness. “If you’re lookin’, you ain’t cookin’!”
- Choose Meaty Ribs: For the best results, always opt for well-marbled, meaty ribs. Thinner ribs will cook much faster and are more prone to drying out. A good butcher can guide you to the best cut for smoking.
🍽️ What to Serve with Your Smoked Ribs
These magnificent BBQ dry rub ribs are versatile and pair beautifully with a wide array of classic barbecue sides. Here are some of our favorites:
- A rich and creamy Mac n’ Cheese is the ultimate comfort food companion, creating an epic Friday night feast. For an extra indulgent twist, try pulling the tender rib meat off the bone and stirring it into your mac n’ cheese for a truly decadent dish!
- A refreshing and tangy Creamy Potato Salad adds a lovely cool contrast to the smoky ribs, making it a perfect addition to any BBQ party spread.
- Our Quick and Easy Coleslaw takes only 5 minutes to whip up and can be effortlessly prepared while your ribs are resting, providing a crisp, fresh bite that cuts through the richness of the meat.
- Grilled corn on the cob, baked beans, or a simple green salad with a vinaigrette dressing also make excellent choices to round out your barbecue meal.
🍲 More Brilliant BBQ Recipes to Try
BBQ
BBQ Sticky Slow-Cooked Ribs
Street Food
Grilled Beef Satay
BBQ
Greek Lamb Souvlaki Kebabs
Appetizers
Lamb Kofta Recipe
Street Food
The Ultimate Double Cheeseburger
BBQ
Mexican Chicken Skewers with Rice and Picante Salsa
Stay updated with new recipes and cooking inspiration!
Subscribe to our newsletter to receive delicious new recipes directly in your inbox. You can also find us on YouTubefor new video tutorials every week and on Instagramfor behind-the-scenes stories and mouth-watering food photos.
Print Recipe
BBQ Dry Rub Ribs Recipe
Nicky Corbishley
10 mins
4 hrs
20 mins
4 hrs 30 mins
18-20 ribs
BBQ
American
Ingredients
- 2 racks Pork ribs (See note 1)
For the Dry Rub/Seasoning:
- 2 tbsp soft brown sugar
- 1 tsp paprika
- 2 tsp salt
- 1 tsp black pepper
- 1 tsp garlic powder
- 1 tsp onion powder
- ½ tsp mild Chilli Powder
- 1 tsp dried oregano
For the Mop:
- 1 tbsp of the rub
- 120 ml (1/2 cup) chicken stock
- 60 ml (1/4 cup) Apple Cider Vinegar
Instructions
- Preheat your BBQ or smoker to 120C/250F and set it up for indirect cooking (see note 1). We recommend using applewood for smoking, as its flavor pairs beautifully with pork.
- While the BBQ is preheating, prepare the ribs and make the rub. Take the 2 racks Pork ribs out of the fridge an hour before cooking.
- Remove the membrane from the inside of the ribs. (See note 2 for detailed instructions).
- Now, prepare the dry rub: place the 2 tbsp soft brown sugar, 1 tsp paprika, 2 tsp salt, 1 tsp black pepper, 1 tsp garlic powder, 1 tsp onion powder, 1/2 tsp mild Chilli Powder, and 1 tsp dried oregano in a bowl and mix together until fully combined.
- Pat the ribs dry with some kitchen roll and sprinkle over 1 tbsp of the rub over each rack of ribs (2 tbsp in total). A light seasoning at this stage allows the smoke flavor to penetrate and create a lovely bark.
- Once the BBQ is up to temperature, place a pan (or foil tray) in the BBQ underneath where the ribs will be placed and pour in some water or weak chicken stock. (See note 3).
- Add the ribs to the BBQ, close the lid, and leave them to smoke indirectly for 2 hours. Avoid opening the lid during this phase.
- Whilst the ribs are cooking, make the mop. Add 1 tbsp of the rub, 120 ml (1/2 cup) chicken stock, and 60 ml (1/4 cup) Apple Cider Vinegar to a bowl and mix until combined.
- After 2 hours, remove the ribs from the BBQ, generously mop them with the sauce, and wrap them tightly in foil. Place them back on the BBQ for a further 1-2 hours, checking for tenderness after 1 hour (see note 4).
- Take the ribs off the BBQ and allow them to rest, still wrapped, for 20-30 minutes before serving.
- When ready to serve, unwrap the ribs, mop them once more, and sprinkle on the remaining dry rub. Slice them up and enjoy!
Notes
1. Use Meaty Ribs
You want to use nice, meaty ribs with good marbling. If you’re struggling to find them at the supermarket, I suggest getting them from a butcher. The less meaty the ribs, the quicker the cooking time, so you’ll want to keep a closer eye on them to prevent drying out.
2. Indirect Heat Setup
You need to set your BBQ up for indirect cooking. This means there should be a barrier between the heat source (charcoal/wood) and the meat. Some BBQs (like Kamado Joe or Green Egg) have a ceramic plate for this. Alternatively, arrange your heat source to one side so the grilling surface where the ribs sit is not directly over the coals. This method ensures the hot air/smoke cooks the ribs slowly and gently, resulting in wonderfully juicy ribs. Here’s a video we found to show how to set up indirect heat on a Kamado Joe BBQ. We recommend searching YouTube for instructions specific to your BBQ model.
3. Removing the Membrane
To remove the membrane from the inside (bone side) of the ribs, use a butter knife or spoon to get in between one of the bones and the membrane, creating a small gap. Then, using a paper towel for extra grip (it can be slippery!), slowly pull the entire membrane away and discard it. This step is crucial for tenderness. Refer to the image in the main post above for a visual guide.
4. The Role of Liquid
Placing a foil tray of water or stock directly under the ribs adds essential moisture to the circulating air within your smoker. This steam helps to keep the meat moist and tender throughout the long smoking process, preventing it from drying out.
5. Judging Doneness and Cooking Time
We aim to cook the ribs until the meat is starting to pull back from the bones, and they feel incredibly tender – almost breaking apart when you gently lift them from the center. The total cooking time is an approximation and will vary based on how meaty your ribs are. Trust the feel of the ribs: they should be juicy and tender, with a slight bite remaining, rather than falling completely off the bone at the slightest touch.
Nutritional information is approximate per rib – based on using 20 ribs altogether.
Nutrition
Nutrition information is automatically calculated, so should only be used as an approximation and can vary based on ingredients used and preparation methods.
Enjoyed this recipe? We’d love to hear from you!
Please leave a comment or rate the recipe below. Your feedback helps us improve and inspires other home cooks!
Some of the links in this post may be affiliate links – which means if you buy the product I get a small commission (at no extra cost to you). If you do buy, then thank you! That’s what helps us to keep Kitchen Sanctuary running. The nutritional information provided is approximate and can vary depending on several factors. For more information please see our Terms & Conditions.