
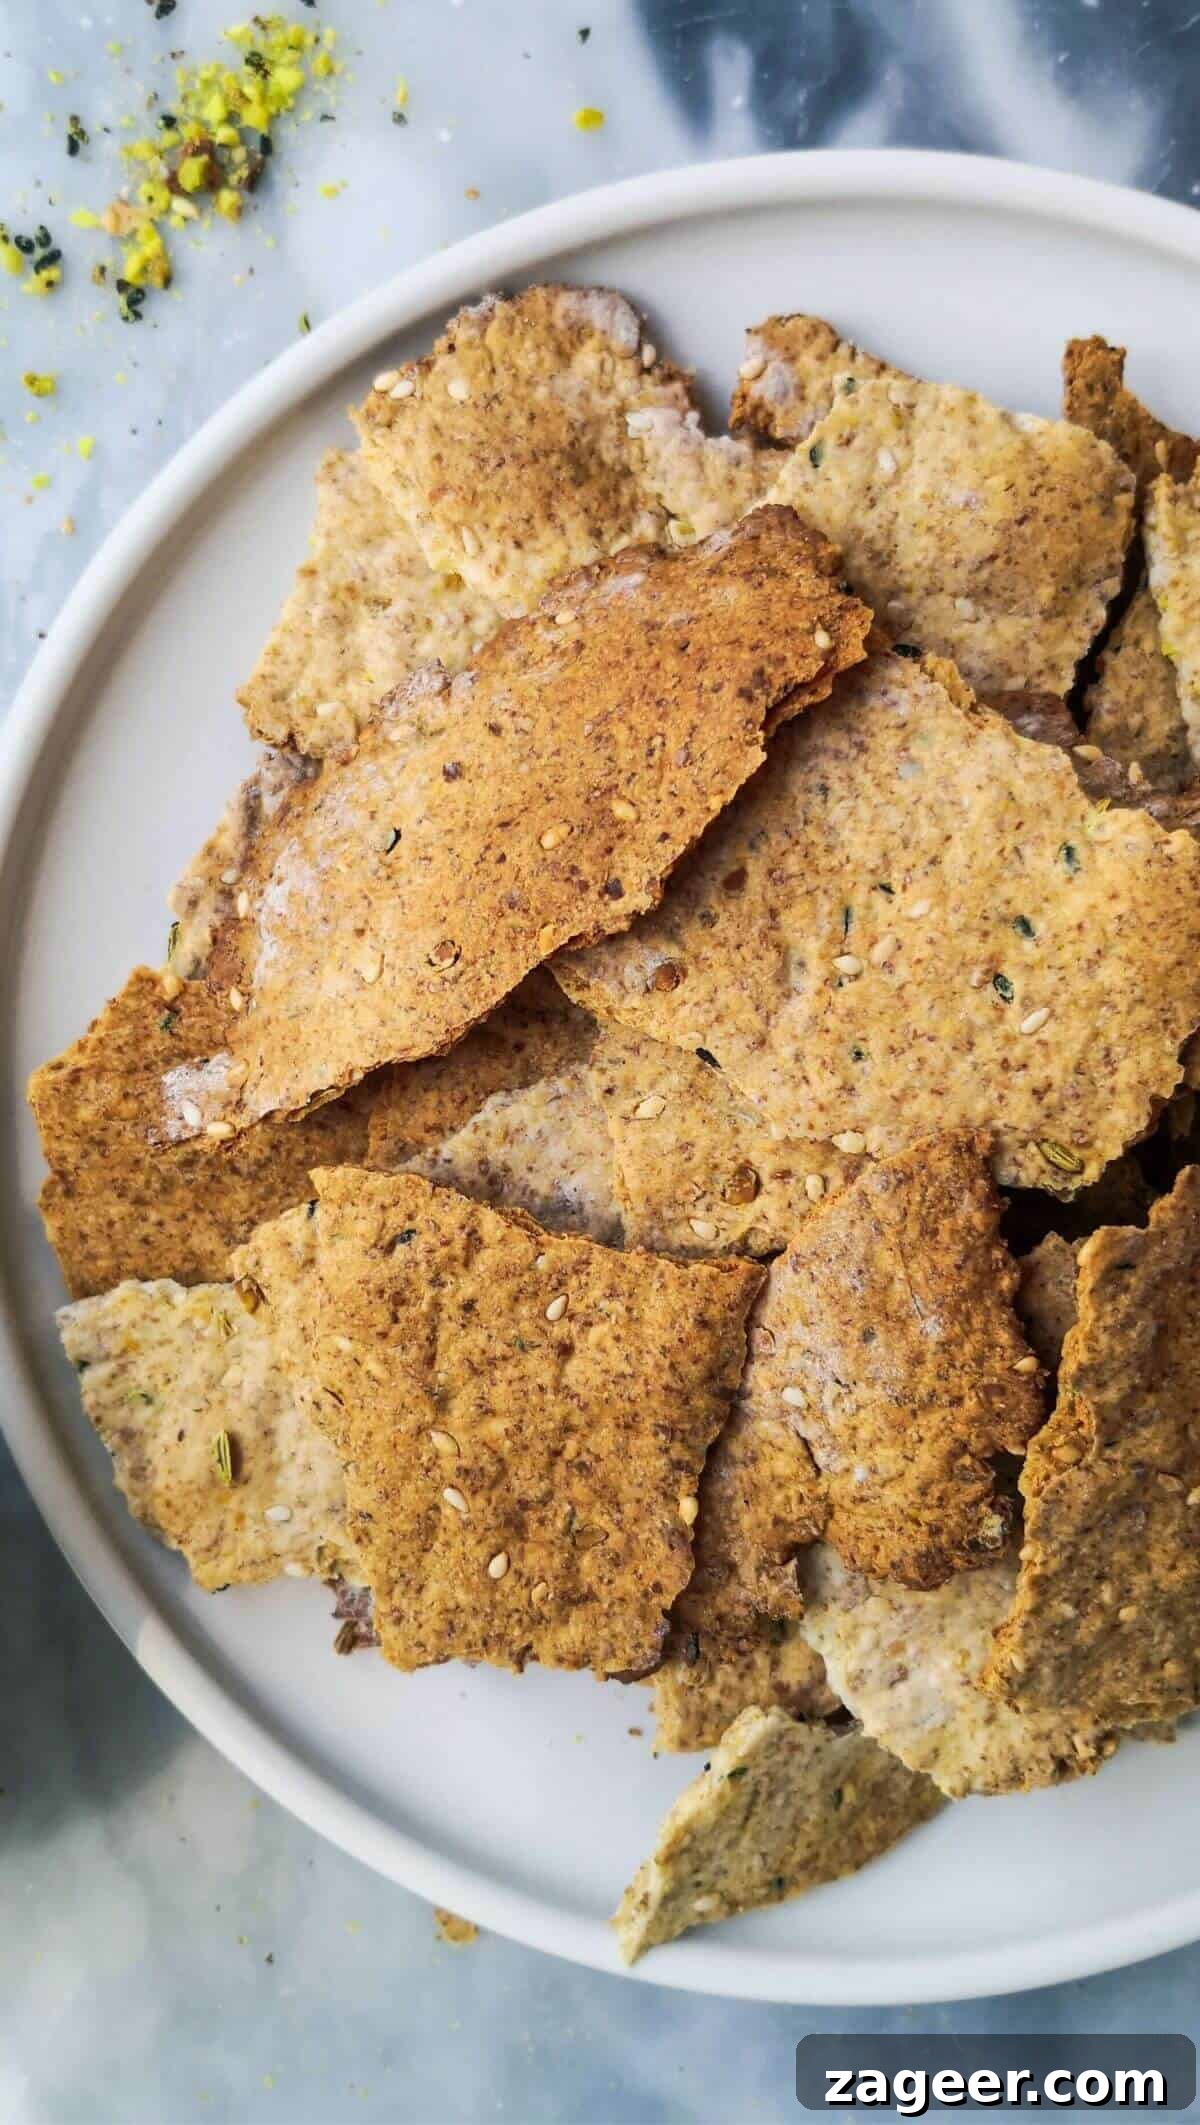
Ultimate Sourdough Discard Crackers with Dukkah: A Zero-Waste Delight
Are you a sourdough enthusiast constantly looking for creative ways to utilize your leftover starter discard? Look no further! This comprehensive guide will show you how to transform that often-discarded sourdough into unbelievably delicious, crispy, and long-lasting crackers. Infused with the aromatic blend of homemade dukkah, these crackers are not just a snack; they’re a gourmet experience that champions zero-waste cooking. Forget store-bought options – mastering this simple recipe will elevate your snacking game and fill your home with the delightful aroma of freshly baked goodness.
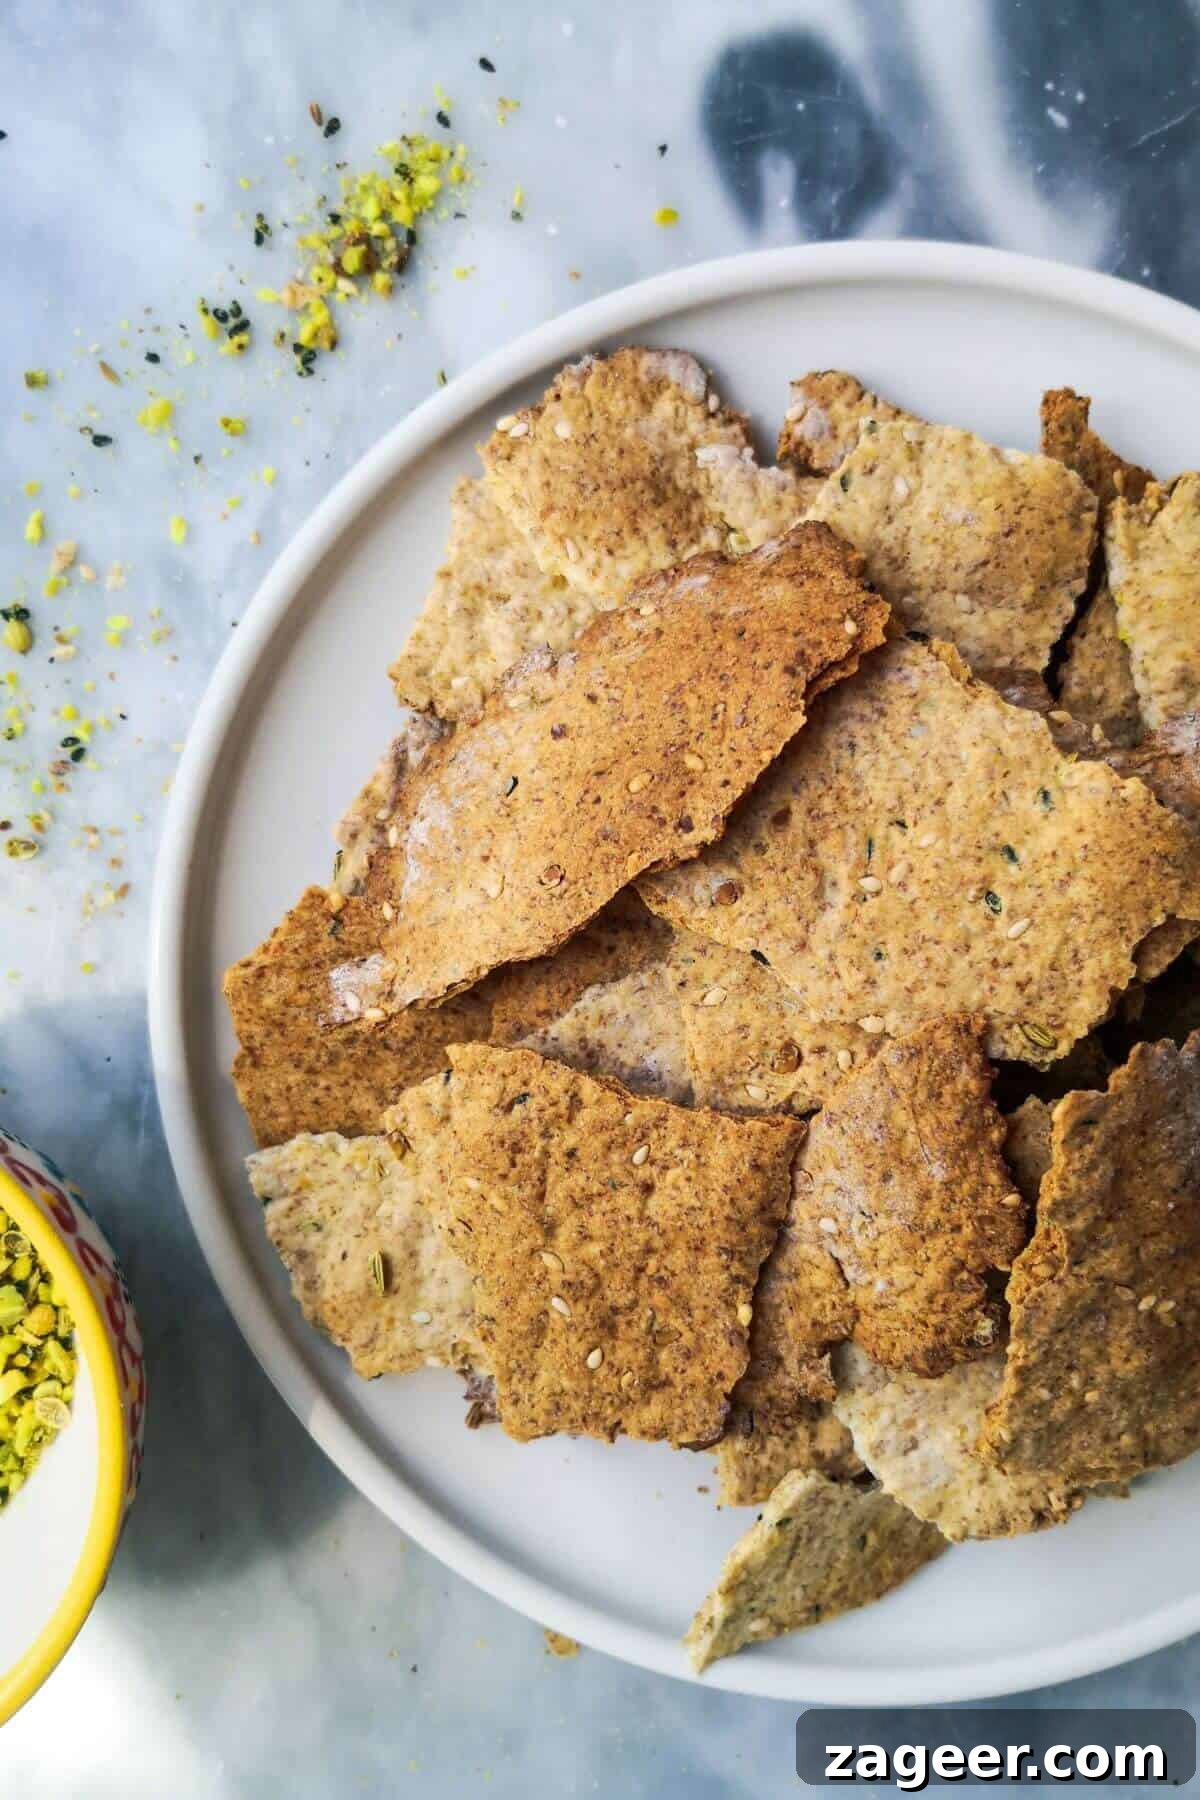
If you’re immersed in the wonderful world of sourdough baking, you’ll be intimately familiar with the sheer volume of sourdough discard generated. This is the portion of your active starter that you remove before feeding it, a necessary step to maintain a healthy and vibrant culture. For many, the sight of good food being “discarded” can be disheartening, often leading to a buildup of jars in the fridge filled with this precious byproduct. Instead of relegating it to the bin, we’re here to offer a revolutionary solution: artisanal sourdough crackers!
These crackers are incredibly simple to make, requiring minimal ingredients and effort, yet yielding maximum flavor and satisfaction. They’re perfect for pairing with cheese, dips, charcuterie, or simply enjoyed on their own as a guilt-free, wholesome snack. Plus, their impressive shelf life means you can bake a batch and enjoy them for weeks, making them an ideal staple for any pantry. Learning to make your own crackers is a rewarding skill that not only reduces food waste but also opens up a world of flavor customization.
Why These Sourdough Discard Crackers Are a Must-Try
- Zero-Waste Solution: Say goodbye to throwing away valuable sourdough discard. This recipe offers a delicious and practical way to use up every bit of your starter.
- Effortlessly Easy: With just a few basic ingredients and straightforward steps, even novice bakers can achieve perfect, crispy crackers.
- Incredibly Versatile: While we highlight the exceptional flavor of dukkah, this recipe serves as a fantastic base for an endless array of spices and herbs.
- Long-Lasting Freshness: Properly stored, these crackers stay crisp and flavorful for weeks, making them an excellent make-ahead snack.
- Budget-Friendly: Making your own crackers is significantly more economical than purchasing gourmet options from the store.
- Healthier Snacking: Control the ingredients, minimize preservatives, and enjoy a wholesome snack packed with the benefits of fermented grains.
PRO TIP: Instead of discarding your sourdough starter, collect it in a dedicated airtight jar and store it in the fridge. This way, you can easily accumulate enough discard to make multiple batches of these delightful crackers!
Essential Ingredients for Your Sourdough Crackers
You’ll be pleasantly surprised by how short and simple this ingredient list is, making this recipe accessible and cost-effective. Each component plays a crucial role in achieving the perfect texture and flavor.
- Sourdough Discard: The star of our show! This is the unfed portion of your sourdough starter, typically at 100% hydration (equal parts flour and water). It provides that signature tangy flavor and contributes to the unique texture of the crackers. The older the discard, the more pronounced the sour notes will be, adding depth to your crackers.
- Flour: The beauty of this recipe lies in its adaptability. You have the freedom to experiment with different types of flour to achieve varying textures and flavor profiles. I highly recommend a blend of plain (all-purpose) flour and wholemeal (whole wheat) flour. The wholemeal adds a delightful nutty depth and a more rustic texture, while plain flour ensures crispiness. Feel free to incorporate a touch of rye flour for an earthier flavor or spelt flour for a slightly sweeter, nuttier undertone.
- Olive Oil: A good quality olive oil is essential here. It contributes to the richness and helps achieve that desired crisp texture, preventing the crackers from becoming too dry or brittle. Extra virgin olive oil will also impart a subtle, pleasant aroma.
- Dukkah: This is where the magic happens for an elevated flavor experience! Dukkah is an exquisite Egyptian spice blend, typically consisting of toasted nuts (like hazelnuts or almonds), seeds (sesame, coriander, cumin), and various spices. Its complex, earthy, and slightly nutty profile pairs exceptionally well with the tang of sourdough. I adore using my own homemade dukkah recipe, which is simple to prepare and yields a generous batch. If homemade isn’t an option, a good quality store-bought dukkah works wonders.
- Sesame Seeds: While dukkah often contains sesame seeds, adding a little extra sprinkle enhances both the visual appeal and the nutty crunch. They also toast beautifully in the oven, intensifying their flavor.
- Salt: A fundamental ingredient for seasoning. A good pinch of fine sea salt not only enhances all the other flavors but also contributes to the cracker’s crispness.
Crafting Your Sourdough Discard Crackers: A Step-by-Step Guide
Making these crackers is a wonderfully straightforward process. It essentially boils down to four key stages: mixing, resting, rolling, and baking. To keep things simple and embrace a rustic charm, I prefer baking the dough as a single sheet and then breaking it into irregular pieces after it cools. This method is far less finicky than trying to precisely cut the dough before baking.
Step 1: Preparing the Dough
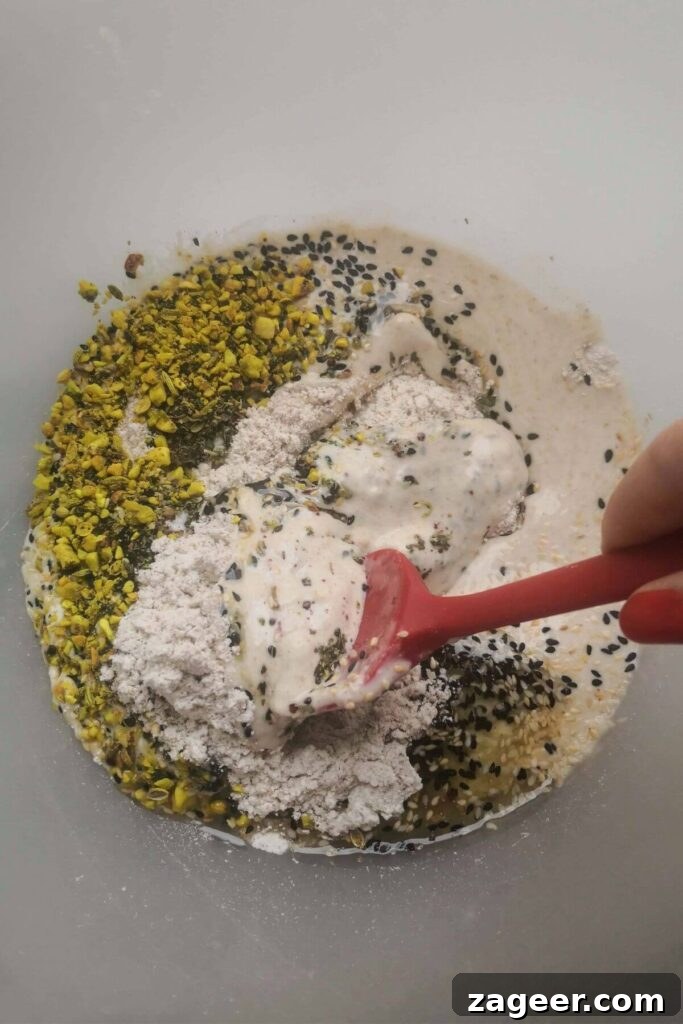
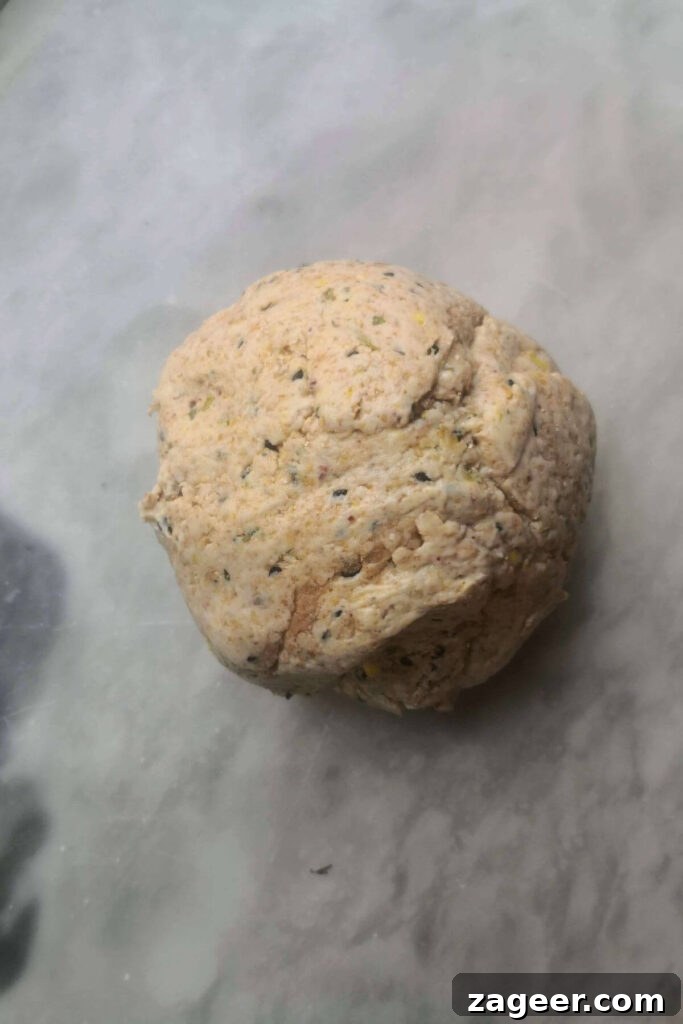
In a large mixing bowl, combine all your ingredients: 200g mature sourdough discard, 65g all-purpose flour, 65g wholemeal flour, 2 tablespoons of olive oil, 1 tablespoon of dukkah, 1 tablespoon of sesame seeds, and 1/2 teaspoon of salt. Using a sturdy wooden spoon or a spatula, mix everything until a shaggy dough begins to form. Once it’s mostly combined, use your hands to bring the dough together into a cohesive ball. It should be firm but pliable. Wrap the dough tightly in cling film (or place it in an airtight container) and refrigerate for at least 30 minutes. This resting period allows the gluten to relax, making the dough much easier to roll out thinly, and also deepens the flavors.
Step 2: Rolling Out the Dough
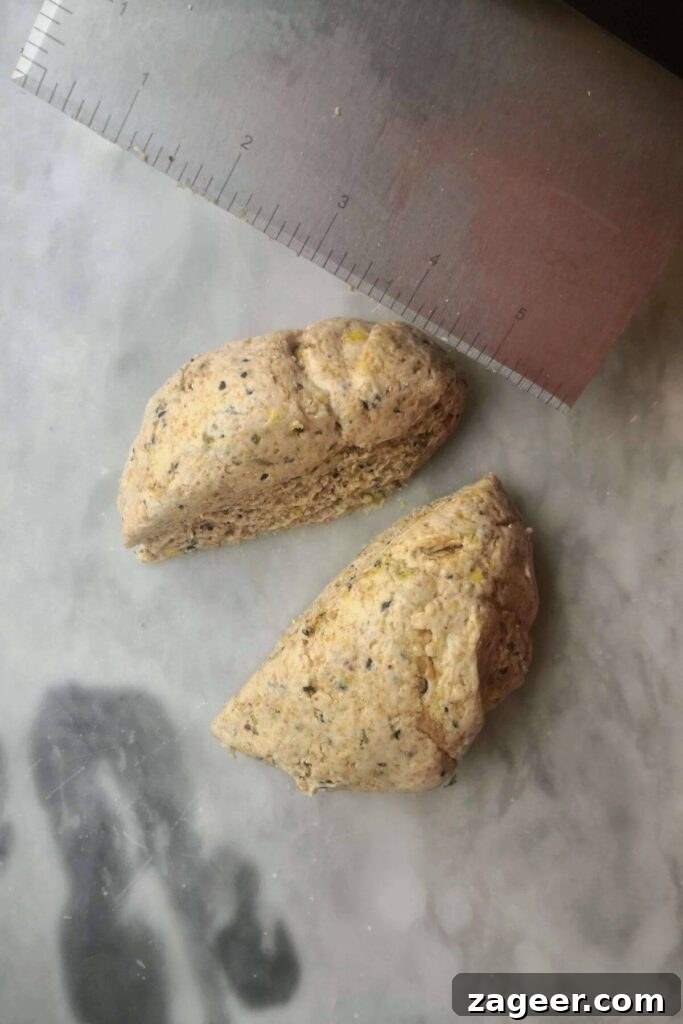
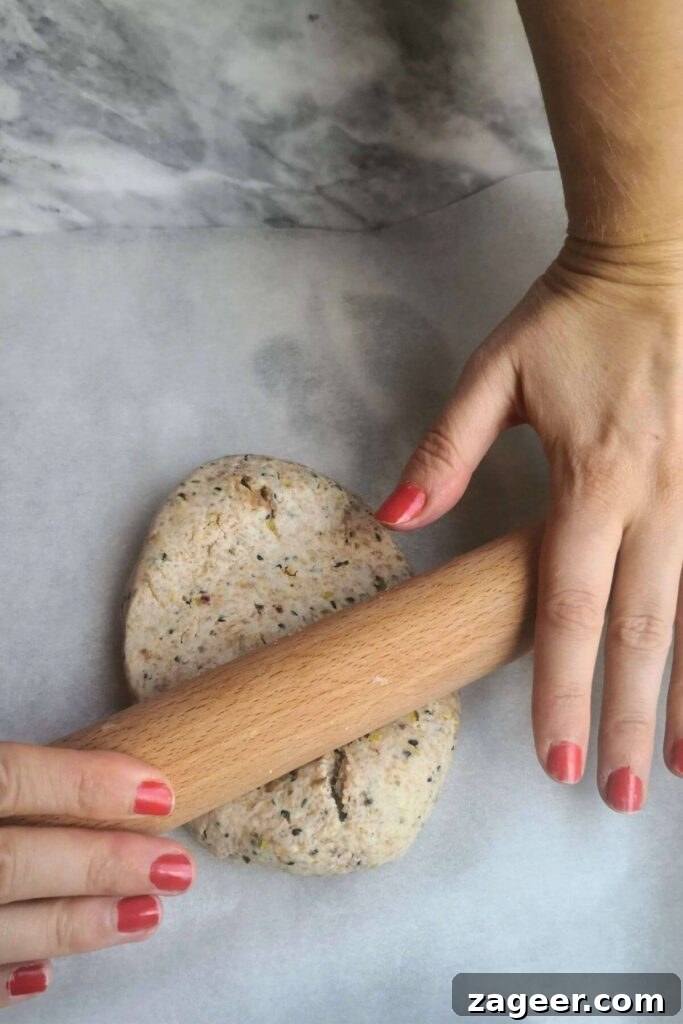
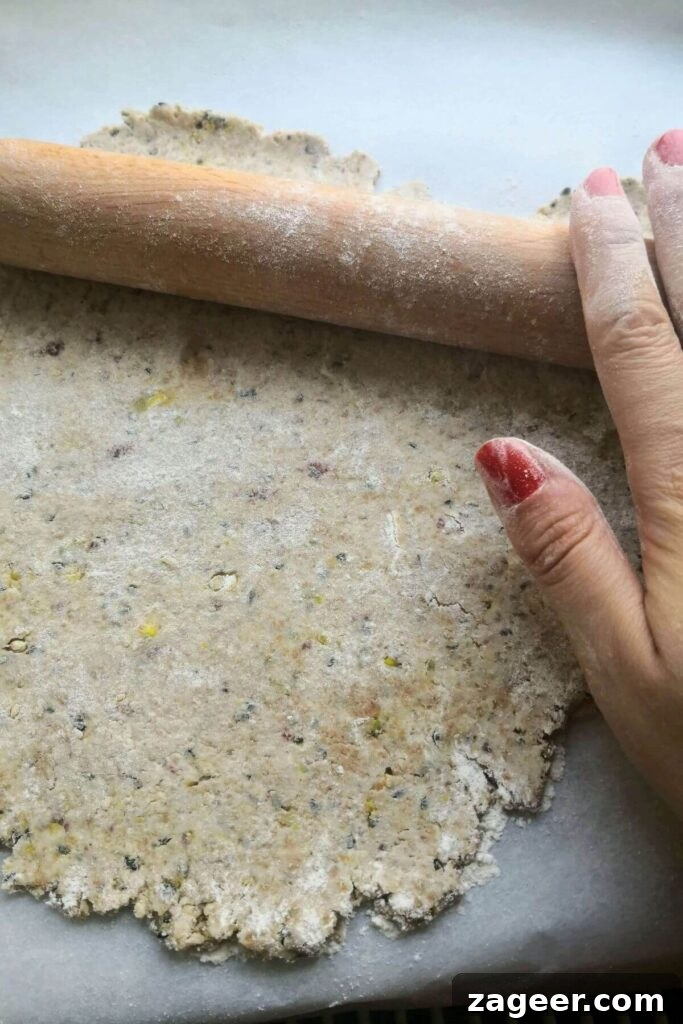
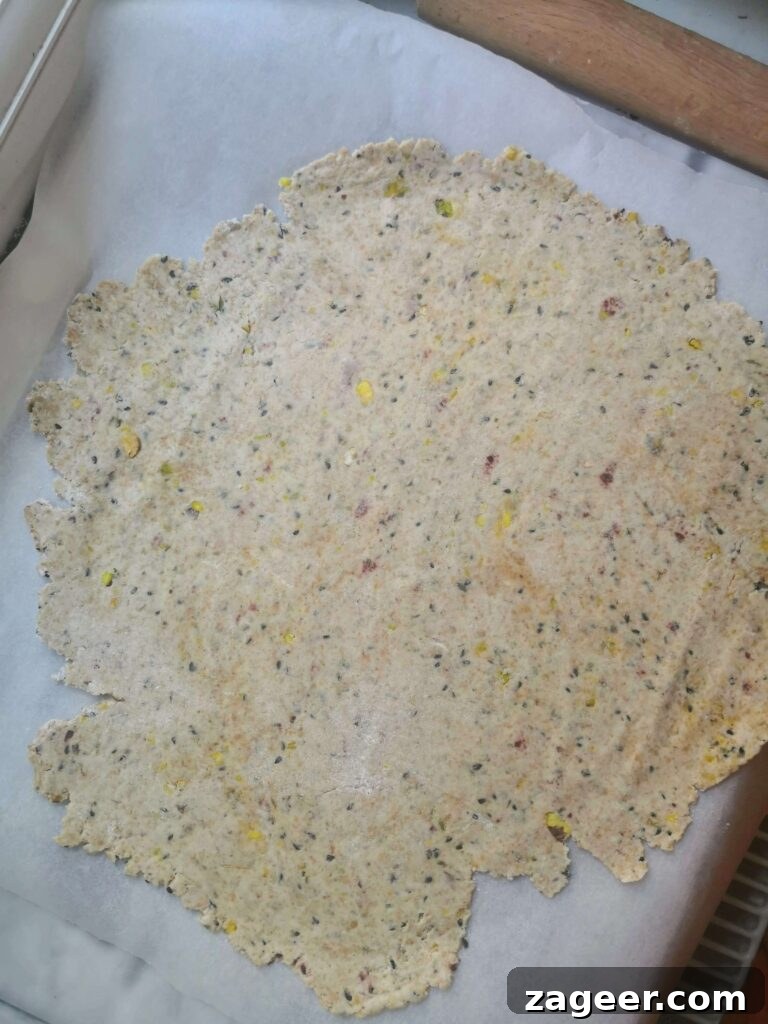
Preheat your oven to 180°C (350°F) fan-assisted or 200°C (400°F) conventional. After the dough has rested, retrieve it from the fridge and divide it into two equal halves. Take one half and place it directly onto a large sheet of baking paper that will fit comfortably on your oven tray. Keep the other half of the dough covered to prevent it from drying out. Using a rolling pin, begin to roll out the dough as thinly as possible. The thinner the dough, the crispier your crackers will be! Don’t worry if the edges crack or become uneven; this merely adds to the rustic, homemade charm. If the dough starts to stick to your rolling pin, lightly dust the top surface with a little extra flour. Aim for a thickness of about 1-2mm.
Step 3: Baking to Golden Perfection
Once your dough is rolled out to your desired thinness on the baking paper, carefully transfer the entire sheet, still on its paper, onto an oven tray. Bake in the preheated oven for approximately 20-25 minutes. Keep a close eye on them, as oven temperatures can vary. You’re looking for a beautiful golden-brown color and a firm, crisp texture when gently tapped. About halfway through the baking time, it’s a good idea to rotate the tray to ensure even cooking. Some thinner spots might brown faster, which is perfectly fine and adds to the varied texture.
Step 4: Cooling and Breaking
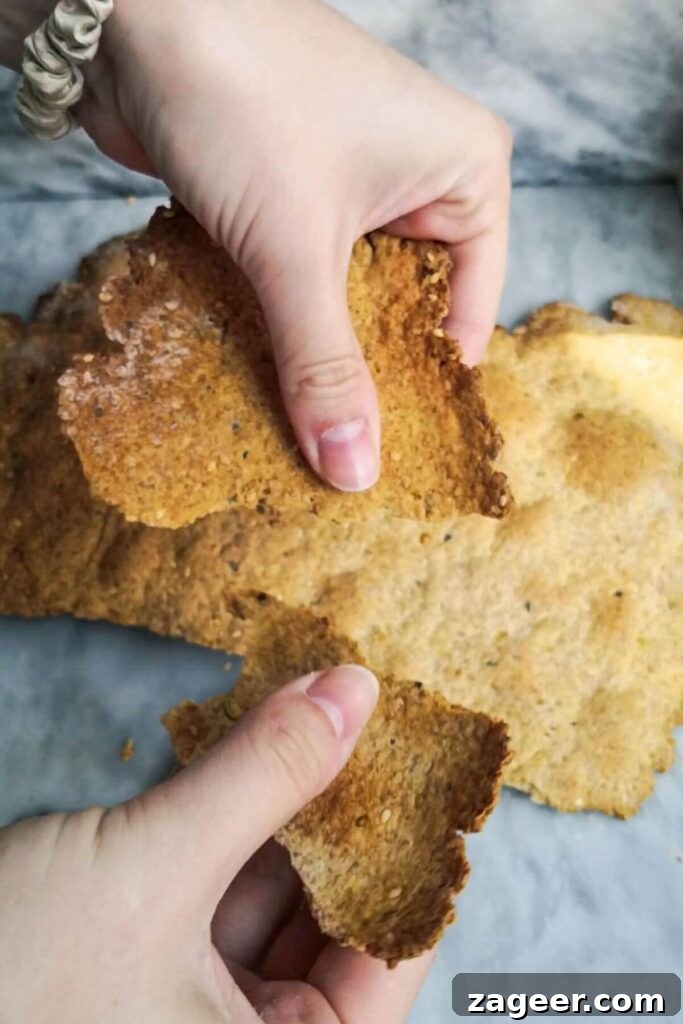
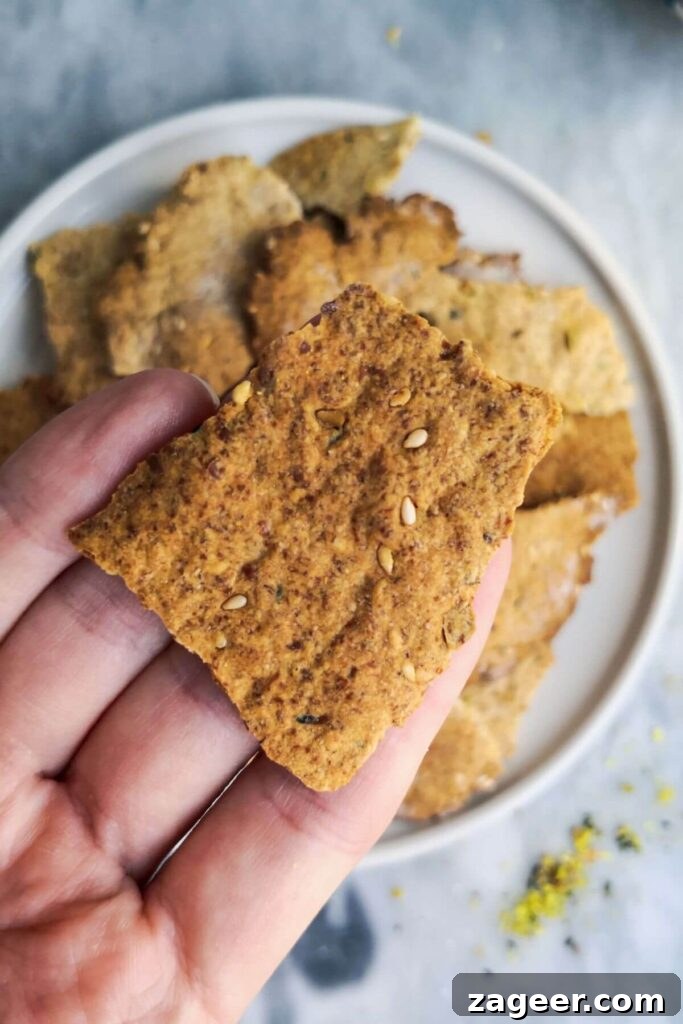
Once baked, remove the cracker sheet from the oven. Let it cool on the baking tray for about five minutes to allow it to firm up slightly. Then, carefully slide the entire cracker sheet, still on its baking paper, onto a wire rack to cool completely. This crucial step prevents sogginess and ensures maximum crispness. While the first batch cools, repeat the rolling and baking process with the second half of your dough. Once both sheets are entirely cool, gently break them into irregular, rustic shards. And there you have it – homemade sourdough discard crackers, ready to be enjoyed!
Tips for Cracker Perfection & Flavor Variations
Achieving the ultimate sourdough cracker is all about attention to detail and a willingness to experiment. Here are some pro tips to ensure success and spark your creativity:
- Thinness is Key: The thinner you roll your dough, the crispier your crackers will be. Don’t be afraid to roll until you can almost see through it!
- Even Baking: Keep an eye on your crackers, especially towards the end of the baking time. Ovens can have hot spots, so rotating the tray halfway through ensures even browning and crispness. If some parts brown faster, you can gently break them off and let the rest continue baking for a few more minutes.
- Storage: Once completely cool, store your crackers in an airtight container at room temperature. This will preserve their crispness for several weeks. Avoid storing them in humid conditions, which can make them soft.
- Flavor Experimentation: Dukkah is fantastic, but the possibilities are truly endless! Here are some ideas:
- Herby Delights: Mix in dried rosemary, thyme, oregano, or a blend of Italian herbs. Freshly chopped herbs can also be added, but ensure they are finely minced to prevent burning.
- Spicy Kick: A pinch of chili flakes, smoked paprika, or a dash of cayenne pepper will add a delightful warmth.
- Cheesy Goodness: Grated Parmesan or nutritional yeast can be incorporated into the dough for a savory, cheesy flavor.
- Seed Power: Sunflower seeds, pumpkin seeds, poppy seeds, or caraway seeds add extra crunch and nutritional value.
- Everything Bagel: Combine dried minced garlic, dried minced onion, poppy seeds, and sesame seeds for a popular flavor profile.
- Za’atar Zing: This Middle Eastern blend of thyme, sumac, and sesame seeds is a wonderful alternative to dukkah, offering a zesty and earthy taste.
- Serving Suggestions: These crackers are incredibly versatile. Enjoy them with:
- Your favorite cheeses and charcuterie.
- Creamy dips like hummus, baba ghanoush, or a simple cream cheese spread.
- As a crunchy topping for soups and salads.
- Alongside a fresh vegetable platter.
- Simply on their own for a satisfying snack!
Frequently Asked Questions (FAQ)
How long will these sourdough crackers last?
These homemade sourdough crackers boast an impressive shelf life! When stored correctly in an airtight container at room temperature, they will remain wonderfully crisp and delicious for up to three weeks, sometimes even longer. The key is to ensure they are completely cool before storing to prevent condensation and maintain their crunch.
My sourdough starter has been in the fridge for weeks without feeding. Will its discard still work for this recipe?
Absolutely! The beauty of sourdough discard recipes is that they are very forgiving. Even discard from a starter that’s been dormant in the fridge for several weeks will work perfectly fine. As long as your starter was initially fed with equal parts flour and water (100% hydration), you’re good to go. If you notice a dark liquid layer (often called “hooch”) on top, simply stir it back into the discard; it’s a sign your starter is hungry but still perfectly usable. If your starter’s hydration level is different, you might need to slightly adjust the flour or olive oil quantities to achieve a pliable dough – refer to the consistency shown in the images as a guide.
What other flavors can I add to the crackers if I don’t have dukkah?
The adaptability of this recipe is one of its greatest strengths! Dukkah is fantastic, but you can truly get creative with what you have in your pantry. Some popular and delicious alternatives include za’atar, a mix of dried chilli flakes, grated Parmesan cheese, nigella seeds, poppy seeds, or various dried herbs like rosemary, thyme, or oregano. You can even combine a few of these. Don’t hesitate to dig through your spice rack and experiment to find your new favorite flavor combination!
Can I make these crackers gluten-free?
While this specific recipe uses wheat flour, you can experiment with gluten-free flour blends. However, you may need to adjust the liquid content (olive oil or a tiny bit of water) as gluten-free flours absorb moisture differently. The texture might also vary slightly, often becoming a bit more delicate. Look for gluten-free all-purpose flour blends that are designed for baking.
What if my dough is too sticky or too dry?
The consistency of sourdough discard can vary, affecting your dough. If your dough is too sticky to handle, add a tablespoon of flour at a time until it reaches a manageable, non-sticky texture. If it’s too dry and crumbly, add a teaspoon of olive oil (or water) at a time until it comes together into a cohesive ball. The ideal dough should be firm enough to roll without tearing easily but soft enough to be pliable.
More Delicious Recipes You Might Enjoy
If you embark on this culinary adventure and make these sourdough discard crackers, I would absolutely love to hear about your experience! Please share your thoughts, photos, and any creative variations you tried in the comments section below. Your feedback and ideas inspire me and others in our wonderful baking community.
Print Recipe
Sourdough Discard Crackers with Dukkah
No reviews yet.
- Author: Kate Alexandra
- Total Time: 1 hour
- Yield: 65 crackers
- Diet: Vegetarian
Description
Stop throwing away your sourdough discard and make these incredible crackers instead! They’re super easy, packed with flavor, and last for ages. We’re adding exotic dukkah to make them even more special, but the true beauty of this recipe lies in how effortlessly adaptable it is to your favorite spices and herbs.
Ingredients
- 200g mature sourdough starter (100% hydration discard)
- 65g all-purpose flour
- 65g wholemeal (whole wheat) flour
- 2 tablespoons olive oil
- 1 tablespoon dukkah
- 1 tablespoon sesame seeds
- 1/2 teaspoon salt
Instructions
- Mix the cracker dough. In a large bowl, combine 200g of sourdough starter, 65g all-purpose flour, 65g wholemeal flour, 2 tablespoons olive oil, 1 tablespoon dukkah, 1 tablespoon sesame seeds, and 1/2 teaspoon of salt. Mix well with a large spoon until a rough dough forms. Use your hands to bring the dough together into a ball. Wrap tightly in cling film and refrigerate for 30 minutes.
- Roll out the crackers. Preheat your oven to 180°C (350°F) fan-assisted. After 30 minutes, remove the dough from the fridge and cut it in half. Place one half onto a large piece of baking paper that fits your oven tray. Keep the other half covered. Roll out the dough as thinly as possible (1-2mm) with a rolling pin, dusting lightly with flour if needed to prevent sticking. Don’t worry about perfect edges – rustic is charming!
- Bake the crackers. Transfer the rolled dough on the baking paper to an oven tray. Bake for 20-25 minutes, or until golden brown and crispy. Rotate the tray halfway through baking for even browning.
- Cool and form the crackers. Let the baked cracker sheet cool on the tray for five minutes, then transfer it to a wire rack to cool completely. Repeat the rolling and baking process with the second piece of dough. Once completely cool, break the cracker sheets into rustic, bite-sized pieces. Enjoy!
Notes
These crackers will keep exceptionally well for several weeks when stored in an airtight container at room temperature.
Feel free to customize the flavors! Replace the dukkah and sesame seeds with your favorite dried herbs, spices, grated cheese, or other seeds for endless variations.
- Prep Time: 10 minutes
- Fridge time: 30 minutes
- Cook Time: 20 minutes
- Category: Snacks
- Method: Oven Baked
- Cuisine: Mediterranean
Nutrition
- Serving Size: 10 crackers