
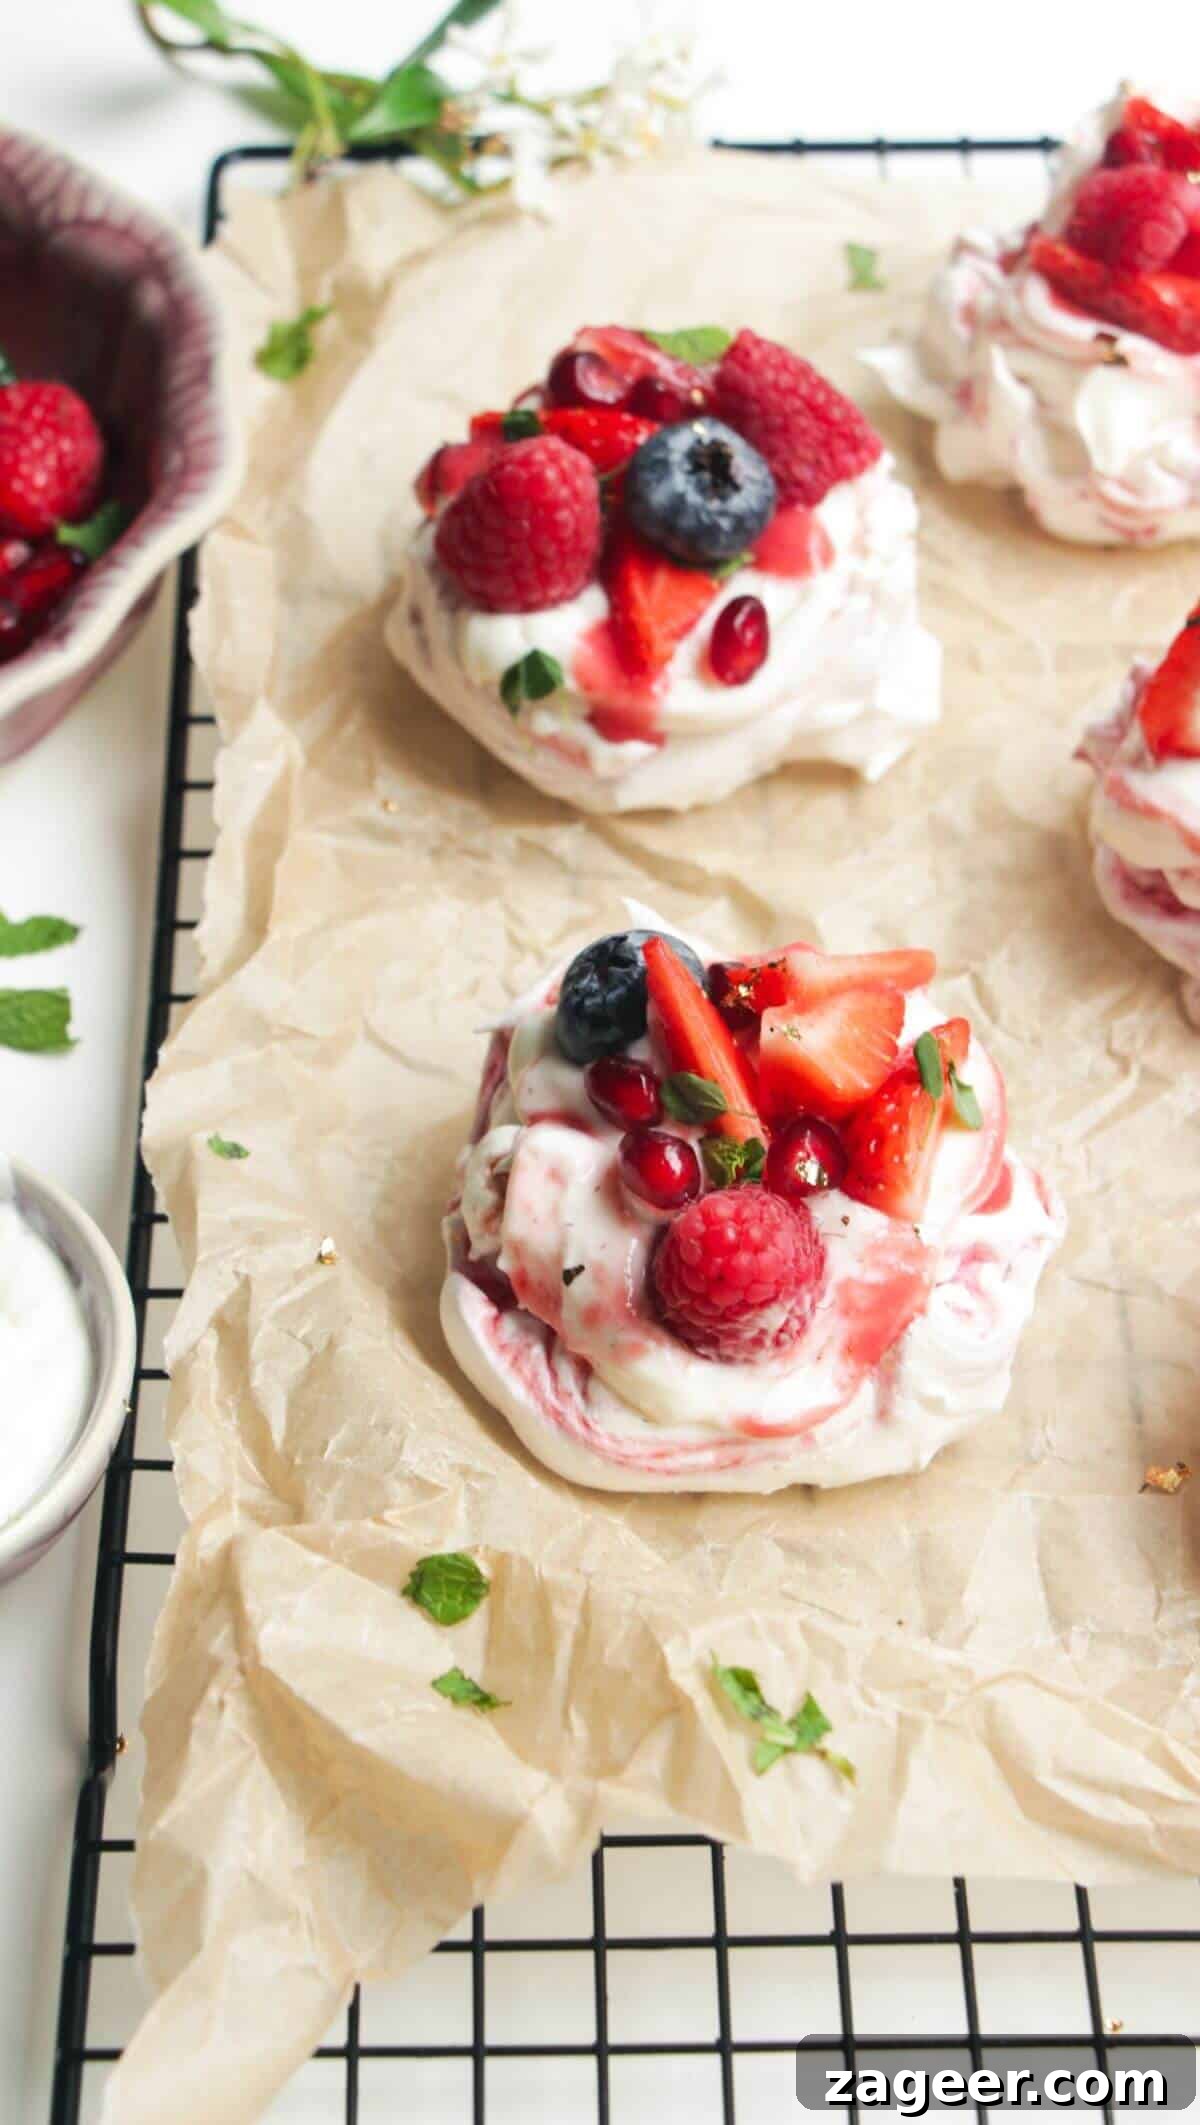
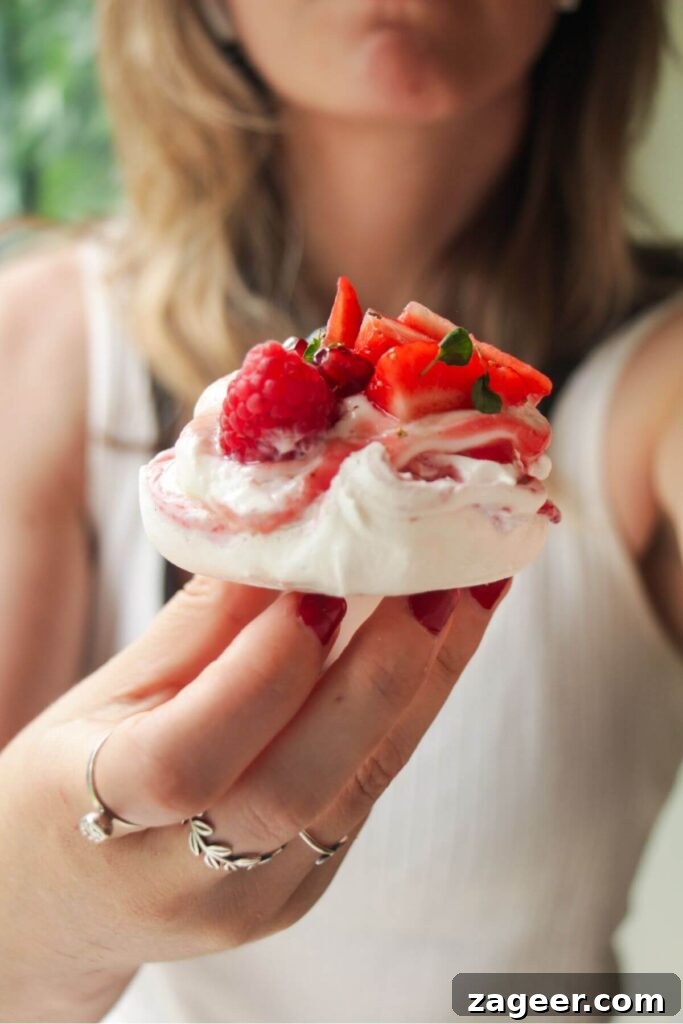
Prepare to be enchanted by these stunning Mini Berry Ripple Cheesecake Pavlovas, a truly exquisite dessert perfect for any celebration. These adorable, individual versions of the beloved classic are elevated with a vibrant raspberry ripple swirled directly into the crispy meringue shell before baking. Instead of traditional whipped cream, each mini pavlova is generously dolloped with a rich, tangy cheesecake topping, offering a luxurious and unforgettable twist. Crowned with an assortment of your favorite fresh mixed berries, this dessert is designed to impress and is surprisingly simpler to create than you might imagine.
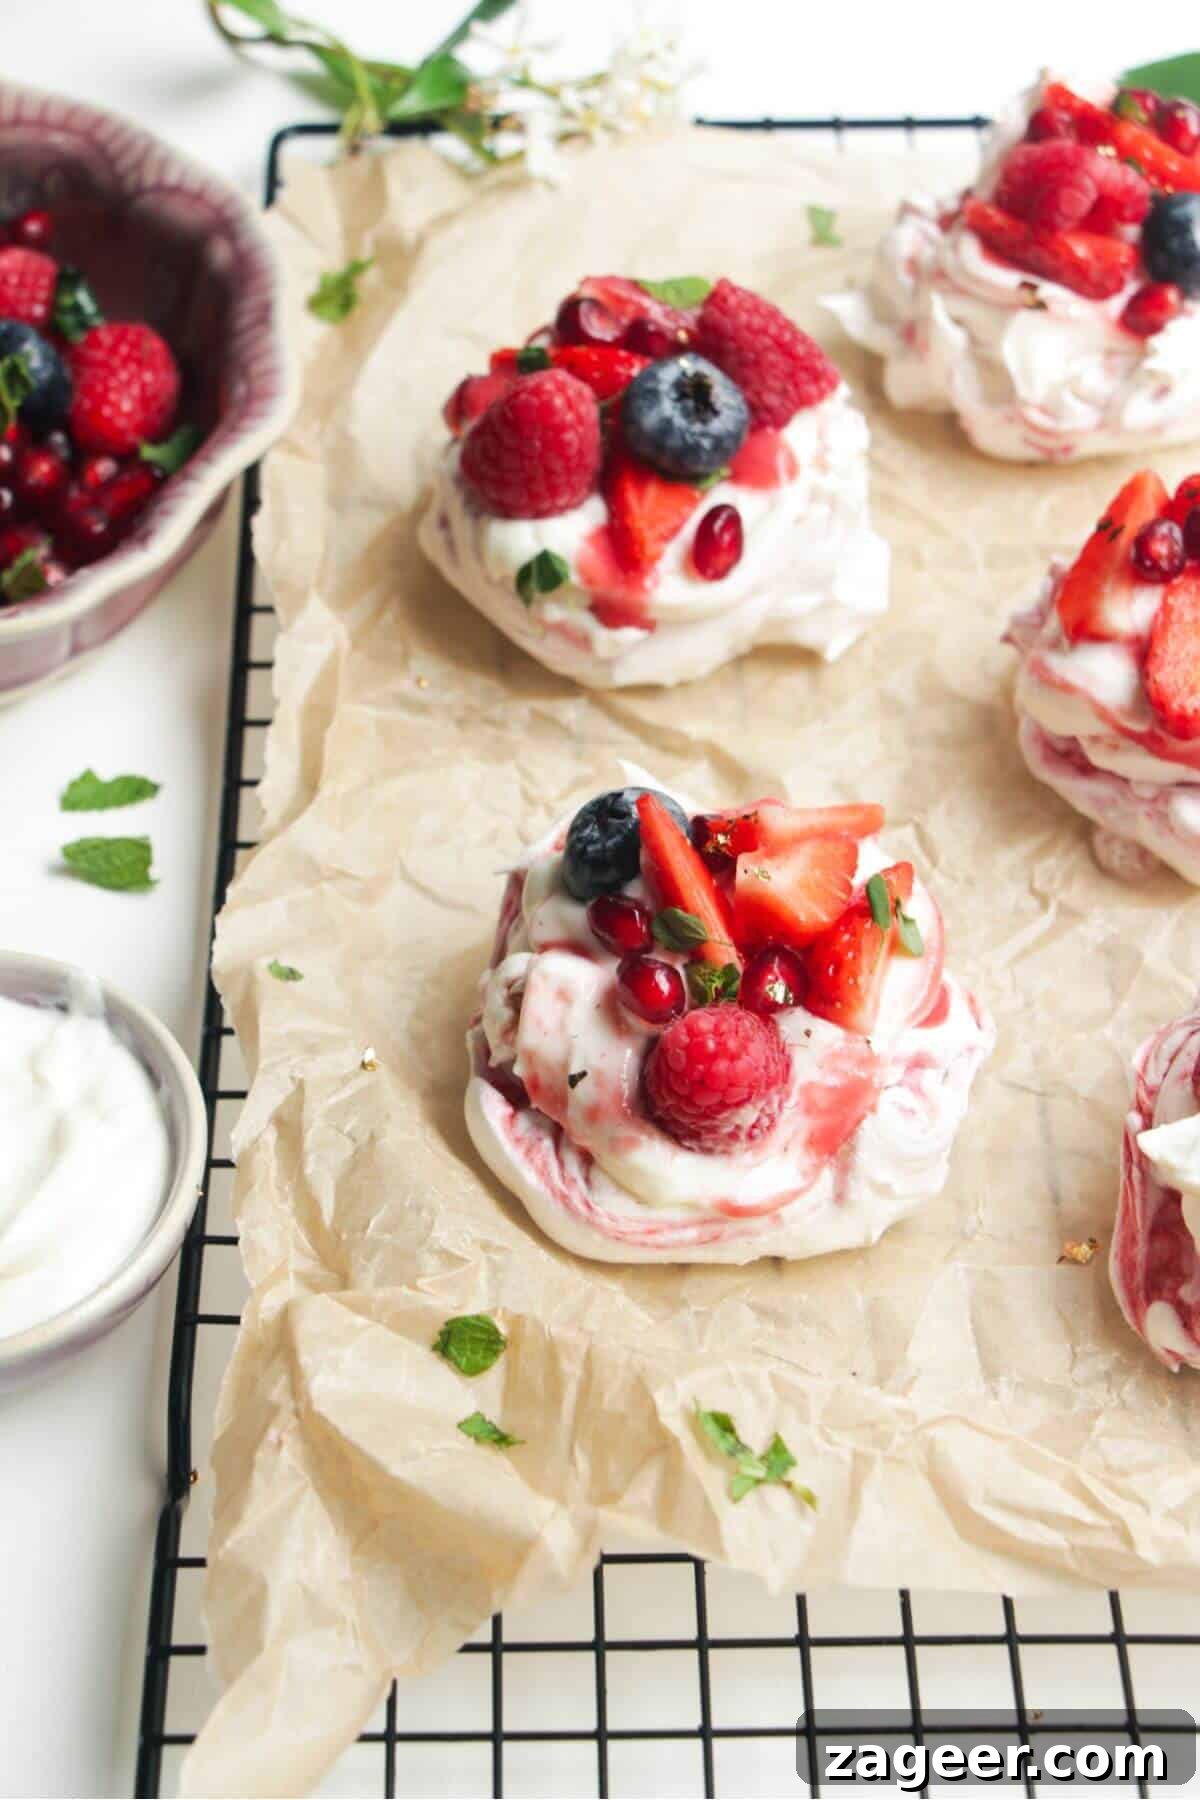
Pavlova holds a special place in the hearts of New Zealanders and Australians, often gracing the Christmas table and countless other celebratory gatherings. It’s more than just a dessert; it’s a culinary icon renowned for its spectacular appearance, straightforward ingredients, and incredible versatility. The beauty of pavlova lies in its endless customization possibilities when it comes to toppings, allowing you to adapt it to any season or preference. Its rustic charm and homemade feel make it the ideal, relaxed finish to any meal.
These mini pavlovas take that charm to the next level with a gorgeous raspberry ripple delicately swirled through their crisp, ethereal shells. Serving individual portions makes them an ideal choice for dinner parties, creating a visually stunning display when lined up. Beyond their aesthetic appeal, mini pavlovas are often quicker to bake and much easier to handle than a large, traditional pavlova, making them a true win-win in the dessert world!
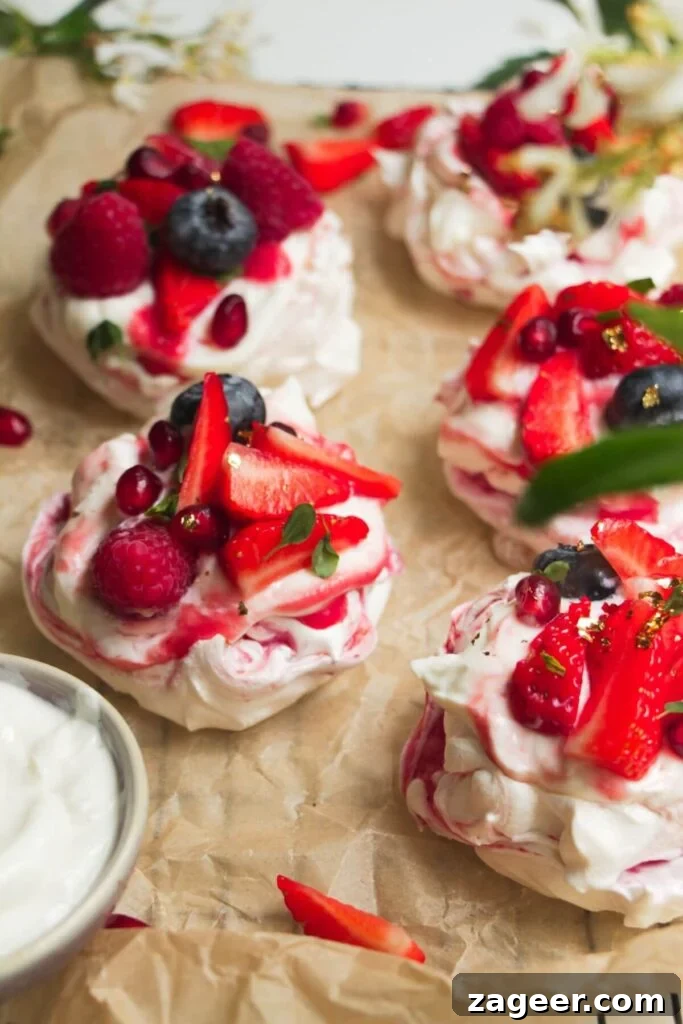
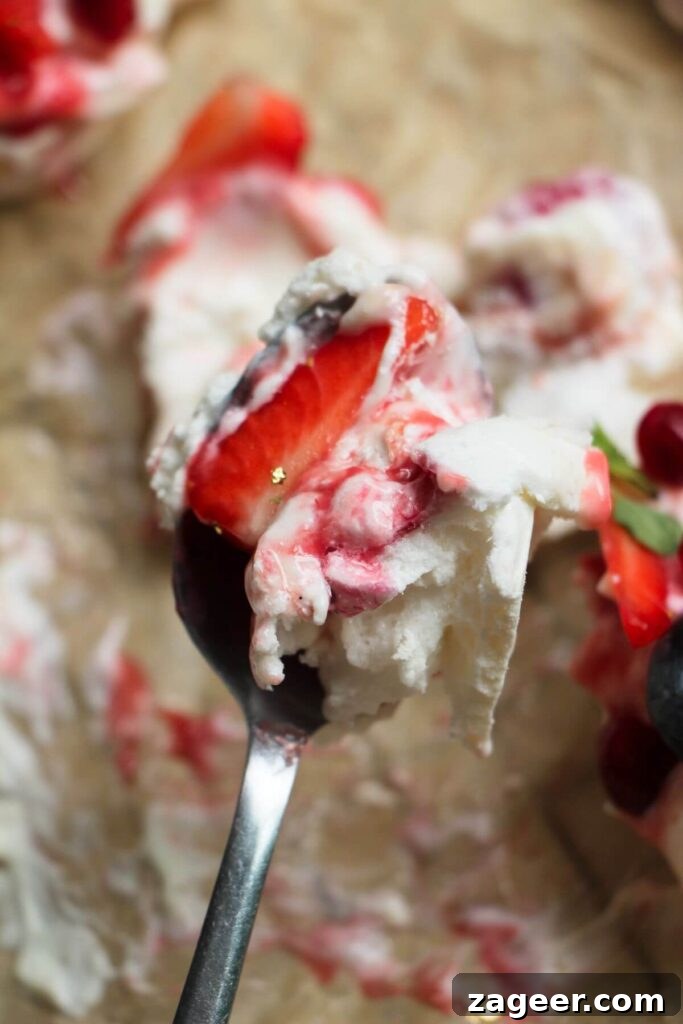
While classic pavlova is traditionally topped with whipped cream, this recipe introduces a delightful innovation that we believe you’ll adore. We’ve swapped out the cream for a vibrant, tart, and incredibly creamy cheesecake topping. This luxurious addition is crafted by blending smooth cream cheese with thick Greek yogurt (or labneh for an even richer texture), a touch of sugar, and a hint of vanilla. The result is a harmonious symphony of textures and flavors: a delicate crispy shell giving way to a soft, fluffy marshmallow interior, complemented by the zingy cheesecake topping, and finally, a generous pile of fresh, mixed berries. It’s a truly beautiful and unforgettable combination that elevates this dessert beyond the ordinary.
Understanding the Difference: Meringue vs. Pavlova
Though they share fundamental ingredients and a delicate, cloud-like appearance, meringue and pavlova are distinctly different in their structure and texture. Both are born from whipped egg whites and sugar, but their unique baking processes yield vastly different outcomes. Meringue is typically baked for a longer duration at a lower temperature, resulting in a product that is crispy and brittle throughout. It shatters with every bite, offering a consistent, airy crunch.
Pavlova, on the other hand, is a masterpiece of contrasts. It boasts a beautifully crisp exterior, often slightly caramelized, that gives way to a gloriously soft, chewy, and marshmallow-like interior. This unique texture is achieved by baking the pavlova at a precise low temperature after an initial brief blast of higher heat, followed by a gradual cooling process within the turned-off oven. The cornflour and vinegar often added to pavlova recipes play a crucial role in creating this distinct chewy center, distinguishing it from its all-crisp cousin, the meringue.
Essential Ingredients for Perfect Pavlovas
The beauty of pavlova lies in its simplicity, requiring just a handful of staple pantry ingredients for the base. The true magic, however, unfolds with your choice of toppings, allowing for endless creativity and personalization.
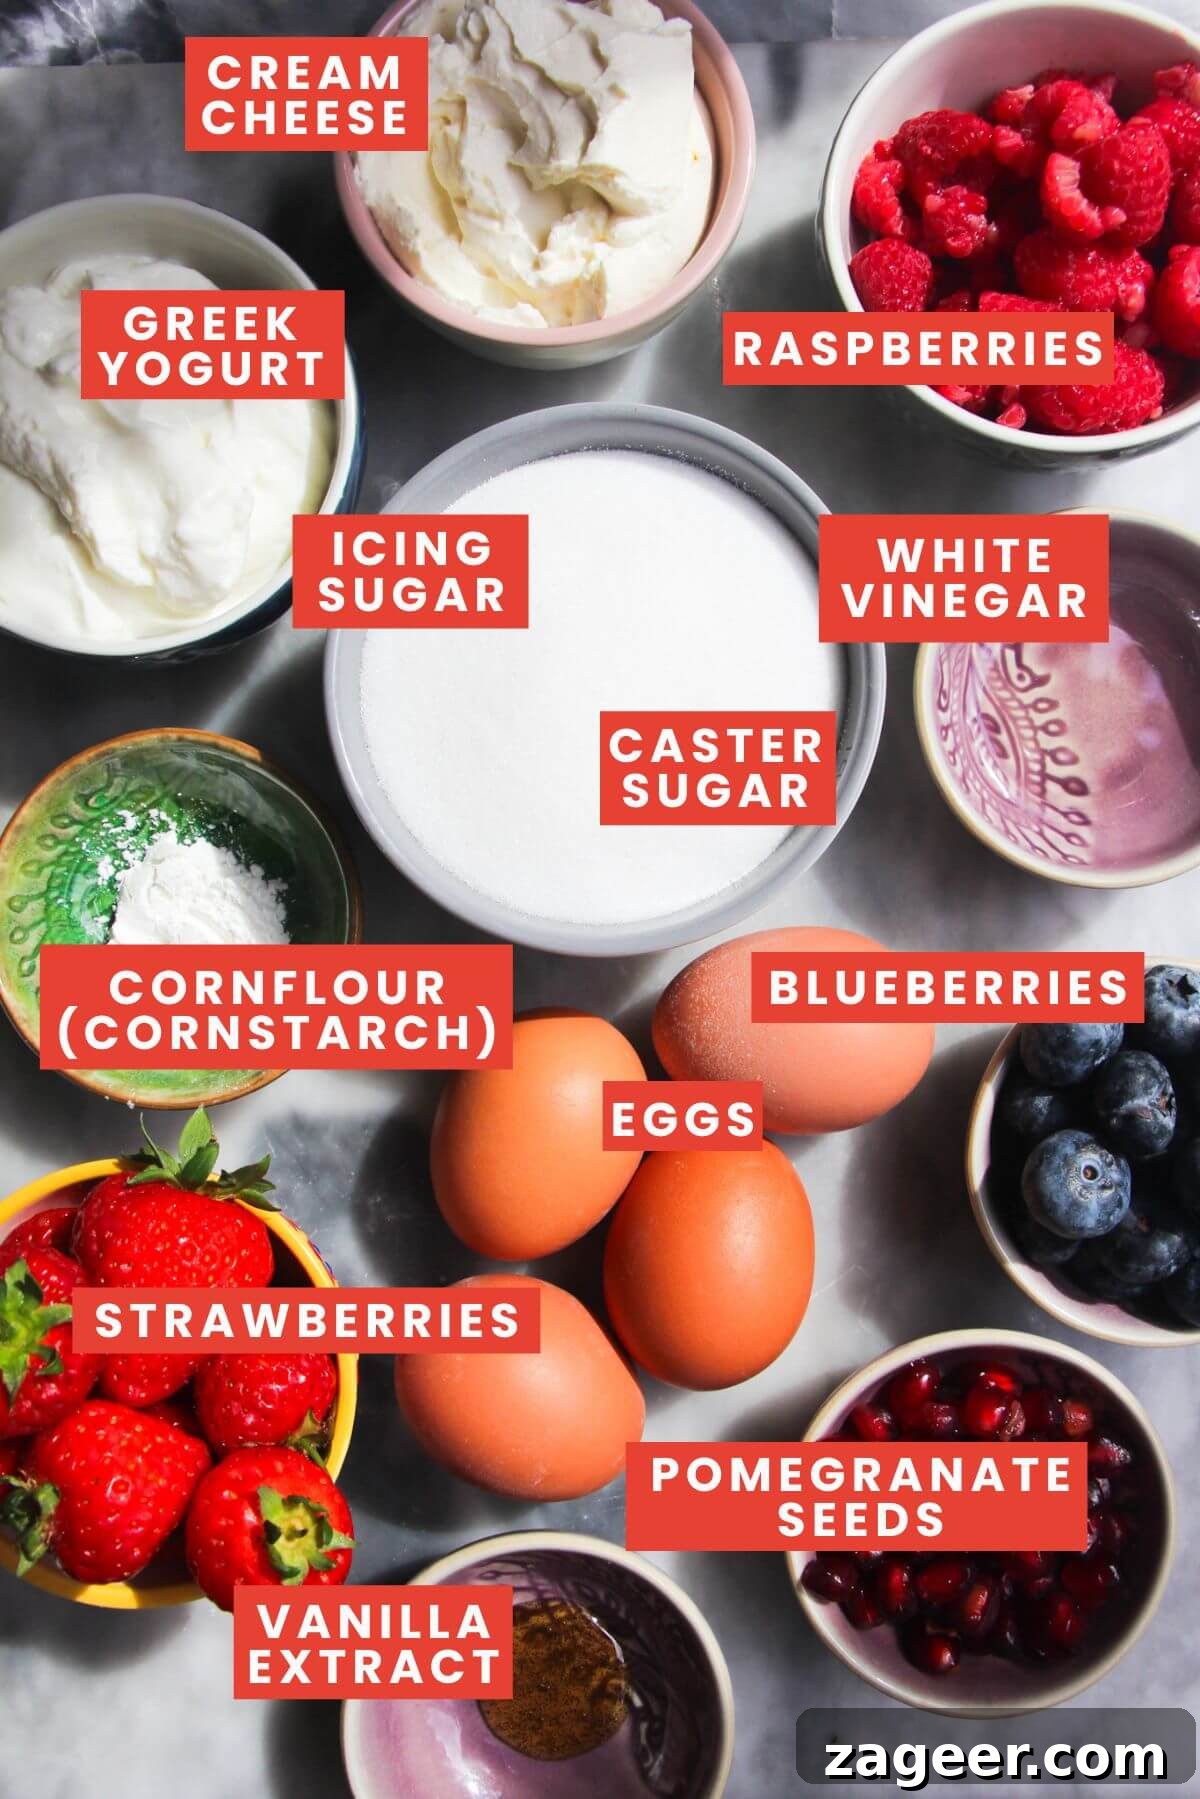
- Eggs: Specifically, you’ll need only the egg whites. For optimal volume and stability when whipping, ensure your egg whites are at room temperature. To separate eggs, carefully crack them and gently pass the yolk back and forth between the shell halves, allowing the whites to drip into a separate bowl. This technique is vital; any trace of yolk or fat in the egg whites can prevent them from whipping properly, so always separate into a clean bowl before adding to your main mixing bowl.
- Cornflour (Cornstarch) and Vinegar: These two seemingly simple ingredients are the unsung heroes of pavlova stability. They act as a protective shield, significantly reducing the common problem of pavlovas collapsing or weeping. White vinegar is a standard choice, but apple cider vinegar or fresh lemon juice work equally well due to their acidic properties. Cream of tartar is another excellent stabilizer; if using, reduce the quantity to **1/2 teaspoon** for this recipe. Rest assured, these additions will not impart any vinegary flavor to your delicate dessert.
- Caster Sugar (Superfine Sugar): The fine granulation of caster sugar is absolutely crucial for achieving a smooth, non-grainy pavlova. It dissolves more readily into the egg whites, forming a stable, glossy meringue. If you only have regular granulated sugar, a quick blitz in a food processor for about a minute will achieve the desired superfine consistency. Sugar not only sweetens but also aids in stabilizing the egg white structure, contributing to that gorgeously crispy exterior.
- Cream Cheese: For the cheesecake topping, ensure your cream cheese is at room temperature. This makes it much easier to beat into a smooth, lump-free consistency. Both full-fat and low-fat cream cheese varieties yield excellent results, so choose according to your preference.
- Greek Yogurt: Opt for a genuine, thick Greek yogurt for the best consistency in your topping. Alternatively, labneh, a strained yogurt cheese, provides an even richer and thicker texture. The goal is a topping that is thick enough to hold its shape beautifully without running off the delicate pavlova shell.
- Berries: For the signature ripple, fresh or frozen **raspberries** are pureed. For decorating post-baking, a vibrant medley of more **raspberries, strawberries, blueberries, and pomegranate seeds** adds both flavor and visual appeal. Feel free to customize this selection based on seasonal availability and personal taste. Stone fruits like peaches or nectarines are fantastic in summer, and defrosted frozen berries create a delicious chunky compote that pairs wonderfully with the creamy cheesecake topping.
A note on equipment: For this recipe, a stand mixer (my preferred choice for its ease) or a hand-held electric mixer is highly recommended. Achieving the necessary volume, thickness, and glossy texture of the meringue by hand whisking is incredibly challenging and often yields less consistent results.
Crafting Your Mini Berry Ripple Cheesecake Pavlovas: A Step-by-Step Guide
Creating these elegant mini pavlovas is a rewarding process. Follow these steps for a dessert that’s as delightful to make as it is to eat.
1. Prepare the Raspberry Puree
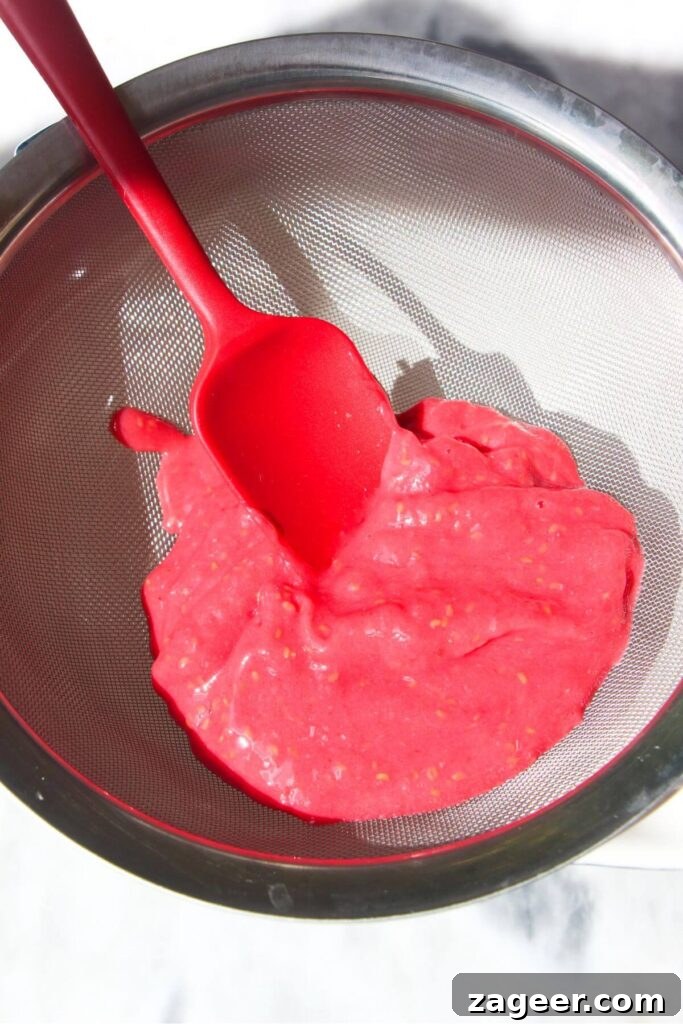
Begin by making your vibrant raspberry puree. Combine fresh or frozen raspberries in a food processor, chopper, or blender. Blitz until the mixture is super smooth. To achieve a perfectly silky puree free of seeds, pass it through a fine-mesh sieve, pressing firmly with a spoon or spatula. Set this beautiful pink puree aside while you prepare the meringue.
2. Whip the Egg Whites to Soft Peaks
Ensure your stand mixer bowl is impeccably clean and completely free of any grease (even a tiny speck can prevent the egg whites from whipping). Add your room-temperature egg whites to the bowl and fit the whisk attachment. Begin whisking on medium speed. Observe the egg whites as they transform: they will first become frothy, then gradually thicken into a white, opaque mixture. Continue whisking until soft peaks form. This stage is reached when you lift the whisk, and the peaks droop slightly, unable to hold their upright shape.
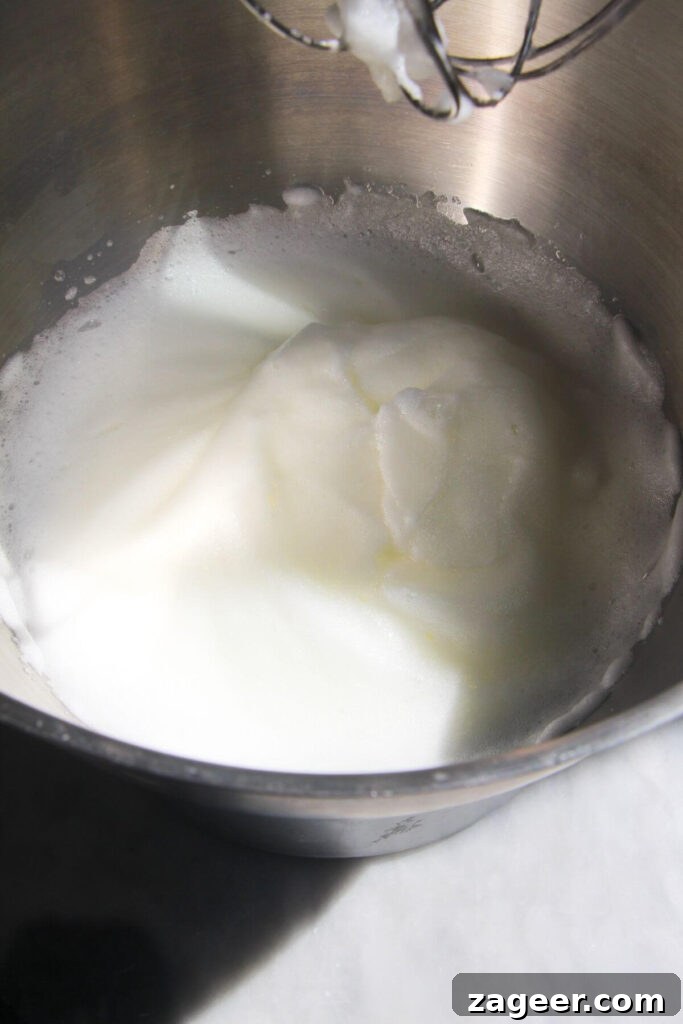
3. Incorporate Sugar and Stabilizers for Stiff Peaks
Once soft peaks are achieved, gradually begin adding your caster sugar, approximately 1 tablespoon at a time, while the mixer continues on medium speed. This slow addition allows the sugar to dissolve properly without deflating the egg whites. After all the sugar has been added, increase the mixer speed to high. Continue whisking the meringue for about 5 more minutes until it becomes incredibly thick, glossy, and reaches the stiff peak stage. You’ll know it’s ready when the meringue holds its shape firmly when you lift the whisk attachment, and if you rub a small amount between your fingers, you shouldn’t feel any granular sugar. Finally, add the cornflour (cornstarch) and vinegar, and whisk for another 30 seconds to fully incorporate them and boost stability. Then, stop your mixer.
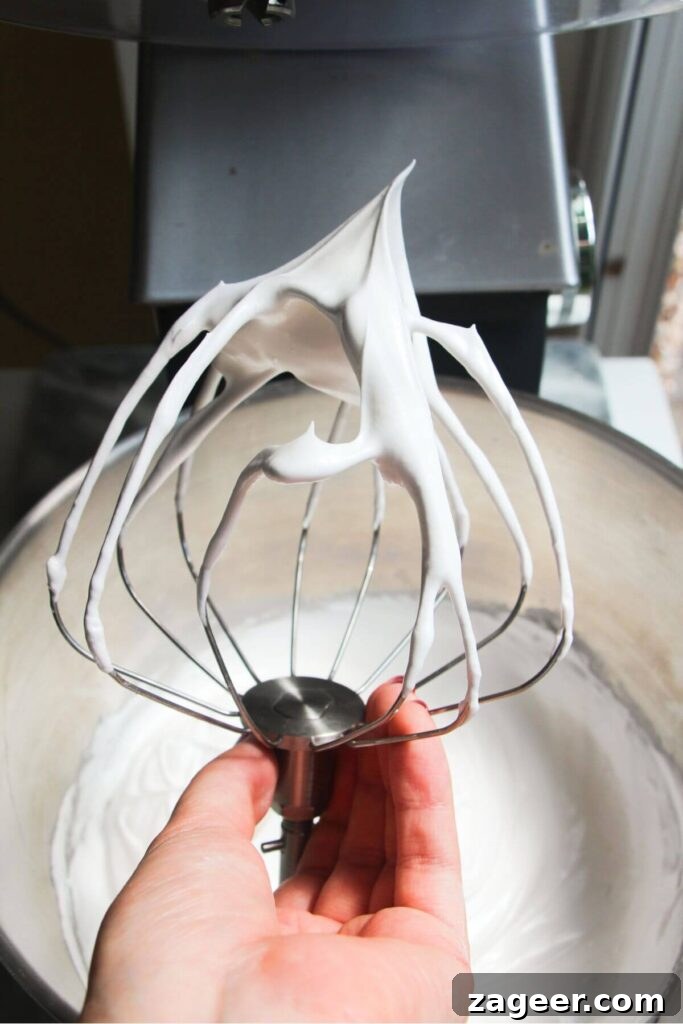
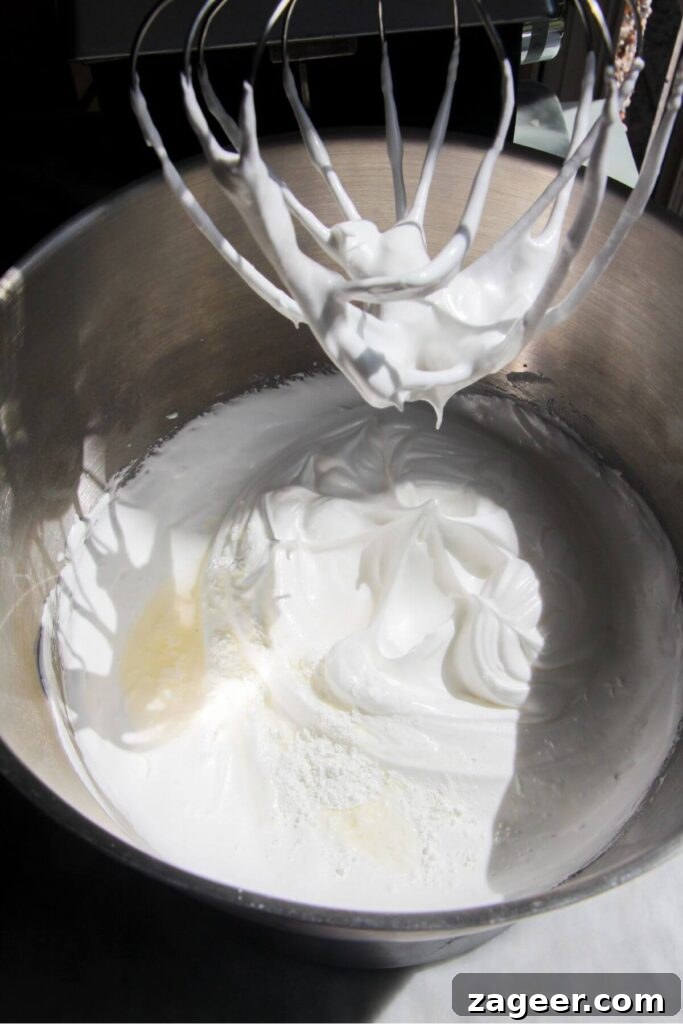
4. Form and Ripple the Mini Pavlovas
Line your baking trays with parchment paper. This recipe yields approximately 10 mini pavlovas, each around 6.5cm (2.5″) in diameter. You can draw small circles on the baking paper as a guide, or simply freehand them. Alternatively, use an upside-down jar or a cookie cutter to mark your circles. Spoon the meringue mixture onto the prepared trays, shaping them with a silicone spatula or the back of a spoon. Aim for a reasonable height; taller pavlovas create a more impressive presence and offer a more substantial marshmallowy center.
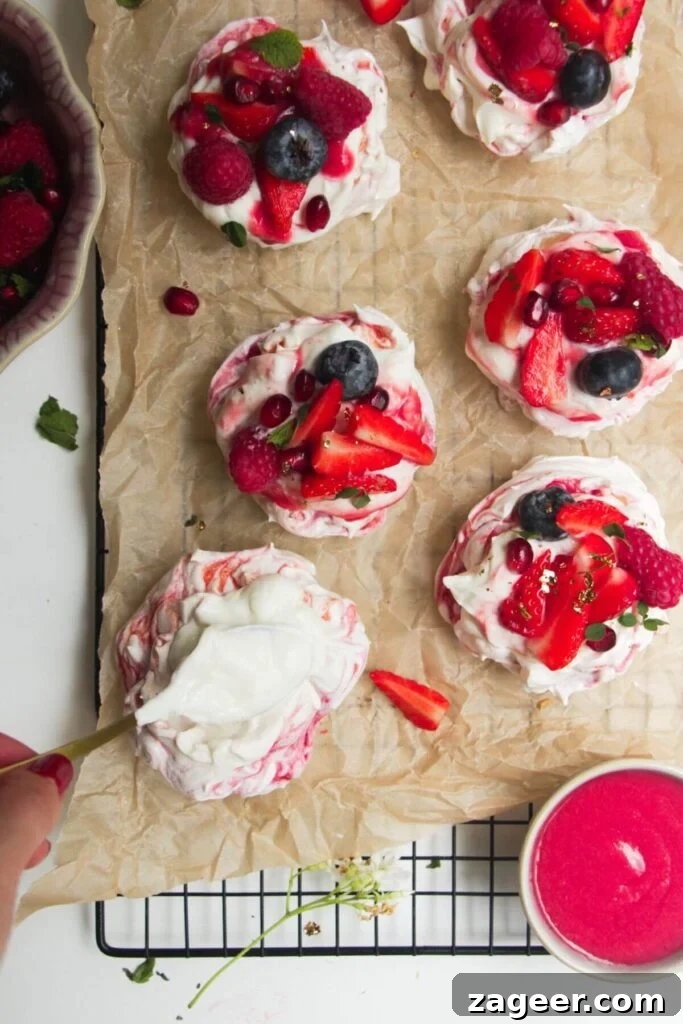
Now for the beautiful ripple effect: Drizzle about 1 teaspoon of your prepared raspberry puree over the top of each meringue. Using a skewer or toothpick, gently swirl the puree into the meringue, focusing on the top and sides. Be careful not to overmix, as aggressive swirling can deflate the meringue and lead to collapse during baking. Finally, use the back of a spoon to create a small, shallow crater on top of each pavlova; this will perfectly cradle your cheesecake filling later.
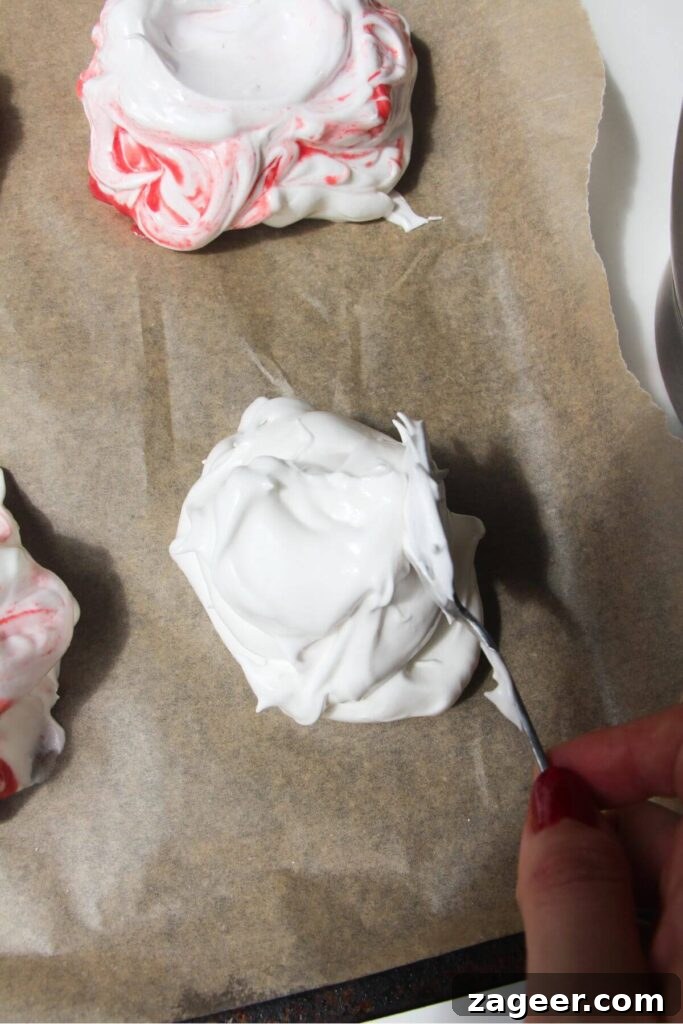
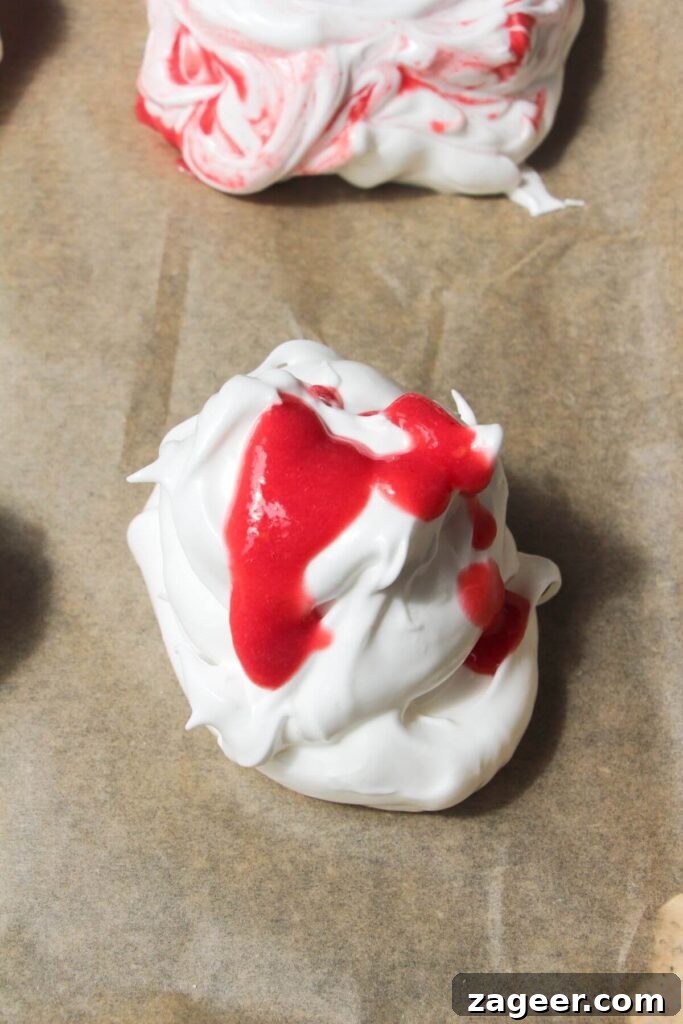
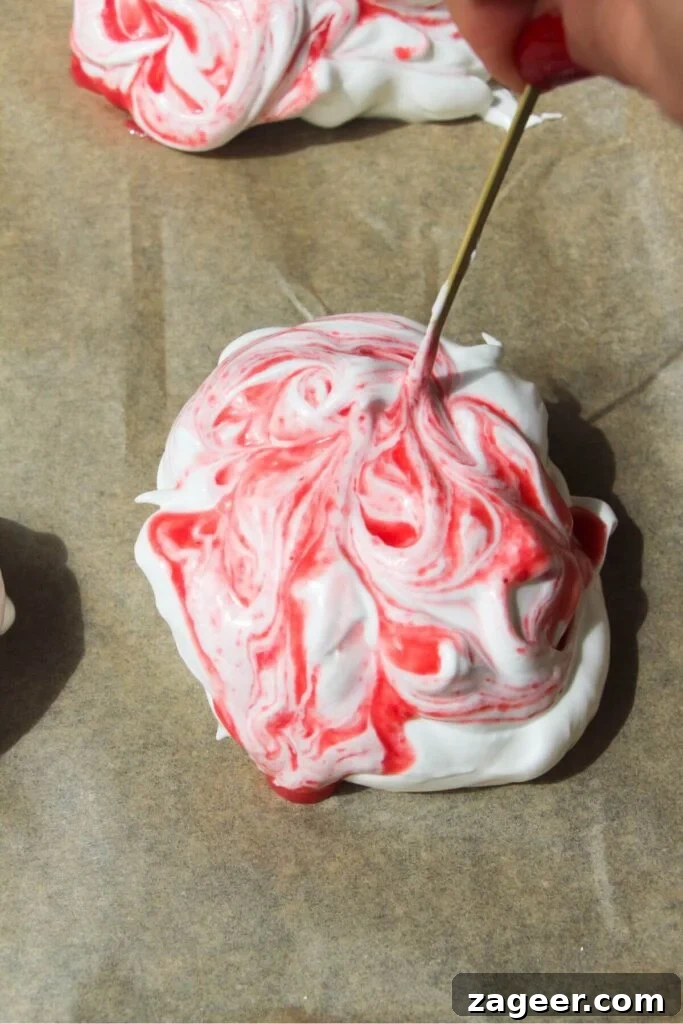
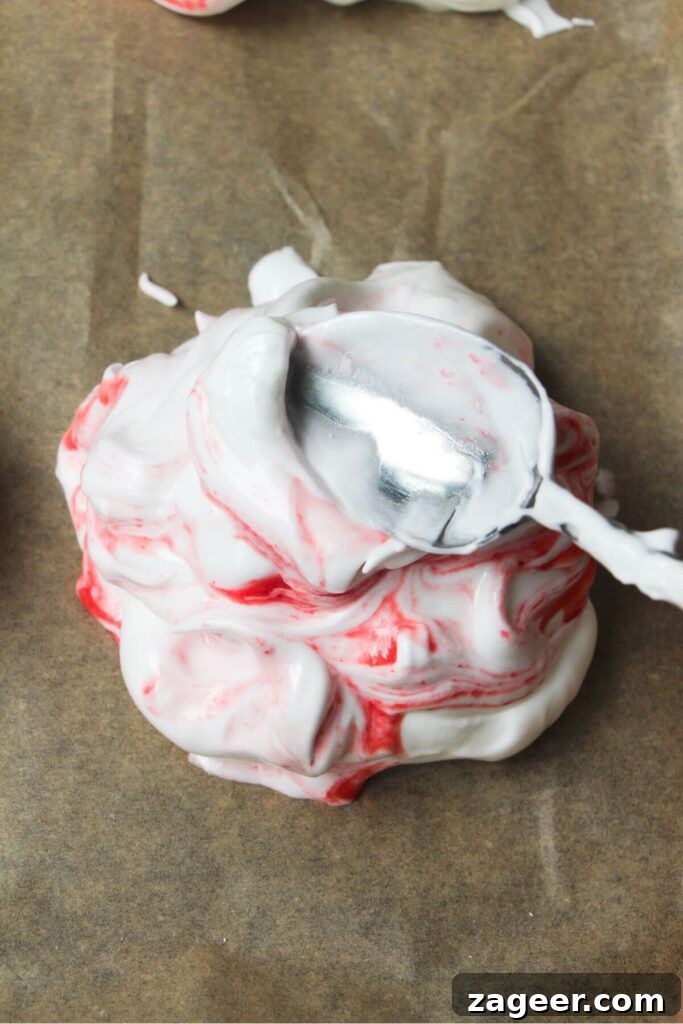
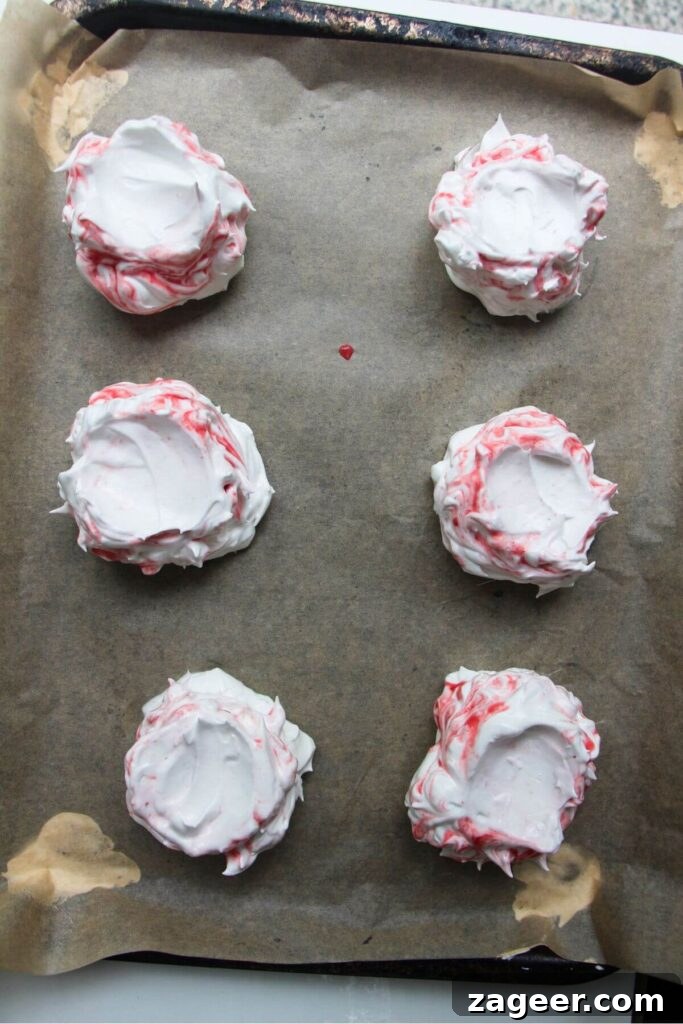
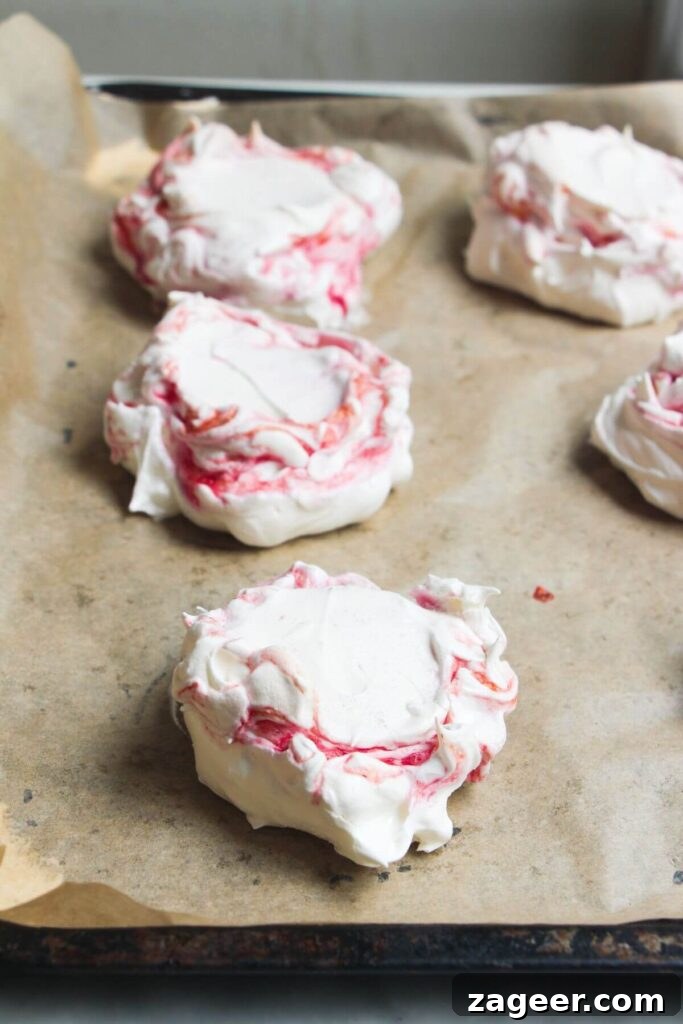
5. Bake Low and Slow, Then Cool Gradually
Transfer the trays into your oven. This is a crucial step for pavlova: you’ll actually **start by heating the oven to 150°C (300°F) and then immediately reduce the temperature to 90°C (195°F)** once the pavlovas are inside. This initial blast of higher heat helps the exterior crisp up quickly and prevents excessive spreading, while the subsequent low heat gently dries out the meringue. Pavlovas require a very low heat; they should essentially be dried out rather than baked, and they should not brown at all. Bake for 45 minutes to 1 hour, or until they are completely dry and firm to the touch. Oven temperatures can vary significantly, so if you know your oven runs hot or cold, adjust the cooking time accordingly. Check them after 45 minutes and continue baking in 10-minute intervals if they are still sticky.
Once dry, turn off the oven but **leave the pavlovas inside to cool completely**. This gradual cooling is essential to prevent cracking, a common issue with delicate meringues. Temperature shock from a hot oven to a cool room can cause them to contract and crack. But fear not if cracks appear! Pavlova is inherently a rustic dessert, and any imperfections can be easily hidden with your delicious toppings.
6. Prepare the Velvety Cheesecake Topping
While the pavlovas are baking and cooling, prepare the luscious cheesecake topping. In a small food processor or chopper, combine the room-temperature cream cheese, thick Greek yogurt (or labneh), icing sugar, a pinch of salt, and vanilla extract. Blitz until the mixture is super smooth and creamy. Alternatively, you can achieve this by hand by whisking vigorously in a small bowl until thick and consistent. Transfer the topping to a bowl and refrigerate until you are ready to assemble, allowing it to firm up slightly.
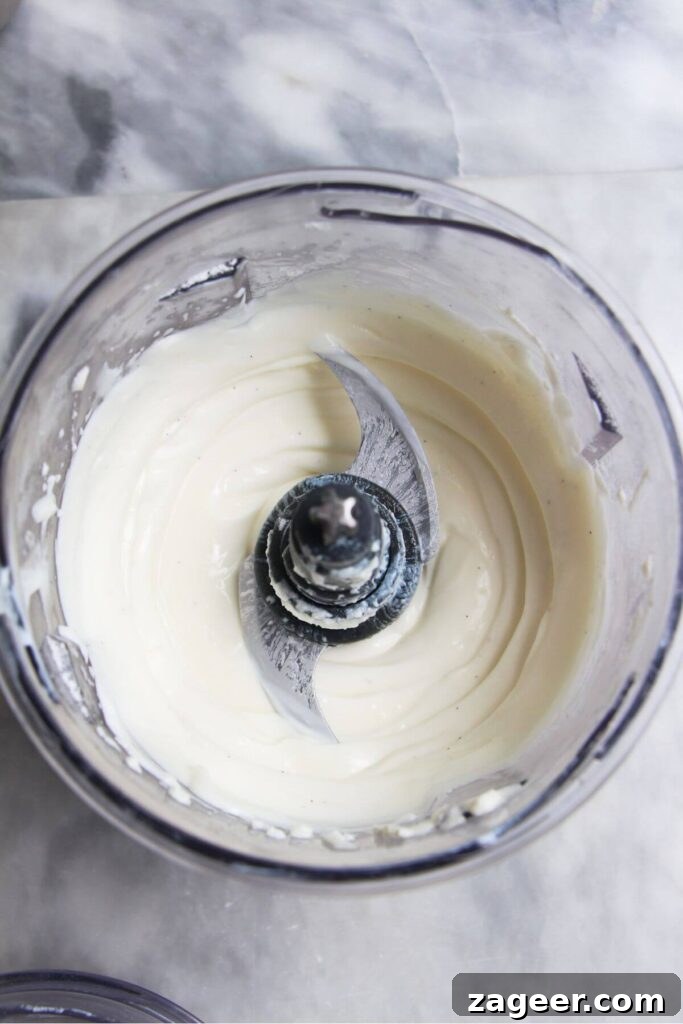
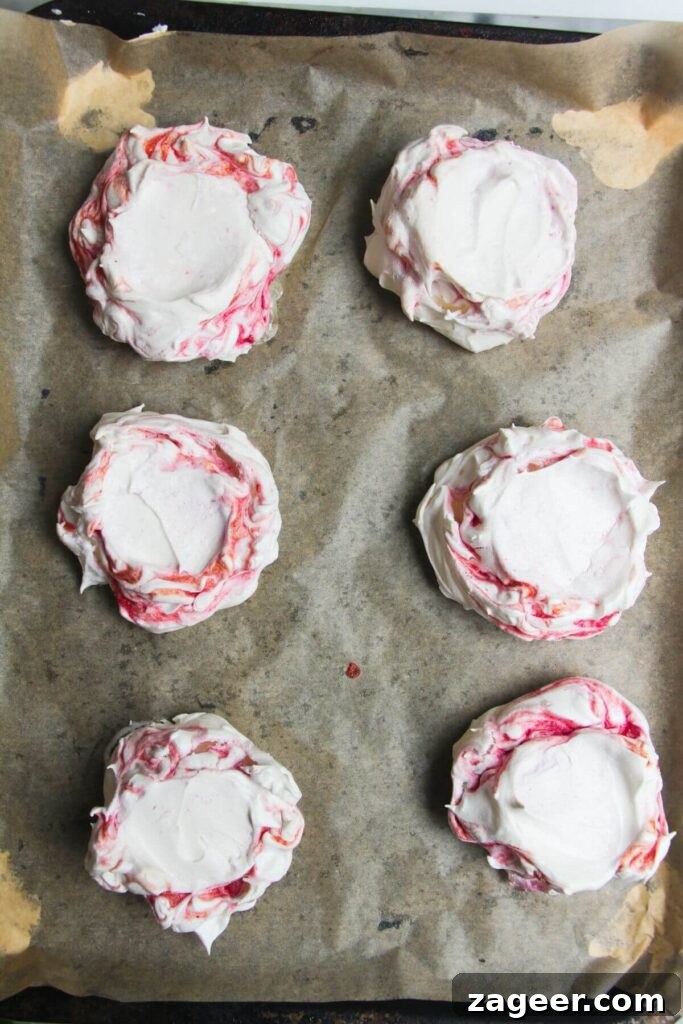
7. Assemble and Serve
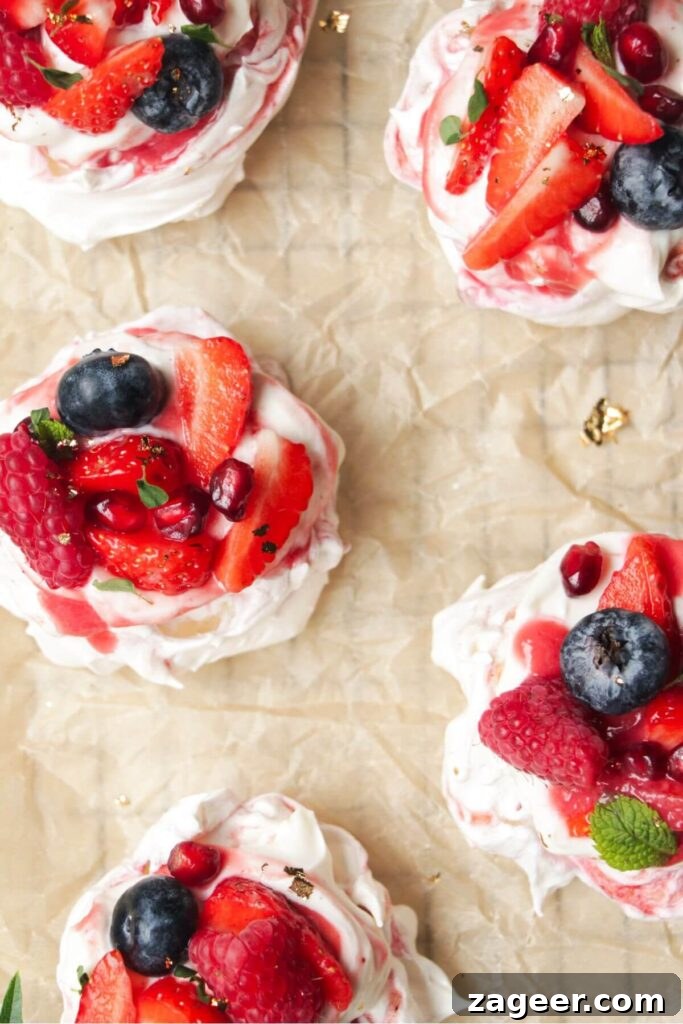
Timing is key for optimal enjoyment: only top the pavlovas just before serving. The delicate meringue shells will begin to soften under the moisture from the liquid toppings if left for too long. To assemble, spoon a generous heaped tablespoon of the chilled cheesecake mixture into the shallow crater you made on each pavlova. Drizzle an additional teaspoon of the leftover raspberry puree over the cheesecake topping, and gently swirl it in with your spoon for an extra artistic touch. Finally, scatter your chosen mixed berries over the top for a burst of color and freshness. For an extra pop of vibrant green and a hint of herbaceous flavor, consider adding a few thinly sliced mint or basil leaves. Serve immediately and delight in your creation!
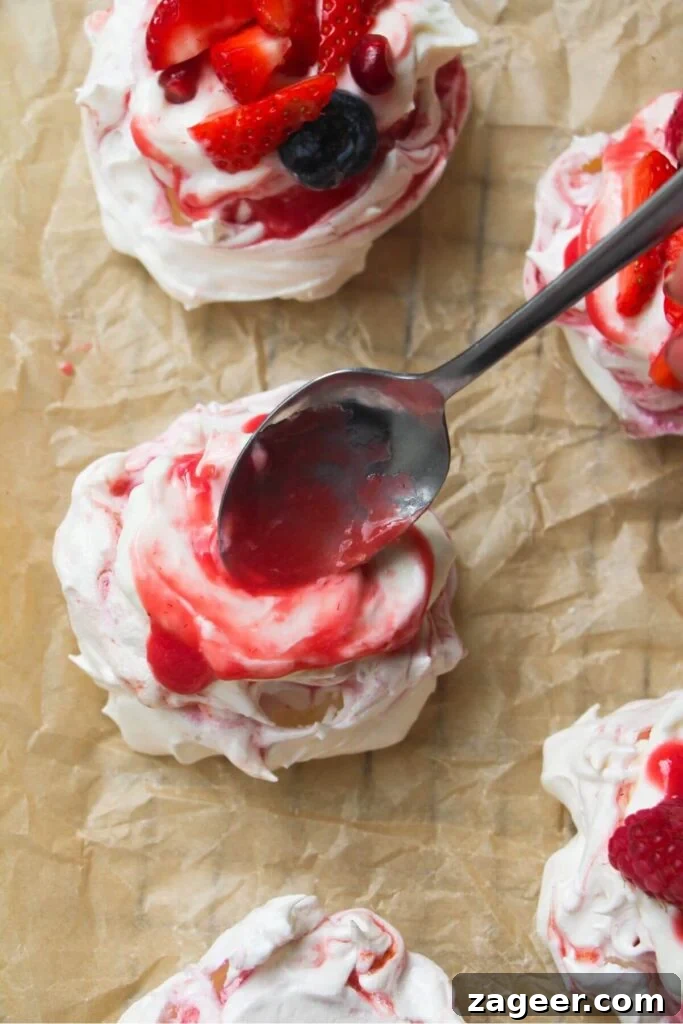
Troubleshooting Your Pavlova: Common Issues and Expert Solutions
Despite its seemingly simple ingredients, pavlova can sometimes be a finicky dessert due due to its delicate nature. Even minor oversight can impact the final result. Here’s a breakdown of common problems and how to confidently solve them:
- Weeping Sugar / Liquid at the Bottom: This can occur for a couple of reasons.
- Undissolved Sugar: If the caster sugar wasn’t fully dissolved and incorporated into the meringue mixture before baking, it won’t properly meld with the egg whites. During cooking or cooling, this undissolved sugar can draw moisture and “weep” out as a syrupy liquid. Ensure you whisk thoroughly until no sugar grains are detectable between your fingers.
- High Humidity: High humidity environments cause the sugar in the meringue to absorb moisture from the air. The meringue struggles to hold this excess water, leading to weeping. If you live in a humid climate, consider baking your pavlovas in the evening and allowing them to cool overnight in the turned-off oven. This extended, dry cooling period helps minimize moisture absorption.
- Overwhipped Egg Whites: Over-whipping the egg whites can damage their protein structure, making them less capable of holding the sugar and moisture, leading to weepage. Stick to whisking until just stiff peaks are formed, then stop.
- Cracks or Collapsed Pavlovas: Several factors can contribute to these structural issues.
- Too High a Baking Temperature: Pavlova requires a “low and slow” baking approach. If the oven is too hot, the exterior shell expands and crisps too rapidly, pulling away from the soft marshmallow interior. This sudden stress causes the pavlova to crack and often collapse as it cools. Always start with the higher temperature flash, then immediately reduce to a low heat.
- Rapid Cooling: Removing pavlovas from the oven too quickly subjects them to a drastic temperature shock. This abrupt change can cause the fragile structure to contract and crack or collapse. Always allow them to cool slowly and completely within the turned-off oven.
- Overwhipped Egg Whites: Similar to weeping, over-whipping can weaken the meringue’s overall structure, making it prone to cracking and collapsing.
- Overmixing Raspberry Puree (in this recipe): When swirling the raspberry puree into the meringue, it’s crucial to be gentle. Vigorous mixing can deflate the delicate meringue, making it more susceptible to collapse during baking. Aim for a light, artistic swirl.
- Browned Pavlova: If your pavlovas are turning brown, it’s a clear indication that your oven is too hot. Pavlovas are meant to be a pristine white with possibly a faint cream tint.
- Oven Temperature Discrepancy: Oven thermostats can be inaccurate. It’s highly recommended to invest in an oven thermometer to verify your oven’s true temperature and adjust accordingly.
- Reduce Temperature: If browning occurs, immediately reduce your oven temperature. You can also slightly open the oven door for a minute to release some heat, then close it again.
While these issues might sound intimidating, please don’t be deterred! Pavlova is forgiving. Even if your pavlovas experience some weeping, cracking, slight collapse, or a touch of browning, they will still taste absolutely delicious. Remember, part of pavlova’s charm is its rustic nature. If all else fails, simply crush them up and transform them into delightful deconstructed pavlova desserts in individual glasses!
Video Tutorial: See How It’s Done!
A video demonstration for making these Mini Berry Ripple Cheesecake Pavlovas would typically be embedded here. Please refer to the full recipe page for the accompanying visual guide.

Mini pavlovas are a beautiful dessert option for any celebration. These cute mini versions of the classic are swirled with berry puree before baking, then dolloped with a velvety cheesecake topping for an elevated twist on regular whipped cream. Top with your favourite mixed berries for the ultimate crowd-pleasing dessert that’s easier to make than you’d think.
Five Creative Topping Ideas for Your Mini Pavlovas
While the berry ripple cheesecake topping is phenomenal, pavlovas are incredibly versatile! Here are five more inspiring ideas to dress up your mini meringue creations:
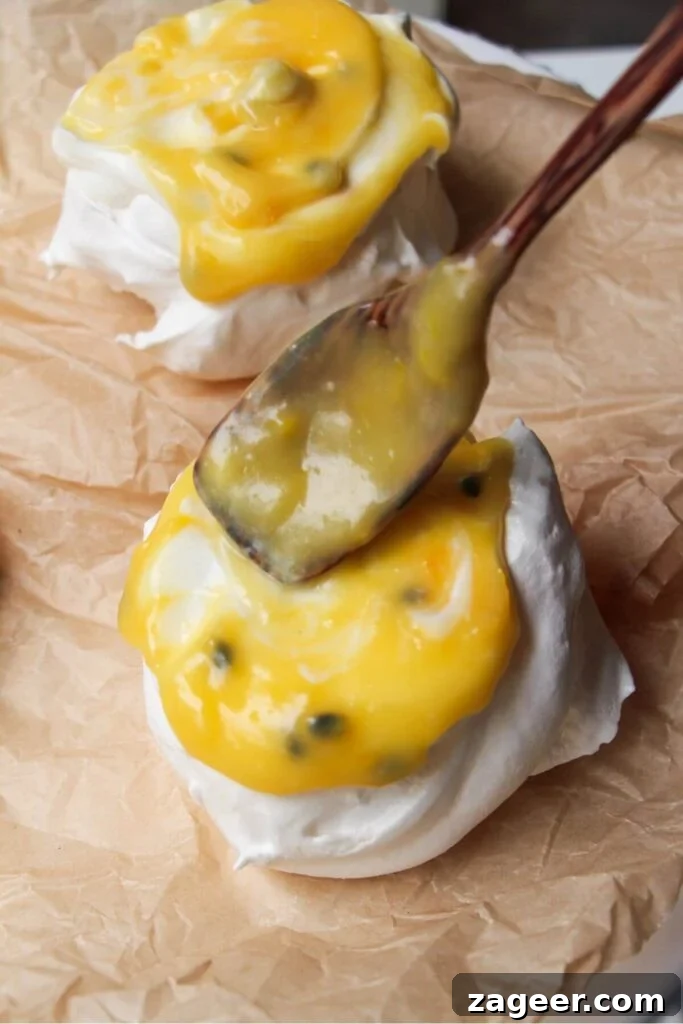
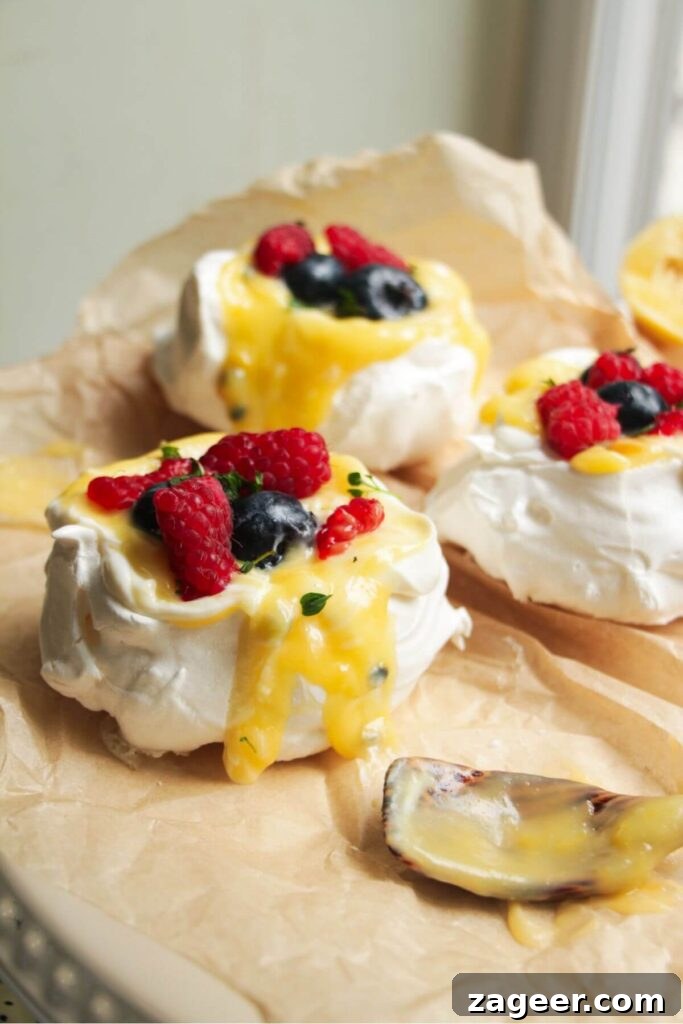
- Lemon and Passionfruit Curd: For a burst of bright, tangy flavor, use the same creamy cheesecake yogurt mixture as the base, or opt for extra thick labneh. Then, dollop generously with a vibrant, zingy lemon or passionfruit curd. A sprinkle of toasted coconut flakes would complement this beautifully.
- Dark Chocolate and Hazelnut: Indulge your sweet tooth with a Nutella-inspired makeover. Swirl a rich dollop of Nutella through freshly whipped cream, then top with crunchy chopped dark chocolate and perfectly roasted hazelnuts. A drizzle of chocolate sauce takes this to another level.
- Pistachio, Raspberry, and Rose: Embrace elegant Middle-Eastern flavors. The delicate sweetness of rose pairs exquisitely with the tartness of fresh raspberries and the nutty crunch of pistachios. Garnish with vibrant crystallized rose petals and a tiny, fragrant drizzle of rosewater for an truly aromatic experience.
- Black Forest Delight: Transform your pavlovas into a classic Black Forest gateau. Crown them with plump Morello cherries (fresh or preserved), chocolate-swirled whipped cream, and delicate chocolate shavings. This rich combination is a guaranteed crowd-pleaser for chocolate lovers.
- Classic Whipped Cream and Seasonal Fruit: Sometimes, simplicity is perfection. The timeless combination of fluffy, lightly sweetened whipped cream and an abundance of fresh, seasonal fruit remains incredibly popular. It’s a beautiful way to highlight the freshest produce of any season, from summer berries to autumnal figs.
Frequently Asked Questions About Pavlova
Absolutely! Pavlovas are actually quite suitable for preparation in advance. You can even bake them, turn off the oven, and leave them inside overnight to cool slowly and completely. Once fully cooled, transfer them carefully to an airtight container and store in a cool, dark place. They will keep for 2-3 days, but for the very best crispy shell and fluffy interior, it’s advisable to serve them sooner rather than later, as the marshmallow center can begin to compress slightly over time. Remember, once you’ve added liquid toppings, pavlovas should be consumed immediately, as the moisture will cause the crisp meringue to soften.
The addition of cornstarch (cornflour) and vinegar is a classic technique to help stabilize the meringue structure. These ingredients work together to create a more resilient pavlova, making it less prone to cracking or collapsing during baking and cooling. The acidity of the vinegar helps to strengthen the egg white proteins, while the cornstarch contributes to the signature chewy, marshmallow-like interior. Despite the vinegar, rest assured that your pavlovas will not taste vinegary at all; the flavor evaporates during baking, leaving behind only the desired texture benefits.
For the best pavlova, always opt for fresh eggs. Fresher egg whites have a stronger, more intact protein structure, which allows them to whip up to a much greater volume and stability. Older eggs tend to have more liquidy whites that don’t hold air as effectively, resulting in a less voluminous and potentially weaker meringue. Room temperature fresh eggs are the ideal combination for achieving a perfect pavlova.
Explore More Sweet Treats from Our Kitchen!
If you’ve enjoyed crafting these delightful mini pavlovas, you might also love exploring other tempting sweet recipes. Here are a few recommendations to satisfy your craving for delicious homemade desserts:
If you try this recipe, I would love to hear your thoughts! Please leave me a comment below.

Mini Berry Ripple Cheesecake Pavlovas
Rating: 5 out of 5 stars from 1 review
- Author: Kate Alexandra
- Total Time: 1 hour 30 minutes
- Yield: 10 pavlovas
- Diet: Vegetarian
Description
Mini pavlovas are a beautiful dessert option for any celebration. These cute mini versions of the classic are swirled with berry puree before baking, then dolloped with a velvety cheesecake topping for an elevated twist on regular whipped cream. Top with your favourite mixed berries for the ultimate crowd-pleasing dessert that’s easier to make than you’d think.
Ingredients
For the Mini Pavlovas:
- 4 egg whites, at room temperature
- 200g (1 cup) caster sugar
- 1 teaspoon cornflour (cornstarch)
- 1 teaspoon white vinegar (or apple cider vinegar, lemon juice or 1/2 teaspoon of cream of tartar)
For the Berry Puree:
- 200g (7oz) frozen (or fresh) raspberries
For the Cheesecake Topping:
- ½ cup cream cheese, at room temperature
- ½ cup labneh (or thick Greek yogurt)
- 2 tablespoons icing sugar (powdered sugar)
- ½ teaspoon salt
- 1 teaspoon vanilla extract
- ½ cup strawberries, sliced into quarters
- ¼ cup raspberries
- ½ cup blueberries
- ¼ cup pomegranate seeds
Instructions
- Prepare your oven and baking trays. Heat your oven to 150°C (300°F). Line a large oven tray with baking paper. PRO TIP: Use a tiny dab of meringue mixture on the underside corners of your baking paper to secure it to the tray.
- Make the berry puree. Add the raspberries to a small food chopper, food processor, or blender, and blitz until super smooth. Pass the puree through a sieve set over a small bowl to remove seeds, leaving a lovely pink puree. Set aside.
- Make the meringue mixture. Add 4 egg whites to a very clean bowl of your stand mixer, fitted with the whisk attachment. Whisk on medium speed for 5-6 minutes until soft peaks form. With the mixer still on medium, gradually add the caster sugar, 1 tablespoon at a time. Once all sugar is added, turn the mixer to high and continue whisking for another 5 minutes, until the meringue is fluffy, glossy, and no sugar grains remain when rubbed between your fingers. Add 1 teaspoon of vinegar and 1 teaspoon of cornflour, then whisk for another 30 seconds. The meringue should be super thick, glossy, and approximately tripled in size.
- Form your mini pavlovas. Roughly mark 6.5cm (2.5″) circles on your baking paper as a guide (this mixture makes 10 pavlovas). Use a silicone spatula to dollop the meringue onto the lined trays, shaping it into high mounds and creating swirls. Drizzle 1 teaspoon of berry puree around the top of each pavlova, then gently swirl with a toothpick or skewer – avoid overmixing to prevent collapse. Use the back of a spoon to create a small, shallow crater on top for the filling.
- Bake the pavlovas. Transfer trays to the oven, then immediately reduce the temperature to 90°C (195°F) fan. Bake for 45 minutes to 1 hour, or until dry to the touch. Pavlovas should not brown. If browning occurs, lower the oven temperature. Once dry, turn off the oven and let the pavlovas cool completely inside the oven to prevent cracking.
- Make the cheesecake topping. In a small food processor or chopper, combine 1/2 cup cream cheese, 1/2 cup labneh (or thick Greek yogurt), 2 tablespoons icing sugar, 1/2 teaspoon salt, and 1 teaspoon vanilla extract. Blitz until super smooth and creamy. Transfer to a bowl and refrigerate until ready to top. (Alternatively, mix vigorously by hand until thick and creamy.)
- Top your pavlovas and serve. Once pavlovas are completely cool and you’re ready to serve, dollop the cheesecake cream into the craters. Drizzle a teaspoon of leftover berry puree over the cream and gently swirl. Finish with the mixed berries on top. Serve immediately, as the toppings will soften the pavlovas over time.
Notes
STORAGE INSTRUCTIONS: Baked, untopped pavlovas can be stored in an airtight container in a cool, dark place for 2-3 days, though they are best enjoyed sooner for optimal texture. The cheesecake topping and raspberry puree can be made ahead and stored separately in the fridge for up to 1 week.
INGREDIENT NOTES: Using fine caster sugar is crucial for a non-grainy, stable meringue; if you only have granulated sugar, pulse it in a food processor until fine. Cornflour and vinegar are essential stabilizers and will not impart any unwanted flavors. Ensure egg whites are at room temperature and free of any yolk for best whipping results.
TOPPING VARIATIONS: Get creative with your toppings! Stone fruits, defrosted frozen berries (which create a lovely compote), or any of the five ideas mentioned above can be used.
WANT A LARGE PAVLOVA? For a traditional large pavlova, follow the meringue recipe, but spoon the entire mixture into one large circle (approx. 20-25cm / 8-10 inches diameter) on your baking tray. Bake for 90 minutes at 90°C (195°F), or until dry to the touch, following the initial 150°C (300°F) oven preheat and reduction method.
- Prep Time: 30 minutes
- Cook Time: 60 minutes
- Category: Desserts
- Method: Oven
- Cuisine: New Zealand
Nutrition
- Serving Size: 1 pavlova