Quick, Fluffy Bao Buns – in Under an Hour
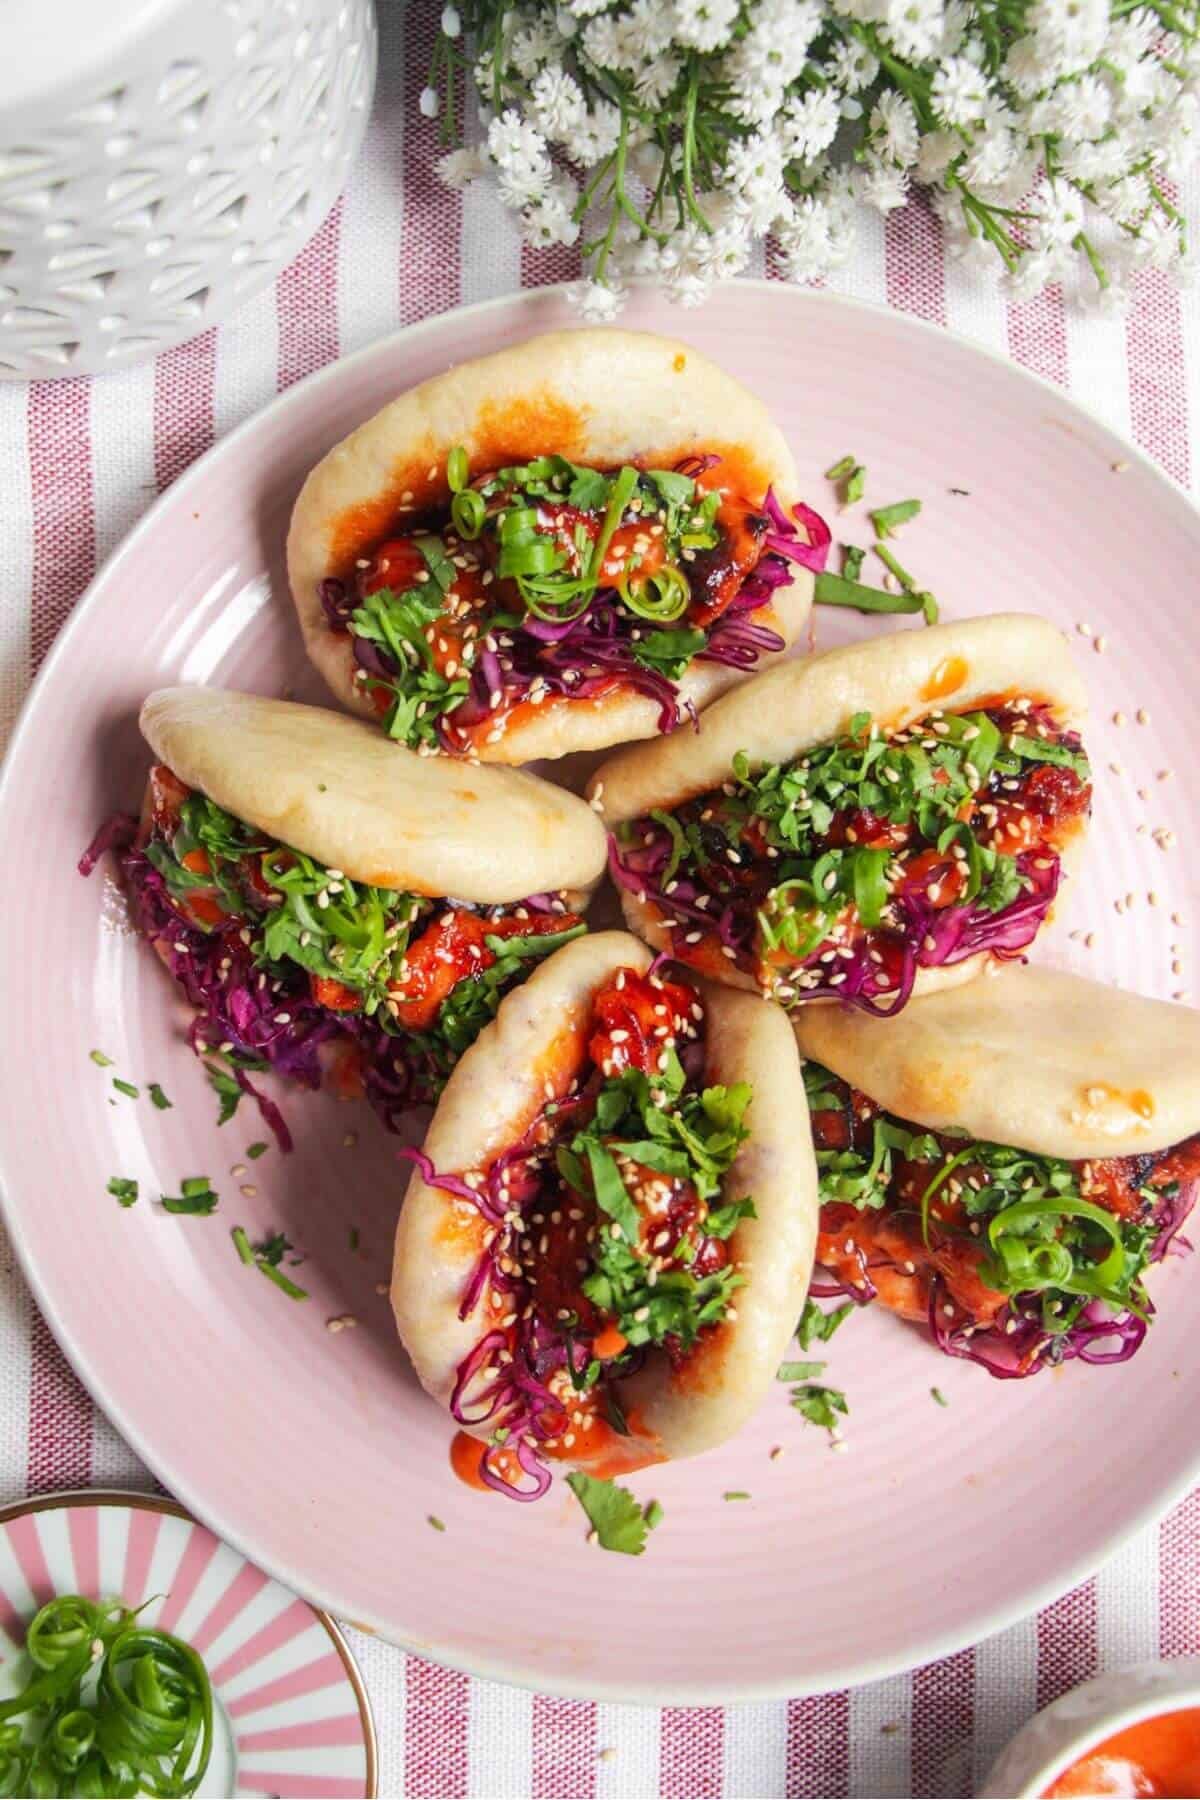
Make soft, fluffy bao buns at home in under an hour. Unlike traditional recipes that need hours to rise, this dough uses yeast and baking powder to speed things up without sacrificing that signature pillowy texture. Perfect stuffed with your favorite fillings for a better-than-takeout night in.
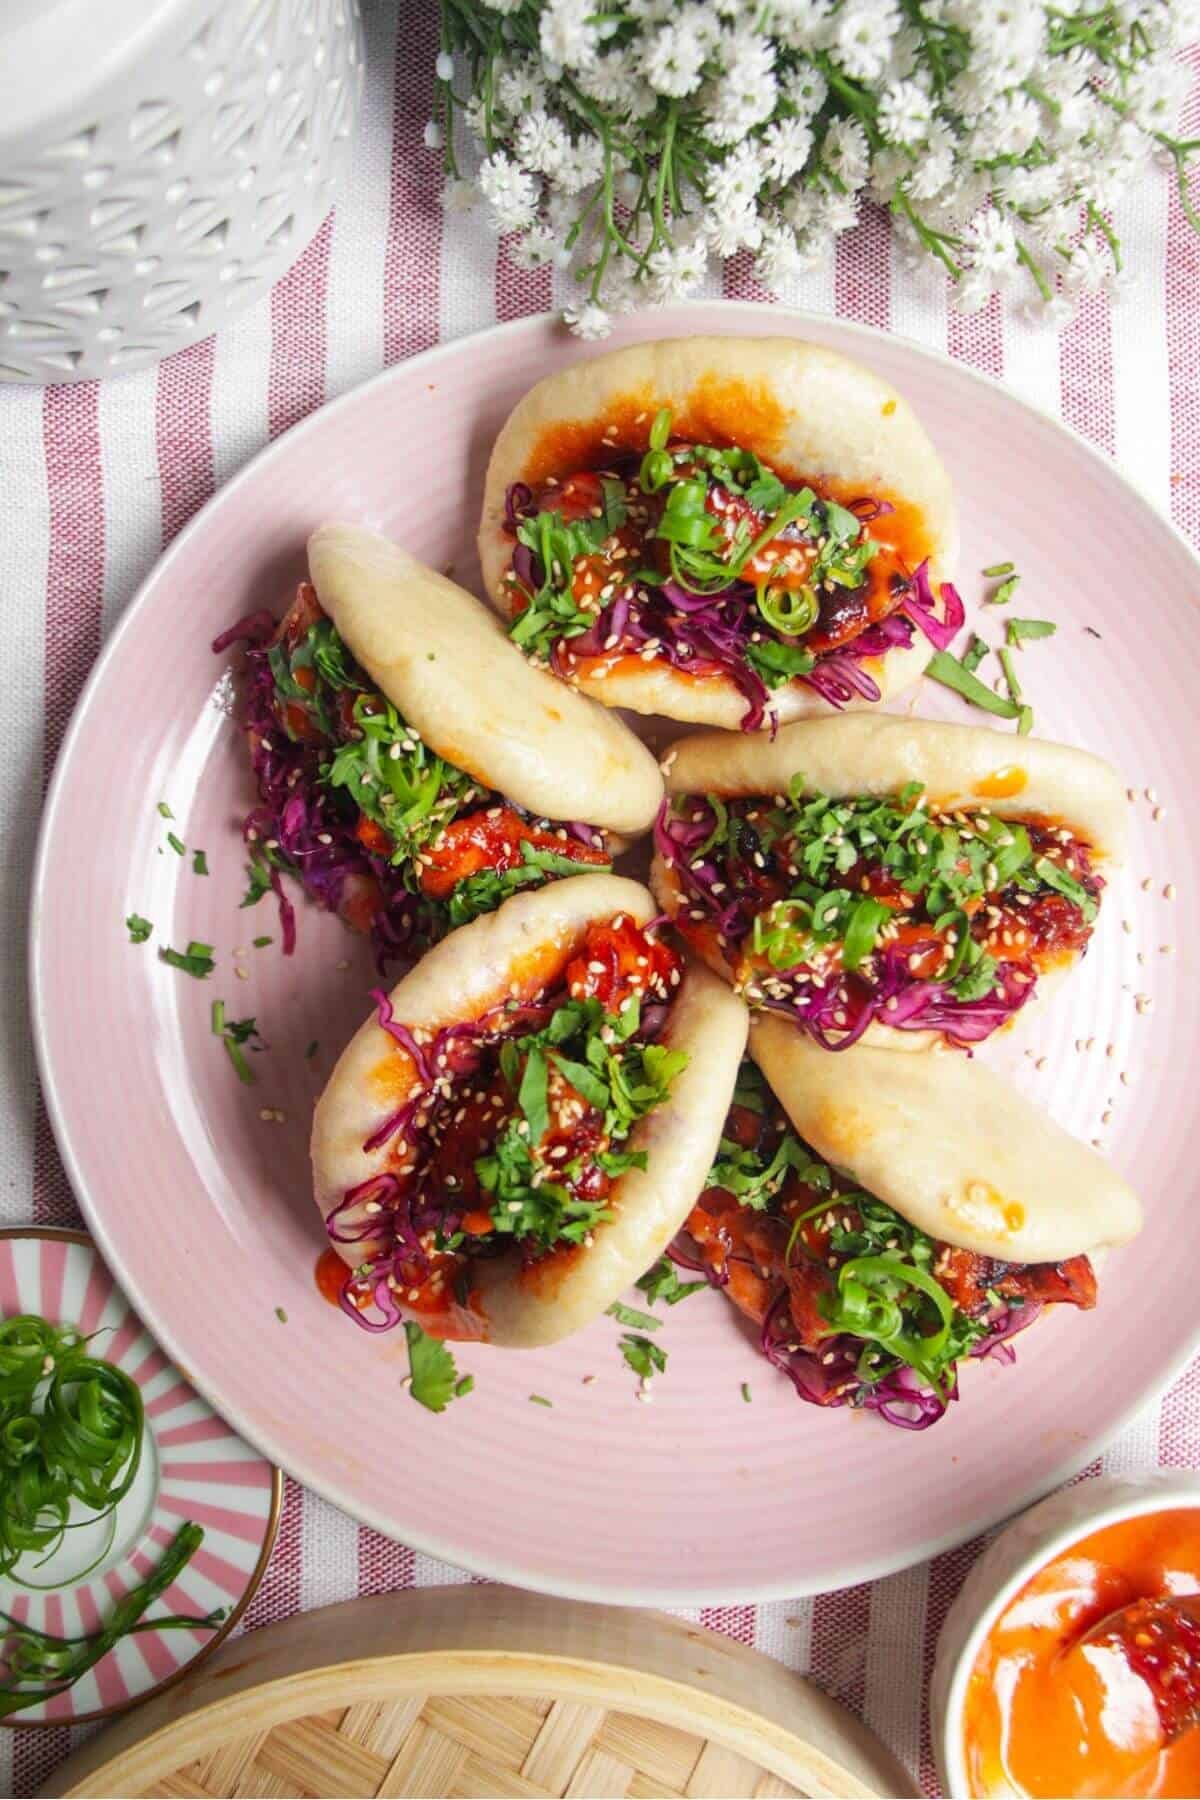
Fluffy Steamed Bao Buns, at a Glance
⏰Time: 60 minutes
🍽️Makes: 12 bao buns
🛒 Key Ingredients: All-purpose flour, baking powder, instant yeast
🧠 Skill Level: Beginner-friendly
👩🍳 Cooking Method: Steamed
🍳 Equipment Needed: Mixing bowl, bamboo steamer, or regular pot steamer (or a DIY hack)
💃 Perfect For: A better-than-takeout night in, date nights, dinner parties, and general entertaining.
Why I Love Making Bao Buns at Home
I don’t know what it is about bao buns, but I can never stop at just one! Soft, fluffy, and pillowy, they’re somewhere between a burger and a taco, making them the ultimate better-than-takeout treat.
While you can easily find frozen bao buns in the grocery store back home in New Zealand, I haven’t had the same luck overseas. But the good news is that homemade ones taste so much better. Plus, this version skips the overly sweet dough you sometimes get with frozen buns, while still delivering that gorgeously light, airy texture.
I’m filling mine in the recipe below with grilled Korean-style chicken (similar to this miso grilled chicken or sticky gochujang chicken) and crunchy slaw, but there are SO many options you could go for. Crispy fried chicken, sticky pulled pork, crispy pork belly, miso aubergine or pulled mushrooms…they all work. It’s also a fab way to use up any leftovers 👀

Why These Bao Buns Work
- Quicker to make than traditional bao. Baking powder combined with yeast supercharges the buns and means you can have them ready within an hour, cutting your prep time in half.
- Easy to prep ahead. The buns freeze PERFECTLY. I’ll often make a big batch, then freeze them to pull out for easy meals. Freeze them after you’ve steamed them, and then you can steam them straight from frozen.
- Perfect party or game day food. I made these (stuffed with Korean fried chicken) for a garden party for 40 people(!), and they went down a storm. Use the freezer trick to help you get ahead, then fill them and serve when you’re ready.
- Great way to use up leftovers. While you can make your filling from scratch, you can get creative and use whatever you have on hand. Leftover herby roast chicken or a rotisserie chicken would be lovely, and you could even stuff them with a hearty salad, like this butternut squash salad, for a vegetarian option.
“Surprisingly easy and absolutely delicious! I steamed them in my regular steamer and they turned out perfect. We had them stuffed with Korean fried chicken and slaw…and my husband commented that there’s really no point going out to restaurants 😂”
– Magda
Read More ReviewsIngredients You’ll Need
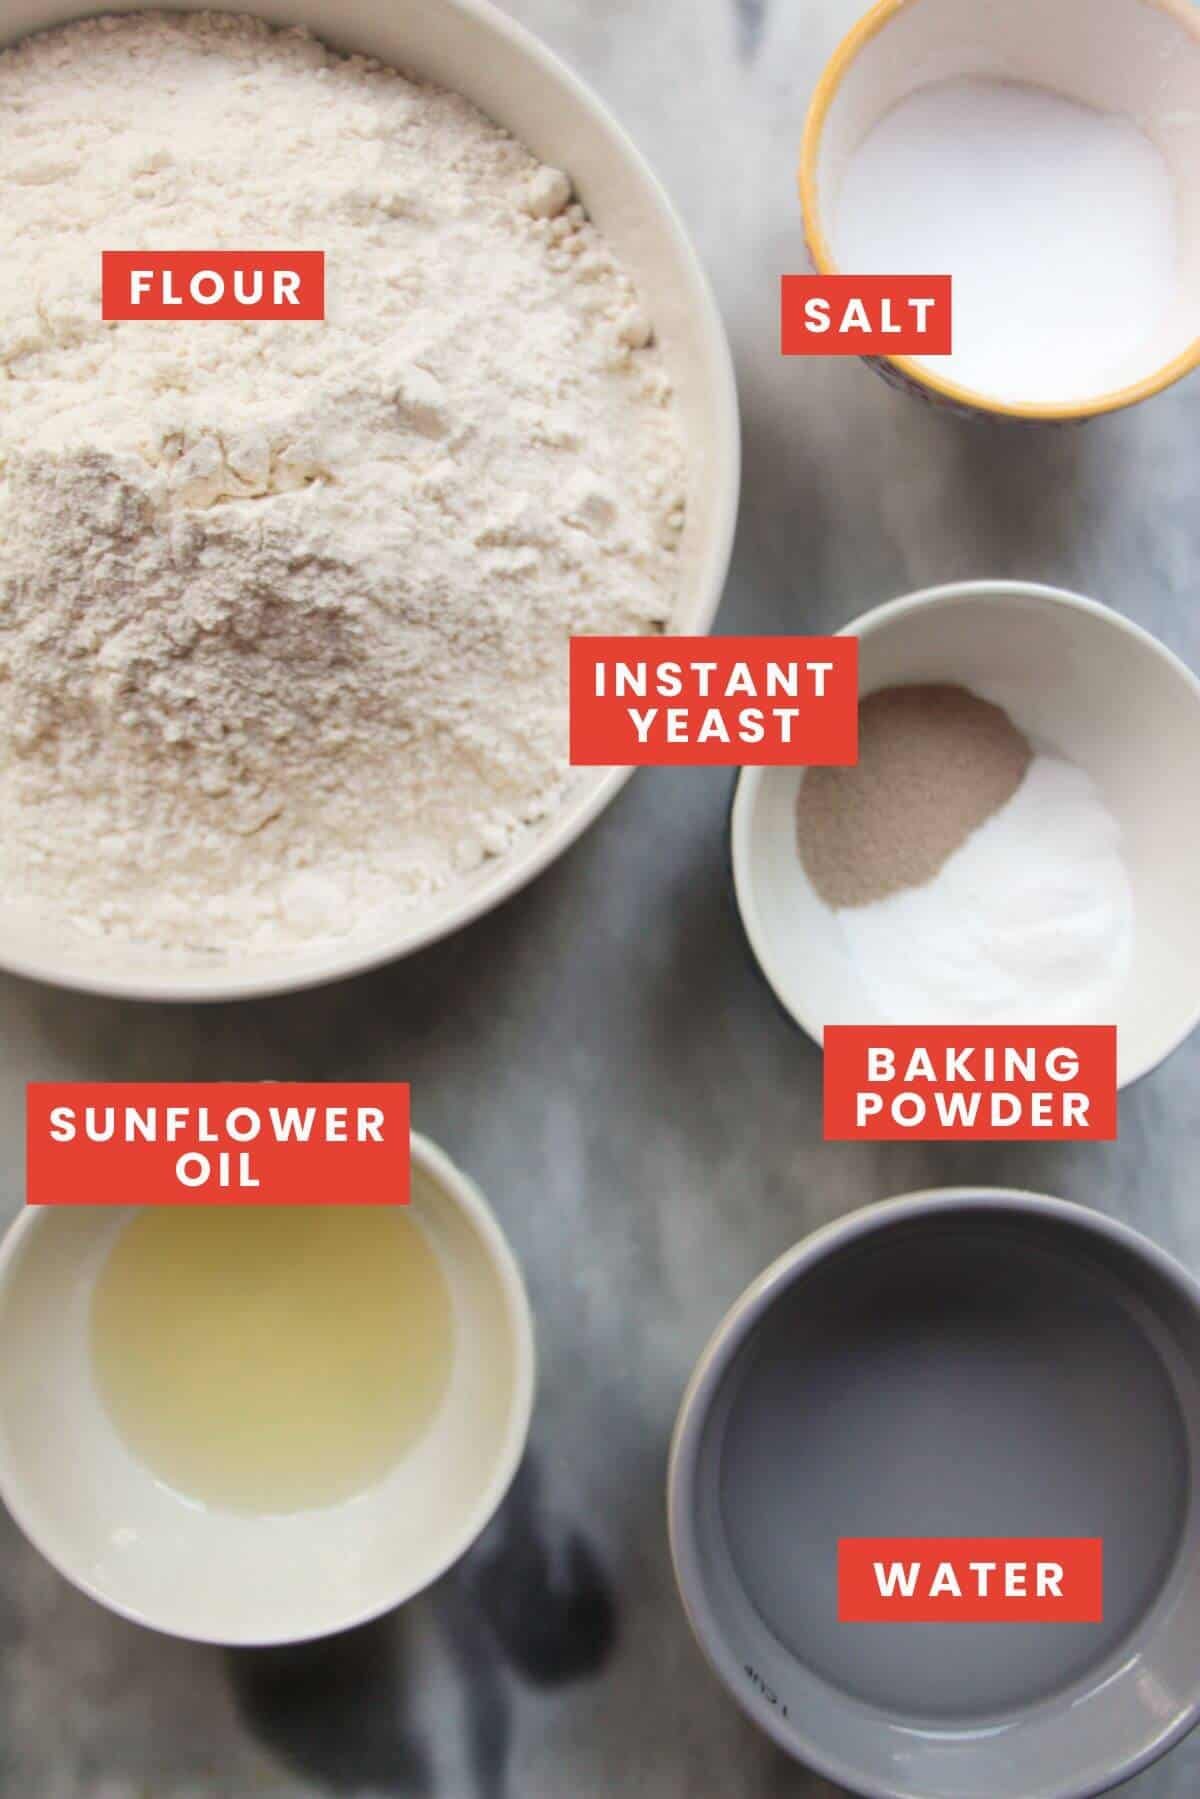
- All-purpose (plain) flour. You can use bleached bao flour if you can find it in an Asian grocery store – this will give your bao that classic bright white look. All-purpose flour is much easier to find, so it’s what I use. You could also use self-raising flour (flour that already has baking powder added) and skip the baking powder.
- Baking powder. This recipe uses baking powder to help the buns rise quickly, meaning you can skip the first rise of the dough and shape the bao right after mixing and kneading.
- Instant yeast. I’m using the kind of yeast you can add directly to your dry ingredients, but if you can only find active yeast (the granules are normally bigger), you’ll need to dissolve the yeast in a little water first. Don’t skip this step, or your bao won’t rise, and you’ll have little grainy pieces of yeast throughout.
- Salt. It’s not traditional, but I can’t make anything bread-related without a little salt for flavor.
How to Make Your Bao Buns
This is a step-by-step photo overview of how to make the buns – the full, detailed recipe with ingredient quantities is at the bottom of the page for you.
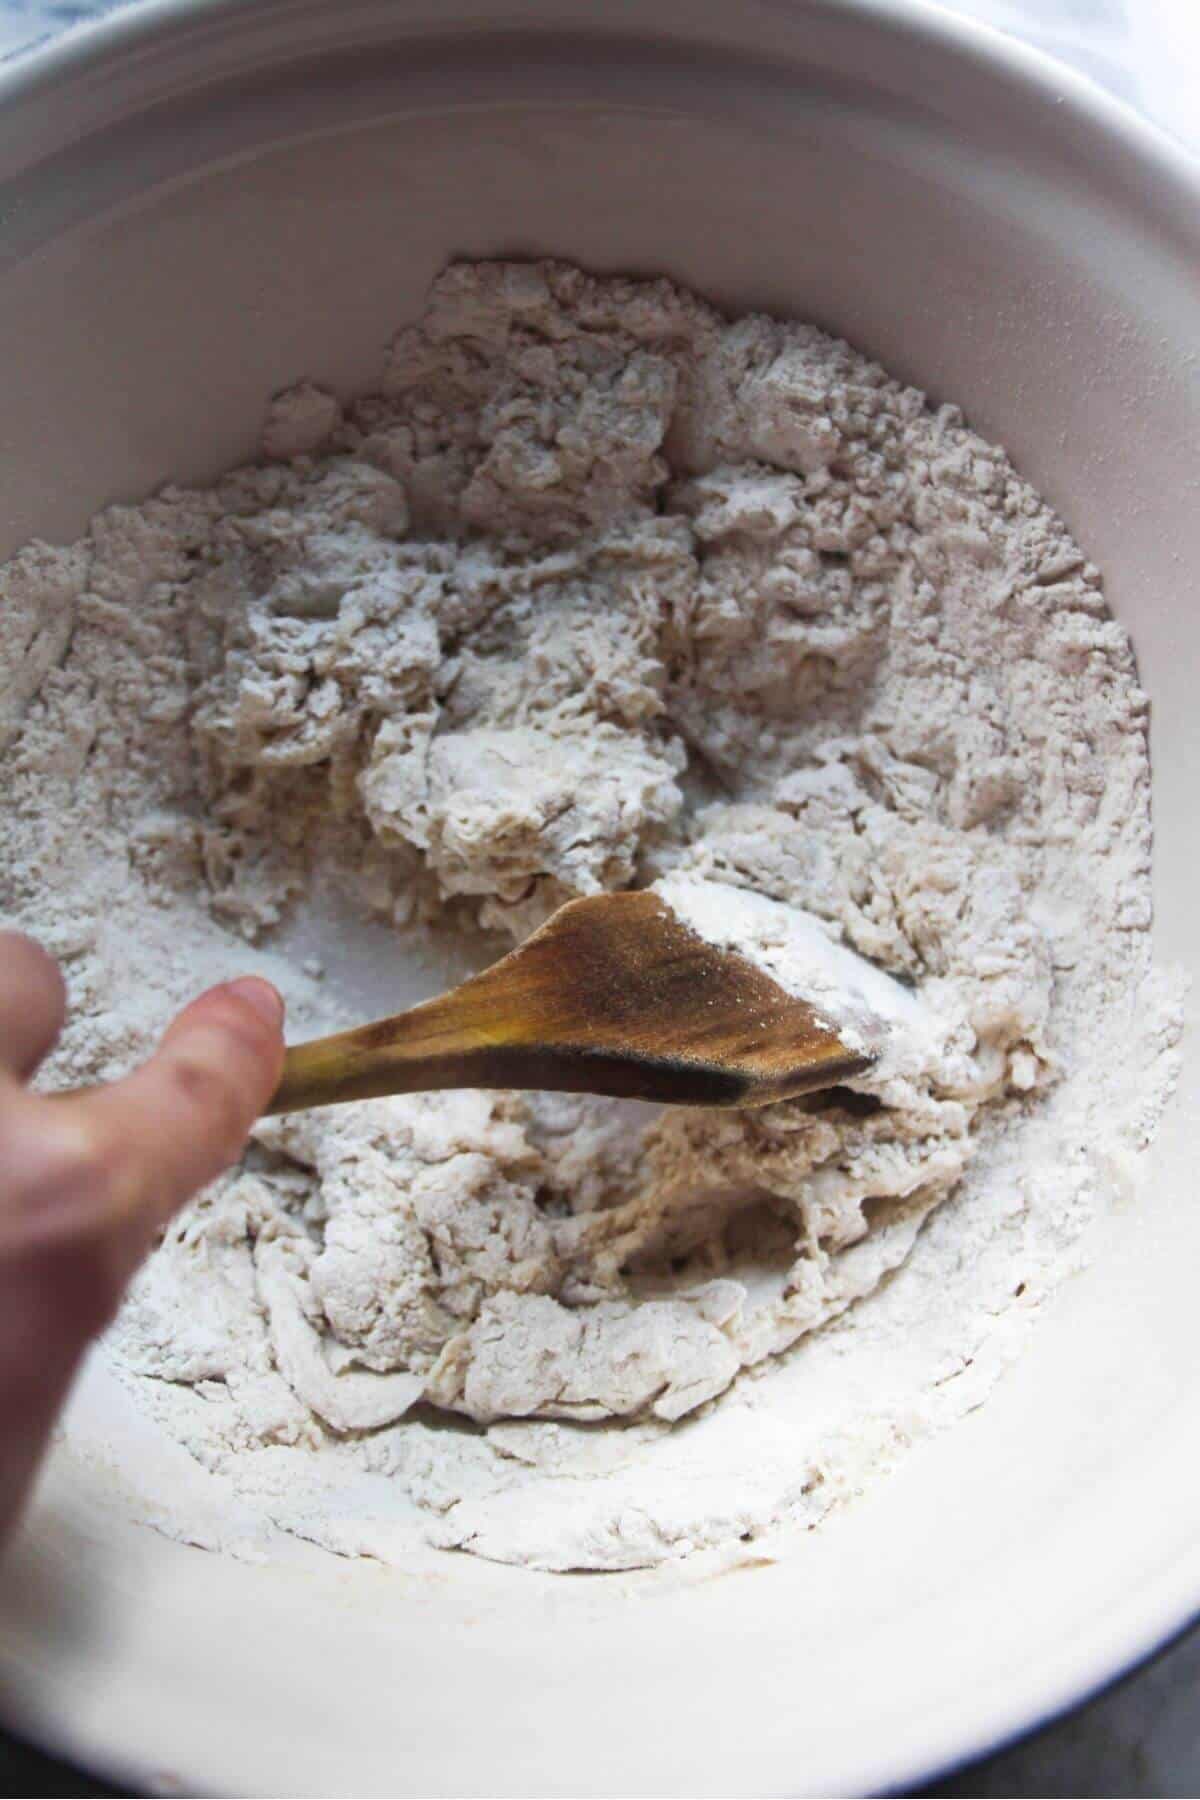
- You can use a stand mixer or mix by hand, but I’ll walk you through the hand method here. Add all your ingredients to a large mixing bowl and stir until a rough dough forms.
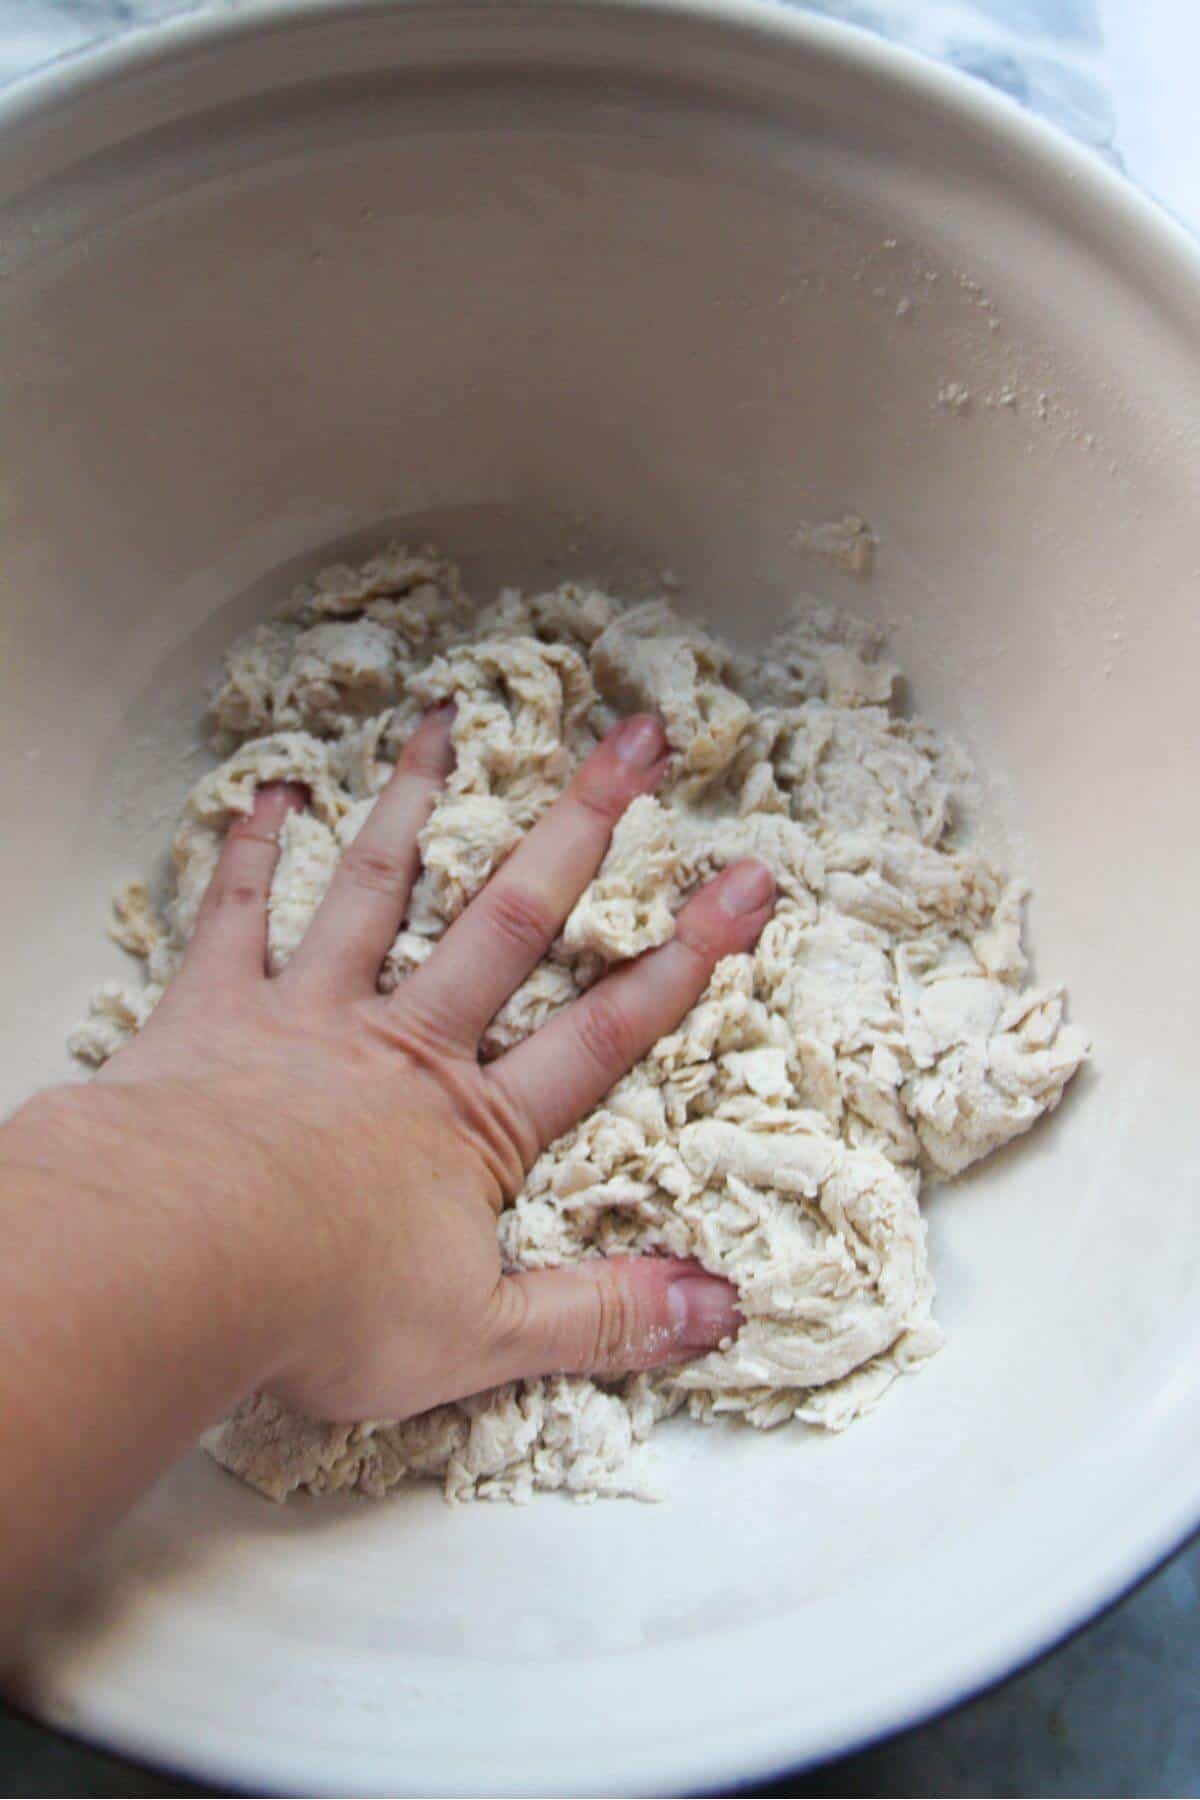
- Then get your hands in there and bring the dough together. I like to give it a quick knead right in the bowl to pick up any rogue leftover flour.
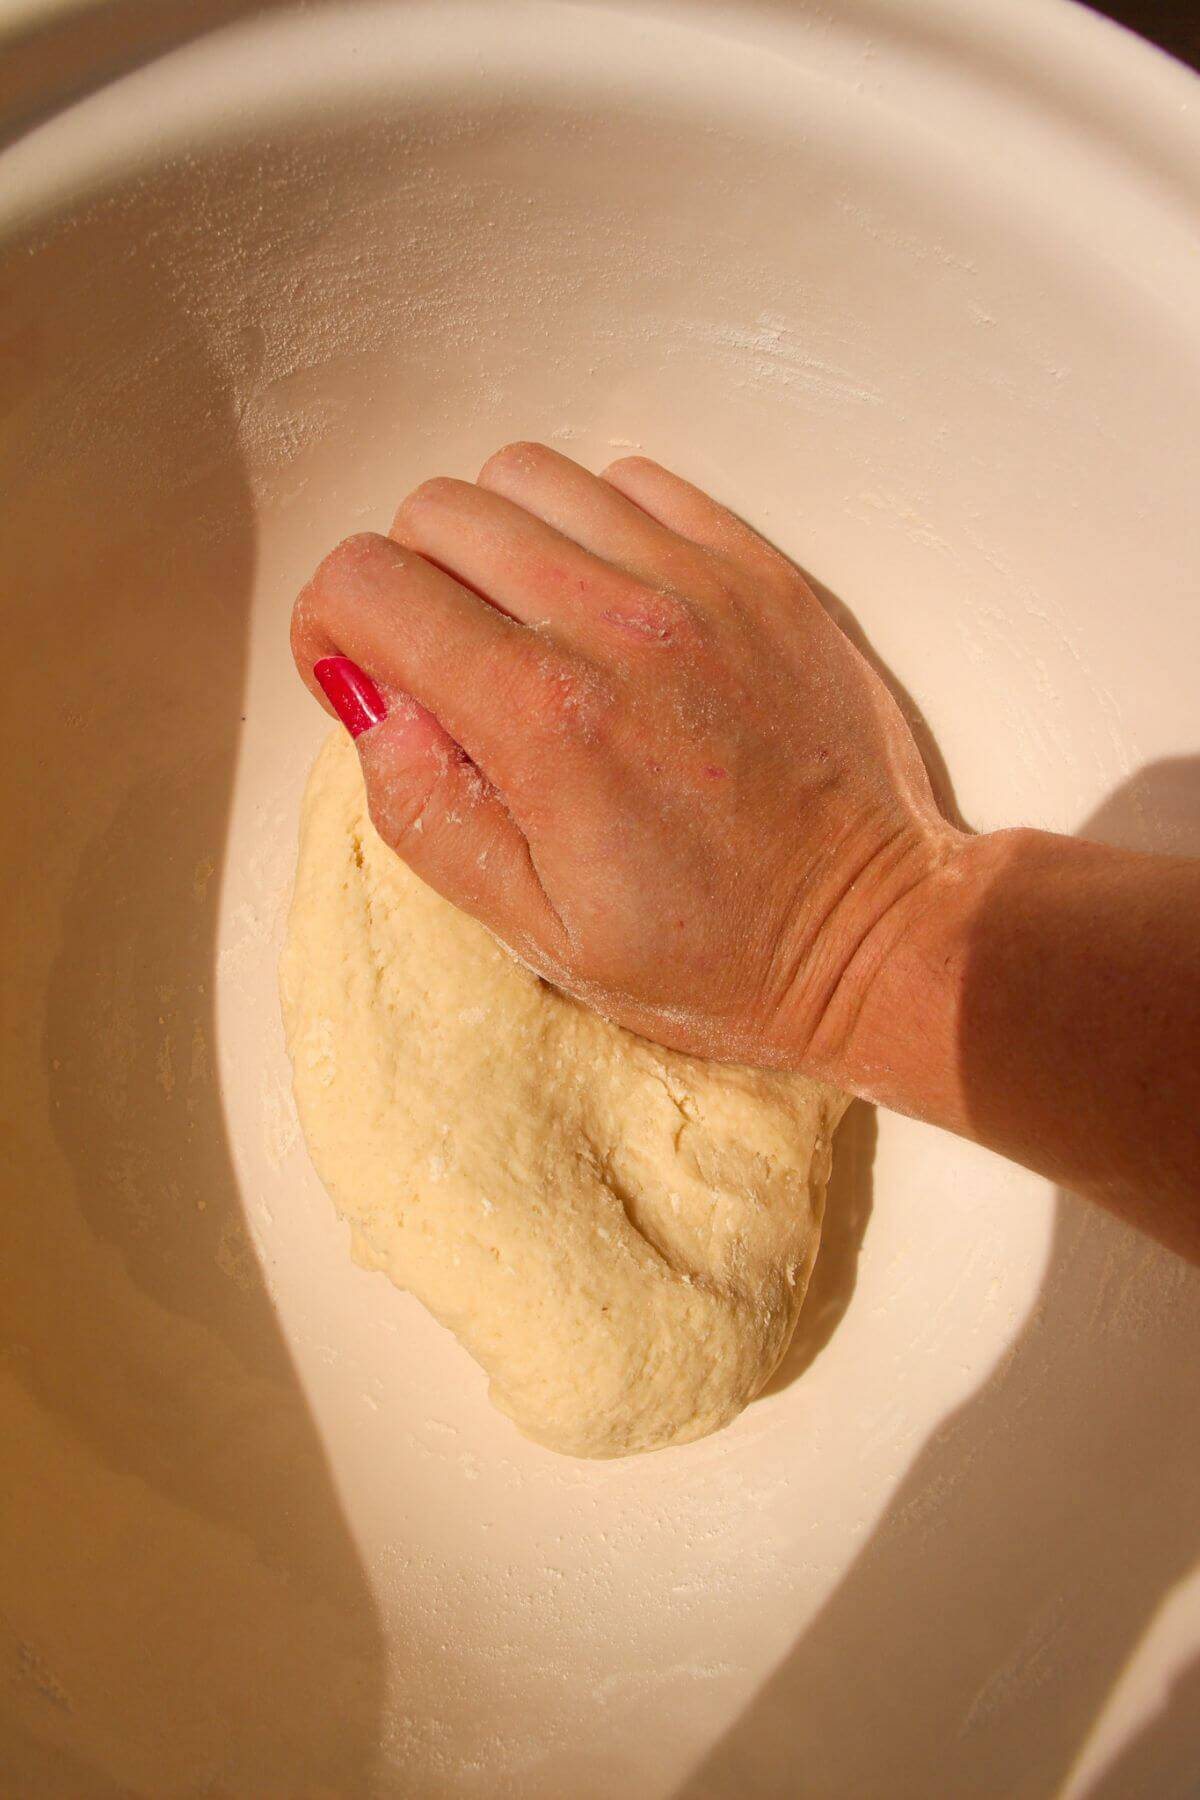
- Continue kneading for about five minutes. Don’t stress too much about technique! A simple way is to push the dough away with the heel of your hand, fold it back over itself, give it a quarter turn, and repeat. As long as you’re pressing and stretching the dough, you’re doing it right.
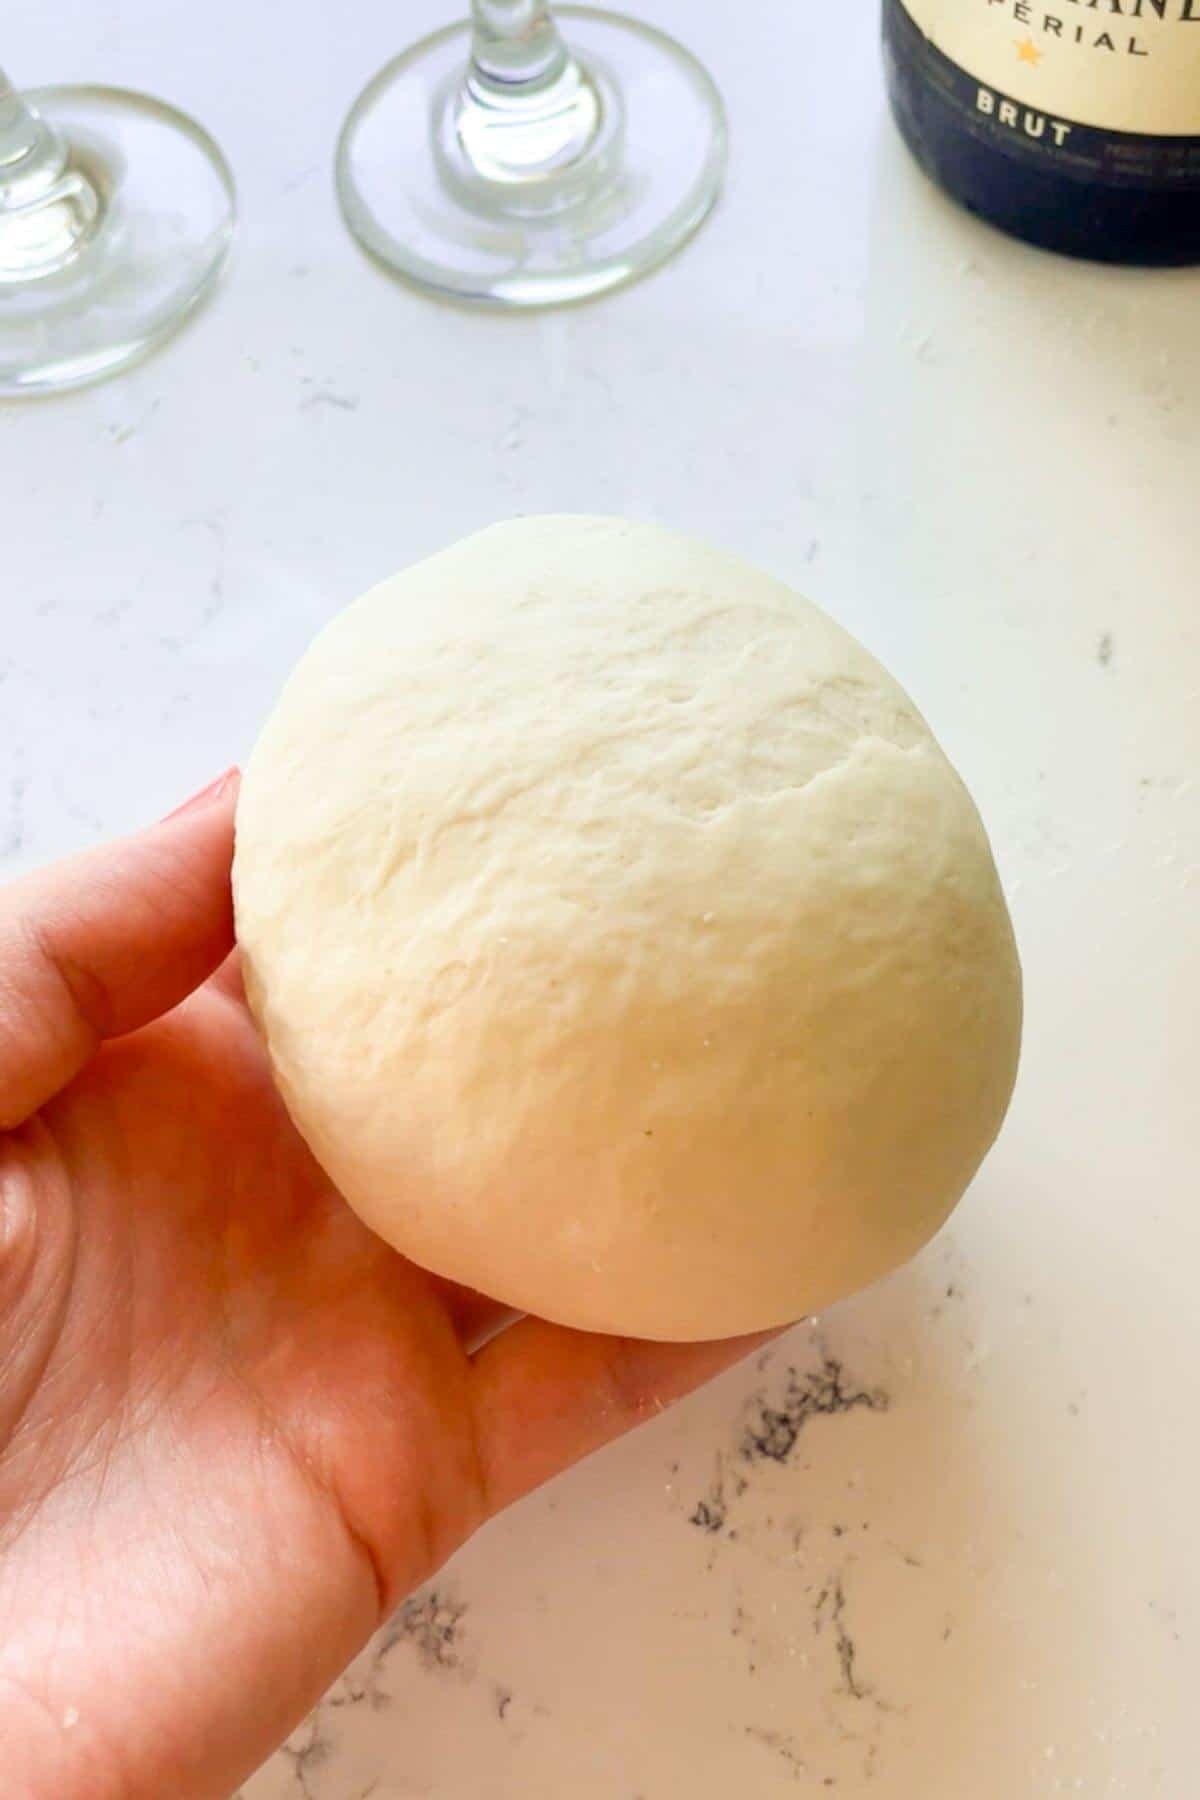
- You’ll notice the dough’s texture change from dry and rough to soft, smooth, and elastic. When it feels supple and bouncy, you’re ready to shape the buns. If you need more help with kneading, I recommend reading my detailed how to knead dough guide.
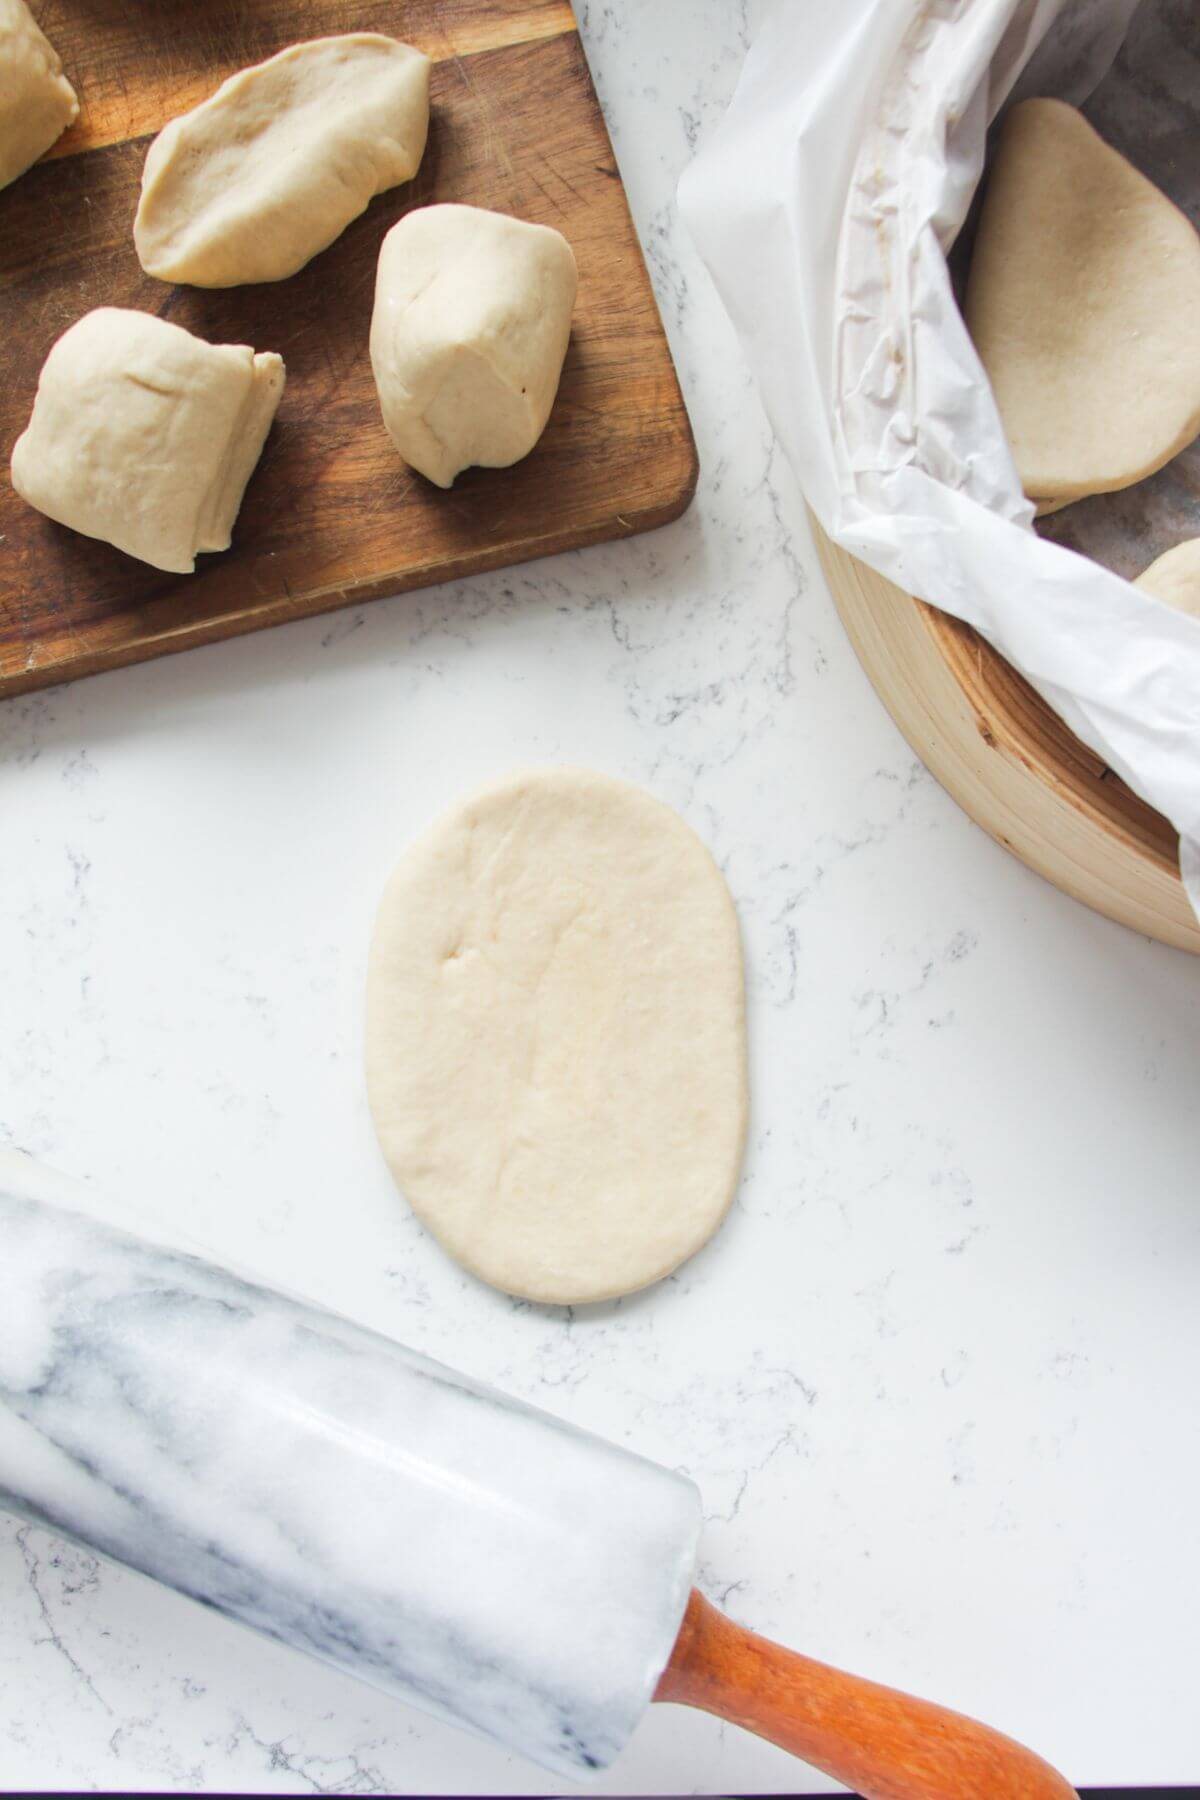
- Divide the kneaded dough into 12 equal pieces (using a kitchen scale will help you get identical buns). Keep the pieces you’re not working with covered to prevent them from drying out.
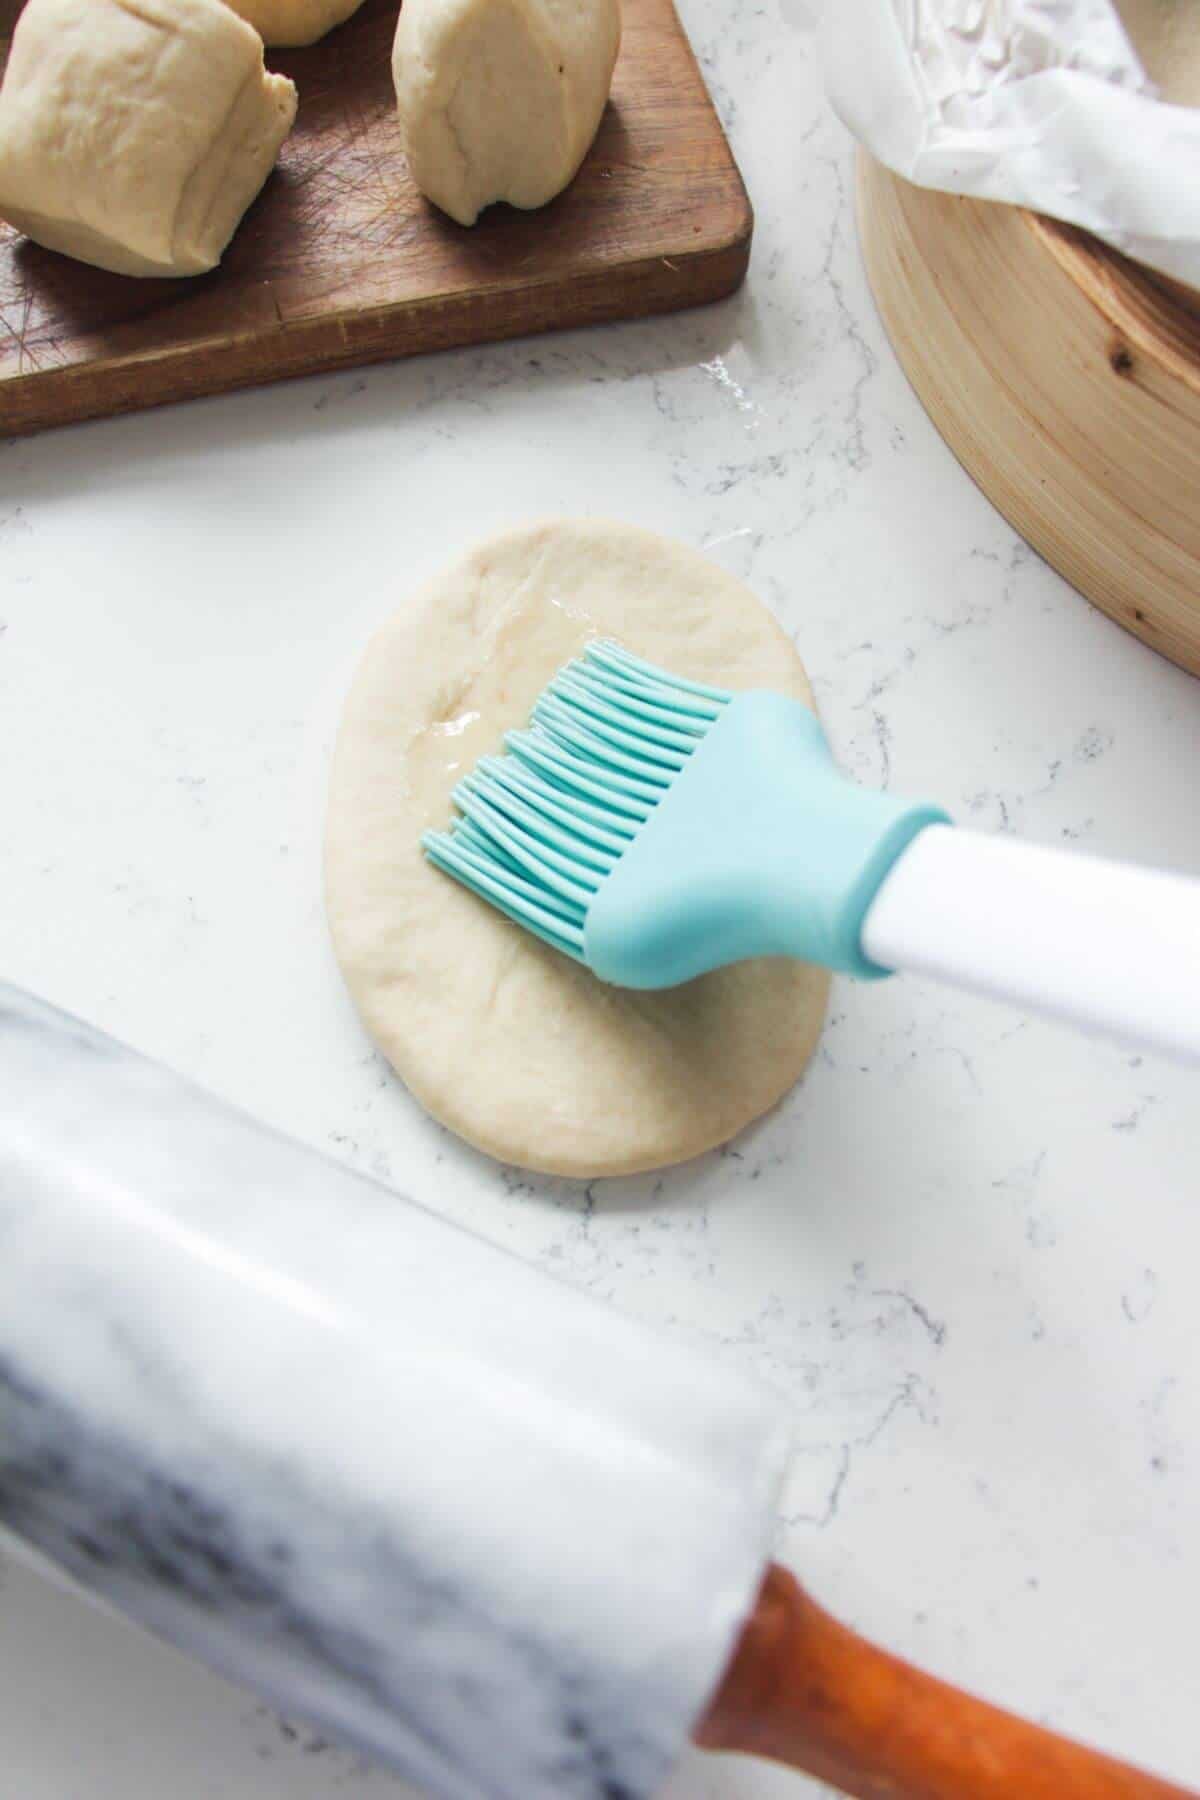
- Take one piece, roll it into a ball, then flatten it lightly with your hand into an oval shape. Use a rolling pin to roll it about three inches long. Brush one side with a little oil.
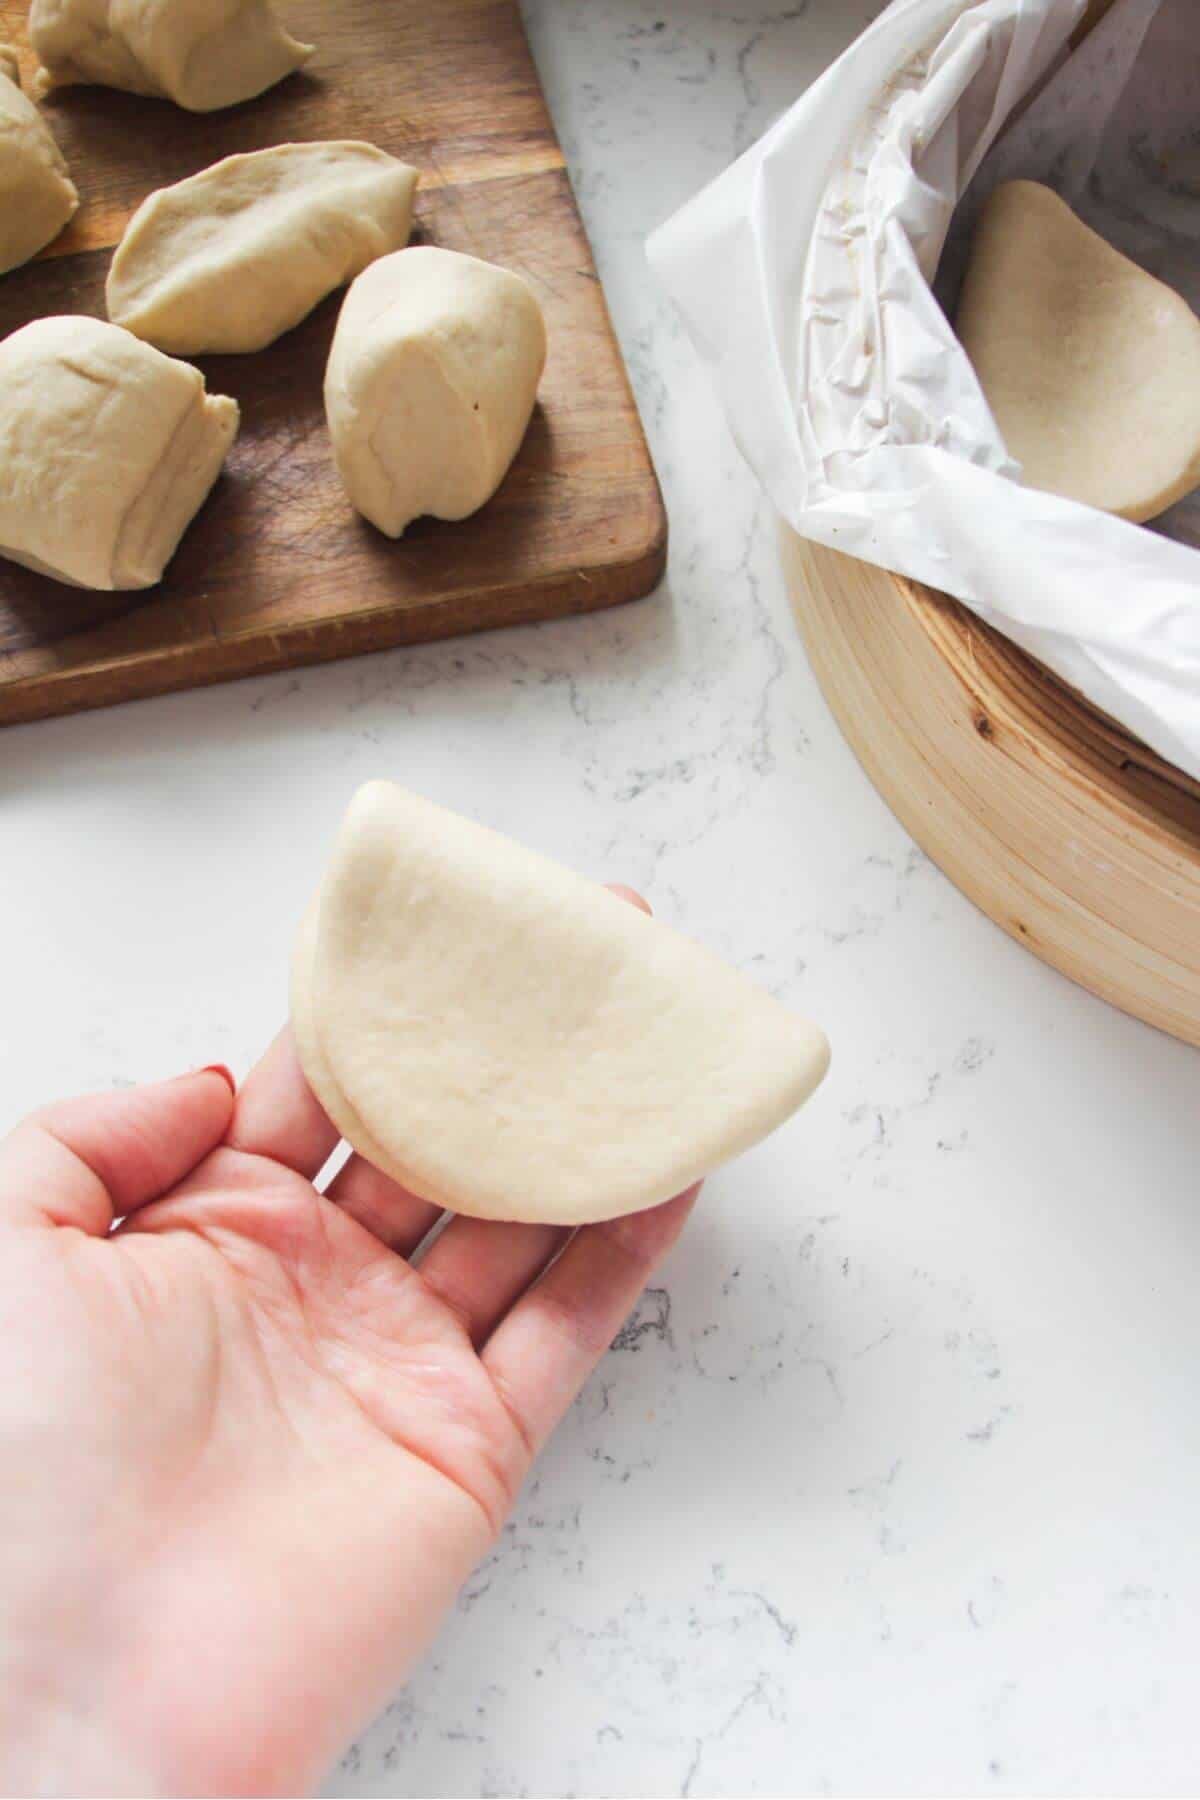
- Fold the oiled oval piece of dough over itself to form your bun.
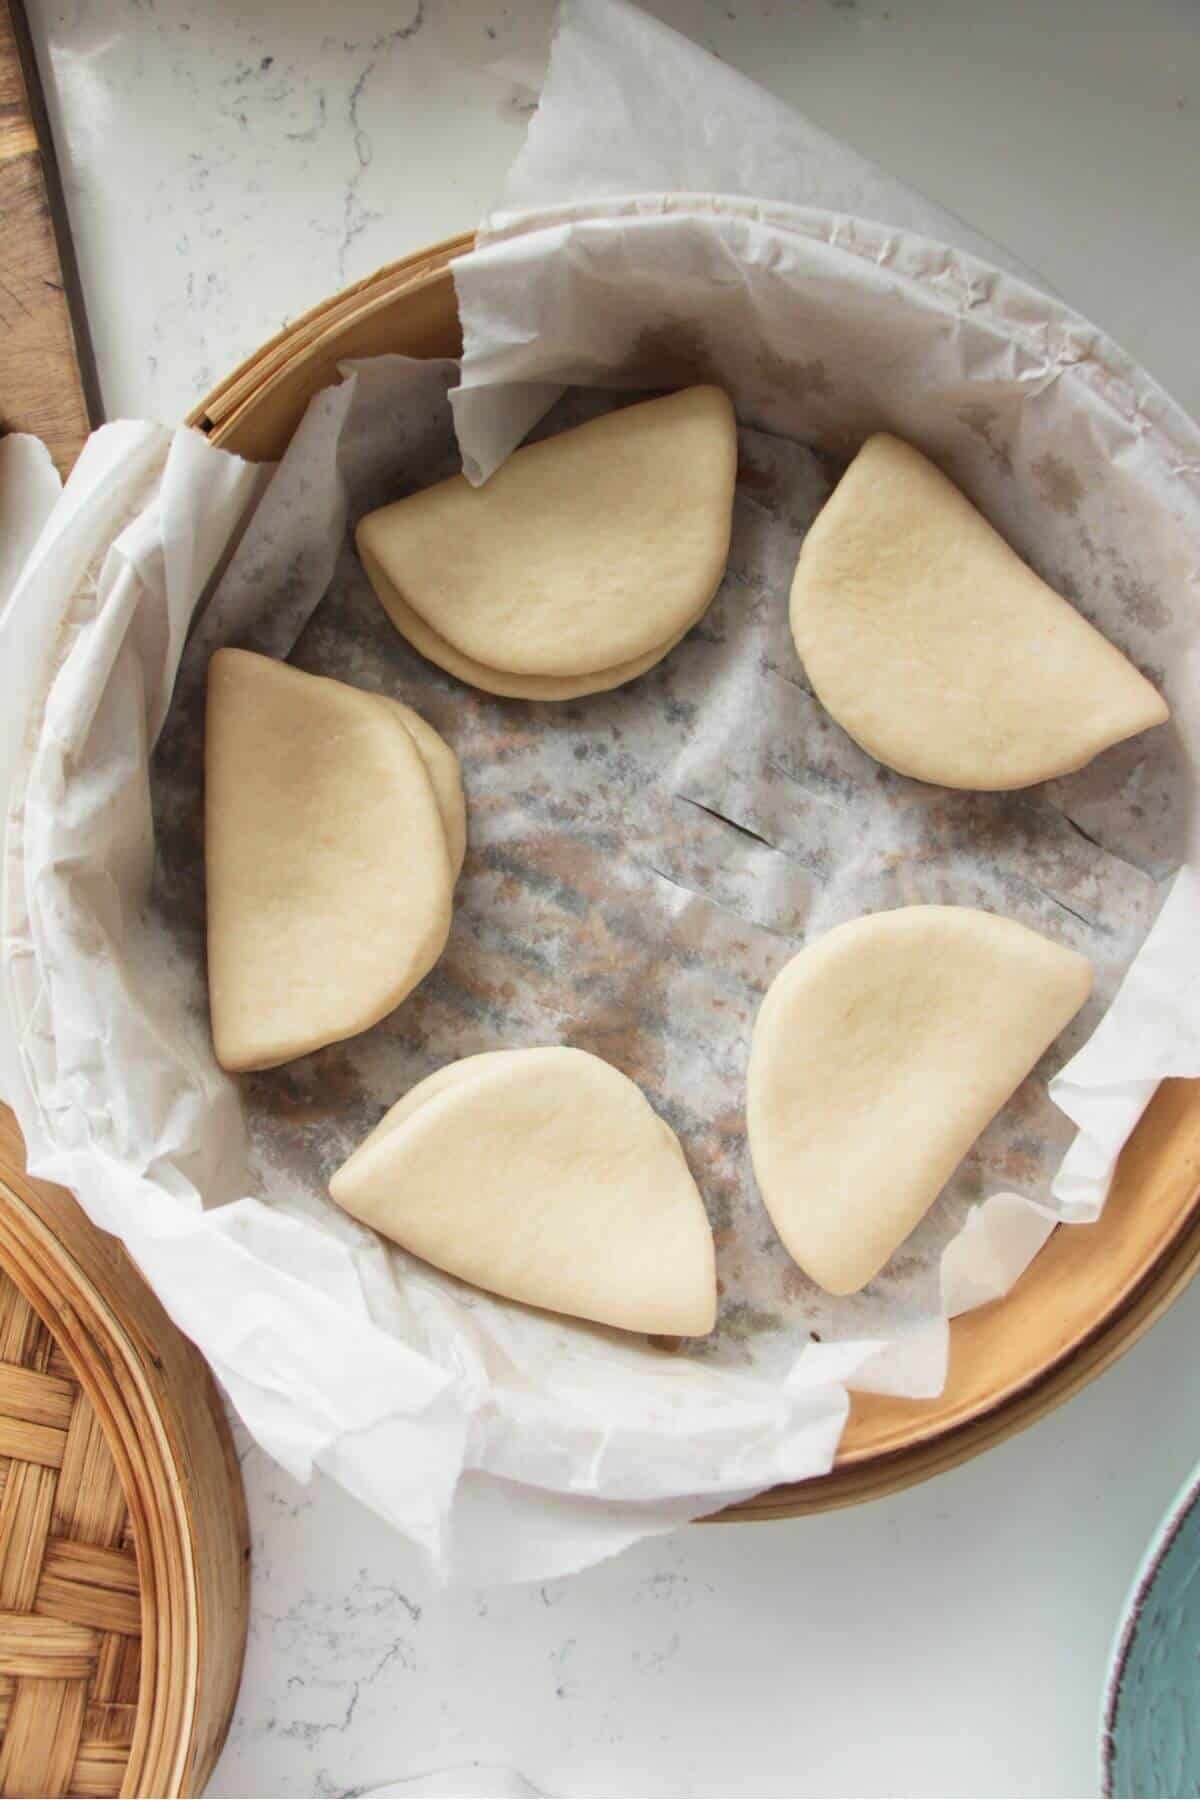
- Arrange the folded buns in your steamer and leave them to rest for about 30 minutes until they puff up slightly. I like to prep my filling while they rest. It’s KEY to line your steamer with parchment paper or cabbage leaves to keep the buns from sticking.
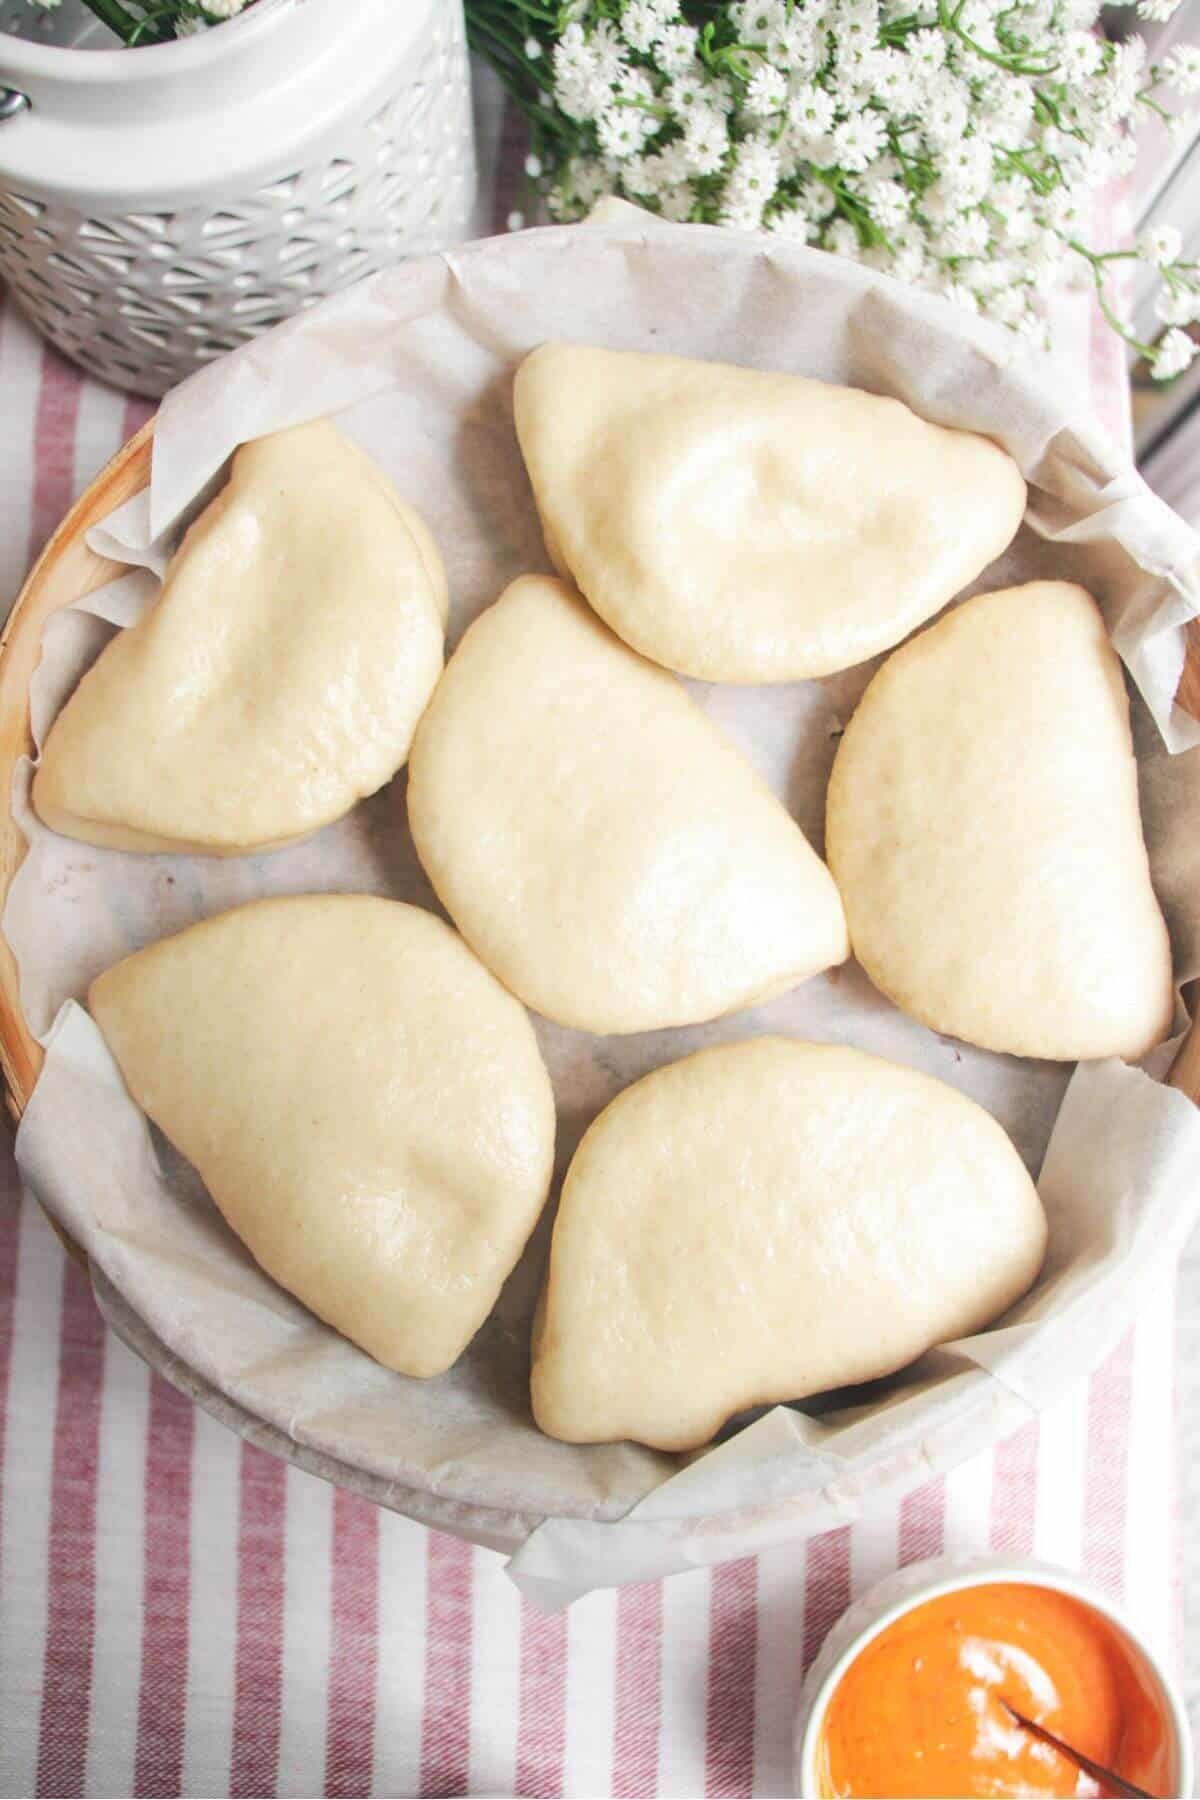
- Steam the buns until pillowy and fluffy. I use a bamboo steamer set on a large pot, but a regular steamer works just as well.
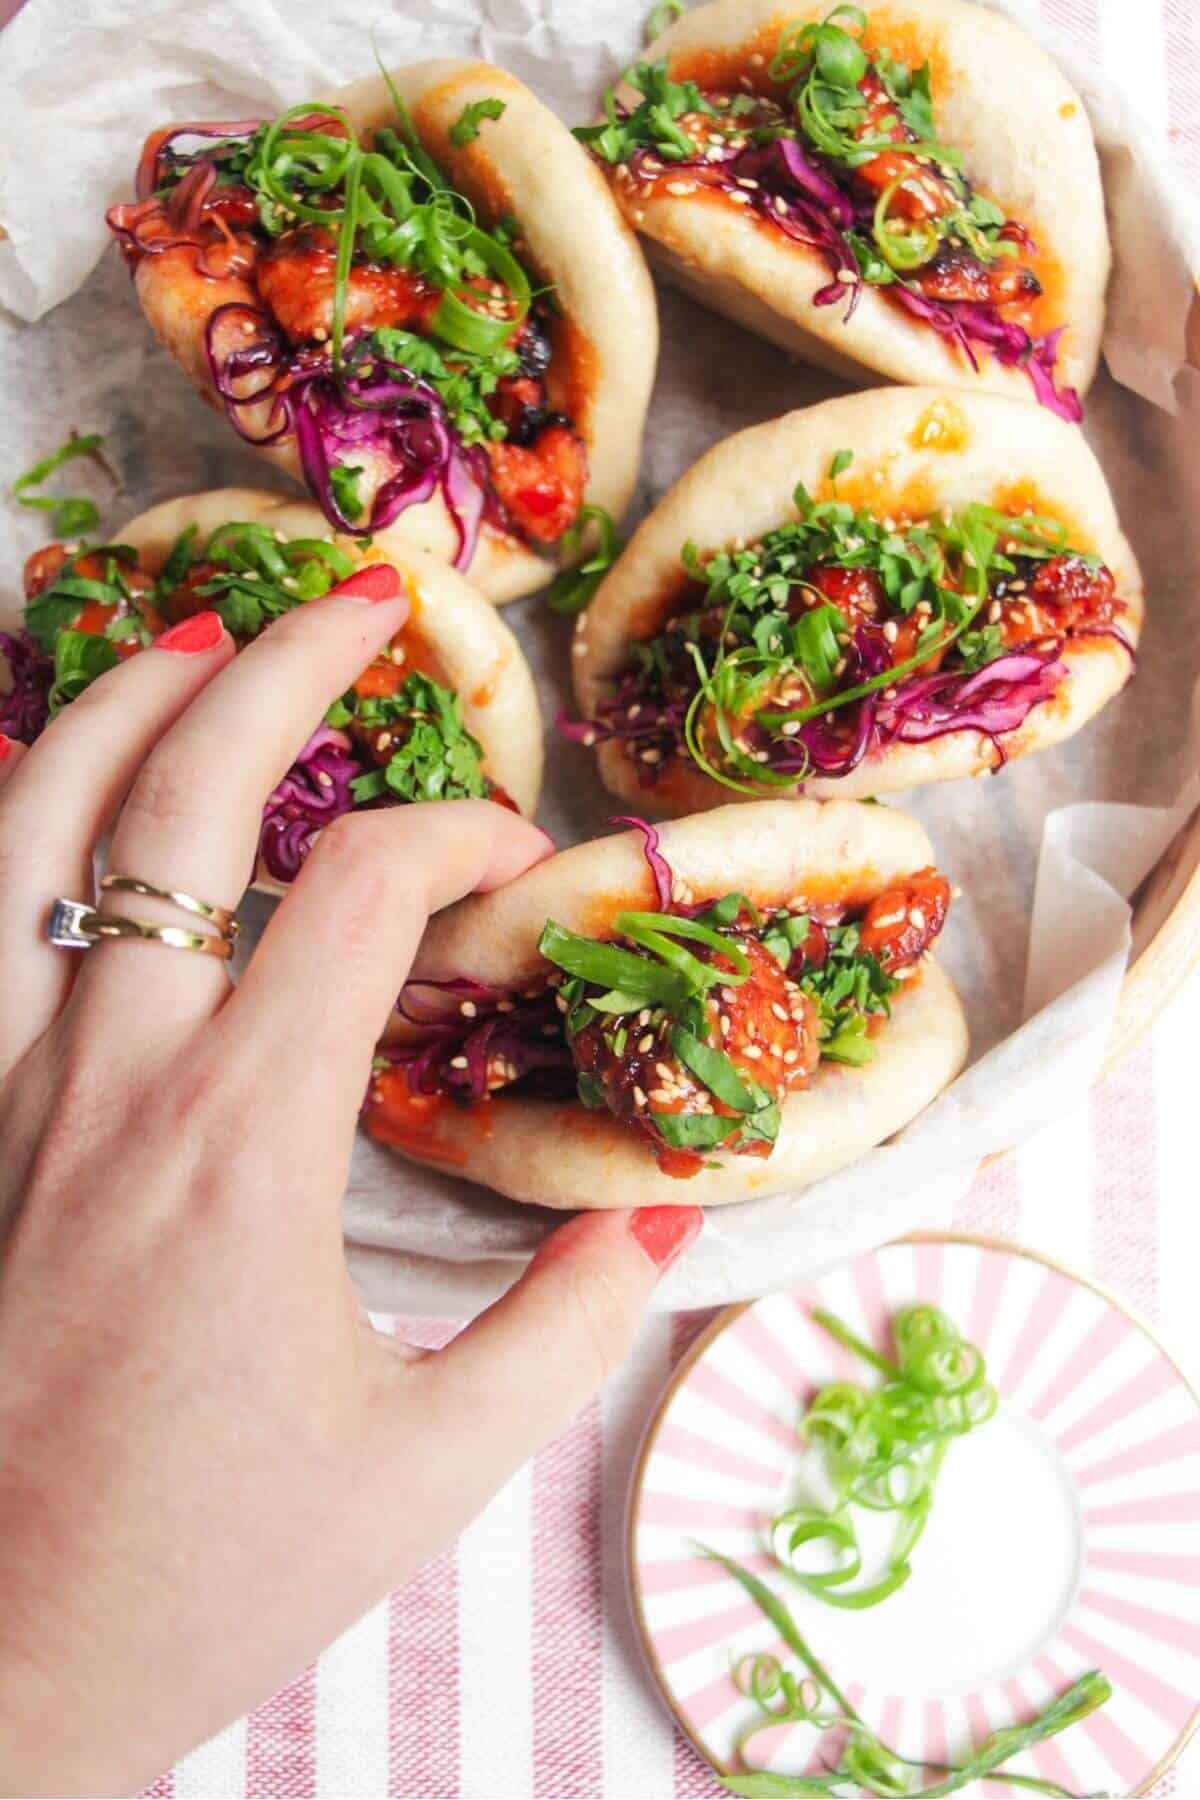
- Once steamed, stuff the buns with your prepared fillings, and dig in.

Kate’s Tip For Knowing When Your Bao Buns Are Cooked
You’ll know your bao buns are ready when they look lovely and puffy, smooth, glossy, and shiny, and are nice and soft when you gently press into them.
If they look a little matte, or similar to how they looked when you placed them on top of the pot, steam them for a further three minutes.
Steamed Bao Buns FAQs
Can you freeze bao buns?Yes! Bao buns freeze really well. I do this all the time. Steam them first, let them cool completely, then freeze on a lined tray until solid. Transfer them to ziplock bags to store. You can then steam them straight from frozen for about 10 minutes.
What’s the best filling for bao?Truly, the options are endless! This recipe includes quick Korean grilled chicken and crunchy slaw, but you can fill them with whatever you like. Here are some options to get you started:
Classic filling ideas: Korean fried chicken, sticky pulled pork, hot honey chicken tenders.
Quick weeknight-friendly options: Miso grilled chicken, sticky gochujang chicken, juicy lamb koftas, crispy sweet and sour chicken, juicy dumpling inspired meatballs.
Vegetarian options: Sweet chili glazed halloumi, crispy shredded tofu, miso-roasted sweet potatoes.
Yes, definitely. You can use a regular steamer pan, or you can make a temporary steamer with a large pan, a plate, and a little aluminium foil. Just make sure you’re lining whatever you use with parchment paper, or cabbage le
For the temporary steamer: Half-fill your pan with water, then put 3 roughly golf ball-sized balls of foil on the bottom of your pan, and pop a heatproof plate on top. Line the plate with parchment paper, then put your bao on there, cover the pan with a lid or a large plate, and steam.
Your bao buns should be lovely, light, and fluffy, so if they’re not, these are the common issues that could be causing it:
Your baking powder or yeast (or both) was dead or old. In my opinion, this is the most common reason. Both these ingredients help the buns rise, so if either one is expired or inactive, your dough won’t puff up as it should. It’s tricky to know how old the ingredients in your pantry are (I never know!), but you can at least check your yeast. Mix a little in warm water with a pinch of sugar – if it’s alive and active, it’ll become foamy within a few minutes.
Your dough was rolled too thick (or too thin). The bao dough should be rolled fairly thin – roughly ¼ inch thick. If it’s too thick, the buns won’t be able to puff up properly and can be dense in the middle. And if they’re too thin, they can wrinkle up and collapse when they’re cooked.
The bao weren’t rested long enough. While this bao dough doesn’t need a long time to rise, it does need to rest a little bit to help the baking powder and yeast start working, and for the dough to relax.
Watch How to Make Bao Buns
Like this recipe? Here are more better-than-takeout ideas for you
If you make this recipe, I’d love to hear from you! You can leave a recipe rating and a comment below. And remember to tag @Zageer on Instagram, Facebook and TikTok if you’ve made one of my recipes. Seeing your recreations really makes my day 😊.
Make soft, fluffy bao buns at home in under an hour. Unlike traditional recipes that need hours to rise, this dough uses yeast and baking powder to speed things up without sacrificing the signature pillowy texture. It’s the ultimate shortcut to homemade bao that still tastes like the real deal.I’ve included a Korean-style grilled chicken filling to get you started, but they're super versatile – stuff them with whatever you love. Prep Time 10 minsCook Time 10 mins
Rising time 30 mins
Total Time 50 mins
Servings: 12 buns
Course: Main Course
Cuisine: asian
Ingredients Equipment Method Nutrition Notes
Ingredients
For the bao buns –- 350 g (2 ⅓ cups) all-purpose flour
- 2 teaspoons instant yeast
- 2 teaspoons baking powder
- 1 teaspoon salt
- 2 tablespoons neutral oil, vegetable, canola, or peanut oil
- 180 g (approximately ¾ cup) lukewarm water
- 3 tablespoons sesame oil, for brushing
- 1 lb (500g) boneless, skinless chicken thighs, (ideally free-range)
- 1 tablespoon gochujang paste
- 1 tablespoon light soy sauce
- 1 tablespoon rice vinegar
- 1 tablespoon sweet chili jam, plus more to serve
- 1 tablespoon sesame oil
- ¼ head red or white cabbage, thinly sliced
- ½ cucumber, finely diced
- 3 scallions, (spring onions), finely sliced
- A handful of cilantro leaves, (coriander)
- 1 tablespoon sesame seeds
- ½ teaspoon salt
- 1 tablespoon rice vinegar
- ½ tablespoon sesame oil
- 1 teaspoon fish sauce
- ¼ cup egg-free garlic aioli, or two-minute gochujang aioli
- ¼ cup sweet chili jam
- 1 tablespoon sesame seeds
- A handful of cilantro leaves, (coriander), chopped
Equipment
- 1 Steamer , either a bamboo steamer or any standard steaming basket.
- Parchment paper for lining your steamer
Method
For the bao buns –- Mix the dough.In a large bowl, combine 350g (2 ⅓ cups) all-purpose flour, 2 teaspoons instant yeast, 2 teaspoons baking powder, 1 teaspoon salt, 2 tablespoons of neutral oil, and 180g (¾ cup) lukewarm water. With a large spoon, stir to combine until a rough, shaggy dough forms. Use your hands to bring it together into a ball. Give it a couple of quick kneads in the bowl to scrape up any leftover bits of flour, then turn it out onto a lightly floured surface.
- Knead the dough.With the heel of your hand, push the dough away from you, then fold the part you just pushed away back on itself, give the dough a quarter turn, and repeat this motion. Continue like this for about five minutes. You’ll start to feel the texture of the dough changing – what was a little rough will become smooth and supple. At this point, you’re ready to shape your bao. You can also do this in a stand mixer with the dough hook attached if you have one.
- Prepare your steamer.Cut out 12 small squares of parchment paper, about 5cm squared.Alternatively, you can line the entire steamer basket. To do that, cut a piece of parchment paper into a circle that will fit inside your steamer. Fold it in half, then in half again, then make 5 small cuts along the folded edge. When you unfold it, you’ll have created a perfect liner with holes for steam to get through. Pop it inside the steamer. You must line your steamer or your bao buns will stick to it, and you'll make a mess.
- Divide the dough. Roll the dough into a log, about 12 inches long. Divide the log into 12 equal pieces – if you want to get exact, you can use a scale (each piece should weigh roughly 1.75 oz or 50g). Working with one at a time, and covering the other pieces of dough with a clean kitchen towel (this is to stop them drying out), shape each piece into a small ball.
- Shape the bao buns.Gently flatten a ball into a small oval and use a rolling pin to roll the dough into an oval shape, about 3 inches or 8cm long and ¼ inch thick. Brush the exposed side with sesame oil, then fold it onto itself.Place on a little square of parchment paper (or into the lined steamer straight away), then put into the steamer, leaving about an inch between each bun so they don't stick together. Repeat with the remaining pieces of dough.
- Let the bao rest. At this point, the dough needs to rest for about 30 minutes to puff up and rise a little. I like to take a photo on my phone of the bao as I place them in the steamer, so it’s easy to compare and see how they’re going.
- Steam the bao.After 30 minutes, they should look a little more puffy. Now it’s time to cook them. Bring a large pot of water to a boil (I boil the kettle and pour that into a pot for ease). Place the steamer on top of the pot and let it steam for 12 minutes, until the buns puff up beautifully and look lovely and glossy. They’re now ready to fill.
- Marinate the chicken. Heat your oven to 450°F (250°C) fan and line a baking sheet with parchment paper. In a bowl, add 1lb of diced chicken thighs, 1 tablespoon of gochujang paste, 1 tablespoon of soy sauce, 1 tablespoon of sesame oil, 1 tablespoon of rice vinegar, and 1 tablespoon of sweet chili jam, and toss to coat the chicken thoroughly.
- Cook the chicken. Transfer the chicken to the lined baking sheet and spread it into a single layer. Pop into the oven for 20 minutes, until lovely and charred around the edges. You can also do this in the air fryer. Air fry for 10 minutes at 400°F (200°C).
- Make the slaw. While the chicken cooks, add the sliced cabbage, scallions, cucumber, and 1 tablespoon of sesame seeds to a bowl. Pour over 1 tablespoon of rice vinegar, ½ tablespoon of sesame oil, 1 teaspoon of fish sauce, and ½ teaspoon of salt. Toss to combine well.
- Fill the bao. Spread a little aioli onto the base of each bao bun and top with a generous spoonful of the slaw. Arrange a couple of pieces of the charred gochujang chicken on top, then drizzle with the remaining chili jam. Finish with another scattering of sesame seeds and cilantro.
Nutrition
Serving: 2filled bunsCalories: 620kcal
Carbohydrates: 64.6g
Protein: 24.1g
Fat: 30.2g
Saturated Fat: 4.6g
Polyunsaturated Fat: 12.2g
Monounsaturated Fat: 11.6g
Cholesterol: 78mg
Sodium: 1279mg
Potassium: 467mg
Fiber: 3.9g
Sugar: 15g
Vitamin A: 409IU
Vitamin C: 20.7mg
Calcium: 178mg
Iron: 2.6mg
Notes
PRO TIP: Make your bao filling while the buns are resting for 30 minutes. A NOTE ON YEAST: Instant yeast is fine, dry yeast that can be added directly into the dough without having to ‘activate’ it first. If you only have active dried yeast, you’ll need to first bloom it in water, as per the instructions on the packet. You must do this – if you don’t, your bao buns won’t rise properly, and you’ll end up with weird little bits of dried yeast throughout your bao. NO STEAMER? If you don’t have a steamer, you can improvise one with a deep pan, a heatproof plate, and some balls of aluminium foil to support it. Just make sure the plate is raised above the water line and cover with a lid. Line your heatproof plate with parchment paper and steam the bao for 12 minutes, as per the recipe. FREEZING INSTRUCTIONS: The bao buns freeze really well. This is my preferred way of storage, as you can cook them straight from frozen in about 10 minutes when you need them. After steaming, let them cool, then pop them onto a lined plate or tray that will fit in your freezer. Freeze until solid, then transfer to zip-lock bags to store. FILLING IDEAS: You can fill the buns with anything you like! Try sticky pulled pork, miso salmon, gochujang chicken, Korean fried chicken, or sweet chilli glazed halloumi. It’s also a great way to use up any leftover meat you might have, or use a rotisserie chicken. BAO DIDN’T TURN OUT FLUFFY? Your bao buns should be lovely, light, and fluffy, so if they’re not, these are the common issues that could be causing it:- Your baking powder or yeast (or both) was dead or old. In my opinion, this is the most common reason. Both these ingredients help the buns rise, so if either one is expired or inactive, your dough won’t puff up as it should. It’s tricky to know how old the ingredients in your pantry are (I never know!), but you can at least check your yeast. Mix a little in warm water with a pinch of sugar – if it’s alive and active, it’ll become foamy within a few minutes.
- Your dough was rolled too thick (or too thin). The bao dough should be rolled fairly thin – roughly ¼ inch thick. If it’s too thick, the buns won’t be able to puff up properly and can be dense in the middle. And if they’re too thin, they can wrinkle up and collapse when they’re cooked.
- The bao weren’t rested long enough. While this bao dough doesn’t need a long time to rise, it does need to rest a little bit to help the baking powder and yeast start working, and for the dough to relax.