
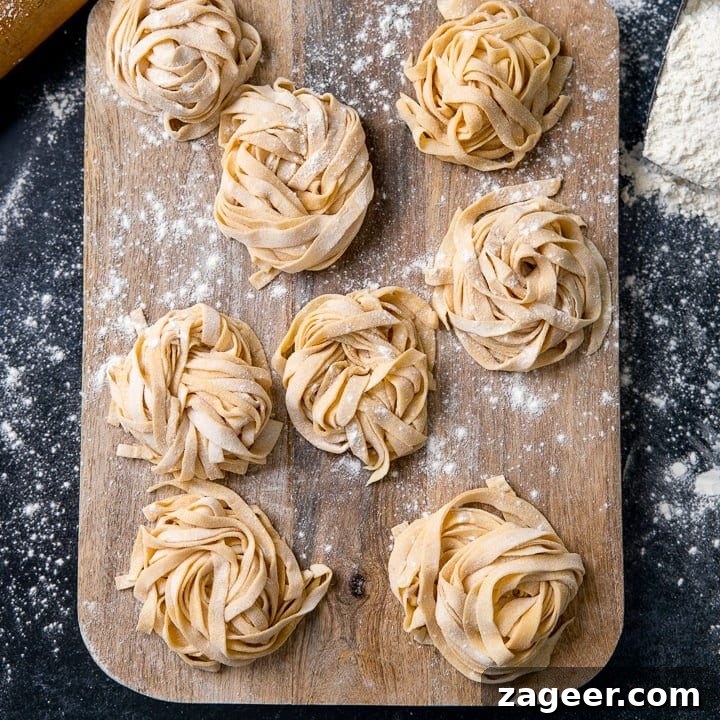
Easy Two-Ingredient Homemade Pasta: Your Essential Guide
Discover the simple joy of making fresh, delicious pasta at home with just two ingredients. This comprehensive guide covers everything from choosing the right flour and essential tools to perfect preparation techniques, smart storage solutions, and delightful serving ideas. Say goodbye to store-bought shortages and hello to gourmet pasta nights!
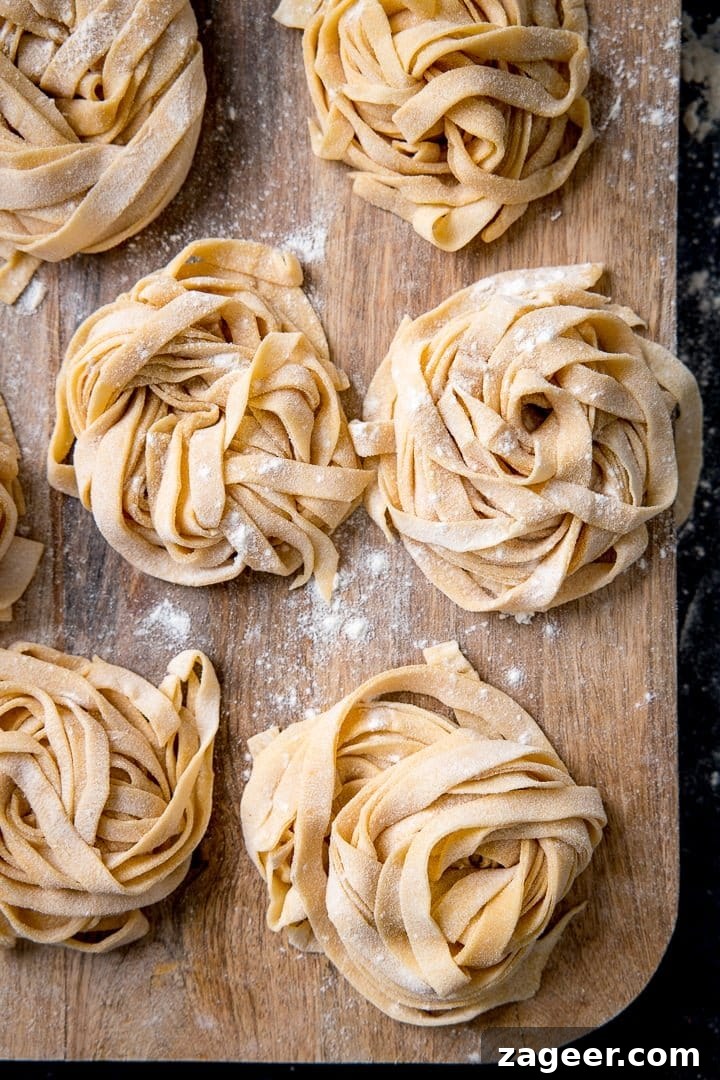
The Simple Pleasure of Homemade Pasta: Fresh, Flavorful, and Accessible
In times when supermarket shelves might be sparse, especially for specific pasta types, it’s reassuring to know that one of the most comforting and satisfying meals is always within reach. You might find certain flours and, for the most part, eggs readily available. And that’s truly all you need to create incredible homemade pasta.
More than just a solution to limited availability, homemade pasta is a culinary revelation. It offers a taste and texture far superior to anything you’ll find pre-packaged, transforming a simple dinner into a gourmet experience. The effort is minimal, but the reward is immense – a fresh, tender, and uniquely flavorful pasta that truly elevates any dish.
Forget the intimidation of specialized equipment. While a pasta machine can certainly streamline the process, it’s far from essential. A humble rolling pin is your most important tool, proving that anyone can master the art of fresh pasta. Of course, if you have a stand mixer, it can expedite the dough-making process, taking some of the manual labor out of the initial steps. But rest assured, a magnificent homemade pasta can be achieved with just your hands and a rolling pin.
Essential Ingredients for Your Fresh Pasta
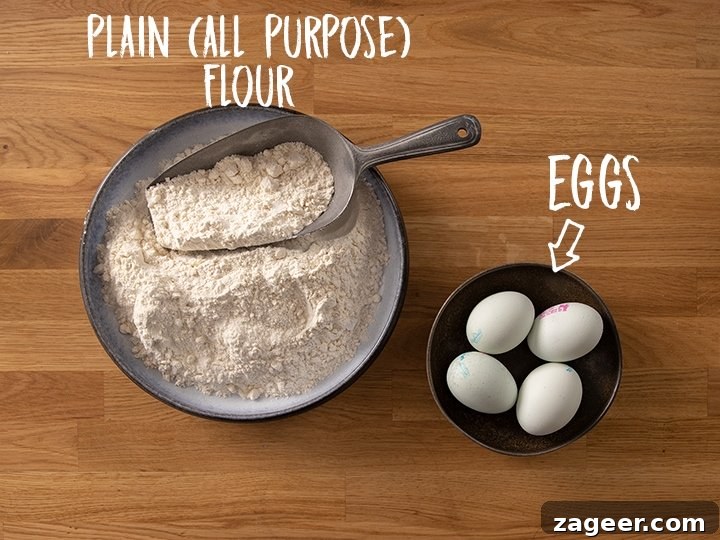
Choosing the Best Flour for Your Homemade Pasta
The type of flour you choose plays a significant role in the texture and overall character of your homemade pasta. While all-purpose flour is a fantastic starting point due to its widespread availability, understanding other options can open up a world of pasta-making possibilities.
- Pasta Flour or ’00’ Flour: This finely milled Italian flour, often called “doppio zero,” is a staple for traditional pasta making. It boasts a higher protein content than standard all-purpose flour, leading to a smoother, silkier dough that is incredibly pliable and easy to roll. The result is a pasta with a wonderfully tender yet chewy bite, perfect for delicate sauces.
- Semolina Flour: Derived from durum wheat, semolina flour has a coarser texture and a golden hue. It yields a pasta that is slightly rougher, providing an ideal surface for sauces to cling to. This characteristic makes semolina flour excellent for heartier pasta shapes and robust sauces, ensuring every forkful is coated in flavor. It also gives the pasta a firmer, more elastic texture.
- Plain or All-Purpose Flour: This is the most common flour found in home kitchens, making it a convenient and accessible choice for beginners. All-purpose flour produces a relatively smooth pasta with a pleasant, light chewiness that sits comfortably between the delicate ’00’ flour and the rustic semolina. For this recipe, we’ll be using plain or all-purpose flour, but feel free to substitute it with ’00’ or semolina flour in equal quantities to experiment with different textures.
No matter which flour you choose, ensure it’s fresh and stored correctly to guarantee the best results for your pasta dough.
How to Make Homemade Pasta: A Simple Guide
Crafting fresh pasta from scratch is a rewarding culinary journey that’s surprisingly straightforward. Follow these steps for perfect results, whether you’re using a stand mixer or working by hand.
Step 1: Preparing Your Pasta Dough
- **Using a Stand Mixer:** Combine the flour and eggs in the bowl of your stand mixer. Attach the dough hook and begin mixing on a slow speed. Continue until the ingredients come together to form a shaggy ball. At this stage, observe the dough’s consistency; if it appears too dry and crumbly, add a tiny splash of water (a teaspoon at a time). If it’s too sticky, sprinkle in a small amount of flour. Once a ball forms, increase the speed to medium and knead for about 5 minutes until the dough becomes smooth, elastic, and uniform in texture.
- **Making Dough by Hand (The Traditional Method):** On a clean, lightly floured work surface, mound your flour into a neat pile. Create a large well in the center of the flour, resembling a volcano crater. Lightly whisk the eggs in a separate bowl, then carefully pour them into the well. Using a fork, gradually incorporate small amounts of flour from the inner walls of the well into the eggs, mixing gently. Continue this process until the eggs and flour are fully combined and a rough dough forms. Use your hands to bring the dough together into a ball. Knead the dough vigorously on your lightly floured surface for about 10-15 minutes. The dough should transform from being stiff and a bit crumbly to smooth, elastic, and resilient, bouncing back when poked. Add a tiny bit of water if it’s too dry, or a dusting of flour if it’s too sticky, always sparingly.
Step 2: Resting for Perfection
- Once your dough is smooth and pliable, remove it from the mixer bowl or your work surface. Wrap it tightly in clingfilm or wax paper, ensuring it’s completely sealed to prevent drying out. Place the wrapped dough in the fridge for at least 30 minutes. This resting period is crucial; it allows the gluten to relax, making the dough much easier to roll out and preventing it from shrinking back. You can rest the dough for up to 12 hours if preparing ahead.
Step 3: Rolling Out and Cutting Your Fresh Pasta
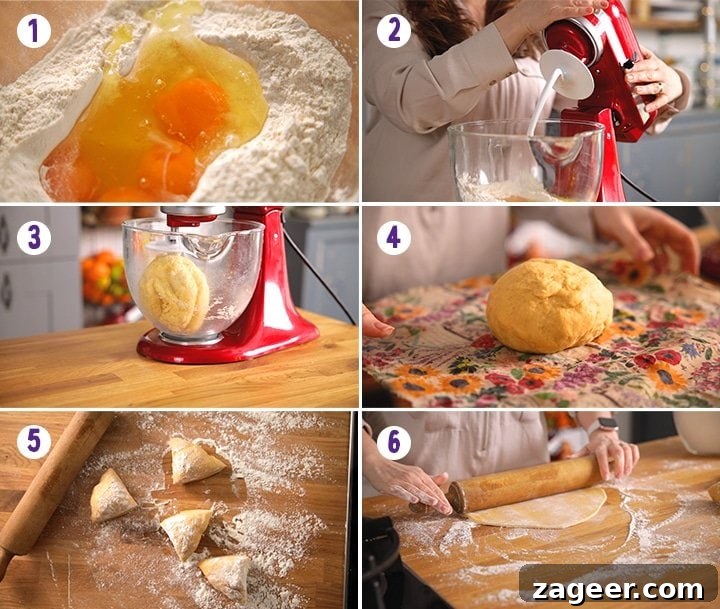
- Remove the rested dough from the fridge and divide it into four equal pieces. This makes it more manageable for rolling.
- **Using a Rolling Pin:** Lightly flour your work surface and one piece of dough. Begin rolling the dough out with your rolling pin, working from the center outwards. Rotate the dough frequently and dust with more flour as needed to prevent sticking. The goal is to get the dough as thin as humanly possible. You should be able to see the outline of your hand faintly through the dough. The thinner you roll it, the more delicate and delicious your pasta will be.
- **Using a Pasta Machine:** If you have a pasta machine, flatten one piece of dough slightly by hand or with a rolling pin. Set your machine to its widest setting and pass the dough through. Fold the dough into thirds, dust with flour, and pass it through the widest setting again. Repeat this step 2-3 times to further smooth and strengthen the dough. Then, gradually reduce the machine’s setting, passing the dough through each setting once or twice, dusting with flour each time, until you reach your desired thinness (typically the second or third to last setting). The dough should be smooth, even, and slightly translucent.
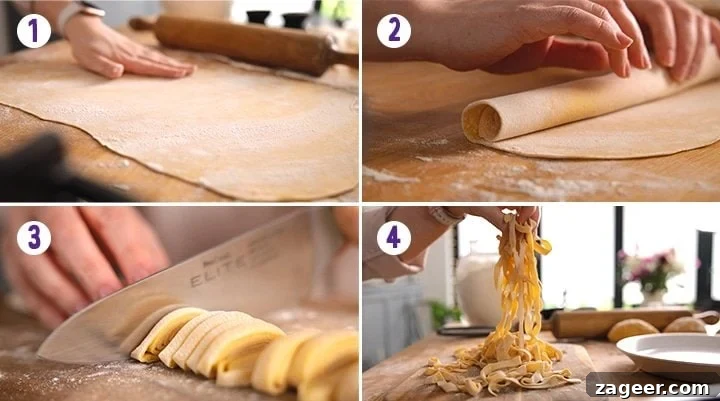
- **Shaping Your Pasta:** At this point, you can cut your pasta into various shapes.
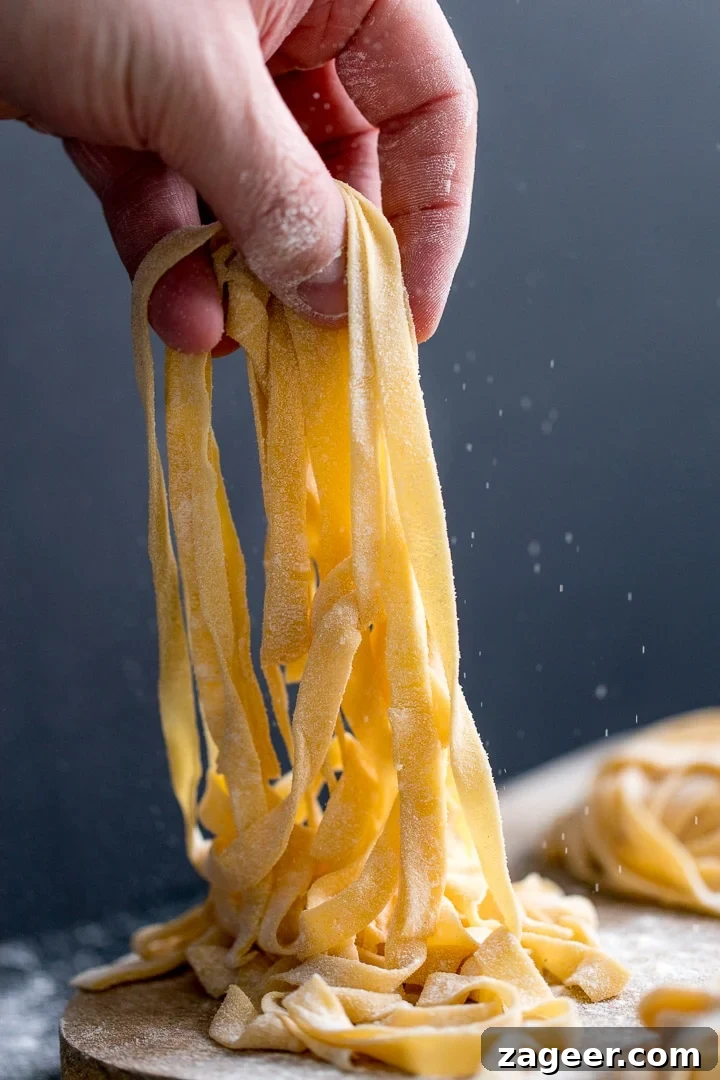
- For classic **tagliatelle** or **fettuccine**, lightly dust the rolled-out dough with flour and gently roll it up loosely, like a scroll. Then, slice it into strips approximately 1/2 cm (0.2 inches) thick for tagliatelle, or slightly wider for fettuccine.
- For **lasagna sheets**, cut the dough into large rectangles.
- For **ravioli** or **tortellini**, cut squares or circles and prepare your filling.
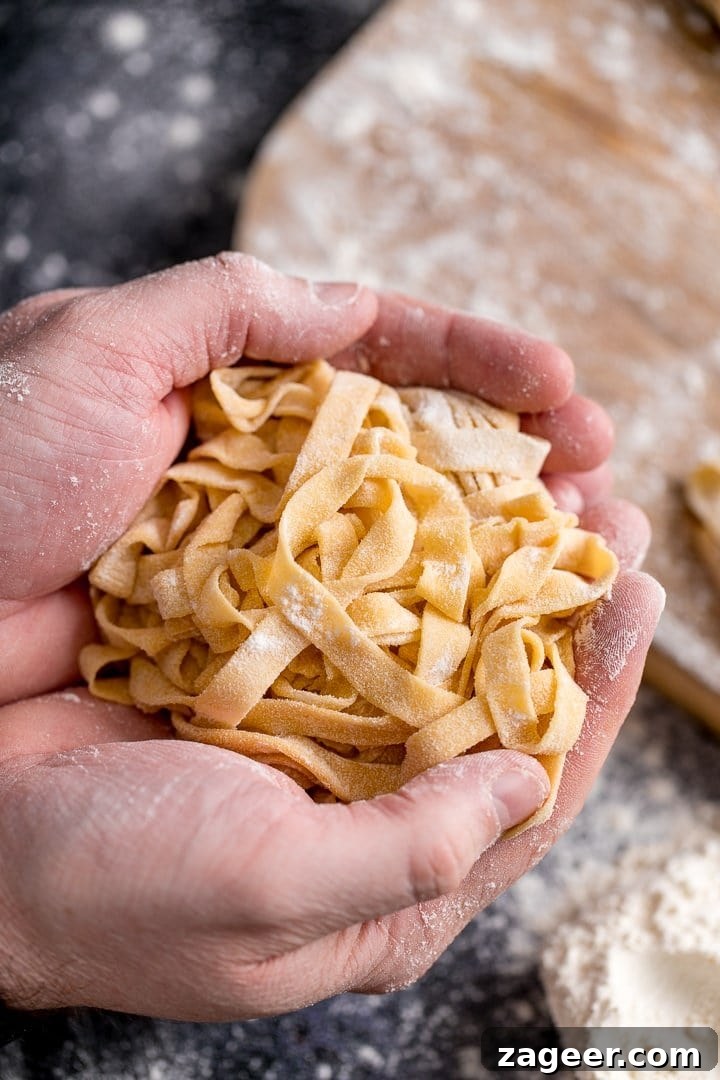
- Once cut, use your fingers to gently separate the strands (if making tagliatelle/fettuccine) and place them in portions on a lightly floured plate or baking sheet to prevent sticking.
Cooking Your Perfect Homemade Pasta
Cooking fresh pasta is a swift process compared to its dried counterpart. Here’s how to ensure it’s perfectly al dente:
- Bring a large pot of water to a rolling boil. It’s crucial to use ample water to allow the pasta to move freely and prevent sticking.
- Generously salt the boiling water. This not only seasons the pasta from within but also helps to elevate the overall flavor of your dish. The water should taste like the sea.
- Carefully add the fresh pasta to the boiling water. Stir gently to ensure the strands don’t clump together.
- Cook for approximately 3 minutes. Fresh pasta cooks very quickly. It will float to the top of the water once cooked through. Taste a piece to confirm it’s al dente – tender but with a slight bite.
- Drain the pasta immediately. You can reserve a small amount of pasta water before draining, as its starchy consistency is excellent for loosening sauces.
This fresh pasta is so incredibly flavorful that it shines even with the simplest of dressings. I love to serve it right away with a generous drizzle of high-quality extra virgin olive oil and a sprinkling of flaky Maldon salt. For a subtle warmth and a little kick, a pinch of chili flakes is a fantastic addition. Freshly grated Parmesan cheese is, of course, always welcome!
Planning Ahead: Storing Your Homemade Pasta
One of the great advantages of making fresh pasta is its versatility in storage. You can prepare it ahead of time and store it in several ways, ensuring you always have a delicious meal ready to go.
Storing Fresh Pasta at Room Temperature
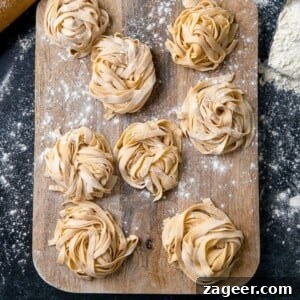
After making and cutting your pasta, gently distribute it in single layers on a lightly floured baking sheet, plate, or tray. Sprinkle a little more flour over the pasta to prevent sticking. You can leave it uncovered at room temperature for a few hours. This allows it to air dry slightly, which can enhance its texture and prevent it from becoming gummy when cooked. For a fully dried pasta, you’ll need a longer drying period (see below).
Time to cook from room temperature: Approximately 3 minutes.
Refrigerating Homemade Pasta
If you wish to prepare your pasta a few days in advance, refrigeration is an excellent option. After shaping and flouring your pasta, spread it out on a floured surface and allow it to air dry at room temperature for about an hour or two. This initial drying helps prevent sticking. Once slightly dry, carefully transfer the pasta to an airtight container or cover the baking sheet with plastic wrap. Refrigerate for 2-3 days.
Time to cook from refrigerated: Approximately 3 minutes.
Drying Homemade Pasta for Long-Term Storage
For a truly pantry-stable option, you can fully dry your homemade pasta. After making and shaping the pasta, spread it evenly on floured baking sheets or hanging racks. Ensure good air circulation and avoid overly humid environments, which can hinder proper drying. Let the pasta dry for about 24 hours, or until it becomes brittle enough to snap easily. Once completely dry, store it in a sealed, airtight container at room temperature. Properly dried pasta can last for up to a month.
Time to cook from dried: 4-7 minutes, depending on thickness. Dried pasta will require a slightly longer cooking time than fresh.
Freezing Fresh Pasta for Future Meals
Freezing is a fantastic way to extend the shelf life of your fresh pasta, making it perfect for quick weeknight dinners. After making and shaping your pasta, arrange it on a lightly floured baking sheet or tray. For best results and to prevent sticking, sprinkle the pasta with semolina flour if you have it; otherwise, a very light dusting of regular all-purpose flour will suffice.
Pro Tip for Freezing: “Open freeze” the pasta on the tray for about 30 minutes. This allows it to firm up slightly but remain pliable. Once partially frozen, divide the pasta into individual serving portions and transfer them to freezer bags or airtight containers. This prevents the pasta from clumping into one large block and makes it easy to grab exactly what you need. Frozen pasta can be stored for up to 3 months.
Time to cook from frozen: 3-5 minutes. You can cook frozen pasta directly from the freezer; there’s no need to thaw it beforehand. Just add it to boiling salted water.
What to Serve with Fresh Pasta
Fresh homemade pasta is a versatile canvas, ready to soak up the flavors of your favorite sauces and accompaniments. Its superior texture and taste make it a perfect match for a wide array of dishes, from rich meat sauces to creamy vegetarian options.
- The rich and meaty bolognese from my spaghetti bolognese post provides a classic and satisfying pairing.
- Creamy steak stroganoff offers an indulgent and comforting option for a special weekend dinner.
- Serve it with Tuscan chicken in a creamy sun-dried tomato sauce for a taste of Italy (or for a delicious veg-based version, try my Tuscan mushrooms).
- Crunchy oven-baked chicken parmesan is another fantastic choice, offering a delightful contrast of textures.
- Pair it with slow-cooked beef goulash for a hearty and flavorful meal.
- For something uniquely delicious, try garlic bread spaghetti – it might sound unconventional, but it’s an absolute game-changer!
Watch the Homemade Pasta Tutorial
You can find a helpful video tutorial demonstrating how to make this easy homemade pasta.
Easy Homemade Pasta Recipe
20 mins
30 mins
50 mins
Ingredients
- 420 g (3 1/4 cups) plain (all-purpose) flour See Note 1 for swaps
- 4 large eggs
Instructions
-
Place the flour and eggs in the bowl of a stand mixer (see: Note 2 below for doing this bit by hand).420 g (3 1/4 cups) plain (all-purpose) flour, 4 large eggs
-
Use the dough hook and start mixing slowly until it comes together as a ball. You may need to add a little splash of water or flour, depending on if the dough looks dry or sticky.
-
Once it forms into a ball, increase the speed to medium and mix for 5 minutes, until the dough is smooth.
-
Take the dough out of the bowl and wrap it in clingfilm or wax paper (ensure it’s fully covered so it doesn’t dry out) and place in the fridge for at least 30 minutes, and up to 12 hours.
-
Remove from the fridge and split the dough into 4 pieces.
-
Using a rolling pin (see Note 3), roll out the dough on a lightly floured surface until the dough is as thin as you can possibly get it. You should just about be able to see the shape of your hand through the dough.
-
Now you can cut the pasta into any shape you want. Large rectangles for lasagna, squares for ravioli or strips for tagliatelle.
-
For tagliatelle, lightly flour the top of the dough and roll it up loosely before slicing it into 1/2 cm (0.2″) thick strips.
-
Use your fingers to separate out the strands and place them on a plate in portions.
Cook the pasta
-
To cook the pasta, place it in a large pan of well-salted boiling water. Bring back to the boil and simmer for 3 minutes. The pasta should float to the top of the water when cooked.
Notes
Note 1 – Flour swaps
I’m using Plain or all-purpose flour for a relatively smooth pasta with a light chewiness.
You can replace it (same quantities) with:
- Pasta flour or ’00’ flour – which is a protein-rich flour commonly used for a smoother, chewier pasta.
or
- Semolina flour – which is great for a slightly rougher pasta that allows the sauce to cling to it better.
Note 2 – Making the pasta by hand
If you don’t have a stand mixer, simply place your flour in a large mound on your work surface.
Whisk the eggs lightly in a bowl.
Make a large well in the centre of the flour and carefully add the eggs.
A little at a time, slowly incorporate the flour into the eggs using a fork until the eggs and flour are fully mixed.
Use your hands to shape the dough into a ball. You may need to add a tiny splash of water if the dough is very dry and crumbly. Or add a sprinkling of flour if the dough is too wet.
Knead the dough on a lightly floured surface for 5 minutes until smooth.
Continue on with the rest of the recipe.
Note 3 – Rolling pin or Pasta Machine
I used a rolling pin, which works great so long as you keep the dough lightly floured and roll until it’s the thinnest you can get it (it will swell a little when cooked).
If you have a pasta machine then take one of the quarter pieces of dough and squash or roll it relatively flat.
Set your pasta machine on the widest setting and dust the dough in flour.
Then work the pasta through the pasta machine.
Knock it down a setting, so it’s slightly narrower, then flour the dough and go again. Continue this, reducing the setting (and flouring the dough to prevent it sticking), until your dough as thin as it can go.
Then roll and cut the dough by hand, or use the cutting setting on your machine.
Making Fresh Pasta ahead
Room temperature
Make the pasta and then distribute it on a floured baking sheet/plate/tray and sprinkle it with flour. You can leave it this way, uncovered, for a few hours. Leave for longer if you want to dry the pasta completely (see more info on drying pasta below).
Time to cook from room temperature – 3 minutes.
Refrigerated
If you want to make the pasta a few days ahead, you can refrigerate it too. Make the pasta then distribute it on a floured baking sheet/plate/tray and sprinkle it with flour, leave to dry for a couple of hours at room temperature, then cover and refrigerate for 2-3 days.
Time to cook from refrigerated – 3 minutes.
Drying homemade pasta
Make the pasta, then distribute it on a floured baking sheet/plate/tray and sprinkle it with flour. Dry for 24 hours, until you can snap the pasta. You should try to avoid a humid environment, as the pasta won’t fully dry out.
Once fully dried, store in a sealed container at room temperature for up to a month.
Time to cook from dried – 4-7 minutes.
Freezing
Make the pasta and then distribute it on a floured baking sheet/plate/tray and sprinkle it with flour. If you have it, it’s best to sprinkle it with semolina flour, as this will help stop the pasta from sticking together when you’re cooking it. If you don’t have it, just dust very lightly with regular plain/all-purpose flour instead.
Time to cook from frozen – 3-5 minutes.
Nutritional information is per serving (serves 6)
Nutrition
Nutrition information is automatically calculated, so should only be used as an approximation.
Some of the links in this post may be affiliate links – which means if you buy the product I get a small commission (at no extra cost to you). If you do buy, then thank you! That’s what helps us to keep Kitchen Sanctuary running. The nutritional information provided is approximate and can vary depending on several factors. For more information please see our Terms & Conditions.