
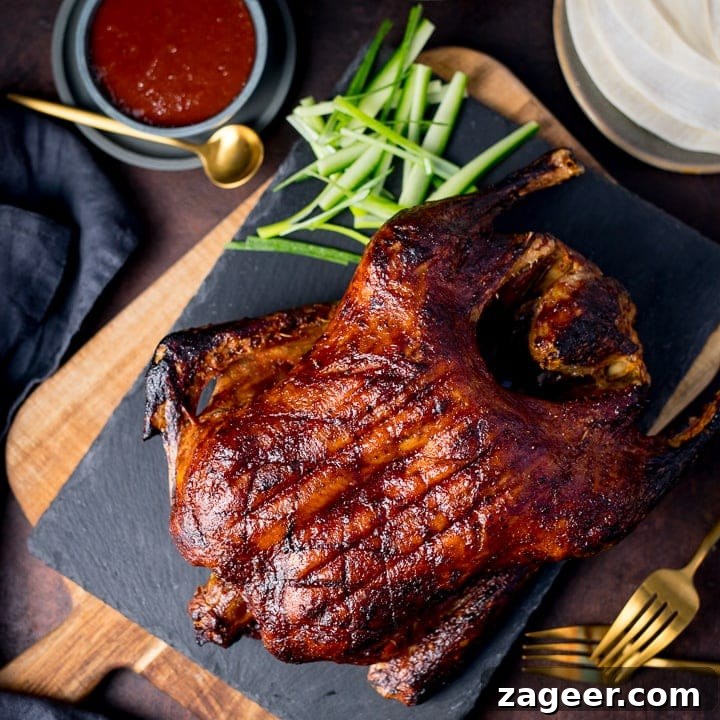
Mastering Homemade Crispy Peking Duck: A Simple Guide to Restaurant-Quality Flavor
Unleash the incredible flavors of oven-roasted Peking duck in your own kitchen! This straightforward method guarantees irresistibly crispy skin and succulent, fall-apart meat, perfectly complemented by a vibrant, spicy plum sauce. Prepare for an unforgettable feast – not a single shred will be left behind!
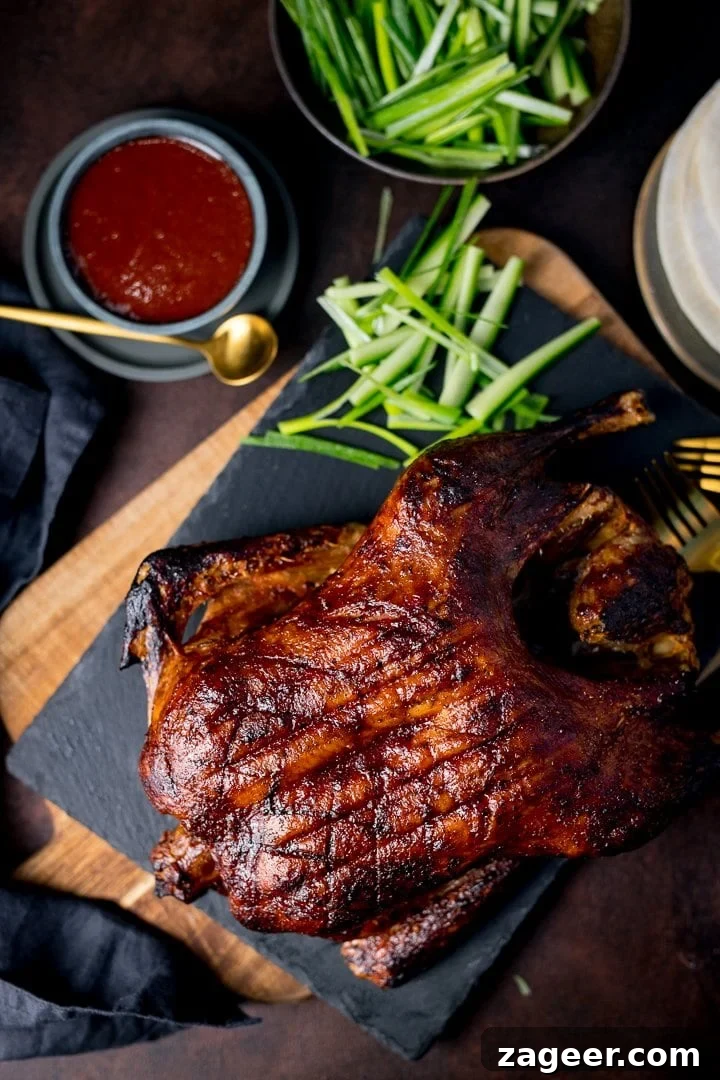
There’s an undeniable allure to the duck course at a Chinese restaurant. It often becomes the highlight of the meal, sparking good-natured arguments over the last few morsels of tender, flavorful meat. We often find ourselves regretting not ordering a whole duck, even as we anticipate the other delectable dishes yet to come. Today, I’m thrilled to share my cherished recipe for homemade Peking duck, allowing you to recreate that coveted experience right in your kitchen.
Imagine serving a magnificent whole duck, brimming with rich flavors, for a fraction of what it would cost at a high-end restaurant. This recipe means more generous portions for everyone and, hopefully, less squabbling over the final tasty bits! I confess, while preparing and photographing this dish, it was a constant battle not to “sample” just one more piece… then another, and another. It’s truly that addictive.
This recipe has become a staple for our family’s celebrations, especially for our annual homemade Chinese banquet. There’s something wonderfully comforting about ringing in the New Year (or any special occasion) with a grand feast, enjoyed from the comfort of our pajamas. It’s perfect for Chinese New Year, birthdays, or simply a weekend when you crave something extraordinary.
The Secrets to Unforgettable Homemade Crispy Duck
Achieving that coveted crispy skin and moist, flavorful meat at home might seem daunting, but with a few simple techniques, it’s entirely within reach. My method focuses on a long, slow roast, designed to render the fat and crisp the skin beautifully, while keeping the duck supremely juicy inside. The final touch, a homemade spicy plum glaze, adds an irresistible caramelization and depth of flavor that elevates this dish from great to truly exceptional.
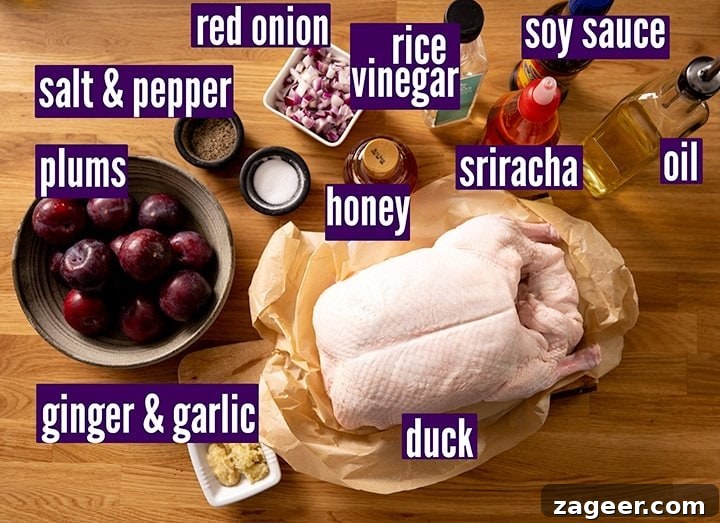
Key Ingredients for the Best Homemade Crispy Duck and Spicy Plum Sauce:
The beauty of this recipe lies in its relatively simple ingredient list, allowing the quality of the duck and the freshness of the plums to truly shine. For a truly authentic and vibrant experience, I highly recommend making the plum sauce from scratch, as it truly complements the richness of the duck.
For the exquisite homemade plum sauce, you’ll need a selection of **nice ripe plums**, the star of our tangy and sweet concoction. Complementing the fruit are aromatic essentials: **red onion, fresh garlic, and ginger**. To achieve the perfect balance of sweetness and acidity, we incorporate **honey, rice vinegar, and soy sauce**. A touch of **oil** helps to sauté the aromatics. For those who appreciate a kick, we add sriracha. Don’t be alarmed by its initial potency – the heat gracefully mellows after simmering for an hour or so. Feel free to adjust the amount of sriracha, or omit it entirely, to suit your spice preference.
As for the duck itself, the requirements are wonderfully simple: a high-quality, juicy **whole duck**, seasoned merely with **salt and freshly ground black pepper**. Good quality duck is essential for the best results.
Crafting the Homemade Spicy Plum Sauce:
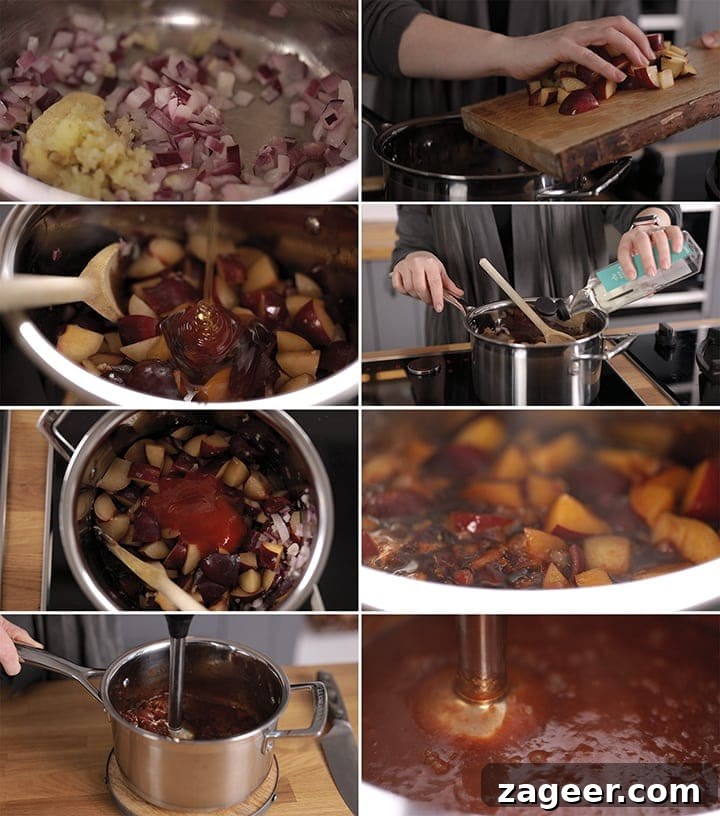
The plum sauce is a labor of love that pays off in spades. It begins by gently frying finely chopped red onion, garlic, and ginger in a medium saucepan until the onion becomes beautifully soft and translucent, releasing its sweet aroma. Next, introduce a generous amount of 8 chopped plums – yes, we want plenty of that glorious sauce! Along with the plums, add the honey, soy sauce, rice vinegar, and sriracha. Bring the mixture to a gentle simmer and let it bubble away for approximately 20 minutes, allowing the flavors to meld and deepen.
Once simmered, carefully blend the sauce using a stick blender directly in the pan. A few pulses are all it takes; I prefer to leave a little texture for a more rustic, homemade feel. Be cautious to avoid splashes of the hot sauce. Once blended, your sensational plum sauce is complete! It can be left to cool and served at room temperature, or reheated gently later if desired. The flavors only intensify as it rests, making it an excellent component to prepare ahead of time.
The Art of Crispy Skin: Your Step-by-Step Guide to Perfect Duck
The crispy skin is arguably the most coveted part of a roasted duck, and achieving it at home is simpler than you might think. It all starts with proper preparation and a little patience. Follow these steps for truly irresistible results:
- Pat Dry Religiously: Begin by thoroughly patting the entire duck skin dry with kitchen paper. Any moisture on the skin will steam rather than crisp, so this step is non-negotiable for ultimate crunch.
- The Essential Wire Rack: You’ll need a sturdy roasting tin fitted with a wire rack. Positioning the duck on the rack is crucial as it allows the copious amounts of fat that render during cooking to drain away. This prevents the duck from sitting in its own fat, which would lead to soggy skin.
- Strategic Scoring: The secret to both crispy skin and perfectly cooked meat is to lightly score the fat layer all over the breast side of the bird. Be meticulous here – score only the fat, being careful not to pierce the flesh underneath. This allows the fat to render more easily and helps the skin crisp up evenly.
- Simple Seasoning: Once scored, simply season the duck generously with salt and pepper. No complicated marinades are needed at this stage; the duck’s natural flavors will shine through.
- Low-and-Slow Roasting with Regular Turning: Place the duck breast-side up on the wire rack and into a preheated oven set to 150°C/300°F (fan). The duck cooks for a total of 3 hours and 40 minutes. The key during this long, slow roast is to turn the duck over every hour. This seemingly minor step is transformative: it helps the natural juices redistribute throughout the meat, ensuring every bite is moist and succulent. It also ensures that all sides of the skin cook evenly, leading to that desirable all-over crispness.
- The Final Glaze for Color and Flavor: In the last ten minutes of cooking, carefully remove the duck from the oven. Turn it breast-side up once more, and generously brush some of your homemade plum-sriracha sauce over the entire surface. Return the duck to the oven for a final 10 minutes. This high-heat blast with the glaze will create a stunning, dark, caramelized finish that not only looks incredible but also adds an amazing layer of sweet and spicy flavor to the crispy skin.
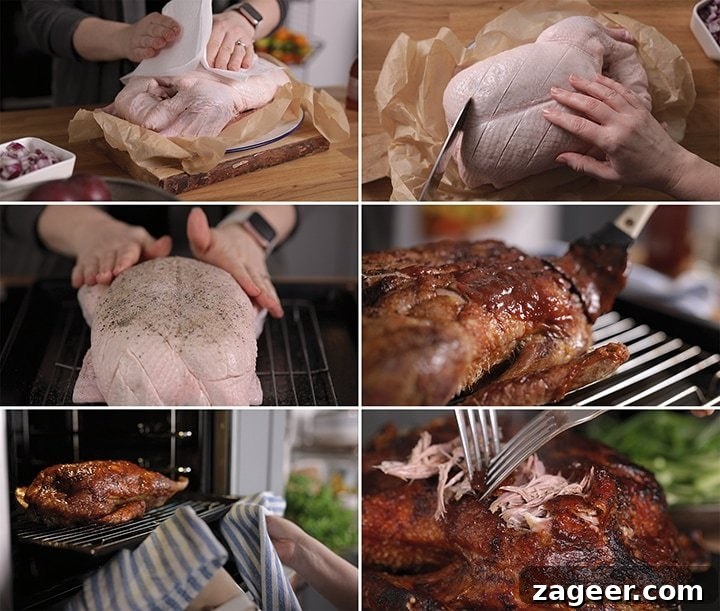
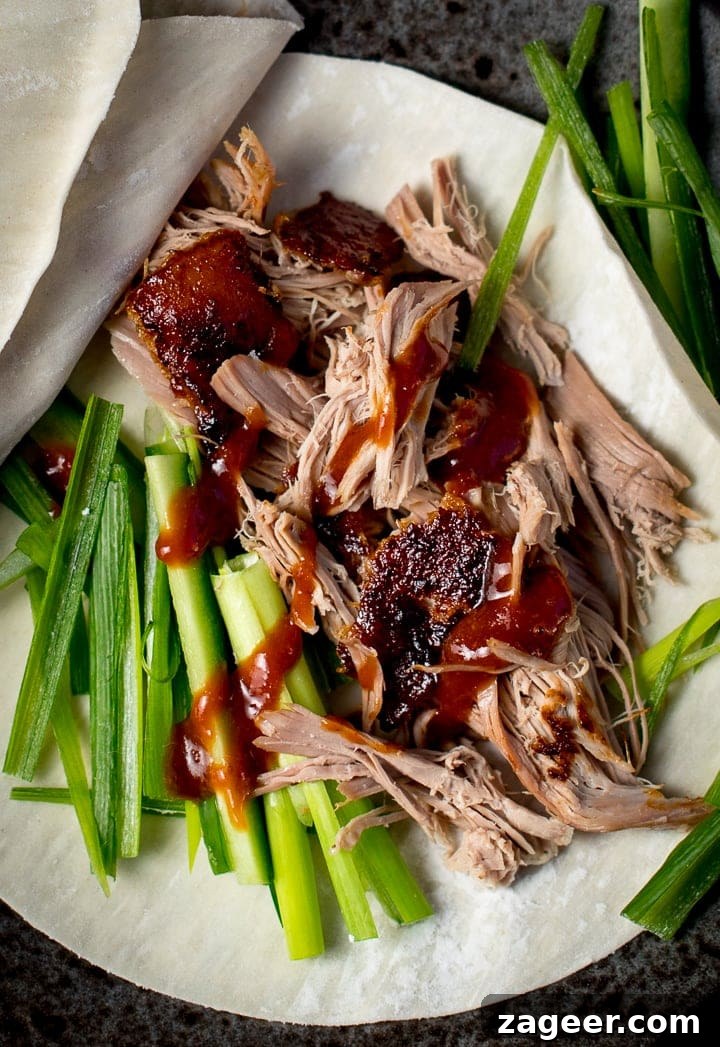
Once out of the oven, allow the duck to rest for about 10 minutes. This resting period is crucial for the juices to settle, ensuring the meat remains incredibly tender. Then, using two forks, effortlessly shred the succulent meat from the bones. Serve this glorious pulled duck with warm Chinese pancakes, crisp strips of spring onion (scallions), refreshing cucumber, and, of course, a generous serving of that irresistible spicy plum sauce.
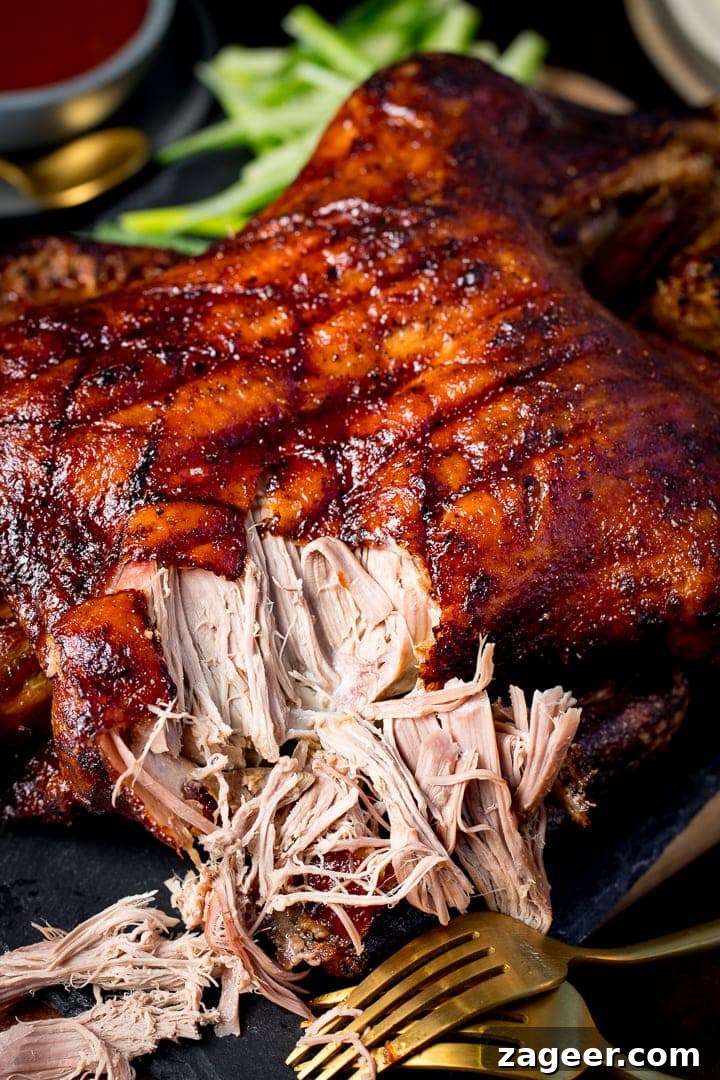
While this recipe is designed to serve six as part of a larger Chinese banquet with rice and other dishes, my family of four happily devours a whole duck as a magnificent main course. It’s a truly satisfying meal that brings everyone to the table with eager anticipation.
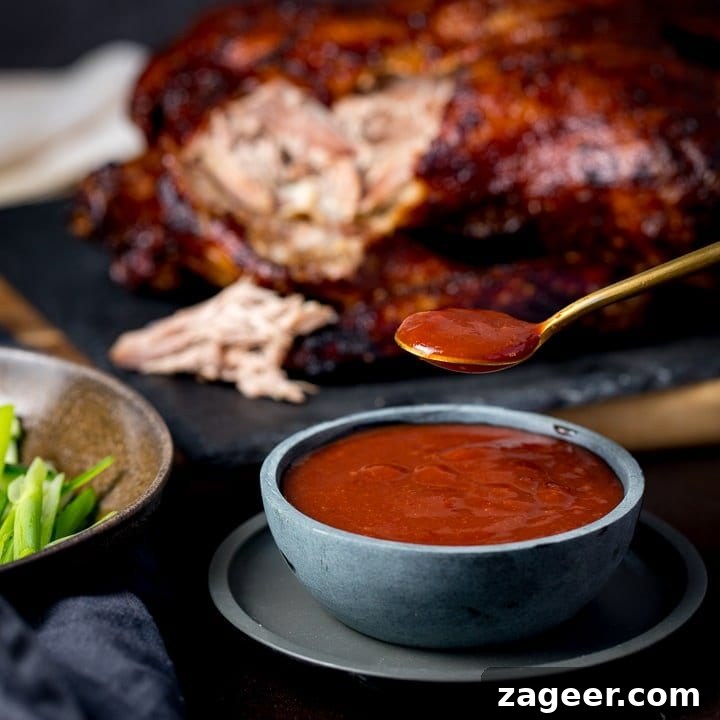
A note on the sauce: while it may taste quite spicy when first made, the heat truly mellows over time. Even my children, aged 9 and 13, absolutely adore it, demonstrating its family-friendly appeal after a short resting period.
Traditional Peking Duck vs. Our Easy Home Method
It’s important to understand that traditional Peking duck, as served in high-end restaurants, involves a deeply elaborate and time-consuming process. This artisanal preparation includes several distinct steps, such as pumping air under the duck’s skin to separate it from the flesh, meticulously plunging the duck into boiling water, and then hanging it to dry for a day or even longer. Finally, the duck is glazed and roasted. This multi-day process is precisely what yields the exceptionally thin, almost glass-like crispiness of authentic Peking duck skin.
While the traditional method produces unparalleled results, replicating many of these intricate steps in a home kitchen is simply not practical for most. My recipe offers a fantastic, accessible alternative that captures the essence of crispy skin and tender, flavorful duck without the professional equipment or multi-day commitment. Our approach focuses on long, slow cooking combined with strategic turning in the oven. This continuous rotation during the roasting process is key to effectively rendering the duck fat and distributing the juices, ensuring both a beautifully crisp skin and wonderfully moist, succulent meat throughout. The duck is then finished with a homemade plum glaze, adding a rich, dark caramelization and an extra burst of sweet and spicy flavor that truly makes this dish shine.
Frequently Asked Questions About Crispy Duck
Can I use store-bought plum or hoisin sauce instead of making my own?
Absolutely! While my homemade plum sriracha sauce is highly recommended for its fresh, vibrant flavor, convenience is key. If time is short, a good quality shop-bought plum sauce or hoisin sauce can be a fantastic substitute. For those who enjoy a little heat, simply mix in a touch of sriracha to your store-bought sauce to customize the spice level. This shortcut won’t compromise the overall enjoyment of your delicious crispy duck.
What do you serve crispy duck with?
Crispy duck is best enjoyed as part of a delicious spread of classic accompaniments that balance its richness and enhance its flavors. The quintessential serving includes:
- Chinese Pancakes: These soft, thin steamed pancakes are perfect for wrapping up the shredded duck. You can find them in the frozen section of most larger supermarkets or Asian grocery stores.
- Strips of Cucumber: Offering a refreshing, cool crunch that contrasts beautifully with the warm duck.
- Spring Onions (Scallions): Thinly sliced into long strips, they provide a mild, pungent freshness.
- Plenty of Plum Sauce: Whether homemade or store-bought, this tangy, sweet, and spicy sauce is the star condiment that brings all the elements together.
Planning a Homemade Chinese Banquet?
Elevate your crispy duck into a spectacular homemade Chinese banquet! This duck makes a fantastic centerpiece, and these additional dishes will create an unforgettable feast:
Complete Your Chinese Feast with These Delights:
- Special Fried Rice (Our full masterclass recipe for a flavor-packed staple)
- Crispy Sesame Chicken (Tender chicken coated in a sticky Asian sauce)
- Crispy Sesame Prawn Toast (A beloved appetizer with a delightful crunch)
- Spicy Ginger Beef Stir-Fry (A quick and fiery main course option)
- Sticky Chinese Pork Belly (Melt-in-your-mouth tender, glazed to perfection)
- Baked Cauliflower Wings in a delicious Asian sauce (A fantastic vegetarian option)
- Oven-Baked Asian Ribs with Crispy Onions (Fall-off-the-bone ribs bursting with flavor)
The Video Guide:
For a visual guide to perfecting this crispy duck and plum sauce, check out my step-by-step video:
Pulled Crispy Duck with Plum Sriracha Sauce Recipe

Click the stars to rate or comment
Pulled Duck with Plum Sriracha Sauce
Ingredients
Duck:
- 1 duck approx. 2.4 kg/ 5.3 lbs in weight. Innards removed.
- ½ tsp salt
- ½ tsp freshly ground black pepper
Plum Sriracha sauce:
- 1 tbsp vegetable oil
- 1 red onion peeled and chopped
- 1 tsp minced ginger
- 4 cloves garlic minced
- 600 g (1.3 lbs) ripe plums de-stoned and cut into small (1 cm pieces) – no need to take the skin off
- 6 tbsp dark soy sauce
- 4 tbsp honey
- 1 tbsp Chinese rice vinegar if you don’t have any you can use white wine vinegar
- 4 tbsp sriracha
Instructions
-
Preheat the oven to 150C/300F (fan). Take a large roasting tin and place a wire rack inside.
-
Pat the duck down with some kitchen paper to ensure the skin is dry.1 duck
-
Score the skin of the duck in a criss-cross pattern (breast side) with a sharp knife. Be sure not to pierce the flesh.
-
Place the duck – breast side up – on the rack in the roasting tin.
-
Season with salt and pepper, and place in the oven for 3 hours 30 minutes. Turn the duck over every hour (I use a clean kitchen towel in each hand to turn the duck over).1/2 tsp salt, 1/2 tsp freshly ground black pepper
-
Whilst the duck is in the oven, make the plum sriracha sauce.
-
Heat the oil in a medium sized sauce pan.1 tbsp vegetable oil
-
Add the onion and cook on low-medium for 5 mins – until the onion is soft. Give it a stir every minute or so.1 red onion
-
Add in the ginger and garlic and cook for a further minute.1 tsp minced ginger, 4 cloves garlic
-
Add in the rest of the ingredients, turn up the heat and bring to a gentle bubble. Turn the heat back down to medium and allow everything to bubble gently for 20 minutes. Give it a stir every so often.600 g (1.3 lbs) ripe plums, 6 tbsp dark soy sauce, 4 tbsp honey, 1 tbsp Chinese rice vinegar, 4 tbsp sriracha
-
After 20 minutes, turn off the heat and blend the mixture in the pan using a hand blender. I like to give it just a few pulses so the sauce still has some texture. Leave to one side.
-
After the duck has cooked for 3 hours and 30 minutes, take it out of the oven and turn the oven temperature up to 190C/375F (fan).
-
Turn the duck so that it’s breast-side-up again and brush 2 tbsps of the plum sriracha sauce all over the top of the duck (including the legs).
-
Place back in the oven for 10 minutes until the glaze has gone dark brown and caramelised.
-
Take the duck out of the oven. Leave to rest for 10 minutes, then place on a large plate and shred all the meat using two forks.
-
Serve immediately with some of the plum sriracha sauce. I also like to serve it will some rice and greens.
Video
Notes
Can I make it ahead?
It tastes best when cooked and served immediately. However, you can prepare the duck ahead of time. Simply cook the duck, shred the meat, allow it to cool completely, then cover and refrigerate.
To reheat, wrap the shredded duck in foil and warm it in the oven for approximately 15-20 minutes at 180°C/350°F, or until it is piping hot throughout. Please note that the skin will not be as crispy as freshly cooked, but reheating it in foil will help keep the duck moist.
Can I freeze it?
Yes, crispy duck is suitable for freezing. After cooking, shred the meat, let it cool completely, then cover tightly and freeze.
When you’re ready to enjoy it, defrost the duck overnight in the refrigerator. Reheat it wrapped in foil in the oven for about 15-20 minutes at 180°C/350°F, ensuring it’s thoroughly heated. Similar to refrigeration, the skin will lose some crispness, but the foil helps retain moisture during reheating.
Don’t Waste the Duck Fat!
The rendered duck fat collected in your roasting tin is a culinary treasure! Don’t discard it. Strain it and store it in an airtight container in the refrigerator. It’s fantastic for making exceptionally delicious crispy roast potatoes, or for sautéing vegetables, adding an incredible depth of flavor.
Nutritional information is provided per serving (please note: this calculation does not factor in the fat that renders out during cooking, so the actual calorie and fat content per serving may be lower).
Nutrition
Nutrition information is automatically calculated, so should only be used as an approximation.
This post was originally published in November 2014 and significantly updated in January 2020 with fresh photos, a helpful video, and enhanced tips to bring you the best possible recipe.
Some of the links in this post may be affiliate links – which means if you buy the product I get a small commission (at no extra cost to you). If you do buy, then thank you! That’s what helps us to keep Kitchen Sanctuary running. The nutritional information provided is approximate and can vary depending on several factors. For more information please see our Terms & Conditions.