
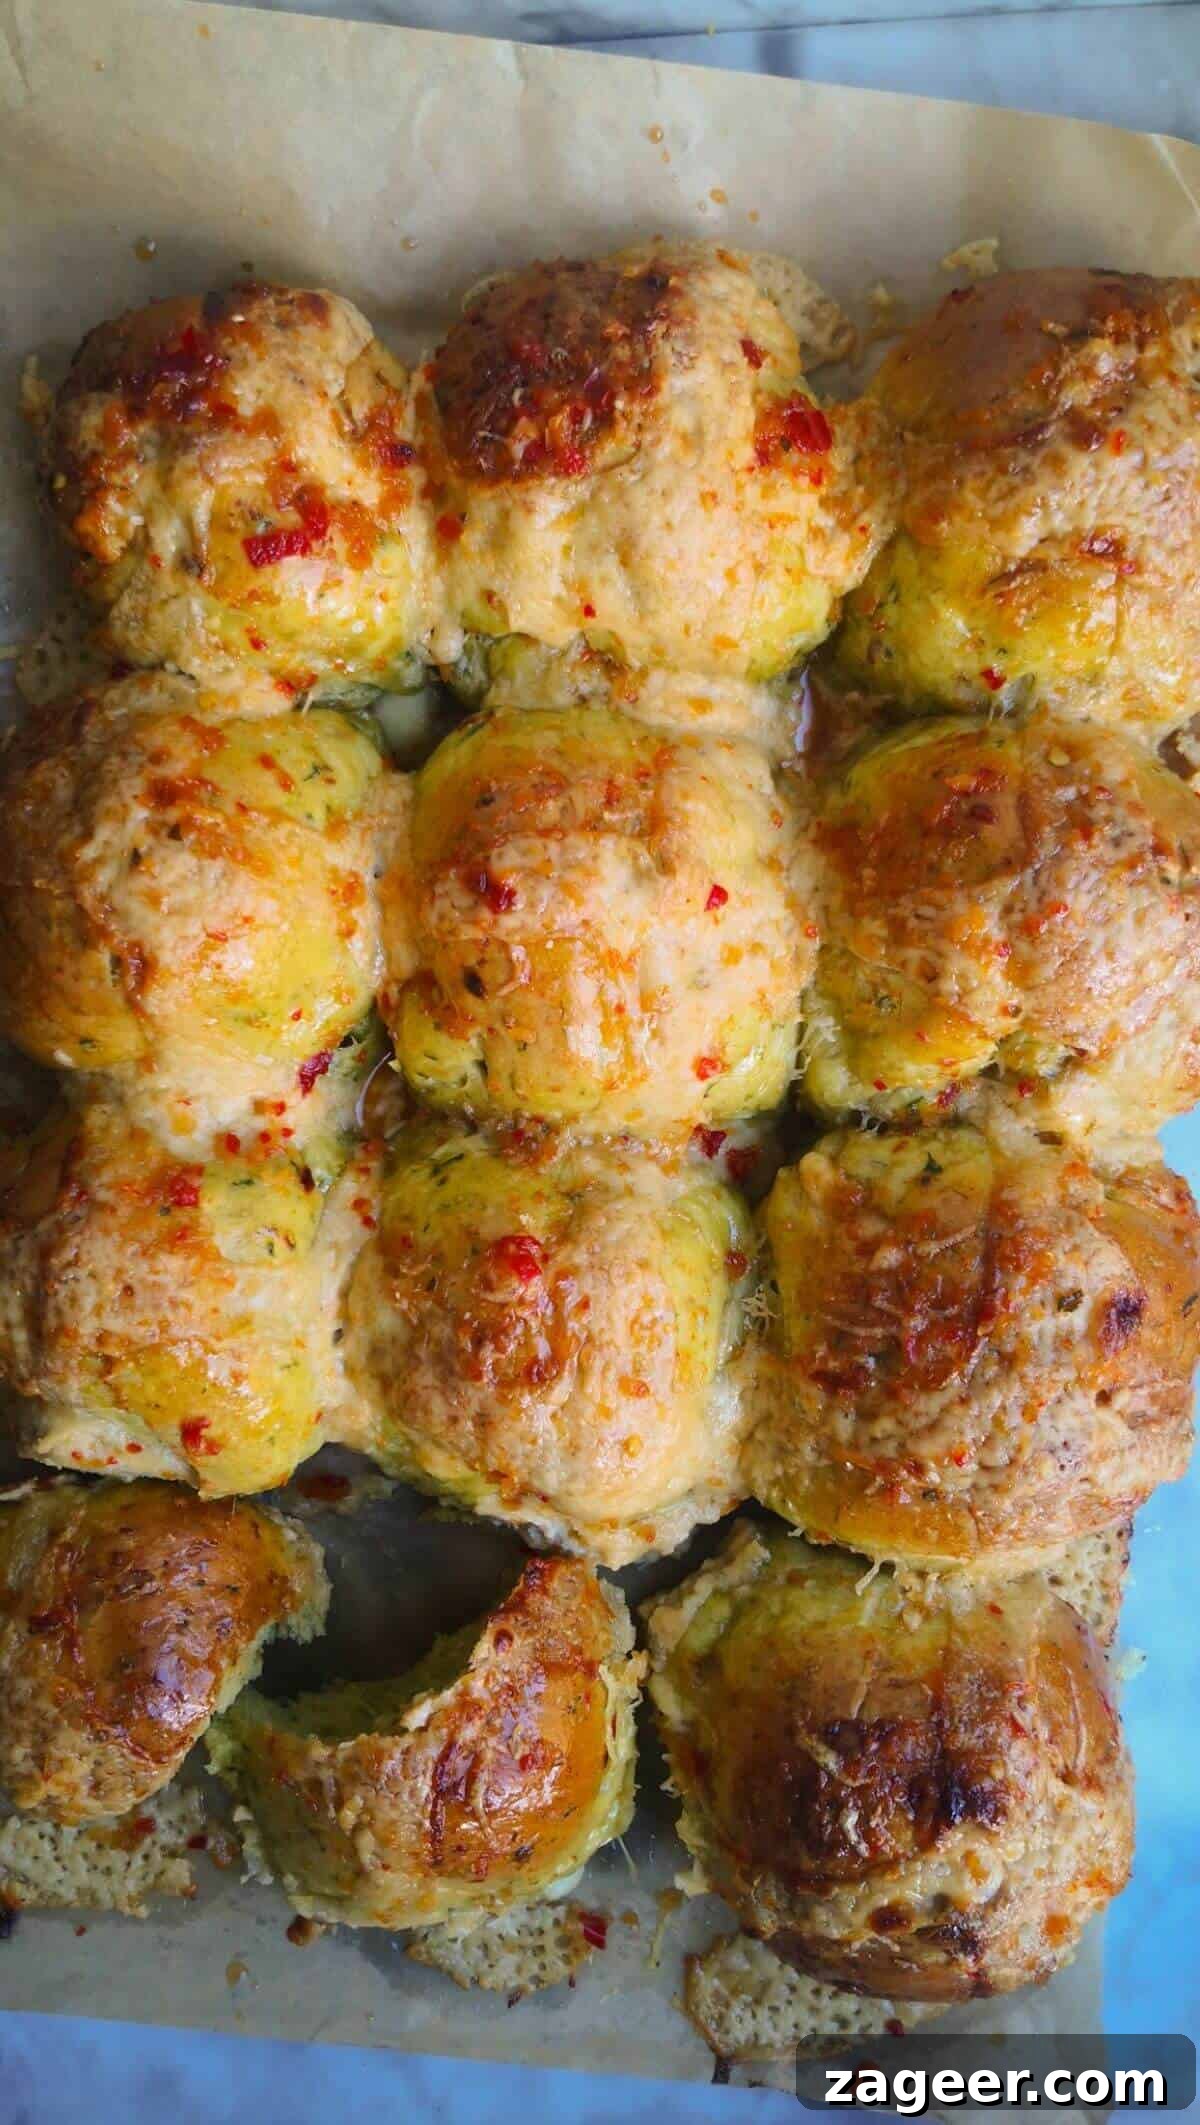
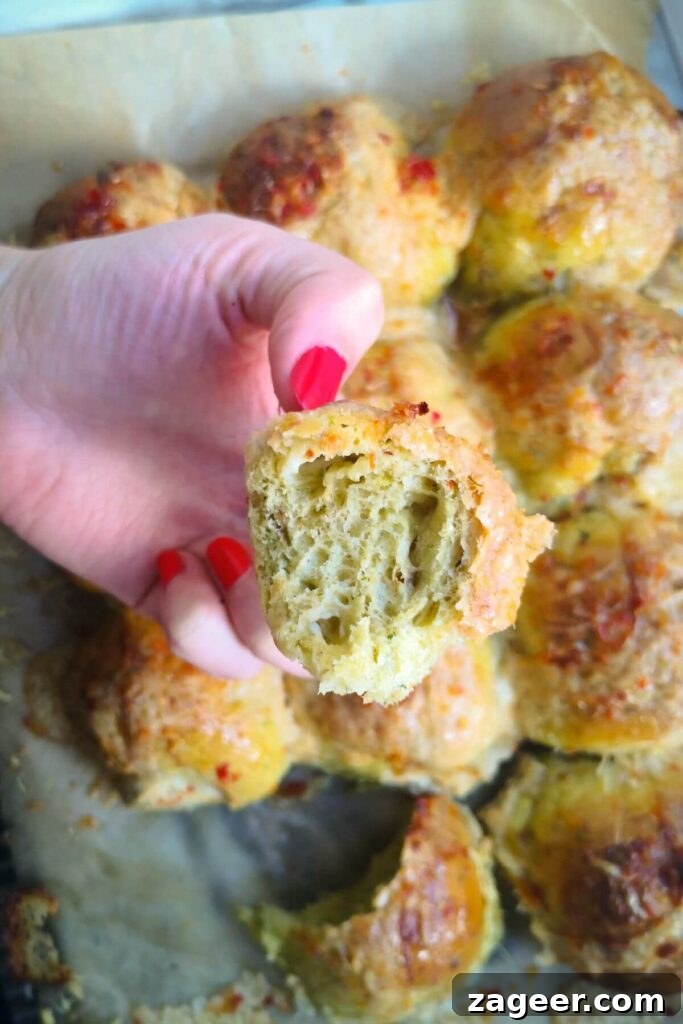
Prepare to elevate your spring baking with these exquisite, ultra-cheesy, and irresistibly soft Wild Garlic Hot Cross Buns. This recipe is a true celebration, perfectly timed for both the fleeting wild garlic season and the joyous occasion of Easter. Forget traditional sweet buns; these savory delights are crowned with lavish, gooey cheesy béchamel crosses and finished with a shimmering sweet chili jam glaze. They offer a profoundly unique and special way to incorporate the distinctive flavor of fresh wild garlic into your holiday spread, creating a memorable treat that’s far beyond the ordinary.
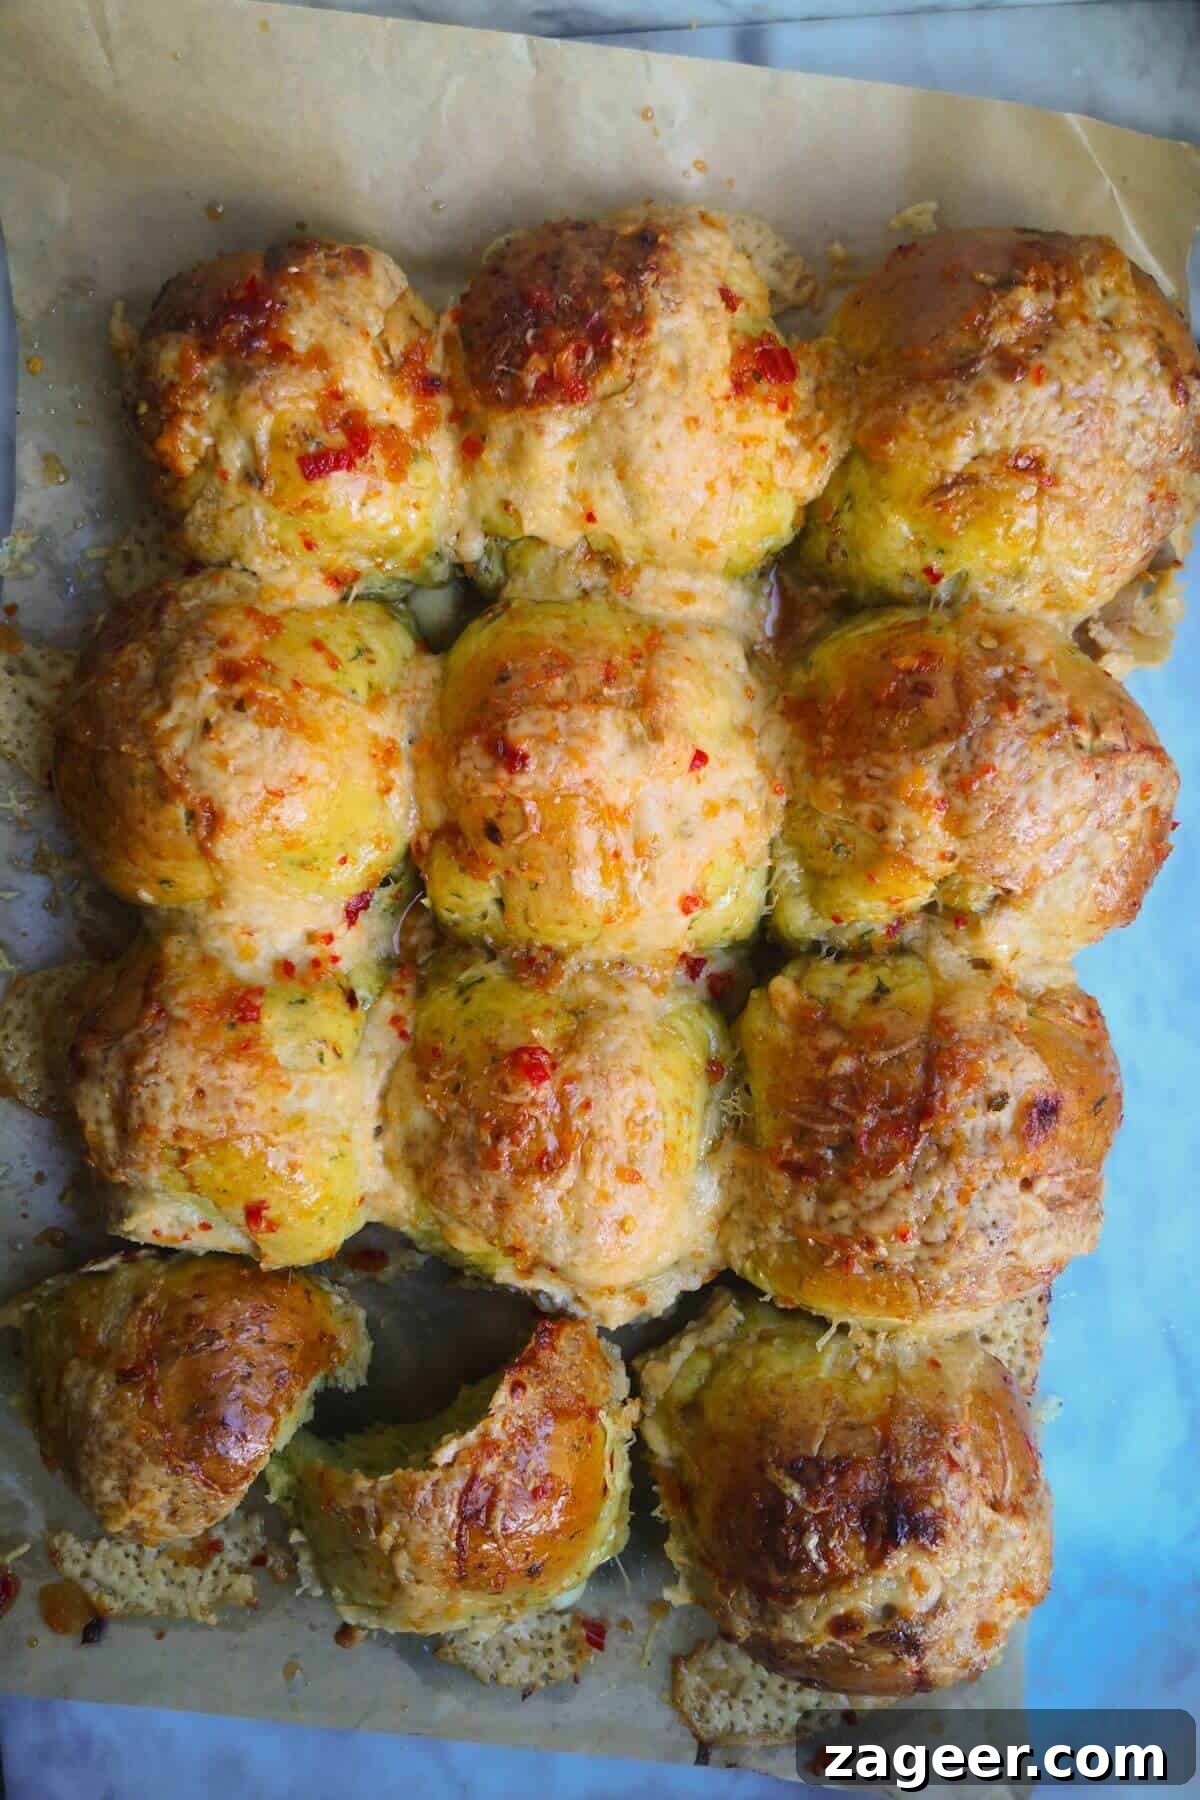
When the vibrant awakening of wild garlic season beautifully converges with the festive anticipation of Easter, culinary magic truly unfolds. Wild garlic, also known as ramps, stands out as one of my absolute favorite seasonal ingredients. Its ephemeral nature – typically available for only a month or two each spring – compels me to maximize its use and explore creative, delicious avenues. While wild garlic pesto and wild garlic butter are undeniable classics and absolute staples in my kitchen, these hot cross buns? They are in a league of their own – outrageously good and utterly unforgettable.
The secret to their sublime flavor lies in the quick wild garlic-infused milk we create by blitzing the fresh leaves. This ensures a delicate, subtle garlic essence permeates every bite, harmonizing perfectly with the pockets of gooey, melted cheese generously stuffed within. But we don’t stop there. Instead of the conventional water-and-flour paste for the iconic cross, we craft a rich, luxurious cheesy béchamel sauce. This inspired addition not only amplifies the magnificent cheesiness but also introduces an unparalleled creaminess and depth, elevating these buns to an extraordinary level. Think of them as the most sophisticated, pull-apart cheesy garlic bread you’ve ever encountered, perfected for a special occasion.
To guarantee these wild garlic hot cross buns achieve an unparalleled softness and maintain their fresh texture for longer, I enthusiastically employ the renowned tangzhong method. This innovative technique involves creating a simple cooked paste from a small portion of flour and liquid – in this case, our aromatic wild garlic milk – before incorporating it into the main dough. The process gelatinizes the starches in the flour, allowing them to absorb and retain significantly more moisture. The result is an incredibly tender, pillowy crumb that remains moist and soft for days, ensuring every bun is a heavenly experience, from the first bite to the last, even after reheating.
Key Ingredients for Unforgettable Buns
Crafting these savory wild garlic hot cross buns requires a few star ingredients, each playing a crucial role in achieving their unique flavor and texture. Here’s what you’ll need and why:
- Wild Garlic (Ramps): This cherished, seasonal leafy green is the heart and soul of our recipe. Appearing for a precious few weeks in spring, its flavor is a gorgeous, subtle, and slightly sweet hint of garlic, distinct from its cultivated cousin. If you’re keen on foraging, seek it out in damp, shady woodlands and riverbanks – always be certain of your identification before consuming. Alternatively, you can find it at farmers’ markets and specialty grocers. In the UK, reputable suppliers like Able & Cole, Riverford, and Ocado often stock it during its season.
- Bread Flour: For that signature light, airy, and chewy texture, bread flour is my top recommendation. Its higher protein content facilitates excellent gluten development, which is essential for creating a strong yet elastic dough that traps air beautifully as it rises. While you *can* substitute with plain (all-purpose) flour, be aware that your buns might not achieve quite the same level of fluffiness and lift, though they will still be delicious.
- Milk: I opt for regular, full-fat whole milk for its richness and contribution to the buns’ tender crumb and golden crust. The fat content adds depth of flavor and helps create a beautifully soft interior. Semi-skimmed or skim milk can also be used, but may slightly alter the richness. For those exploring plant-based options, I anticipate that unsweetened soy or oat milk would perform well as suitable alternatives.
- Instant Yeast: My preference for instant yeast stems from its sheer convenience – it can be added directly with your dry ingredients without prior activation. If you only have active dry yeast on hand, don’t worry! You’ll simply need an extra step. Sprinkle it over a portion of the wild garlic milk (ensure the milk is lukewarm, not hot, to avoid killing the yeast) and let it sit for about 10 minutes. Look for a frothy, bubbly surface – this indicates your yeast is active and ready to work its magic. Once activated, proceed with the recipe as directed. Adding active yeast directly without this step can hinder proper rising and result in an undesirable grainy texture.
- Cheese: The cheese factor is paramount in these savory buns! I use a dynamic duo: mozzarella for its incredible melt and stretch, and mature cheddar for a robust, tangy flavor. This combination delivers both visual appeal and a satisfying taste. However, feel free to experiment with your favorites! Excellent alternatives include nutty Gruyère, creamy Havarti, mild Edam, sharp Parmesan, or even a bold blue cheese for an adventurous twist.
- Sweet Chilli Jam: This vibrant condiment isn’t just for glazing; it adds a crucial sweet and spicy counterpoint to the rich, savory buns. I absolutely adore using my homemade sweet chilli jam recipe, but a good quality store-bought sweet chili sauce works wonderfully too. The glaze provides a beautiful sheen and a burst of flavor that truly completes the experience.
Crafting Your Cheesy Wild Garlic Hot Cross Buns: A Step-by-Step Guide
Embark on the delightful journey of baking these unique hot cross buns. Each step is designed to ensure a perfect balance of flavor and texture, from the aromatic dough to the irresistible cheesy topping.
Begin by preparing your wild garlic milk: simply blitz fresh wild garlic leaves with the milk in a blender until you achieve a vibrant pale green liquid. Next, create the tangzhong paste by combining a small amount of this infused milk with flour in a pot, cooking it gently until it forms a thick, smooth paste. This critical technique is key to incredibly soft bread that stays fresh for days. Once cooled, add the tangzhong to your stand mixer bowl along with the remaining dough ingredients. Knead diligently for approximately 12 minutes until the dough transforms into a smooth, elastic, and supple mass, pulling away cleanly from the sides of the bowl. This vigorous kneading is essential for developing the gluten structure that gives the buns their characteristic chew and rise.
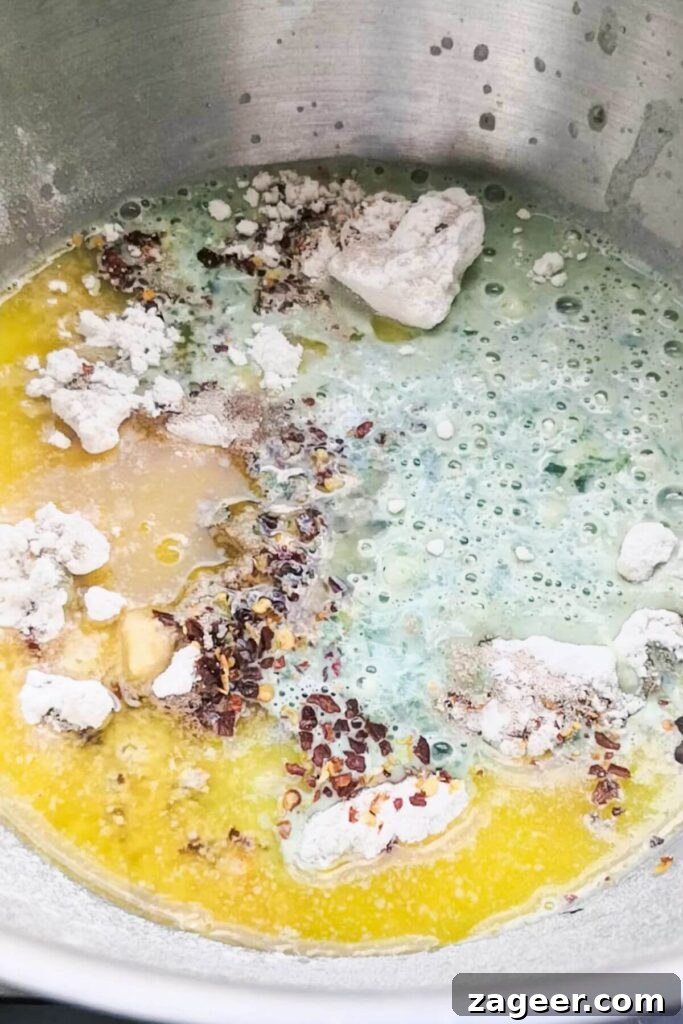
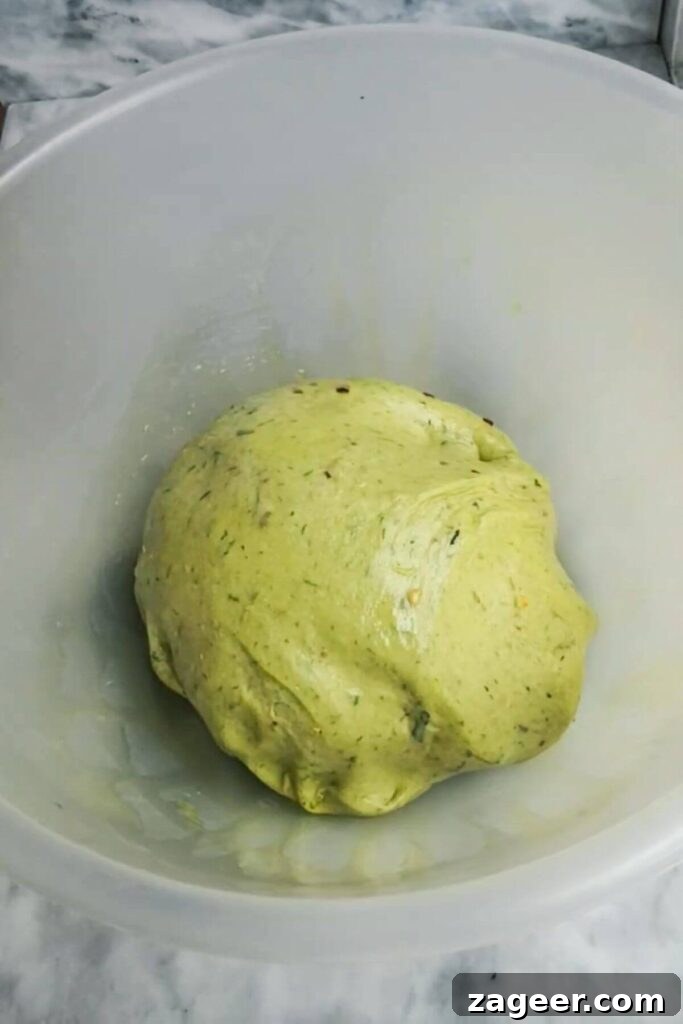
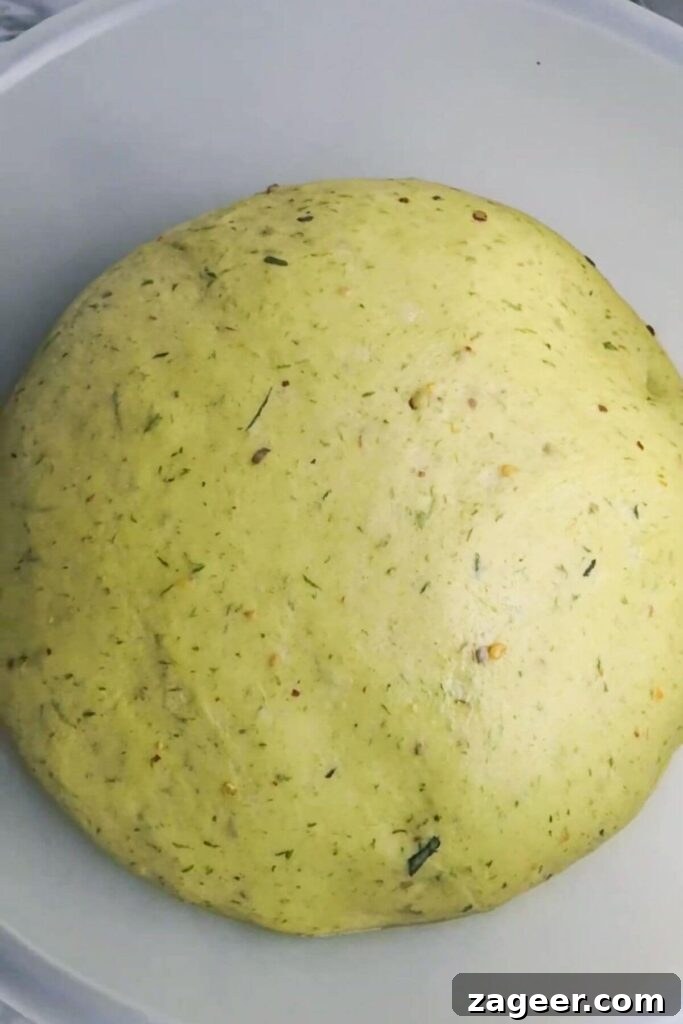
Once your dough has completed its first rise, looking beautifully puffy and having gloriously doubled in size, it’s time for the exciting step of incorporating the cheese and shaping your individual buns. This stage is where the magic of gooey cheese truly begins to integrate into the tender dough.
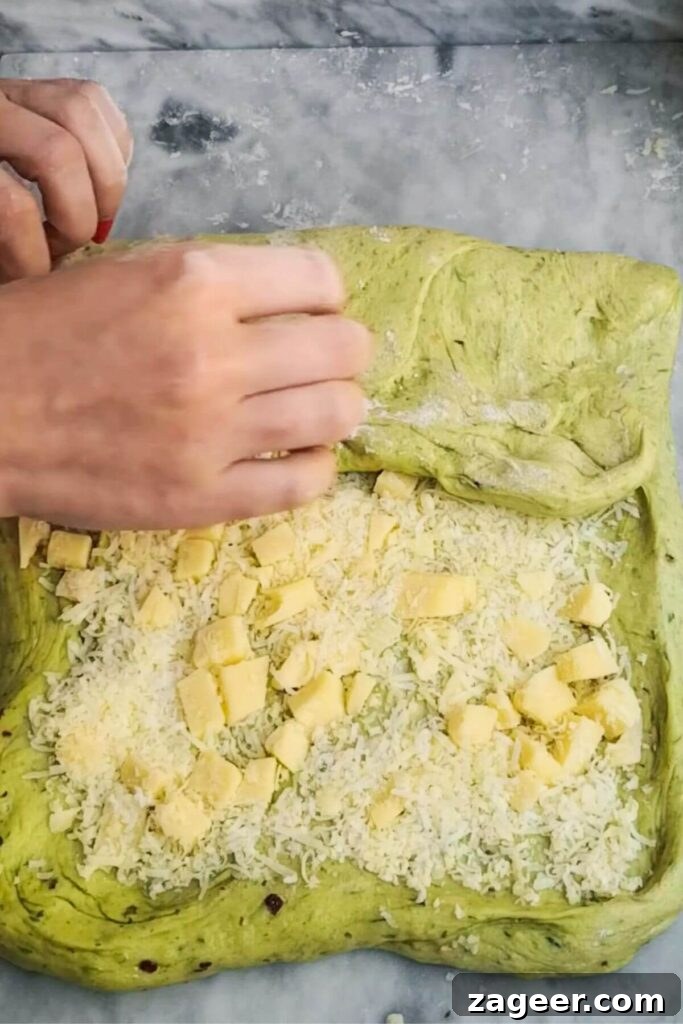
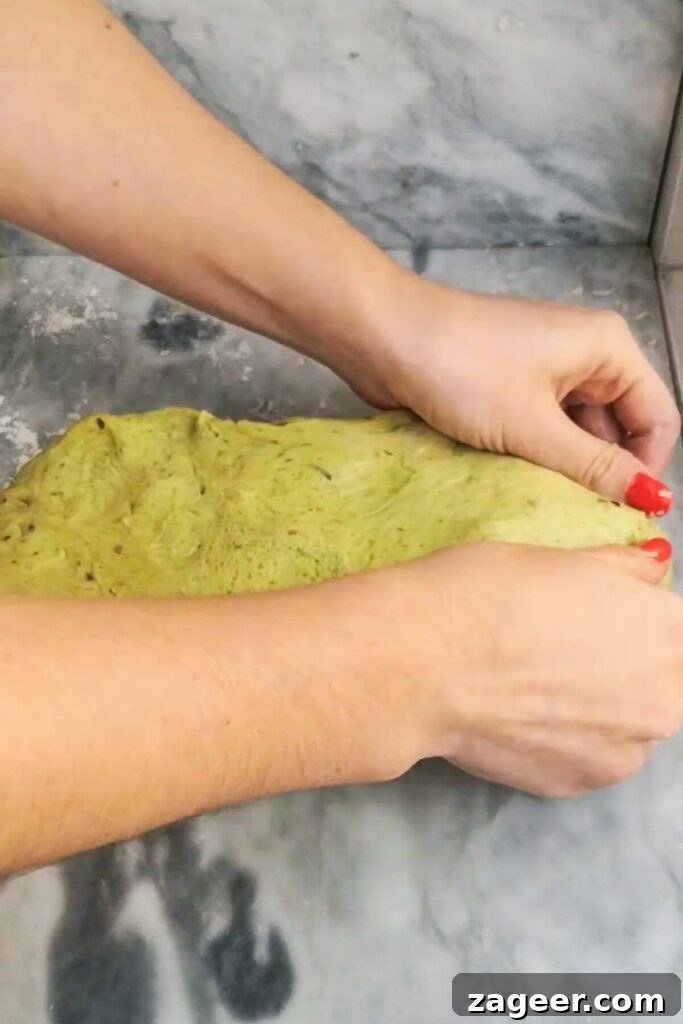
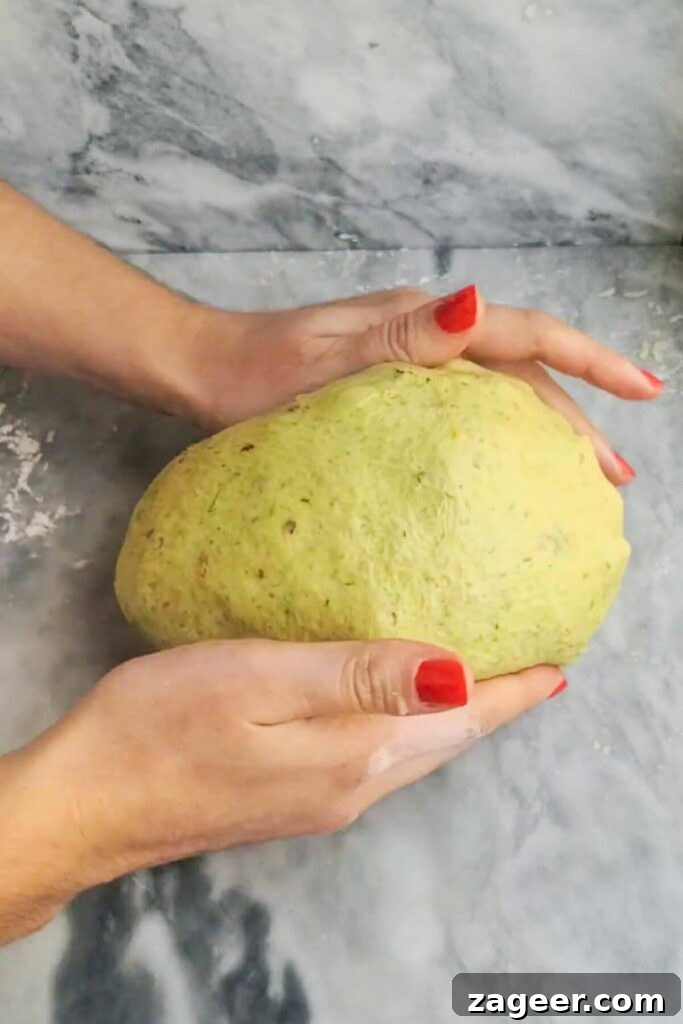
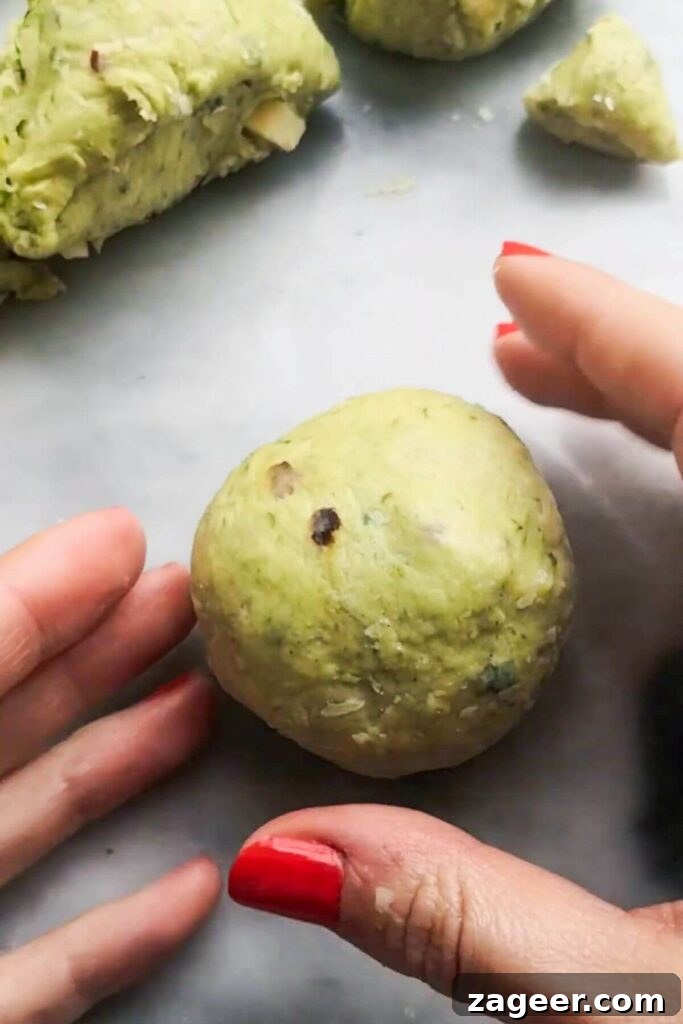
Gently press the dough out onto a lightly floured surface, forming it into a large, even rectangle. Then, scatter your chosen shredded cheeses generously across the entire surface. To ensure even distribution and layers of cheesy goodness, fold one-third of the dough over onto itself, then fold the remaining third on top, much like folding a letter. Carefully seal the ends of the dough, then gently roll it into a cylinder. Finally, use your hands to cup and roll the cylinder into a neat, cohesive ball. Don’t be alarmed if a little cheese escapes during this process – simply tuck it back into the dough as you go, ensuring every bun is packed with flavor.
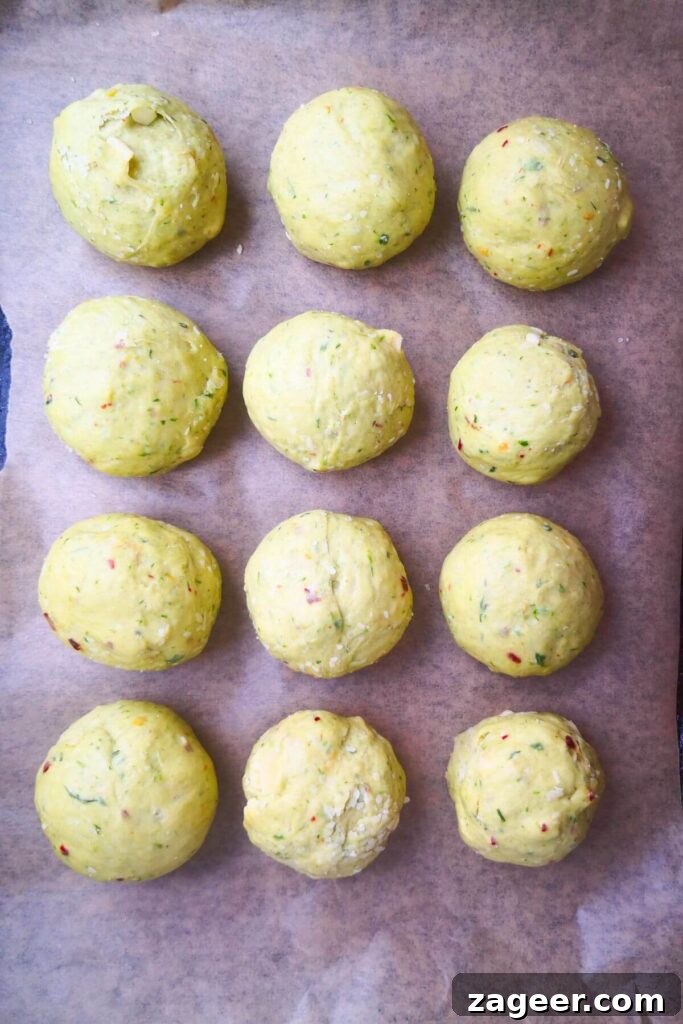
Next, carefully divide the large dough ball into 12 individual, roughly equal pieces. For utmost precision and consistent baking, I highly recommend using a kitchen scale to portion each piece, aiming for about 80g per bun, though this is optional. Roll each dough piece into a snug, smooth ball. Arrange these perfectly formed buns onto a baking tray lined with parchment paper, leaving enough space between them for their second rise. They will expand beautifully as they proof, creating a satisfying pull-apart effect once baked.
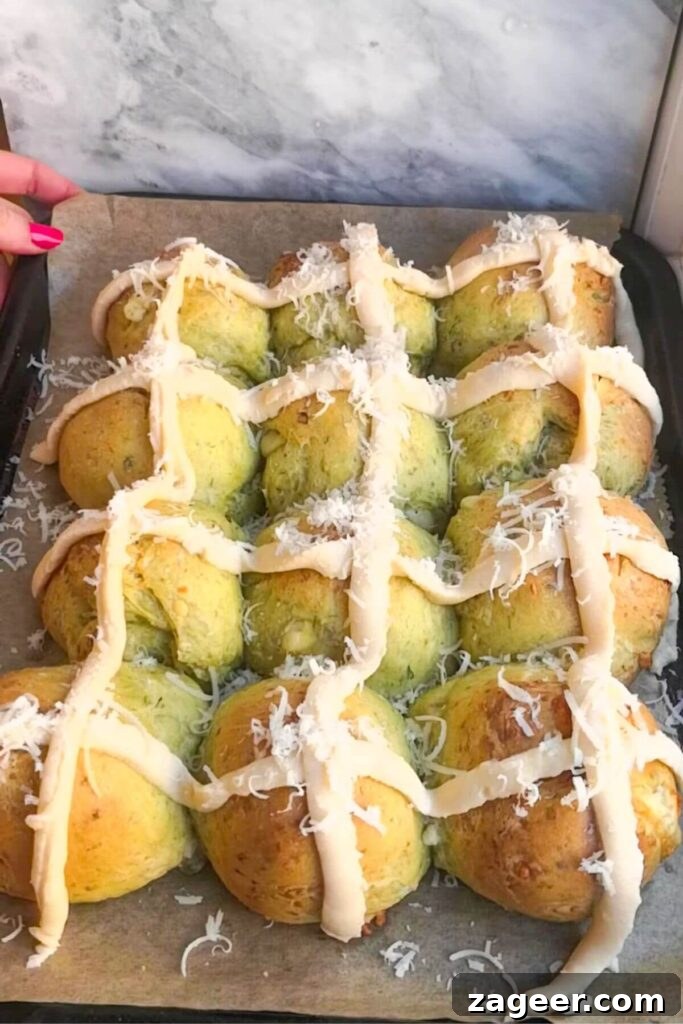
Allow them to rise for a second time until they appear noticeably puffy and have increased in size by approximately two-thirds. This crucial proofing stage develops their final airy texture. Just before baking, delicately slash a cross into the top of each bun. This not only provides the traditional hot cross bun aesthetic but also creates a perfect little channel for our decadent cheesy béchamel cross to settle into. Bake the buns for an initial 15 minutes. After this time, remove them from the oven, carefully pipe the creamy béchamel crosses onto their tops, and then return them to the oven for another 15 minutes, or until they reach a beautiful golden hue and the cheese is gloriously melted and bubbly.

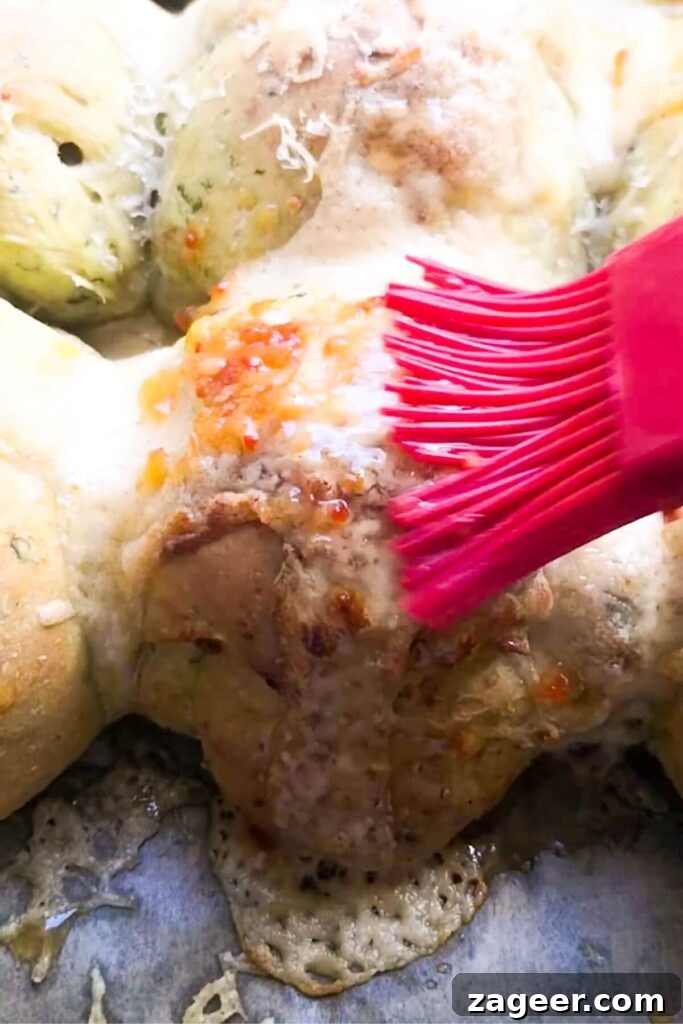
Finally, once the buns emerge from the oven, golden and with their cheese bubbling, allow them to cool for just a few minutes. While they are still warm, brush them generously with the sweet chili jam glaze. This final touch adds a beautiful shine and a delightful sweet-spicy counterpoint to the savory buns. The aroma will be intoxicating! Serve them immediately, while they are still wonderfully hot, oozy, and gloriously gooey, allowing the melted cheese and fragrant wild garlic to truly shine.
Your Questions Answered
Can I use regular garlic instead of wild garlic?
While regular garlic will provide a garlic flavor, it won’t replicate the unique, subtle, and earthy notes of wild garlic. Its intensity is quite different. If wild garlic isn’t available, you can substitute the wild garlic leaves with an equal amount of finely chopped baby spinach leaves for color and texture, and then incorporate 2 cloves of finely crushed or grated regular garlic directly into the dough mixture to impart that familiar garlic flavor. This adjustment will create a delicious savory bun, albeit with a slightly different flavor profile than the original wild garlic version.
How long will these delicious buns stay fresh?
Thanks to the tangzhong method, these buns remain wonderfully soft and delicious for up to 3 days when stored in an airtight container at room temperature. For optimal enjoyment after the first day, I highly recommend popping them into a toaster or oven for a few minutes. This will gently warm them through, bringing back their freshly baked softness and allowing the cheese to become gooey again. They also freeze exceptionally well! To extend their shelf life, slice them in half once cooled, then place them in freezer-safe zip-lock bags. This way, you can conveniently defrost and reheat them directly in your toaster for a quick, delightful snack anytime.
What’s the best cheese to use for this recipe?
I personally love the combination of mozzarella for its fantastic melt and stretch, and a good sharp cheddar for its rich, savory flavor profile. This duo delivers both texture and taste. However, this recipe is incredibly versatile when it comes to cheese! Feel free to use whatever cheese you have readily available or prefer. Excellent alternatives that would also shine include the nutty depth of Gruyère, the creamy texture of Havarti, the mild sweetness of Edam, the sharp tang of Provolone, or even the robust, salty notes of Parmesan. For an even bolder flavor, a crumbly blue cheese could offer an intriguing contrast.
Why is the recipe provided in grams?
Baking is a precise art, and using grams (a metric measurement) is the most accurate way to ensure consistent and successful results when following any recipe. Unlike volume measurements like cups, which can vary wildly depending on how ingredients like flour are packed, grams provide an exact weight. This precision significantly reduces the margin for error and helps you achieve the intended texture and outcome every time. I use a very affordable digital kitchen scale from Amazon and wholeheartedly recommend investing in one. You’ll be surprised how frequently you use it, not just for baking but for cooking in general. Plus, it often means fewer dishes to wash, as you can measure ingredients directly into your mixing bowl!
More Irresistible Baking Ideas You Might Enjoy
If you loved crafting these savory wild garlic hot cross buns, you’re in for a treat! Here are more delightful baking recipes that I’m sure will capture your heart and palate. Each one is designed to bring joy to your kitchen and deliciousness to your table.
Mini Egg Chocolate Hot Cross Buns
Easy No Knead Focaccia
Vogel’s Style No Knead Seed Bread
The EASIEST No Knead Rosemary Parmesan Bread
If you decide to try this delightful recipe, I would absolutely love to hear about your experience! Please feel free to leave me a comment below and share your thoughts. Your feedback and baking adventures make my day!
Print Recipe

Cheesy Wild Garlic Hot Cross Buns
No reviews yet
-
Author:
Kate Alexandra -
Total Time:
2 hours 20 minutes -
Yield:
12 buns -
Diet:
Vegetarian
Description
These ultra-cheesy, super-soft wild garlic hot cross buns are the perfect celebration of wild garlic season and Easter. Finished with gooey, luxurious cheesy béchamel crosses and a sweet chili jam glaze, these buns are a very special way to use up your wild garlic, offering an unforgettable savory treat.
Ingredients
For the buns:
- 1/2 cup wild garlic leaves, chopped
- 250g whole milk
- 425g bread flour
- 7g instant yeast
- 1 teaspoon salt
- 1 teaspoon chilli flakes
- 50g melted butter
- 1 egg
- 1/2 cup cheddar cheese, grated
- 1/2 cup mozzarella cheese, grated
- 1/4 cup sweet chilli jam (for glaze)
For the cheesy béchamel:
- 2 tablespoons butter
- 2 tablespoons plain flour
- 1 cup milk
- 1 tablespoon miso paste (optional, for extra umami)
- 1/2 cup grated cheese (cheddar recommended)
- Salt to taste
Instructions
- Prepare the Wild Garlic Milk: In a blender, combine the chopped wild garlic leaves with 250g of milk. Blitz until the mixture is pale green and smooth.
- Make the Tangzhong: Take 25g of the bread flour and 90g of the wild garlic milk mixture. Add them to a small pot over low heat. Stir continuously for about 2 minutes, until a thick, smooth paste forms. Transfer this tangzhong paste to the bowl of a stand mixer.
- Mix and Knead the Dough: Add the remaining bread flour, 1 teaspoon salt, 7g instant yeast, 1 teaspoon chilli flakes, the egg, 50g of melted butter, and the rest of the wild garlic milk to the stand mixer bowl with the tangzhong. Attach the dough hook and knead on medium speed for about 12 minutes. The dough should become smooth, supple, elastic, and pull away cleanly from the sides of the bowl. Cover the bowl tightly with clingfilm and place it in a warm spot to rise. The dough needs to double in size, which can take anywhere from 45 minutes to 1.5 hours, depending on your kitchen’s temperature and humidity. Taking a photo when you cover it can help you track its progress.
- Prepare the Cheesy Béchamel: While the dough is rising, melt 2 tablespoons of butter in a small saucepan over medium heat. Whisk in 2 tablespoons of plain flour to create a roux, cooking it for a couple of minutes to remove the raw flour taste. Reduce the heat to low, then gradually pour in 1 cup of milk, whisking constantly to prevent lumps. Continue whisking as the sauce thickens and begins to bubble, which typically takes about 5 minutes. Stir in 1 tablespoon of miso paste (if using, for extra depth) and 1/2 cup of grated cheese until it melts smoothly into the sauce. Taste and add a pinch of salt if needed. Remove from heat, transfer the béchamel to a piping bag (or a zip-lock bag with a corner snipped off), and let it cool.
- Shape the Buns: Lightly flour a clean, flat surface. Turn the risen dough out onto it and gently press it into a rectangle, roughly 45cm (18″) long and 15cm (6″) wide. Scatter the grated mozzarella and all but 2 tablespoons of the grated cheddar evenly over the dough. Press the cheese lightly into the dough. Fold one-third of the dough up, then fold the other third on top. Rotate the dough so the exposed edges face you. Roll the dough up into a cylinder, then turn it over and use your hands to cup and roll it into a neat, large ball. Divide this ball into 12 equal pieces (each roughly 80g). For each piece, gently press it down, bring the edges up to pinch them closed, then turn it over and roll it into a smooth ball. Place the shaped buns onto a parchment-lined baking tray (approximately 30cm/12″ long and 20cm/8″ wide), leaving some space between them. Lightly cover the tray with clingfilm and let them rise again until they are visibly puffy and have increased by about two-thirds in size. They should spring back slowly when lightly pressed.
- Bake and Glaze: About 15 minutes after covering the shaped buns for their second rise, preheat your oven to 180°C (360°F) fan. Using a sharp knife, carefully slice small crosses into the top of each risen bun – this creates a channel for the béchamel. Bake the buns for 15 minutes. Remove them from the oven, then pipe the cooled béchamel crosses onto the slashed areas. Scatter the reserved 2 tablespoons of cheddar cheese on top of the béchamel crosses. Return the buns to the oven for another 15 minutes, or until they are golden brown and the cheese is beautifully melted and oozy. Remove from the oven and allow to cool for about 5 minutes. While still warm, brush generously with the sweet chili jam glaze. Serve immediately and enjoy them hot, oozy, and wonderfully gooey!
Notes
STORAGE INSTRUCTIONS: These delightful buns will stay fresh and soft for up to 3 days when stored in an airtight container at room temperature. For a revitalized taste and texture after the first day, simply pop them into a toaster or warm oven. They also freeze exceptionally well! To freeze, slice the buns in half once completely cooled, then store them in zip-lock bags. This allows for easy defrosting and reheating directly in your toaster, ensuring a warm, cheesy treat anytime.
INGREDIENT NOTES: It is crucial to use instant yeast if you are following this recipe exactly as written, as it can be mixed directly with dry ingredients. If you only have active dry yeast, you’ll need to activate it first. To do this, sprinkle the active dry yeast over a portion of the wild garlic milk (ensure the milk is lukewarm, not hot) and let it sit for about 10 minutes until it becomes foamy and bubbly. Once activated, you can proceed with the recipe. Don’t hesitate to customize the cheese blend! Gruyère, Havarti, or even a bold blue cheese would make fantastic substitutions or additions to the mozzarella and cheddar.
MORE WILD GARLIC RECIPES: If you’re eager to explore more ways to savor this wonderful seasonal ingredient, be sure to try making wild garlic pesto for a vibrant pasta sauce, rich wild garlic butter perfect for spreading, a creamy wild garlic risotto, or a comforting wild garlic mac and cheese.
- Prep Time: 20 minutes
- Rising time: 90 minutes
- Cook Time: 30 minutes
- Category: baking
- Method: oven
- Cuisine: british
Nutrition Information (per bun)
- Serving Size: 1 bun
- Calories: 522
- Sugar: 5.6g
- Sodium: 1136.4mg
- Fat: 20.4g
- Saturated Fat: 11.3g
- Unsaturated Fat: 7g
- Trans Fat: 0g
- Carbohydrates: 63g
- Fiber: 2.8g
- Protein: 22.1g
- Cholesterol: 84.2mg
Note: Nutritional values are approximate and may vary based on ingredients and preparation methods.