
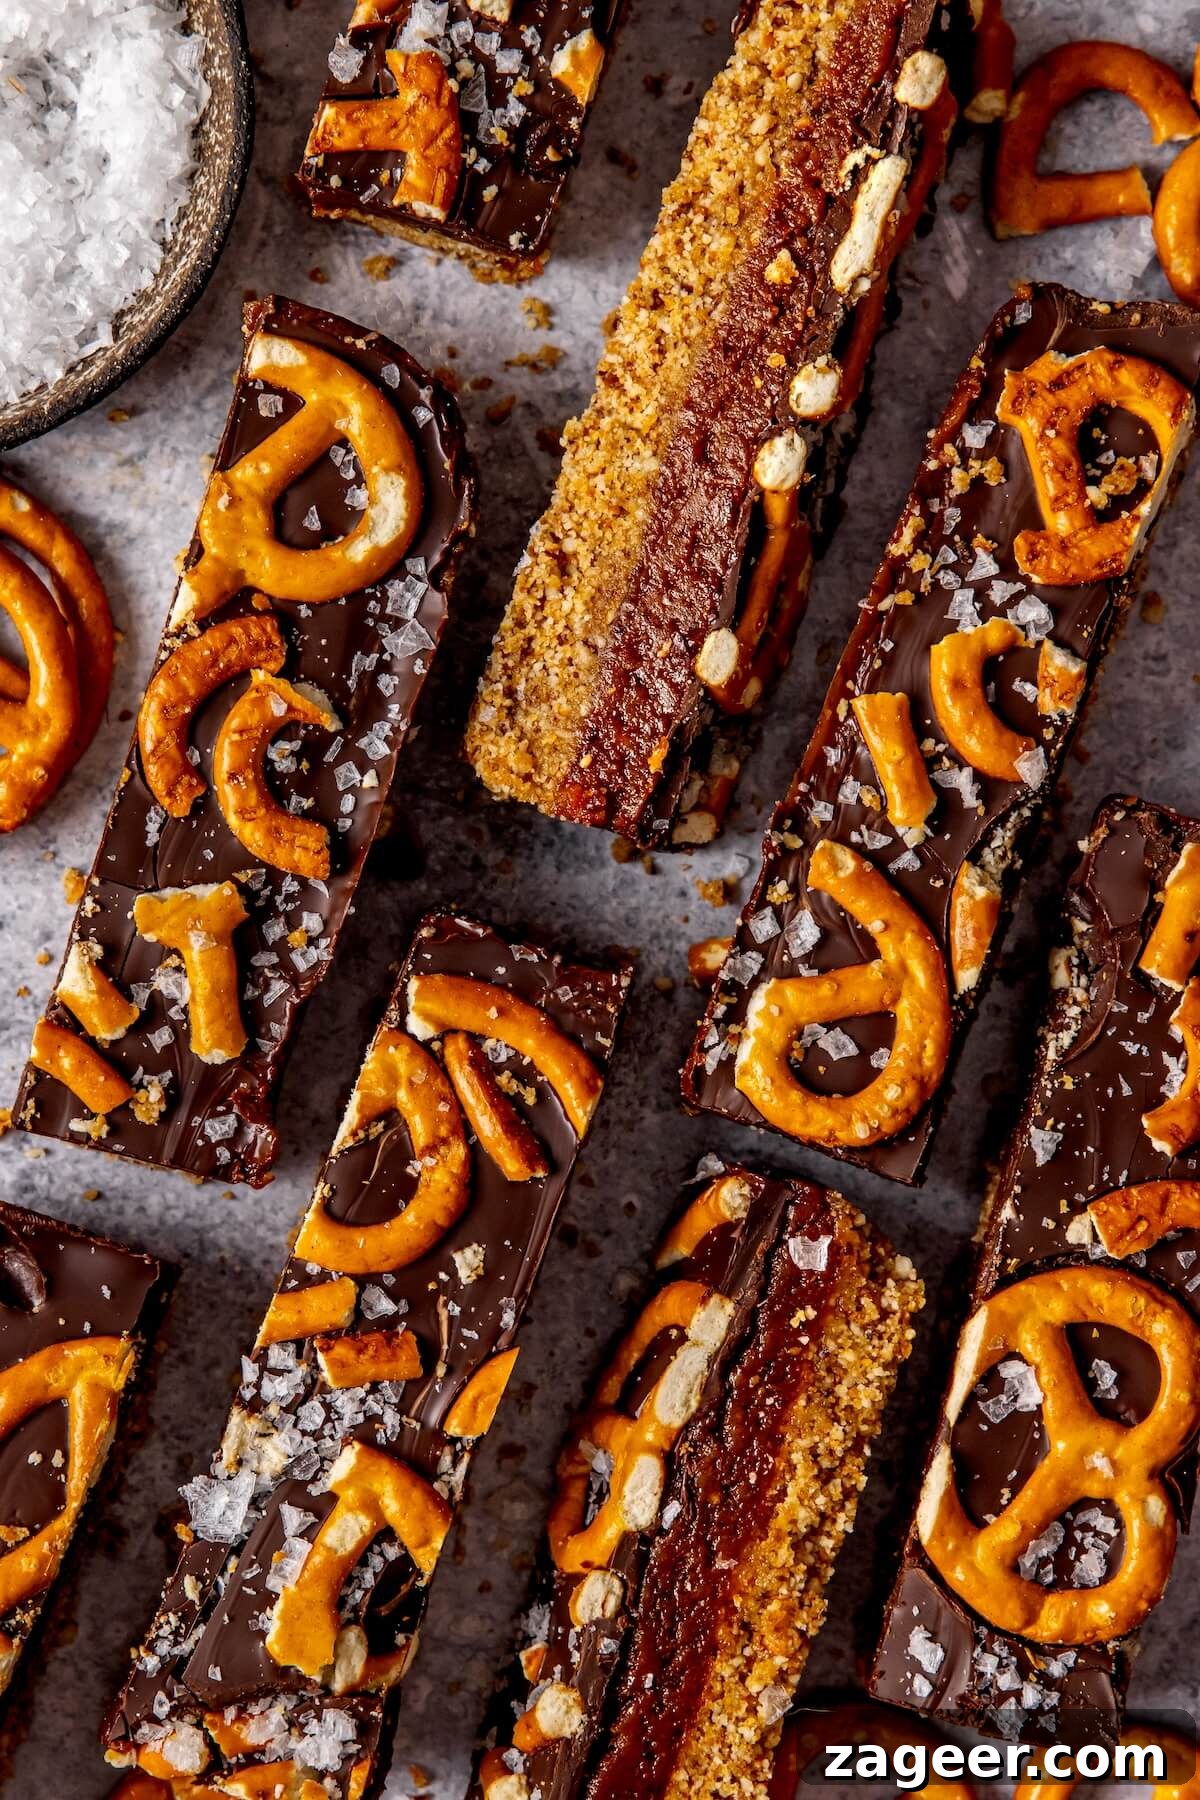
Indulge in the perfect harmony of sweet and salty with these truly irresistible No-Bake Chocolate Peanut Butter Pretzel Bars. A must-make dessert for anyone craving a treat that hits all the right notes, this recipe artfully combines crunchy gluten-free pretzels, rich dairy-free dark chocolate, and creamy, luscious peanut butter. It’s a flavor combination that’s simply impossible to resist.
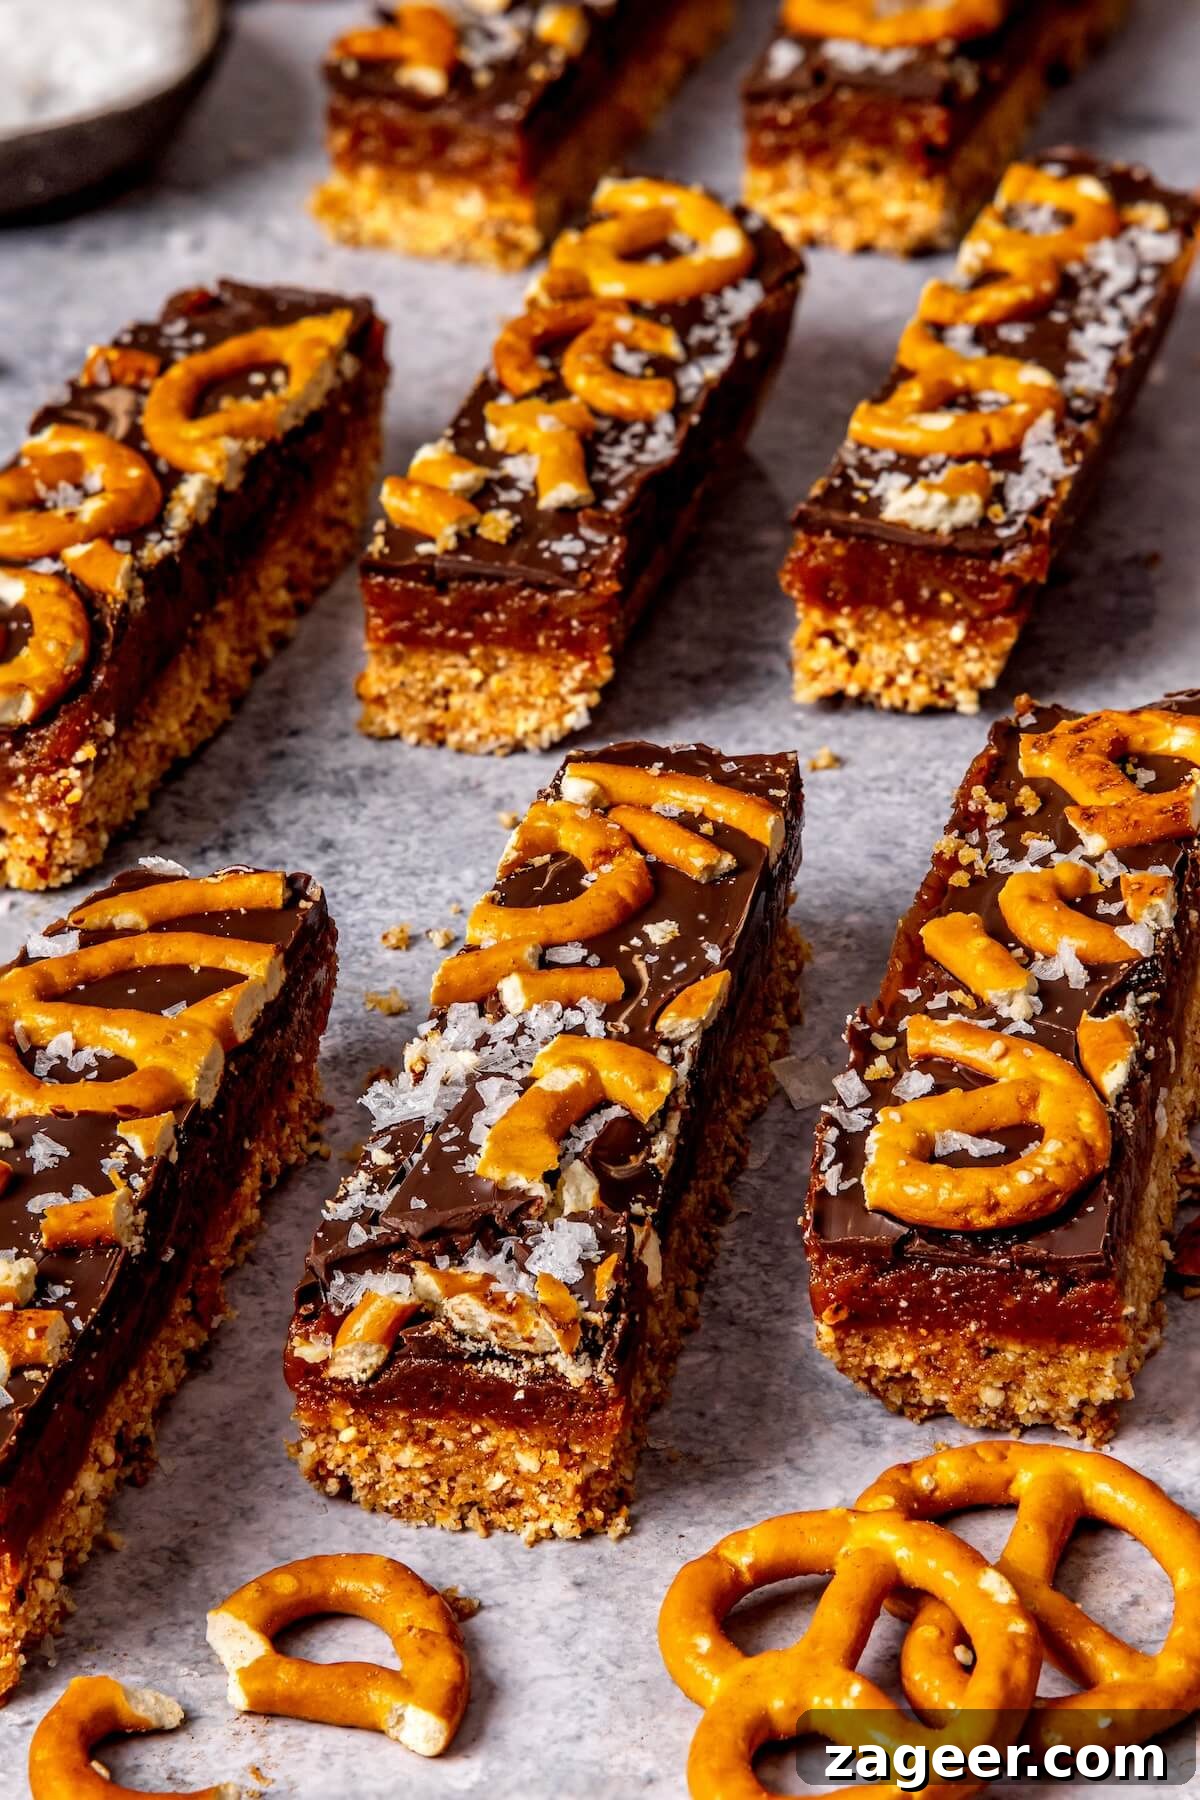
Imagine a dessert that’s sweet, salty, wonderfully crunchy, and intensely chocolatey, all without ever needing to turn on your oven. If your mouth is already watering, then you absolutely must experience these incredible No-Bake Chocolate Peanut Butter Pretzel Bars. They are a game-changer for anyone who loves a decadent treat but prefers simplicity in the kitchen.
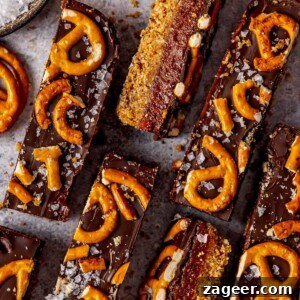
The magic begins with a simple, three-ingredient crust. Crafted from perfectly crushed gluten-free pretzels, naturally sweet Medjool dates, and a touch of refined coconut oil, this base provides the ideal sturdy yet tender foundation. It’s a delightful salty crunch that perfectly primes your palate for the layers to come.
Next up is the heart of these bars: a gloriously sticky, rich peanut butter caramel. This middle layer is a masterpiece of natural sweetness, made solely from Medjool dates and pure maple syrup, blended seamlessly with creamy peanut butter. The result is a smooth, luxurious caramel that melts in your mouth, offering a deep, satisfying sweetness and a hint of nutty richness that balances beautifully with the pretzel crust.
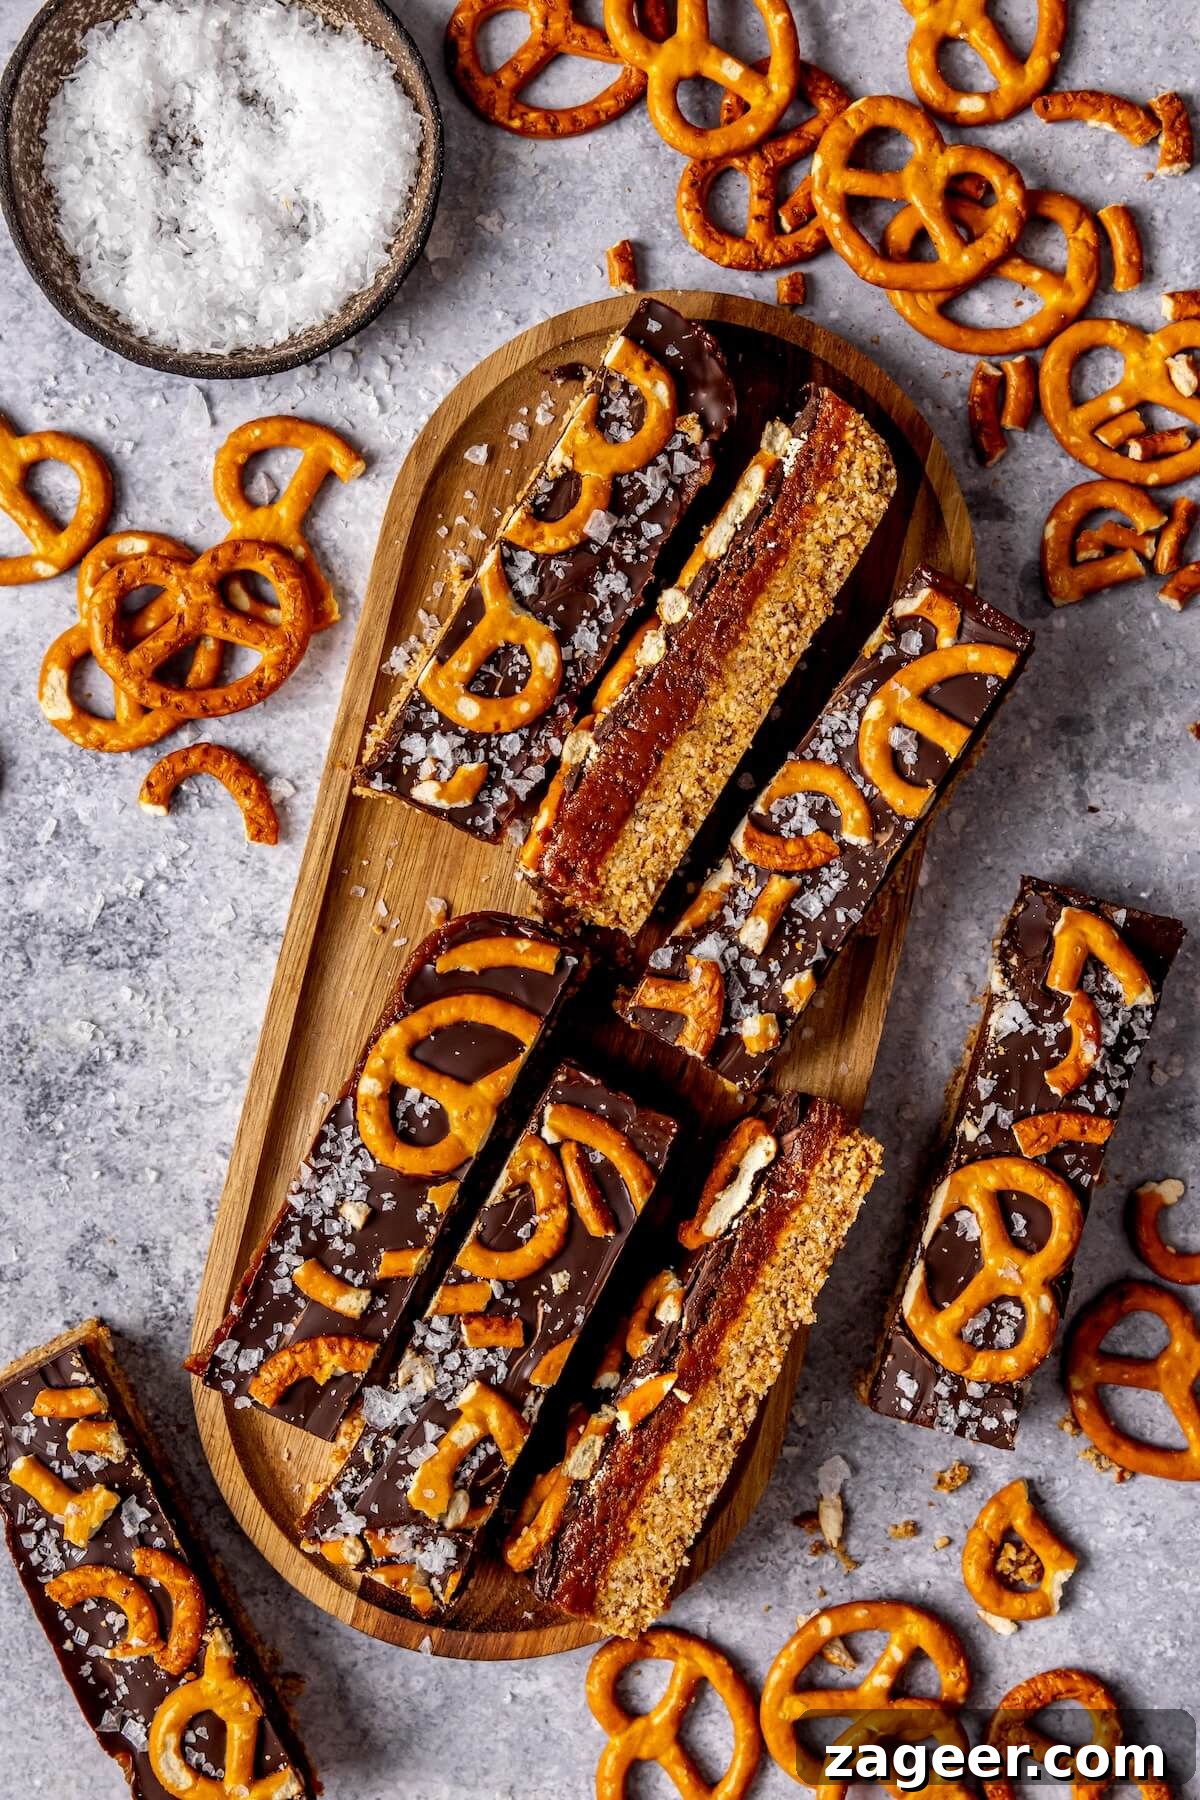
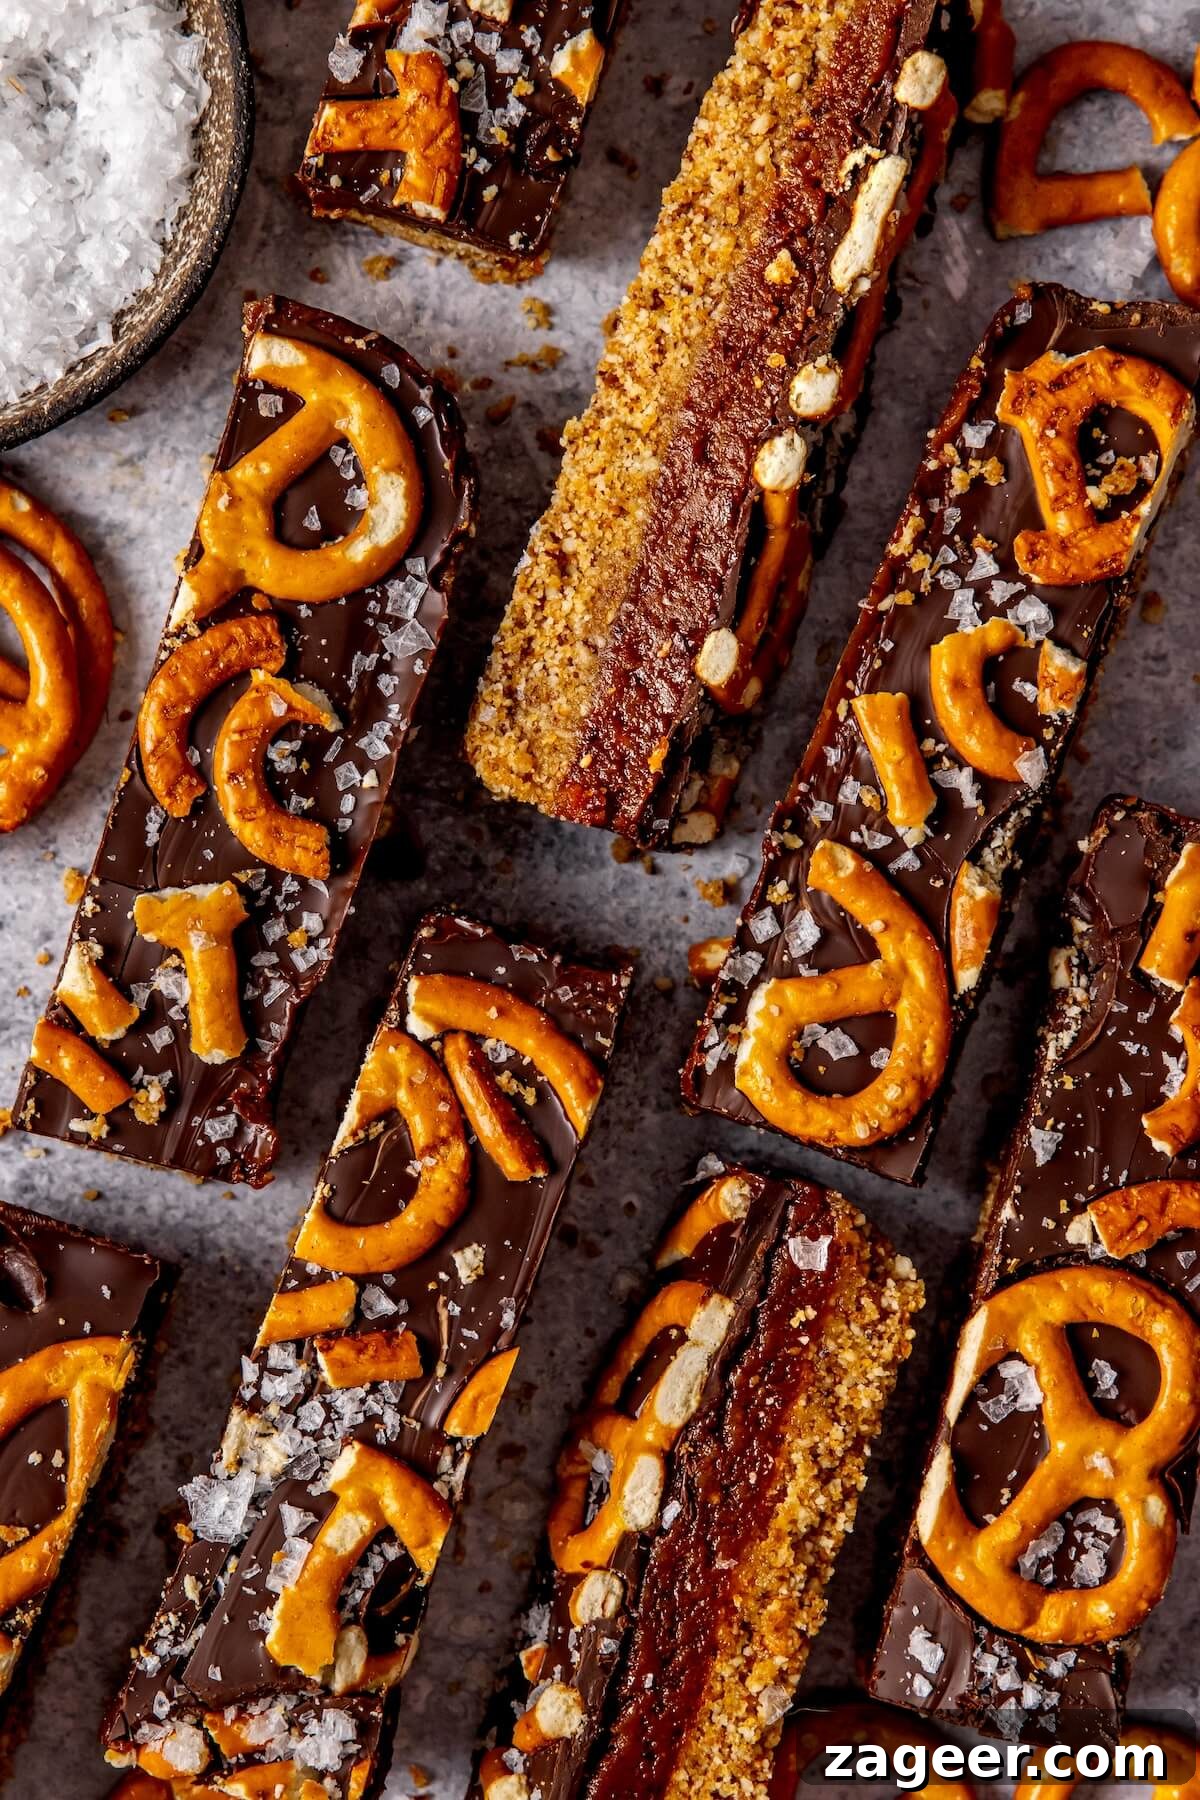
To crown this masterpiece, each bar is generously topped with a layer of perfectly melted dairy-free dark chocolate. But the indulgence doesn’t stop there! A final flourish of additional crushed pretzels adds an extra textural dimension, while a sprinkle of flaky sea salt provides that ultimate gourmet touch, amplifying the sweet and salty flavors for the most irresistible bite imaginable. These bars aren’t just a dessert; they’re an experience.
Why These No-Bake Bars Are Your New Favorite Dessert
Beyond their mouth-watering taste, these No-Bake Chocolate Peanut Butter Pretzel Bars offer numerous advantages that make them a standout choice for any occasion. They are remarkably easy to prepare, perfect for those intimidated by traditional baking, and consistently deliver impressive results.
- Effortless Preparation: Say goodbye to ovens, tricky temperatures, and complex baking techniques. These bars come together quickly with minimal equipment, primarily your food processor.
- Perfect Sweet & Salty Balance: The classic pairing of rich chocolate and creamy peanut butter is elevated by the satisfying crunch and savory kick of pretzels. It’s a flavor profile that appeals to everyone.
- Dietary Inclusive: Designed to be gluten-free, dairy-free, and refined sugar-free, these bars allow more people to enjoy a delicious treat without compromise. They cater to common dietary needs without sacrificing flavor.
- Ideal for Any Gathering: Whether you’re tasked with bringing a tasty treat to a picnic, a birthday party, a potluck, or any social event, these bars are a guaranteed crowd-pleaser. Their no-bake nature makes them stress-free for entertaining.
- Excellent Make-Ahead Option: These bars set beautifully in the refrigerator and maintain their quality for days. This means you can prepare them well in advance, freeing up your time closer to your event or simply ensuring you always have a delightful snack on hand.
- Portable and Convenient: Once set, these bars are easy to slice, pack, and transport, making them a fantastic option for packed lunches, road trips, or on-the-go snacking.
- Wholesome Ingredients: With natural sweeteners like Medjool dates and maple syrup, and healthy fats from coconut oil and peanut butter, you can feel good about indulging in these delicious treats.
Fuel your body and delight your taste buds! Discover the Protein-Empowered digital cookbook.
But let’s be entirely honest: you don’t need a grand event to justify making these. They are so remarkably good, you’ll find yourself making a tray just for yourself to enjoy throughout the week! Any delicious leftovers (if you manage to have any!) can be easily stored in the refrigerator, ready for when a craving strikes. We are genuinely excited for you to give them a try. Prepare to be delighted, and enjoy every single bite!
Key Ingredients for Your No-Bake Chocolate Peanut Butter Pretzel Bars
The beauty of this recipe lies not only in its simplicity but also in its carefully selected, wholesome ingredients. Many of these components play crucial roles in multiple layers, ensuring a harmonious flavor profile and minimizing your grocery list. Here’s a detailed look at what you’ll need to create these delightful treats.
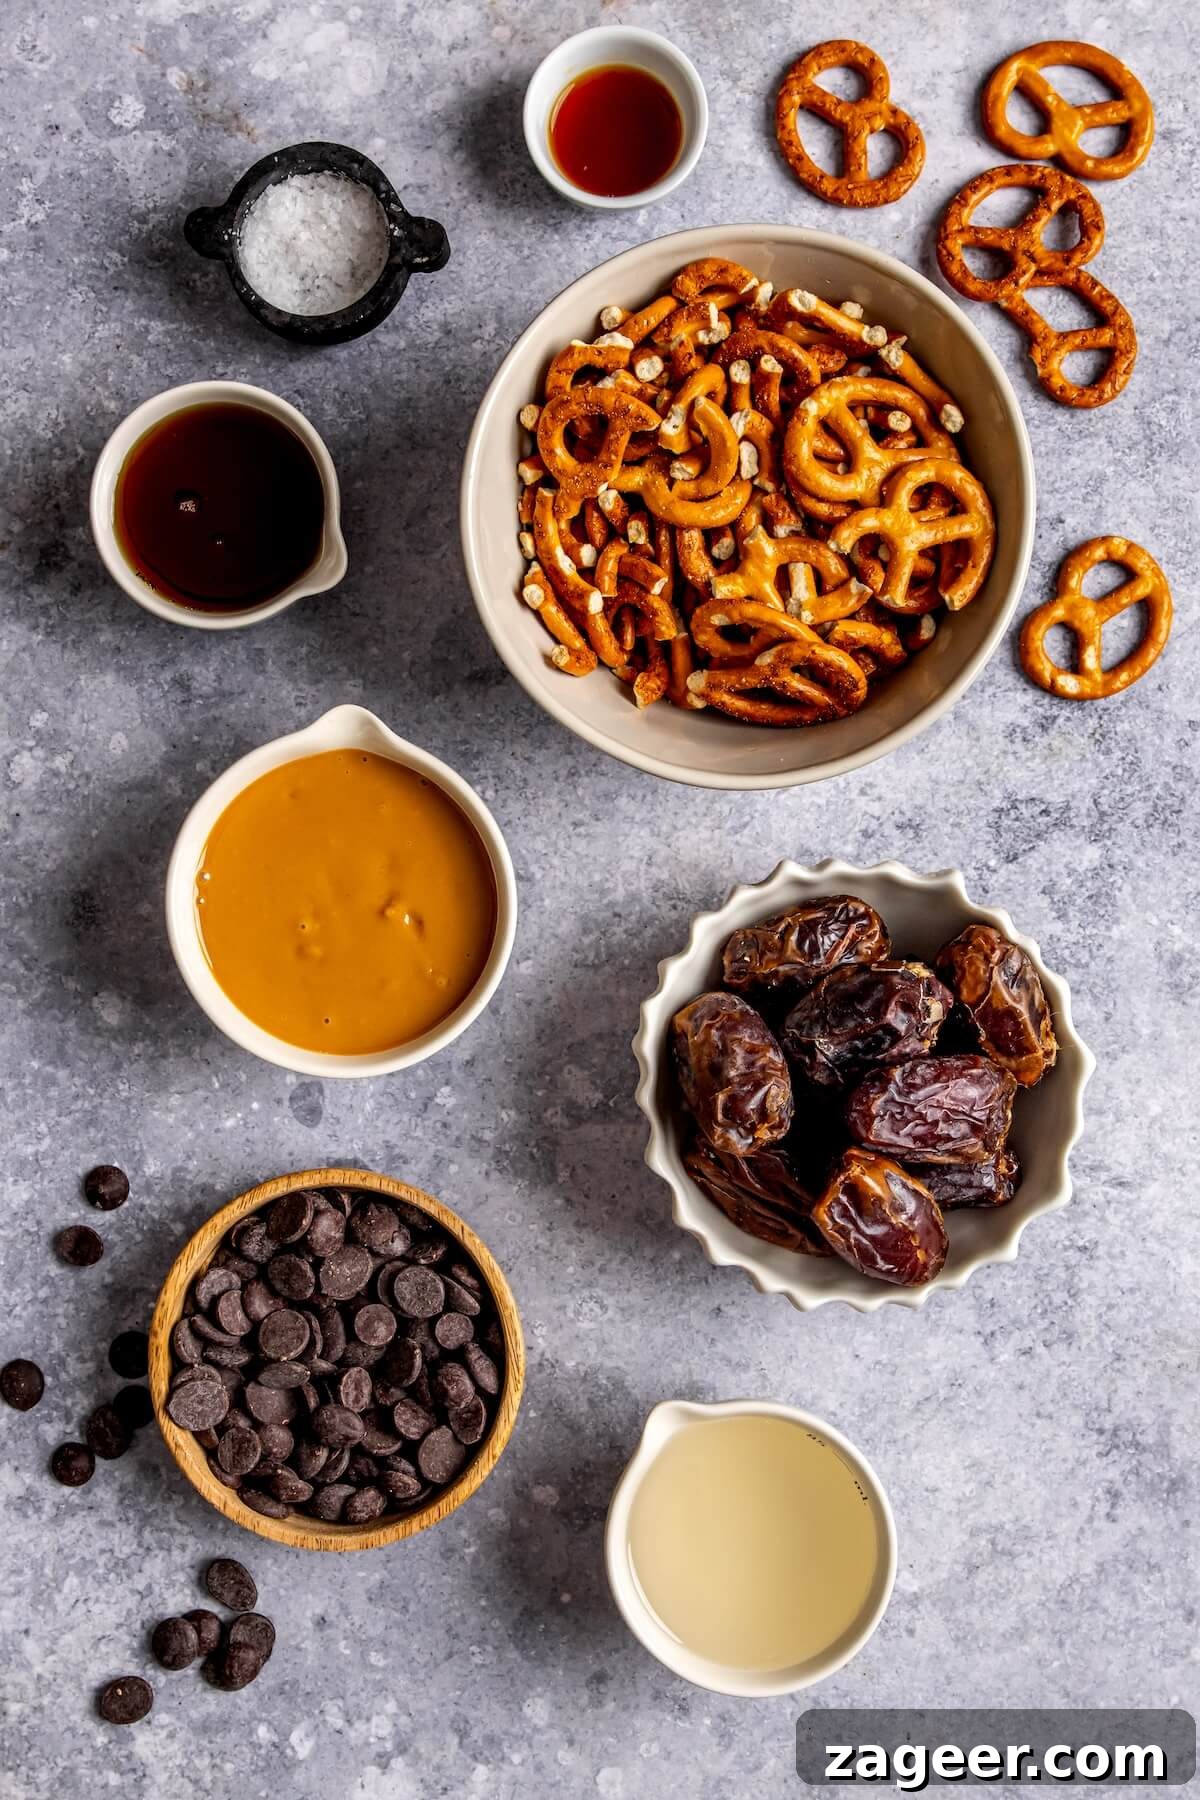
- Creamy Natural Peanut Butter: This is fundamental for achieving a silky-smooth and rich peanut butter caramel filling. Opt for a natural variety that ideally contains just peanuts and salt, as these typically have a better texture for blending. If you prefer, creamy almond butter or cashew butter can be excellent alternatives, maintaining the luxurious texture. I’m fond of brands like @picspeanutbutter for their quality.
- Refined Coconut Oil: A versatile healthy fat that performs two key functions. In the caramel, it helps create that incredibly luxurious, smooth consistency, ensuring the filling sets perfectly. In the pretzel crust, it acts as a binder, holding the ingredients together to form a firm and stable base. Crucially, using *refined* coconut oil means you won’t detect any coconut flavor, allowing the peanut butter and chocolate to shine. Make sure it’s melted before incorporating.
- Medjool Dates: These large, plump dates are a natural wonder for sweetness and binding power. They provide a rich, caramel-like flavor and help create the perfect sticky texture for both the caramel layer and the pretzel crust. Always look for fresh, soft dates, and remember to remove the pits before adding them to your food processor. If your dates are a bit dry, a quick 10-minute soak in hot water will soften them right up.
- Pure Vanilla Extract: A touch of high-quality vanilla extract is indispensable. It adds a warm, aromatic depth that rounds out the flavors in the peanut butter caramel, enhancing both the sweet and nutty notes.
- Pure Maple Syrup: This natural liquid sweetener is a key component of the peanut butter caramel, contributing to its rich, gooey consistency and infusing it with a subtle, earthy caramel flavor. Using maple syrup helps keep these bars delightfully refined sugar-free.
- Gluten-Free Pretzels: The essential ingredient for that satisfying crunch and salty kick! Gluten-free pretzels are widely available now, ensuring everyone can enjoy this classic combination. I’ve had great success with @fitjoy gluten-free pretzels, often found at stores like @wholefoods. You’ll need them for the crust and a sprinkle on top.
- Dairy-Free Dark Chocolate: For the decadent top layer, a good quality dairy-free dark chocolate is paramount. It provides a rich, intense chocolate flavor that beautifully complements the sweet and salty elements. Brands like @hukitchen are excellent for keeping these bars dairy-free and refined sugar-free. Ensure it’s melted smoothly for an even, glossy finish.
- Flaky Sea Salt: This humble ingredient is the ultimate game-changer. A generous sprinkle of flaky sea salt on top provides a crucial burst of salinity that cuts through the sweetness and enhances all the other flavors, transforming these bars into a truly gourmet experience. It’s the perfect finishing touch.
Loved this recipe? Pin it for later and share the sweetness!
Pin This Recipe
How to Make Your Perfect No-Bake Chocolate Peanut Butter Pretzel Bars
Creating these delightful no-bake bars is an incredibly simple and enjoyable process. We’ll break it down into three easy stages: first, crafting the smooth peanut butter caramel; second, preparing the crunchy pretzel crust; and finally, assembling and chilling your magnificent dessert. Follow these steps for sweet success!
Step 1: Prepare the Velvety Peanut Butter Caramel
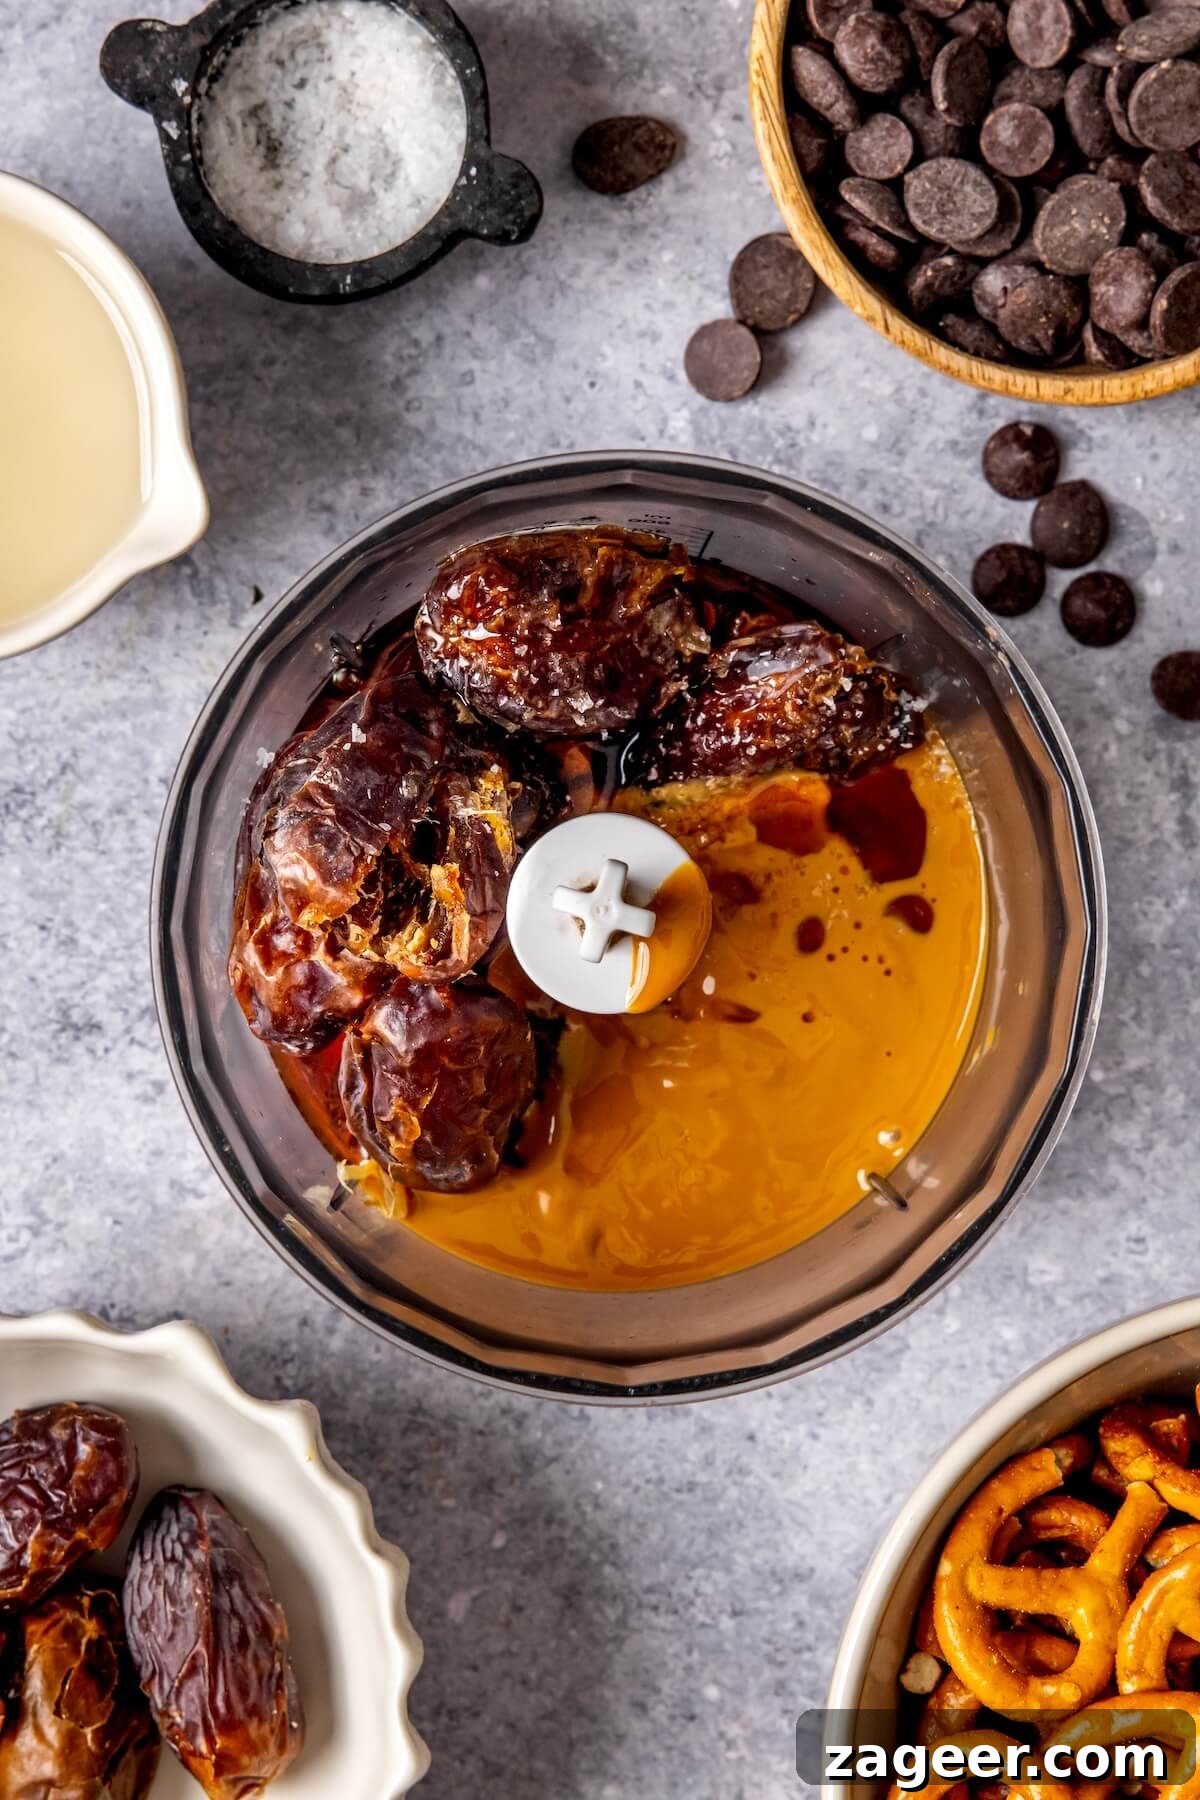
Begin by gathering all the ingredients for your peanut butter caramel: creamy peanut butter, melted refined coconut oil, pitted Medjool dates (ensure they’re soft; soak in hot water for 10 minutes if dry), vanilla extract, a pinch of salt, and maple syrup. Carefully add all of these wonderful ingredients into the bowl of a large food processor.
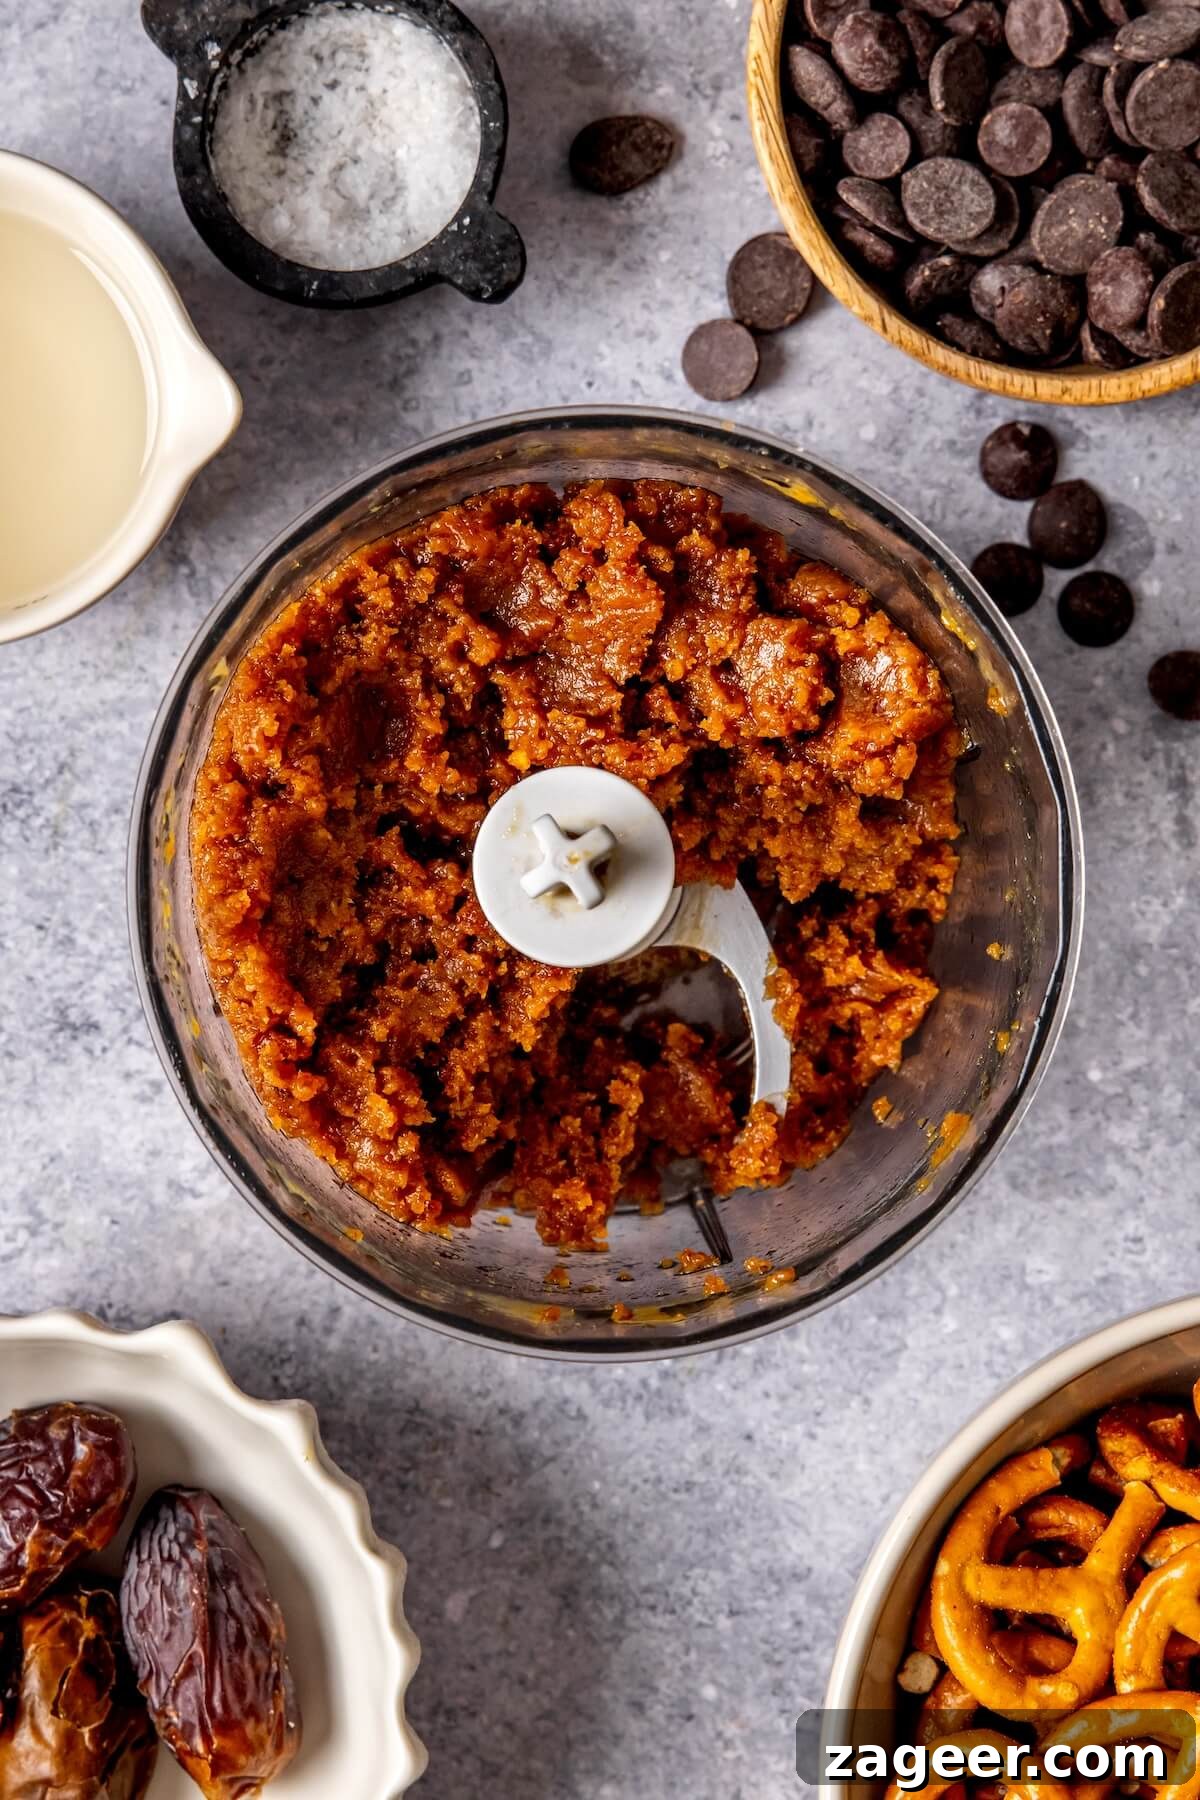
First, pulse the mixture a few times to start breaking down the dates and help the ingredients combine. Then, process continuously for approximately 30 seconds to 1 minute, or until you achieve a perfectly smooth, thick, and wonderfully sticky caramel consistency. Remember to pause occasionally and use a spatula to scrape down the sides of the food processor bowl. This ensures all ingredients are thoroughly blended and no chunks remain. Once smooth, transfer the peanut butter caramel into a separate bowl and set it aside. *Pro tip: By making the caramel first, you cleverly avoid needing to wash your food processor between this step and making the crust, saving you precious cleanup time!*
Step 2: Craft the Crunchy Pretzel Crust
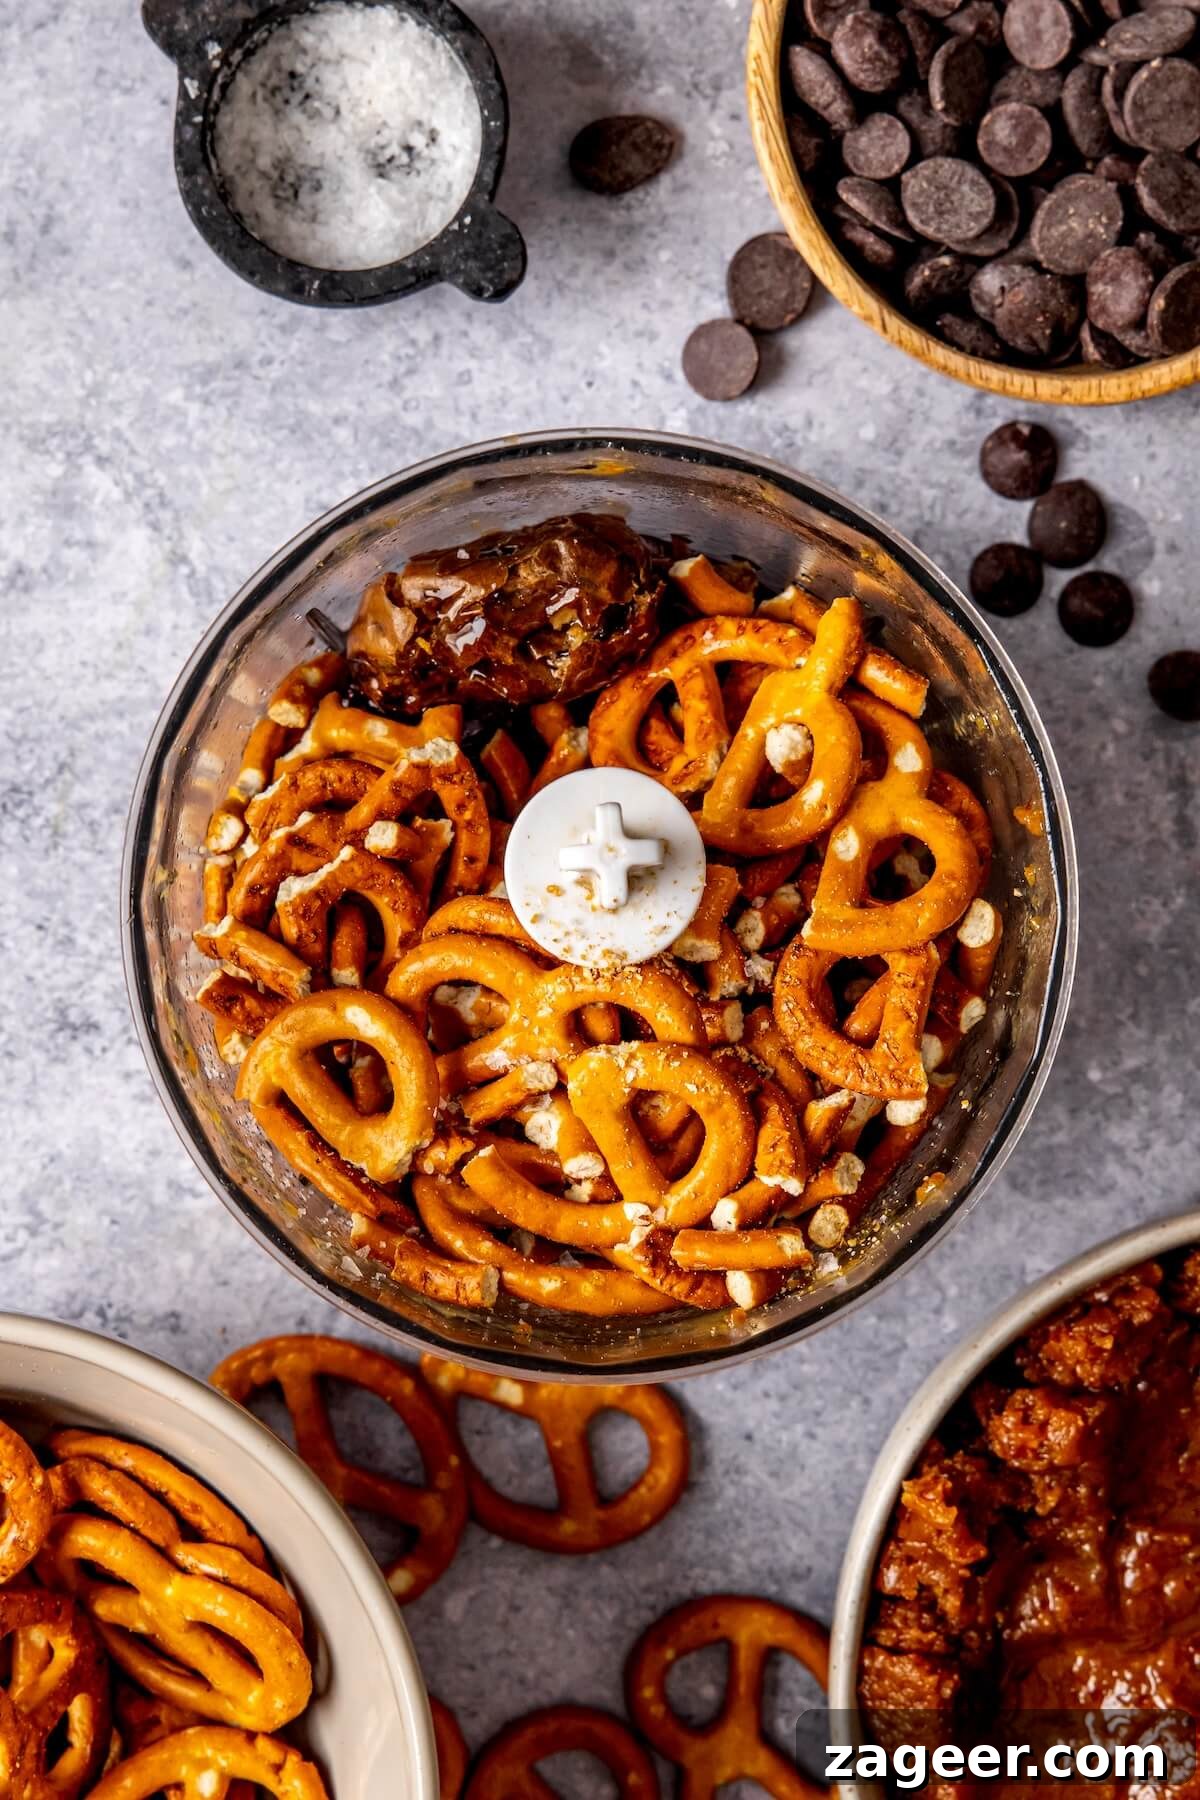
Now, with your food processor already seasoned with delicious caramel remnants (no cleaning needed!), add the ingredients for the pretzel crust. This includes your gluten-free pretzels, the remaining pitted Medjool dates, melted refined coconut oil, and a dash of salt. Pulse these ingredients until they form a dense, sandy, and slightly sticky mixture. You want to ensure there are no large, uncrushed pretzel pieces; a fine, uniform crumb is ideal, though a little textural variation is perfectly fine.
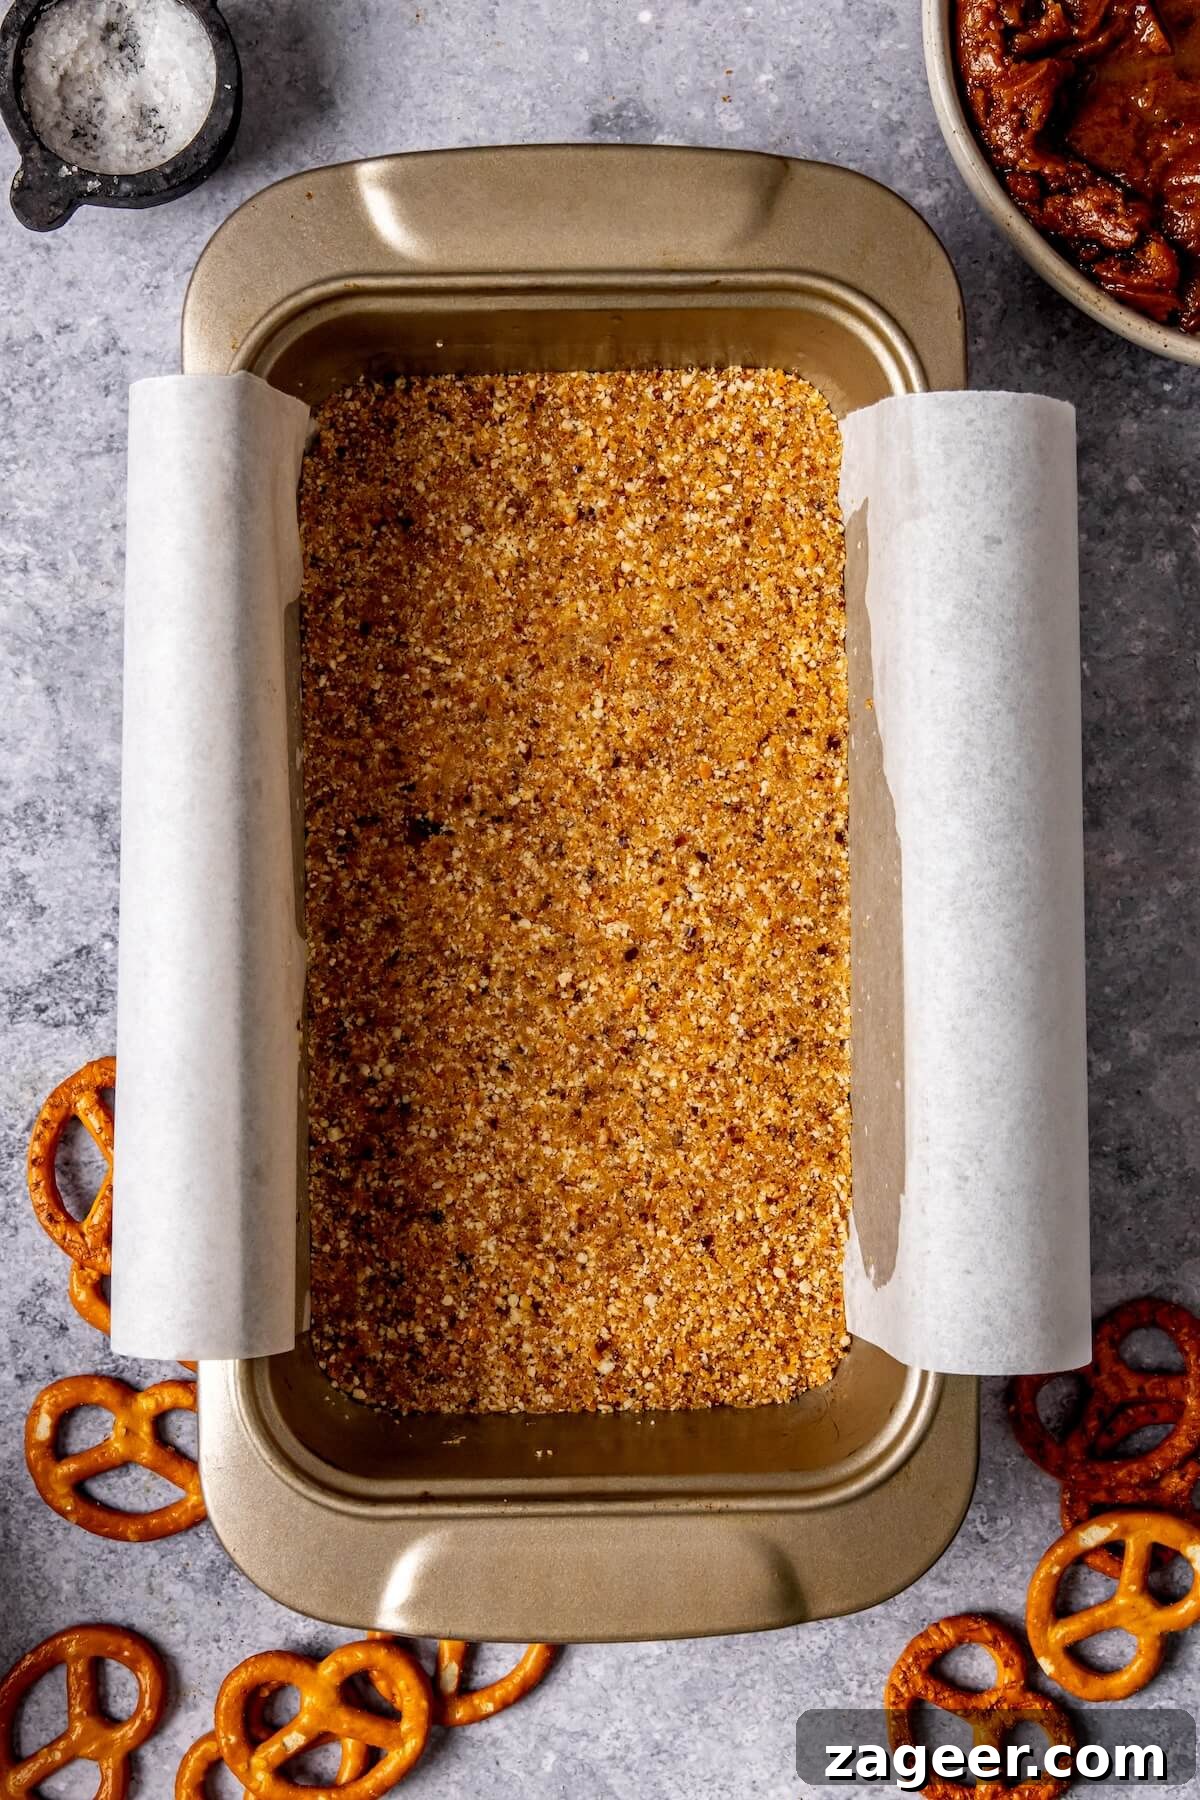
Once your crust mixture is prepared, pour it into the bottom of a 9” x 5” loaf pan. It’s highly recommended to line your pan with parchment paper, leaving an overhang on the sides – this will make lifting the set bars out incredibly easy. Gently spread the mixture evenly across the bottom of the pan. Then, use the back of a spoon, a flat-bottomed glass, or your knuckles to firmly tap and press the crust down. Compacting it well is essential for a stable and delicious base.
Step 3: Assemble, Top, and Chill to Perfection
With your firm pretzel crust in place, it’s time for the layers to come together. Carefully spoon the reserved peanut butter caramel mixture on top of the pressed crust. Using an offset spatula or the back of a spoon, gently spread it out into an even, smooth layer, ensuring full coverage. Take your time to make it consistent across the entire surface.
Next, pour your perfectly melted dairy-free dark chocolate over the caramel layer. Gently tilt the pan from side to side to help the chocolate spread evenly and create a beautiful, glossy top. Before the chocolate has a chance to set, generously sprinkle additional crushed gluten-free pretzels over the entire surface. This adds another delightful layer of crunch and enhances the visual appeal. For the ultimate finishing touch, a final sprinkle of flaky sea salt will truly elevate the flavors and add a professional look.
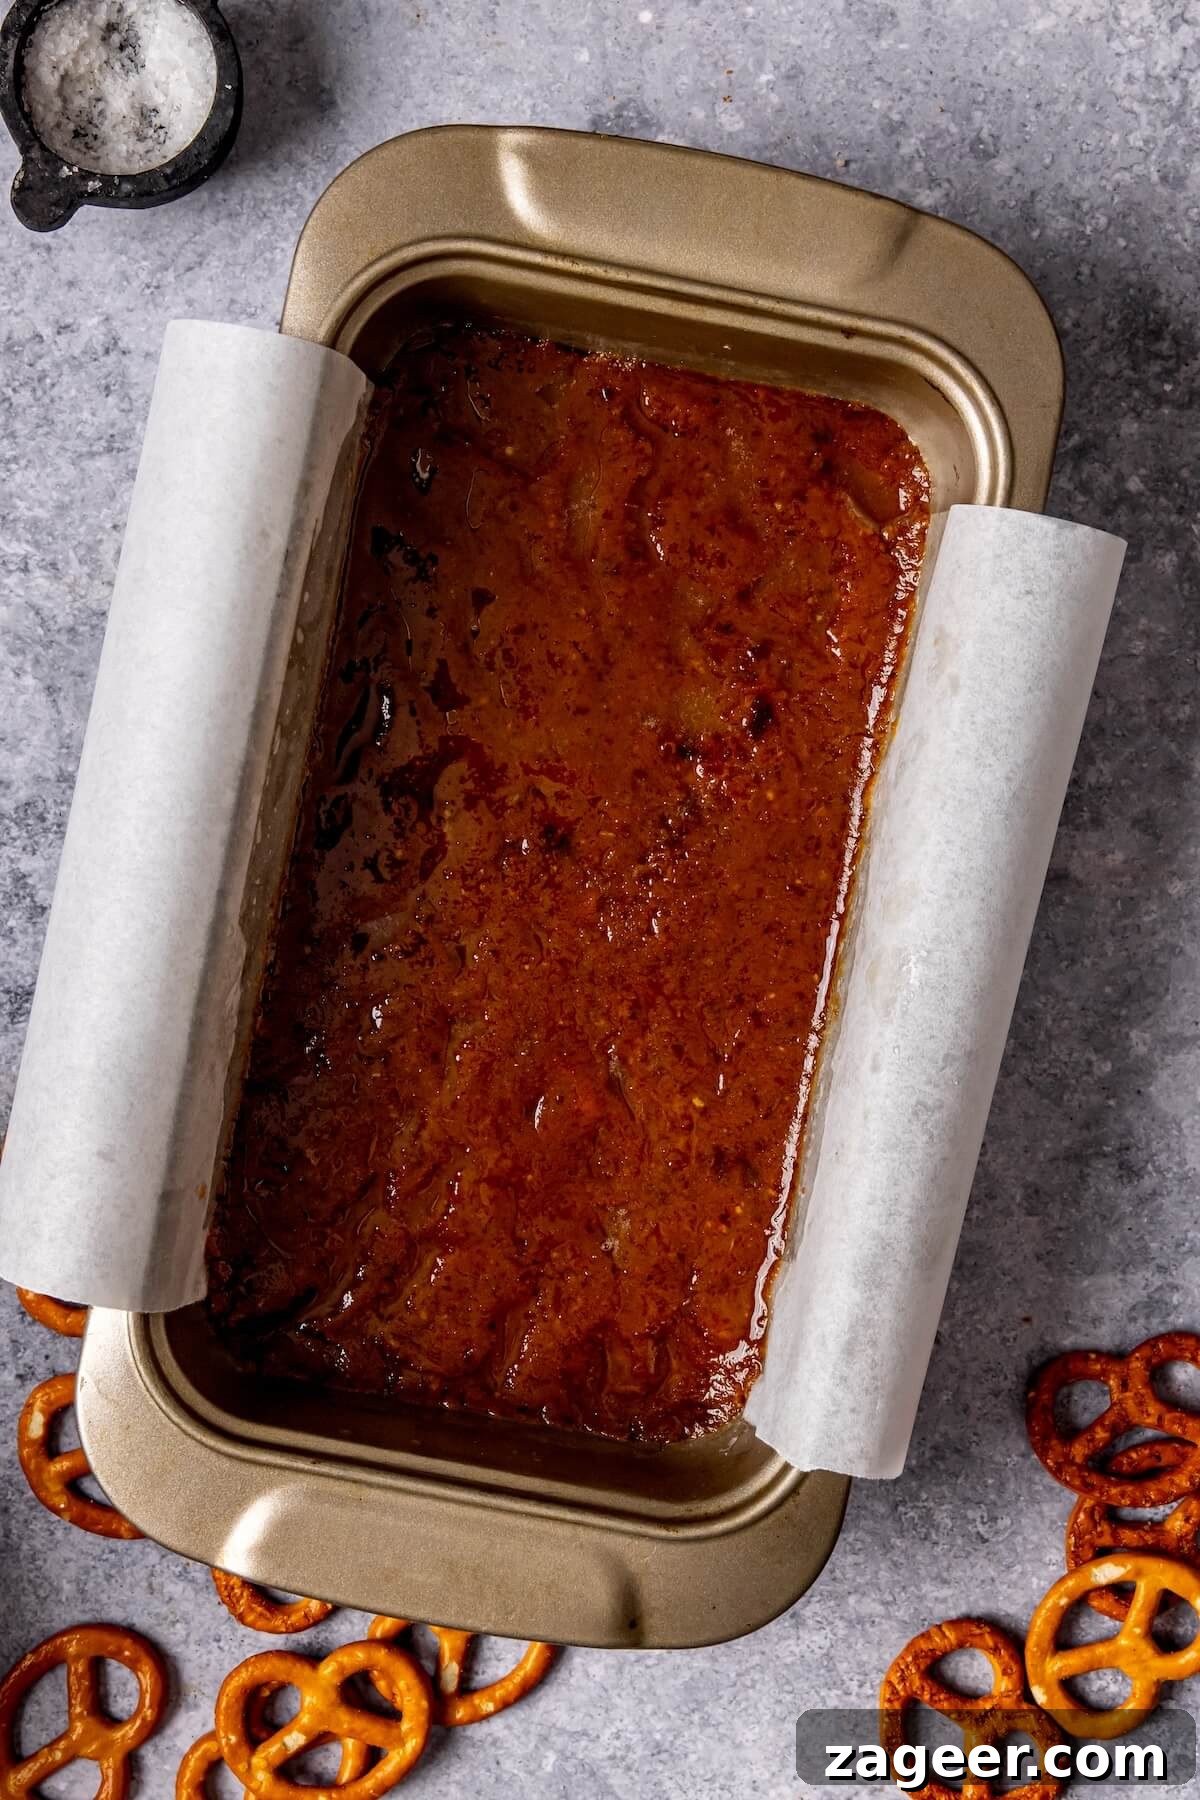
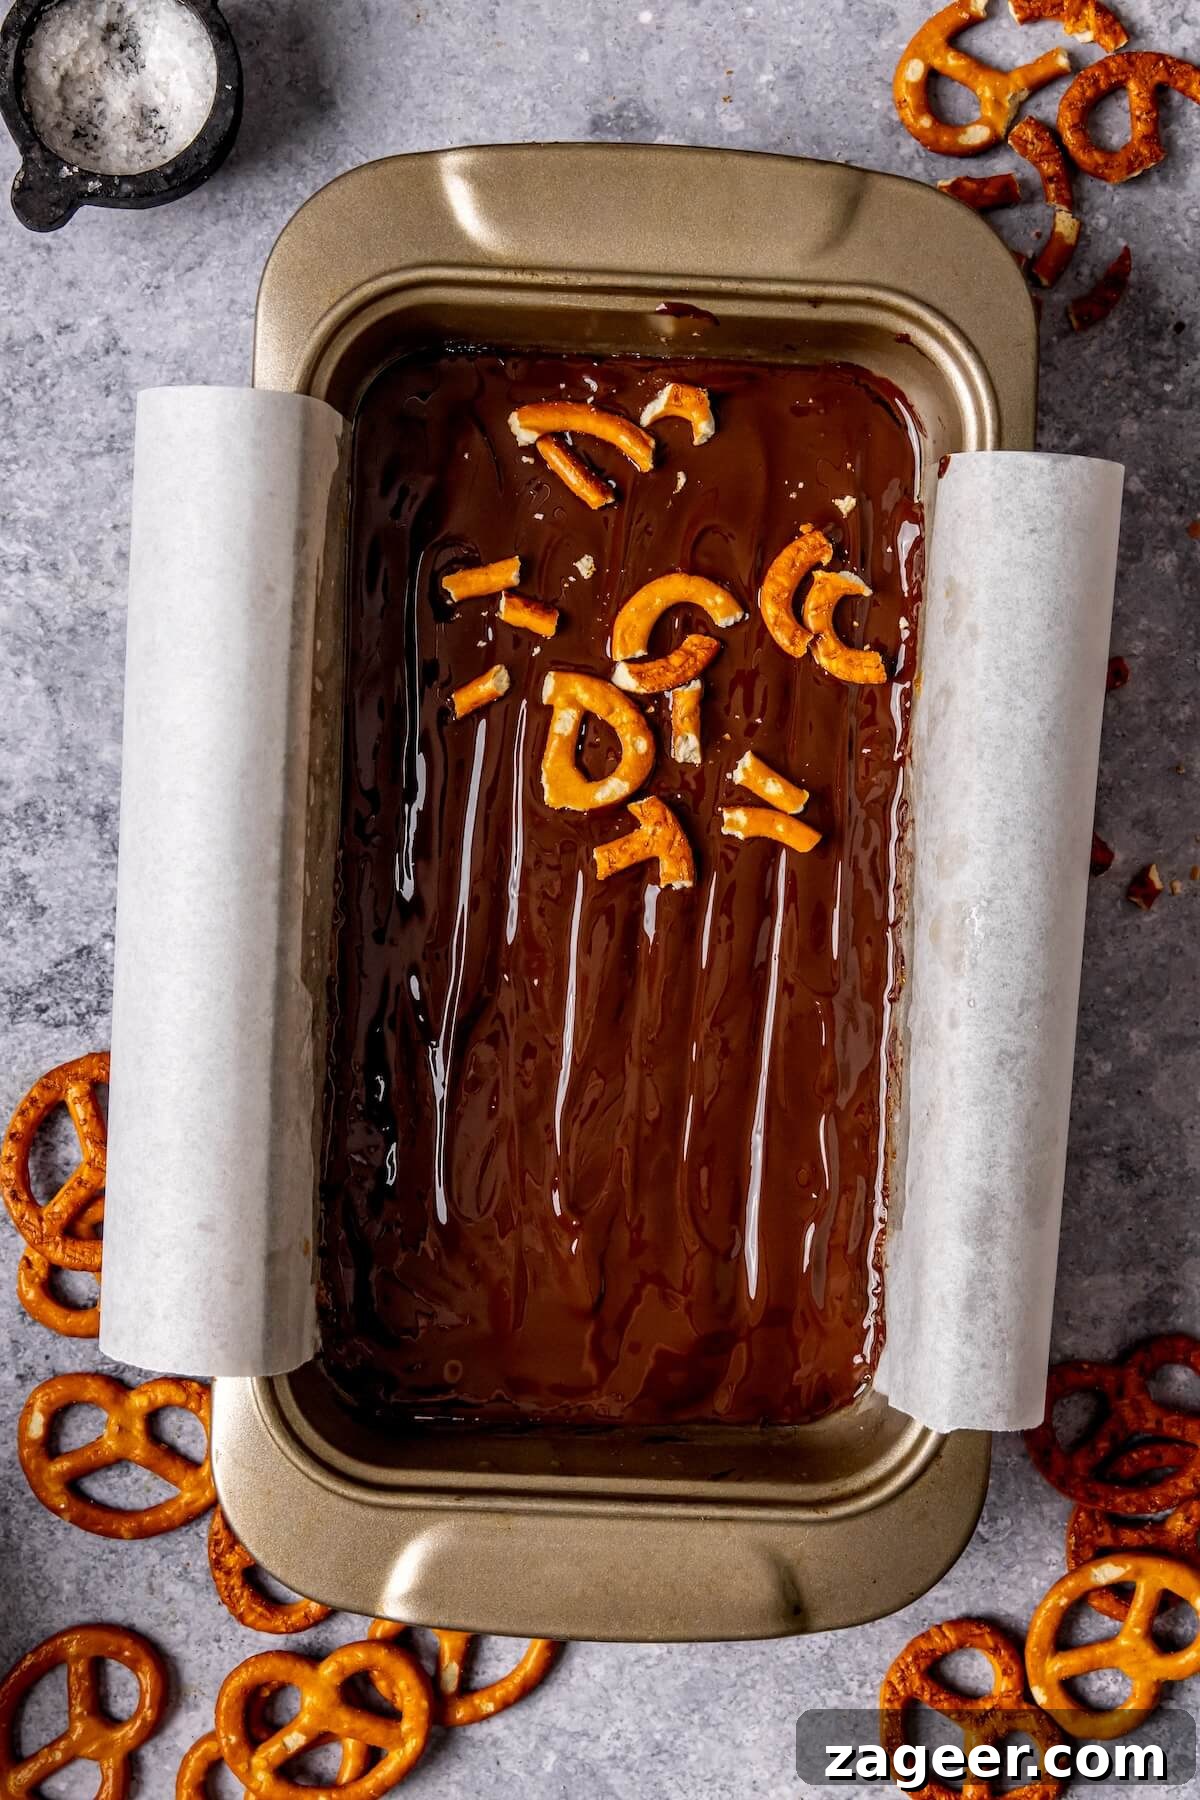
Once assembled, place the entire pan into the refrigerator to harden for at least 1 hour. This chilling time is absolutely crucial for the bars to set properly, ensuring clean slices and a perfect firm texture. After an hour, carefully remove the pan from the refrigerator. Use the parchment paper overhangs to lift the entire slab of bars out of the pan and transfer it to a cutting board. Give it one final sprinkle of flaky sea salt if desired, then slice into your preferred bar sizes. Now, your heavenly No-Bake Chocolate Peanut Butter Pretzel Bars are ready to be savored!
Storage, Make-Ahead, and Serving Tips
These No-Bake Chocolate Peanut Butter Pretzel Bars are not only delicious but also incredibly convenient. They store beautifully, making them perfect for preparing in advance or enjoying throughout the week.
- Storage: To maintain their optimal freshness and texture, store any leftover bars in an airtight container in the refrigerator. They will remain wonderfully fresh and firm for up to 5-7 days.
- Serving Suggestions: For the best eating experience, allow the bars to sit at room temperature for 5-10 minutes before serving. This slight warming helps to soften the peanut butter caramel, enhancing its creamy texture and deepening its flavors.
- Freezing for Longer Storage: These bars are excellent for freezing! Once sliced, arrange them in a single layer on a parchment-lined baking sheet and freeze until solid (about 1-2 hours). Then, transfer the frozen bars to a freezer-safe airtight container or bag, separating layers with parchment paper to prevent sticking. They can be stored in the freezer for up to 2-3 months. To enjoy, thaw them in the refrigerator for a few hours or at room temperature for about 30 minutes.
- Make-Ahead Perfection: Since these bars require chilling, they are an ideal candidate for make-ahead desserts. You can prepare them completely a day or two before you plan to serve them, allowing them ample time to set and freeing you up for other preparations.
Customization and Delicious Variations
While this recipe is a true delight in its original form, it’s also incredibly adaptable to your personal preferences and dietary needs. Feel free to get creative and experiment with these delicious variations:
- Alternative Nut Butters: If peanut butter isn’t your preference or you have an allergy, feel free to substitute with creamy almond butter, cashew butter, or even sunflower seed butter for a nut-free option. Ensure the alternative is natural and creamy for the best consistency.
- Chocolate Choices: Experiment with different types of dairy-free chocolate! Instead of dark chocolate, you could use a dairy-free “milk” chocolate for a sweeter profile, or even a dairy-free white chocolate for a different aesthetic and flavor. Adding a teaspoon of coconut oil to your melted chocolate can also give it a smoother, snappier finish.
- Boost the Crust: For an extra layer of flavor in the crust, consider adding a tablespoon of cocoa powder for a chocolatey base, or finely chopped toasted nuts like pecans or walnuts for added texture and richness.
- Topping Fun: Beyond crushed pretzels and flaky sea salt, unleash your creativity with other toppings! Drizzle with a contrasting chocolate (like white chocolate over dark), sprinkle with toasted shredded coconut, a dash of cinnamon, or even finely chopped roasted peanuts for an extra layer of peanut flavor.
- Spicy Kick: For those who love a surprising twist, a tiny pinch of cayenne pepper mixed into the melted dark chocolate can add a subtle, warming heat that beautifully complements the sweet and salty notes.
- Flavor Extracts: Try adding a few drops of peppermint extract to the chocolate topping for a mint-chocolate variation, or orange extract for a citrusy hint.
Frequently Asked Questions (FAQs)
Here are some common questions about making these delectable No-Bake Chocolate Peanut Butter Pretzel Bars:
Q: Can I use regular pretzels instead of gluten-free?
A: Absolutely! If you do not require a gluten-free diet, feel free to use your favorite brand of regular salted pretzels for both the crust and the topping. The flavor combination will remain just as delicious.
Q: What if my Medjool dates are too dry or firm?
A: If your dates feel dry or are hard to pit, simply soak them in hot water for about 10-15 minutes. This will soften them considerably, making them much easier to process into a smooth caramel and crust mixture. Drain them thoroughly before use.
Q: What’s the best way to melt the chocolate for the topping?
A: You can melt the dairy-free dark chocolate using a double boiler method (placing a heatproof bowl over a pot of simmering water, ensuring the bowl doesn’t touch the water) or in the microwave. If using the microwave, heat in 30-second intervals, stirring well after each, until the chocolate is smooth and fully melted. Be careful not to overheat it, as dark chocolate can seize easily.
Q: Are these bars truly refined sugar-free?
A: Yes, the primary sweeteners in this recipe are natural Medjool dates and pure maple syrup. While some dairy-free dark chocolates may contain a small amount of sugar, choosing high-quality dark chocolate (70% cocoa or higher) minimizes added sugars, keeping the overall recipe refined sugar-free.
Q: Can I make these in a different sized pan?
A: A 9″ x 5″ loaf pan is recommended for the ideal thickness of these bars. If you use a larger pan, such as an 8″ x 8″ square pan, your bars will be thinner, and you might need to adjust the chilling time slightly. For thicker bars in a larger pan, you would need to scale up the recipe ingredients accordingly.
Q: How do I ensure the crust is firm and doesn’t crumble?
A: The key to a firm crust is to pack it down very well into the parchment-lined pan. Use a flat-bottomed glass, the back of a spoon, or your knuckles to press it firmly and evenly. The refined coconut oil also acts as a binder, helping it set properly once chilled.
More Irresistible Desserts from Our Kitchen:
- Gluten-Free Molten Chocolate Brookies (Dairy-Free, Refined Sugar-Free)
- Giftable Stuffed Date “Chocolate” Box (Stuffed Dates 10 Ways!)
- Gluten-Free Dairy-Free Vanilla Cake with Raspberries
- Healthy Peanut Butter and Jelly Protein Bars
- No-Bake Lemon Cheesecake Bars
NO-BAKE CHOCOLATE PEANUT BUTTER PRETZEL BARS (GF, DF, RSF)
Print Recipe
These unbelievably delicious no-bake bars require minimal ingredients and equipment, yet deliver an out-of-this-world experience. With layers of sweet, salty, crunchy, and chocolatey goodness, they are the perfect gluten-free, dairy-free, and refined sugar-free treat for any occasion.
Ingredients
For the Peanut Butter Caramel:
- ½ cup creamy natural peanut butter
- 3 tablespoons melted refined coconut oil
- 8 large Medjool dates, pitted (softened in hot water for 10 minutes if dry)
- 1 teaspoon pure vanilla extract
- ½ teaspoon salt
- ¼ cup pure maple syrup
For the Pretzel Crust:
- 2 cups gluten-free pretzels, crushed
- 3 large Medjool dates, pitted
- ¼ cup refined coconut oil, melted
- ½ teaspoon salt
For the Chocolate Topping:
- ½ cup dairy-free dark chocolate, melted
- Crushed gluten-free pretzels, for sprinkling
- Flaky sea salt, for finishing
Instructions
1. Prepare the Peanut Butter Caramel:
- Add creamy peanut butter, melted refined coconut oil, pitted Medjool dates, vanilla extract, salt, and maple syrup to a large food processor.
- Pulse a few times, then process for 30 seconds to 1 minute until the mixture is completely smooth and thick, scraping down the sides of the bowl as needed.
- Remove the peanut butter caramel from the food processor and set it aside in a separate bowl.
2. Create the Pretzel Crust:
- Without cleaning the food processor, add the crushed gluten-free pretzels, pitted Medjool dates, melted refined coconut oil, and salt. Pulse until a dense, sandy mixture forms, ensuring there are no large pretzel chunks.
- Pour the crust mixture into a 9” x 5” loaf pan lined with parchment paper. Gently spread it out evenly and firmly press it down to create a compact, stable layer.
3. Assemble & Chill:
- Evenly spread the prepared peanut butter caramel over the pressed pretzel crust.
- Pour the melted dairy-free dark chocolate over the caramel layer. Gently tilt the pan to distribute the chocolate evenly, creating a smooth topping.
- Generously sprinkle additional crushed pretzels over the melted chocolate.
- Place the pan in the refrigerator for at least 1 hour to allow the bars to set and harden completely.
- Once chilled, carefully lift the entire slab of bars out of the pan using the parchment paper. Transfer to a cutting board, sprinkle with flaky sea salt, and slice into your desired bar sizes. Serve and enjoy!
Notes
Making the peanut butter caramel first and then the pretzel crust in the same food processor is a clever trick to save you from extra washing up!
Store any leftover bars in an airtight container in the refrigerator for up to 5-7 days. For the best texture, let them sit at room temperature for a few minutes before serving to soften the caramel slightly.
Nutrition Information (Approximate per bar)
Calories: 825kcal | Carbohydrates: 119g | Protein: 7g | Fat: 38g | Saturated Fat: 22g | Polyunsaturated Fat: 3g | Monounsaturated Fat: 8g | Trans Fat: 0.01g | Cholesterol: 0.4mg | Sodium: 1719mg | Potassium: 563mg | Fiber: 6g | Sugar: 43g | Vitamin A: 71IU | Calcium: 64mg | Iron: 3mg
Nutrition information is automatically calculated and should only be used as an approximation. Values can vary based on specific ingredient brands and preparation methods.
Loved this recipe? Share your experience and leave a comment below!