

Crispy Loaded Antipasti Salami Bites: Your New Go-To Easy Appetizer
Ready in just 20 minutes, these delectable crispy, super-loaded salami bites are the ultimate solution for effortless entertaining. Simply press salami slices into a mini muffin pan, whip up a quick filling using classic antipasti ingredients you likely already have on hand, then fill and finish with a drizzle of honey. This easy-to-make, yet incredibly impressive appetizer is guaranteed to be a crowd-pleaser at any gathering.
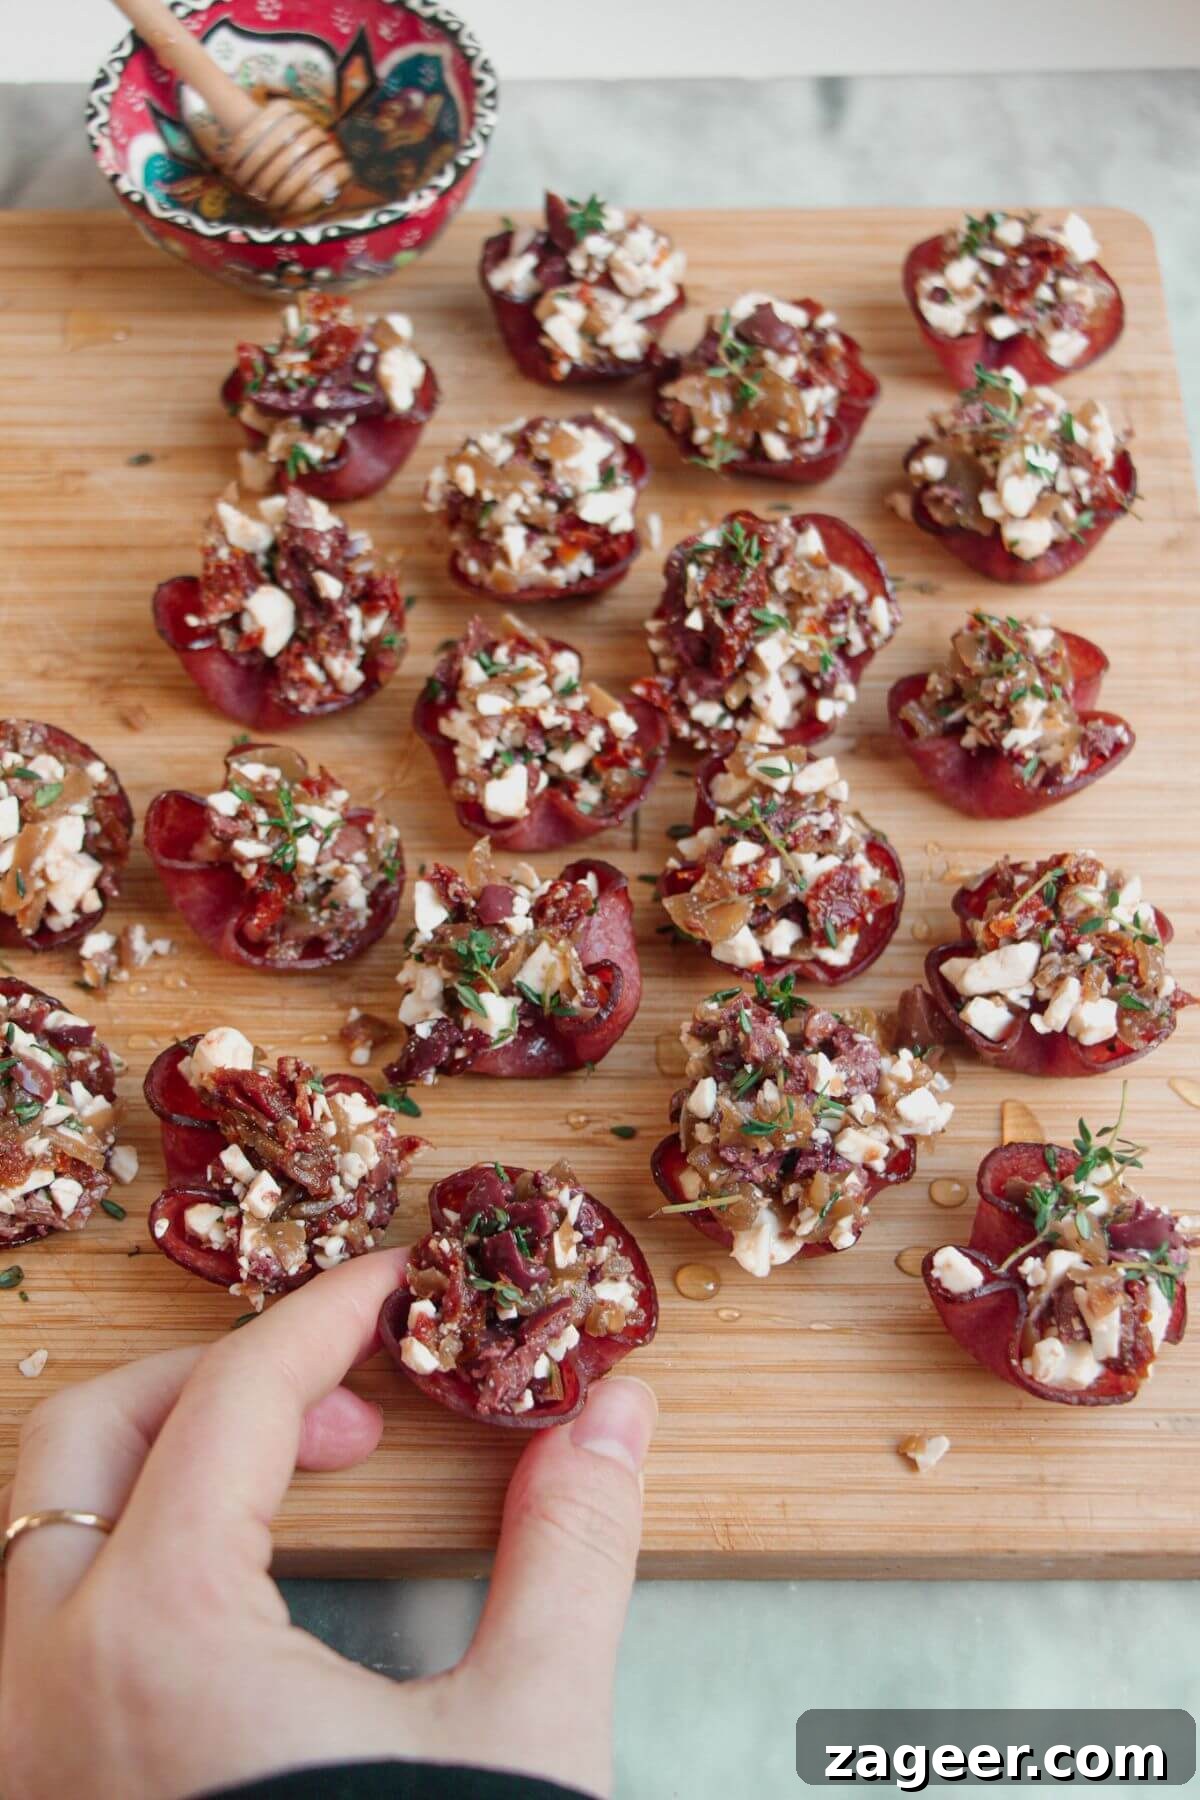
Imagine the vibrant flavors of a classic antipasti board, perfectly condensed into a single, irresistible bite. These gorgeous little cups offer a symphony of tastes and textures: the delightful sweetness from caramelized onions and a touch of honey, the savory saltiness of sundried tomatoes and olives, the satisfying crispiness of the baked salami, and the creamy richness of feta cheese. Every bite is an explosion of flavor!
Not only are they incredibly easy to prepare, coming together in about 20 minutes, but they also boast a charming presentation that will undoubtedly impress your guests. Their inherent design relies on readily available cupboard staples, making them a convenient option for last-minute entertaining.
What’s more, these crispy salami bites are a fantastic option for advance preparation. You can make both the crispy salami cups and the flavorful filling ahead of time, then simply assemble them whenever you’re ready to serve. This flexibility allows you to customize the filling ingredients based on your preferences and what you have on hand – I’ve provided some simple and delicious swap ideas below to inspire you.
Why You’ll Love These Crispy Salami Bites
Beyond their stunning appearance and incredible taste, these antipasti salami bites offer numerous advantages that make them an instant favorite for hosts and guests alike:
- Lightning Fast: From prep to plate in approximately 20-25 minutes, making them ideal for spontaneous gatherings or busy weeknights.
- Effortlessly Impressive: They look far more complex than they are to make, earning you rave reviews with minimal effort.
- Make-Ahead Friendly: Both the salami cups and the filling can be prepared days in advance, significantly reducing stress on party day.
- Customizable: Easily adapt the filling to suit different tastes or dietary needs with various cheese, vegetable, and flavor substitutions.
- Crowd-Pleasing Flavors: The sweet, salty, savory, and creamy elements combine to create a balanced flavor profile that appeals to nearly everyone.
- Perfect Finger Food: Designed as single bites, they are mess-free and perfect for mingling at parties or as an elegant starter.
Essential Ingredients for Perfect Salami Bites
Crafting these delicious bites requires a handful of simple, high-quality ingredients, many of which are likely already in your pantry or easily found at any grocery store. Here’s a detailed look at what you’ll need to create these irresistible appetizers:
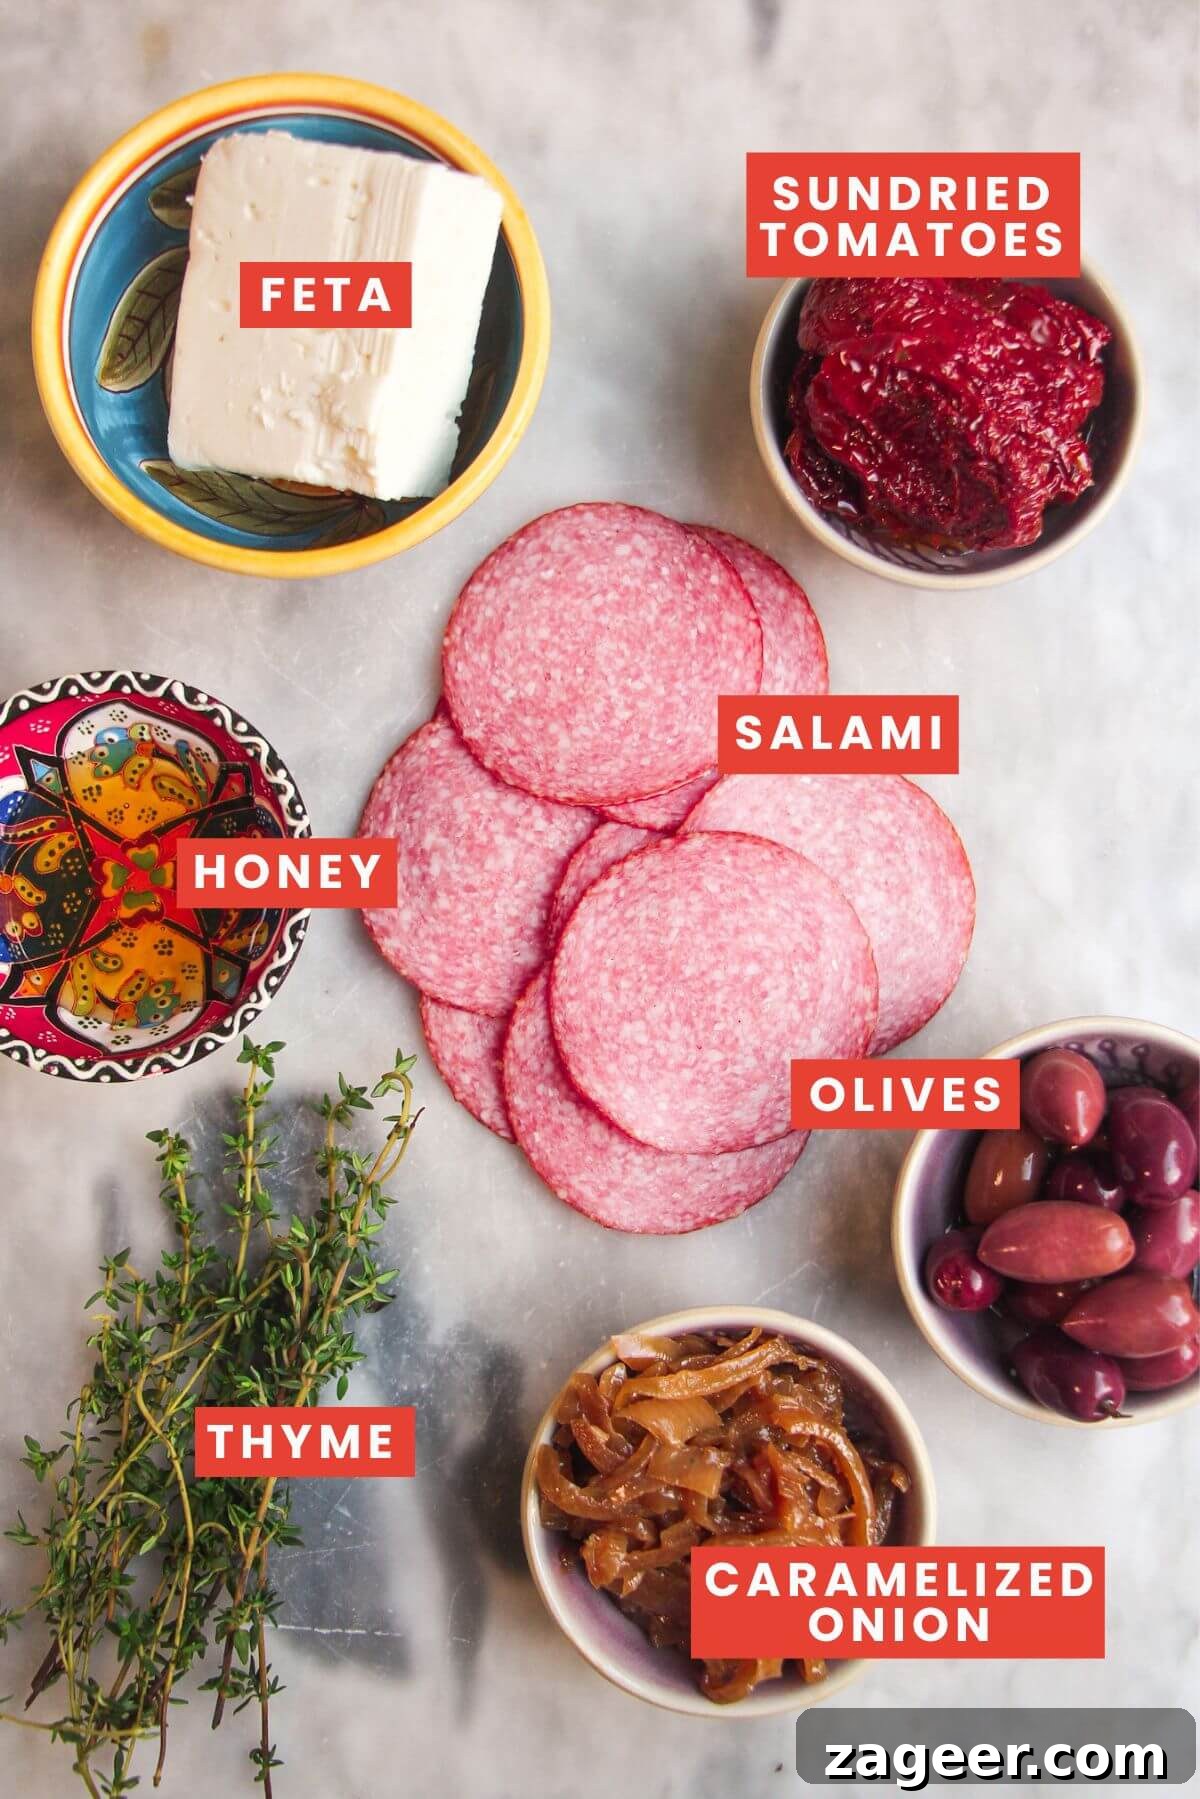
- Salami: The star of the show! Select your favorite type of salami. The key is to choose slices that are large enough to fit into the wells of a mini muffin pan, allowing them to form sturdy, crispy cups. Hard salamis work best for achieving that desirable crisp texture. Experiment with different varieties like Genoa, sopressata, or even spicy pepperoni for a kick.
- Feta Cheese: A creamy, tangy feta is crucial here, providing a delightful texture and a burst of savory flavor that beautifully complements the other ingredients. If feta isn’t your preference, crumbled goat’s cheese offers a similar tang and creaminess, shredded Manchego adds a nutty profile, or torn fresh mozzarella can provide a milder, milky creaminess.
- Olives: My personal preference for this recipe is Kalamata olives, known for their rich, fruity, and slightly briny taste. However, feel free to use any olives you enjoy. Green olives, for example, can add a festive pop of color, making the bites even more visually appealing. To save time and ensure a smoother filling, I highly recommend using pitted olives.
- Caramelized Onions: These provide a wonderful layer of sweetness that elegantly cuts through the saltiness of the salami, feta, and olives, creating a perfectly balanced flavor profile. If you’re short on time, a good quality caramelized onion jam, relish, or chutney can be an excellent substitute. Other sweet and savory chutneys, like a fig and tamarind chutney, also work beautifully.
- Sundried Tomatoes: These intensely flavored tomatoes bring a concentrated sweet-tart and umami punch to the filling, enhancing the Mediterranean feel of the appetizer. Choose oil-packed sundried tomatoes for the best flavor and texture, ensuring to drain them well before chopping.
- Fresh Thyme: A handful of fresh thyme leaves adds a fragrant, earthy, and slightly peppery note, elevating the overall aroma and taste of the bites. Other fresh herbs like oregano or finely chopped rosemary could also be used for a different aromatic twist.
- Honey: A final drizzle of honey over the assembled bites adds a touch of golden sweetness, tying all the savory elements together. For those who enjoy a little heat, a spicy twist can be achieved by using hot honey sauce or a sweet chili jam. This sweet finish is truly what makes these bites sing.
You’ll also need a reliable mini muffin tin for this recipe. I find a 24-piece pan to be ideal, allowing for a good batch size without constant re-loading.
Crafting Your Crispy Loaded Salami Bites: Step-by-Step
Creating these impressive appetizers is surprisingly simple, broken down into a few easy steps. Follow these instructions for perfectly crispy salami cups and a flavor-packed filling every time.
1. Prepare the Crispy Salami Cups
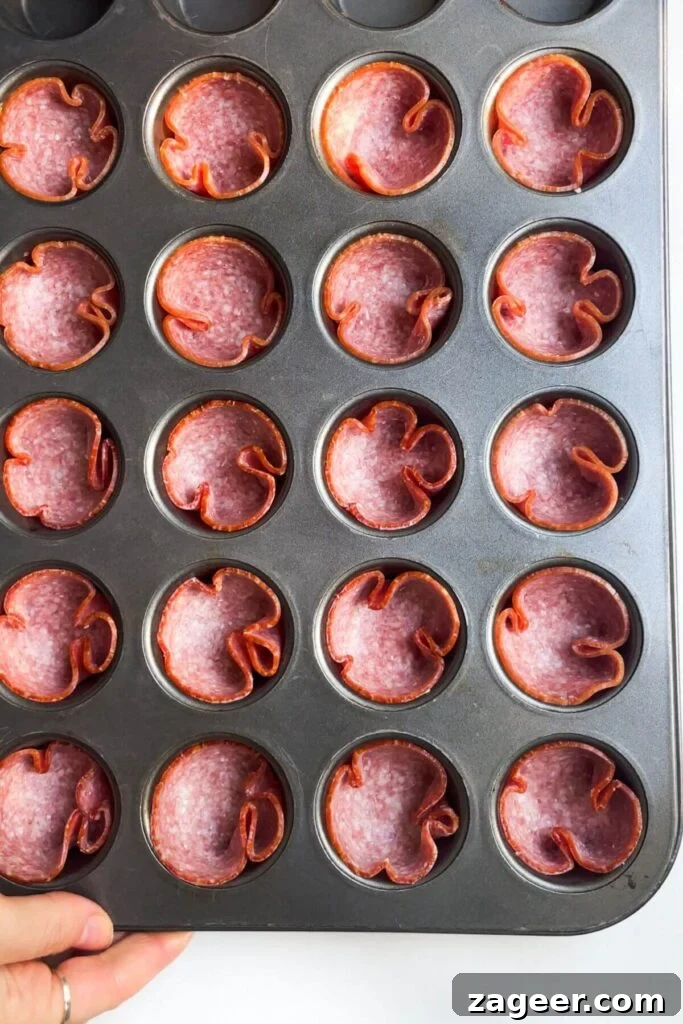
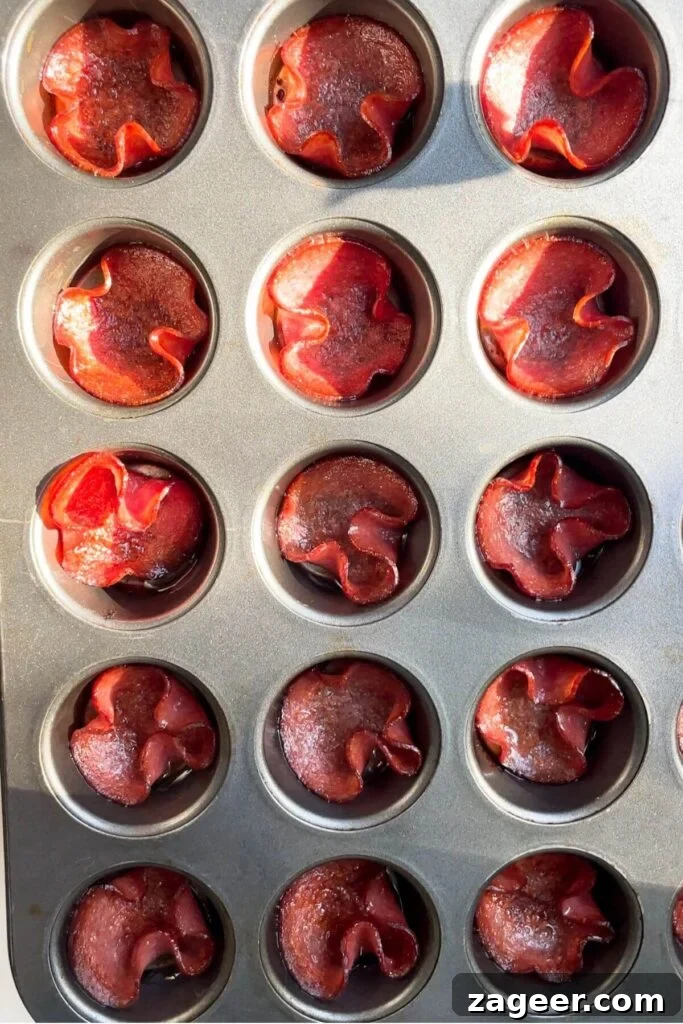
Preheat your oven to 400°F (200°C fan). Gently press each salami slice into the wells of your mini muffin pan. The goal is to create a small cup shape. A shot glass or the back of a small spoon can be helpful tools to gently mold the salami into the desired form, ensuring it holds its shape during baking. Bake for approximately 10 minutes, or until the edges of the salami are beautifully crispy and golden brown. Once baked, carefully remove the salami cups from the pan and transfer them to a wire rack. This allows them to cool completely and continue to crisp up, becoming delightfully firm and ready for filling.
2. Mix the Flavorful Antipasti Filling
While your salami cups are baking and cooling, it’s the perfect time to prepare the vibrant filling. Finely chop your caramelized onions, sundried tomatoes, and pitted olives. The goal is small, uniform pieces that will fit well into the small salami cups. Transfer these chopped ingredients to a small mixing bowl. Crumble the feta cheese into the bowl, and then add most of your fresh thyme leaves, reserving a small amount for garnish. Mix all the ingredients thoroughly until they are well combined. The mixture should be moist and easy to spoon.
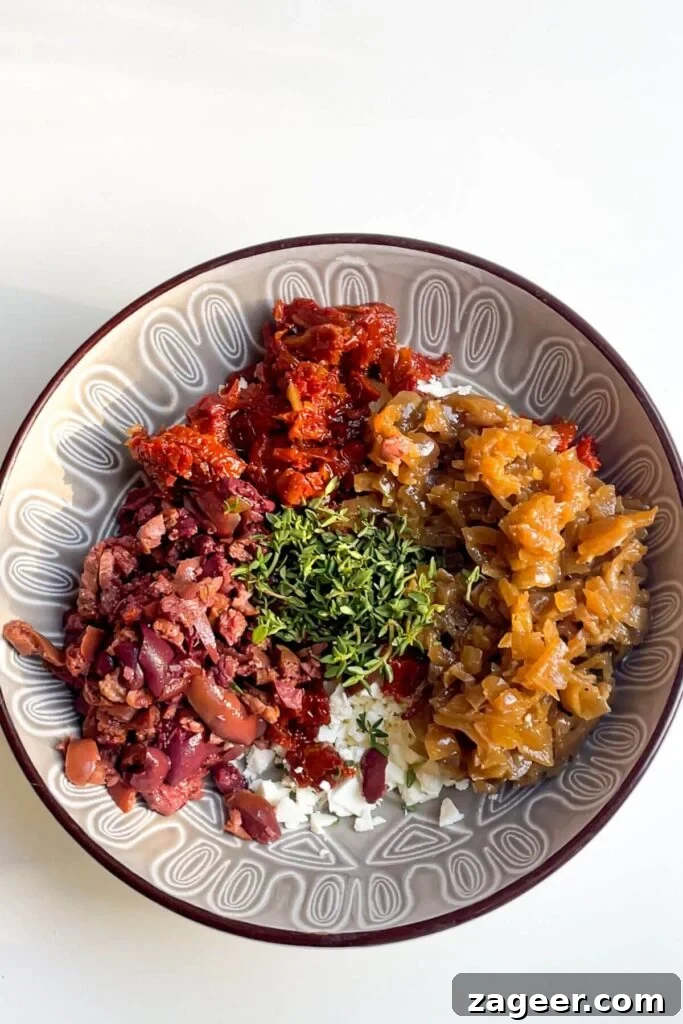
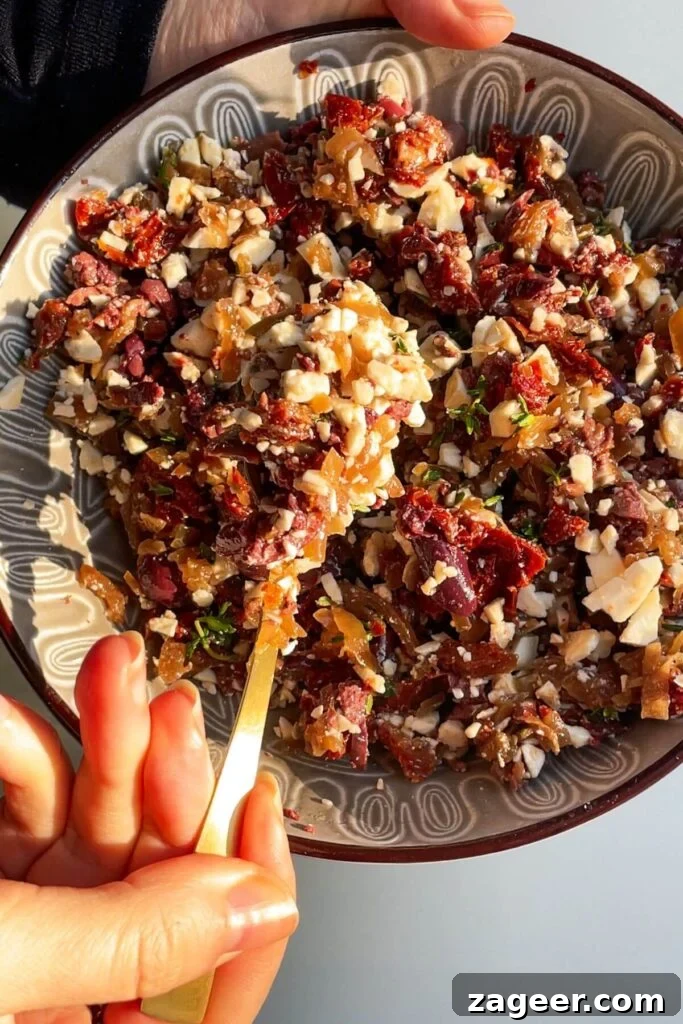
3. Assemble the Bites
Once the salami cups have cooled completely and are firm, it’s time for assembly. This step is quick and easy! The most efficient way to fill the cups is to pick up each crispy salami cup individually and spoon in a generous tablespoon of the prepared filling. Do this directly over the mixing bowl containing the filling. This smart technique ensures that any filling that might accidentally fall out during the process lands back into the bowl, minimizing mess and waste. You can gently press the filling down with the back of your spoon to ensure each cup is fully loaded.


4. Garnish and Serve
Arrange your beautifully assembled salami bites on a serving platter. For the final touch, lightly drizzle honey over each bite – this adds that irresistible sweet counterpoint. Finally, scatter the remaining fresh thyme leaves over the platter for an extra burst of freshness and visual appeal. Serve immediately and watch them disappear!
Pro Tips for Perfect Salami Bites
Achieving perfectly crispy salami bites that are packed with flavor is simpler than you think. Here are some expert tips to ensure your appetizers are a resounding success:
- Choosing Your Salami: Opt for a good quality, thinly sliced salami that isn’t too greasy. Varieties like Genoa salami or hard salami work wonderfully, as they crisp up nicely without becoming brittle. Ensure the slices are large enough to comfortably line the mini muffin wells.
- Molding the Cups: While pressing the salami into the muffin pan, be gentle. If you find them resistant, a quick zap in the microwave for 5-10 seconds can make them more pliable, but usually, fresh salami is flexible enough. Don’t overfill the muffin wells before baking, as this can prevent them from crisping evenly.
- Cooling is Key: Always transfer the baked salami cups to a wire rack to cool completely. This crucial step allows air to circulate around them, ensuring they become optimally crispy. Cooling on a solid surface might trap steam and make them softer.
- Flavor Balance in the Filling: The balance of sweet (caramelized onions, honey) and salty (salami, olives, feta, sundried tomatoes) is what makes these bites so addictive. Taste your filling before assembly and adjust if necessary. A pinch of black pepper can also enhance the flavors.
- Efficient Filling Technique: The “fill over the bowl” method is a game-changer for speed and cleanliness. Don’t be shy about pressing the filling firmly into the cups with a spoon; this prevents bits from falling out when handled.
- Drizzle with Care: The honey drizzle is an essential finishing touch. Apply it evenly but sparingly; a little goes a long way in providing that delightful sweetness without making the bites sticky or overly sweet.
- Serving Temperature: These bites are best served at room temperature or slightly warm, allowing the flavors to meld beautifully. If you need to re-crisp them, follow the instructions in the make-ahead section below.
Creative Variations & Customization Ideas
One of the best aspects of these crispy salami bites is their incredible versatility. Feel free to unleash your culinary creativity and adapt the filling to your personal taste, dietary needs, or what you have available. Here are some inspiring ideas for delicious variations:
- Cheese Swaps:
- Cream Cheese: For a milder, richer, and tangier filling, blend some softened cream cheese with a little garlic powder and fresh chives.
- Ricotta: Combine ricotta with a touch of lemon zest and parmesan for a lighter, fluffy texture.
- Goat Cheese: Offers a more pungent, earthy flavor and a wonderfully creamy texture.
- Grated Parmesan/Pecorino: Mix into the feta filling for an extra layer of savory, salty depth.
- Vegetable & Herb Additions:
- Roasted Red Peppers: Finely chop jarred roasted red peppers for a sweet and smoky flavor.
- Artichoke Hearts: Chopped marinated artichoke hearts add a distinct tangy, savory note.
- Capers: A small amount of finely chopped capers can introduce a briny, salty punch.
- Pesto: Swirl a teaspoon of basil pesto into the filling for an aromatic, herbaceous twist.
- Fresh Basil: Instead of thyme, use finely chopped fresh basil for a classic Italian flavor.
- Chives/Scallions: Adds a mild oniony freshness.
- Spice & Heat:
- Chili Flakes: Sprinkle a pinch of red chili flakes into the filling for a subtle warmth.
- Hot Honey: As mentioned, a drizzle of hot honey sauce instead of regular honey provides a fantastic sweet and spicy kick.
- Jalapeño: Finely minced fresh or pickled jalapeño can add vibrant heat.
- Sweet & Savory Drizzles:
- Balsamic Glaze: A rich balsamic glaze can replace honey for a tangy-sweet finish.
- Fig Jam: Instead of caramelized onions, you could use a small amount of fig jam in the filling for a different kind of sweetness.
- Nutty Crunch:
- Toasted Pine Nuts: A small sprinkle of toasted pine nuts on top before serving adds a lovely texture and nutty flavor.
Make-Ahead & Storage Solutions
These crispy salami bites are perfect for meal prepping and entertaining, thanks to their excellent make-ahead potential. Planning your party menu just got a whole lot easier!
- Preparing in Advance: Both the crispy salami cups and the delicious antipasti filling can be prepared up to five days ahead of time. Store the cooled salami cups in an airtight container at room temperature (if very humid, store loosely covered in the fridge). Keep the filling in a separate airtight container in the refrigerator. When you’re ready to serve, simply fill the cups, drizzle with honey, and garnish. This significantly reduces last-minute stress.
- Cooling for Crispness: It’s essential to let the salami cups cool completely on a wire rack before storing them. This prevents condensation that can lead to sogginess.
- Re-Crisping Softened Cups: Over time, the salami cups may soften slightly. No worries! You can easily bring back their crisp texture. Pop them into an air fryer at 350°F (175°C) for 2-3 minutes, or into a preheated oven at 350°F (175°C) for 5-7 minutes. Watch them carefully to prevent burning. Only re-crisp the cups if they are unfilled; filling them first and then heating might make the filling warm, which may not be desired.
- Storage of Assembled Bites: While best enjoyed fresh, assembled bites can be stored in an airtight container in the refrigerator for up to 2 days. The salami might lose some of its crispiness, but the flavors will still be delightful. Allow them to come to room temperature before serving for optimal taste.
Frequently Asked Questions
Yes, absolutely! Both the salami cups and the filling can be prepared up to five days ahead of time. Store the cooled salami cups in an airtight container at room temperature (or fridge if very humid), and the filling separately in the fridge. Assemble them just before serving for the best texture. If the salami cups have softened, you can easily crisp them up in an air fryer or oven for a few minutes at 350°F (180°C).
Of course! Olives aren’t a universal favorite, so feel free to swap them out. Excellent alternatives include finely chopped sundried tomatoes (if you want more!), jarred marinated artichoke hearts, or roasted red peppers. These will still provide that wonderful antipasti flavor profile.
Look for a firm, good-quality salami that is thinly sliced and relatively large in diameter, typically 2.5-3 inches (6-8 cm), to form adequate cups in a mini muffin tin. Genoa salami or hard salami are excellent choices as they crisp up well. Avoid very thinly sliced deli-style salami that might not hold its shape as effectively.
Generally, yes! Most salami products are naturally gluten-free, and all the other ingredients in this recipe (feta, olives, caramelized onions, sundried tomatoes, honey, thyme) are also typically gluten-free. However, always check the labels of your specific salami brand and any pre-made ingredients (like caramelized onion jam) to ensure they do not contain hidden gluten if this is a concern.
These crispy salami bites are fantastic served on a beautiful platter or wooden board, perhaps nestled among some fresh rocket or basil leaves. They pair wonderfully with a crisp white wine, a light sparkling rosé, or even a refreshing prosecco. They’re also an excellent addition to a larger charcuterie or appetizer spread, complementing other finger foods beautifully.
Love this recipe? Discover More Easy Appetizer Ideas!
Mini Pesto Ricotta Puff Pastry Cups
Make-Ahead Smoked Salmon Cucumber Bites
Easy Brie, Cranberry & Prosciutto Filo Bites
Cheesy Jalapeno Popper Puff Pastry Straws (Twists)
If you create this delicious recipe, I would love to hear from you! Please consider leaving a recipe rating and a comment below to share your experience. And don’t forget to tag @DishedByKate on Instagram, Facebook, and TikTok if you’ve made one of my recipes. Seeing your culinary creations truly brightens my day! 😊

Crispy Loaded Antipasti Salami Bites
No reviews yet.
- Author: Kate Phillips
- Total Time: 25 minutes
- Yield: 20 bites
Description
Only 20 minutes stand between you and a platter of crispy, super-loaded salami bites. Pop salami slices into a mini muffin pan, mix a quick filling using classic antipasti ingredients I bet you already have, then fill and drizzle with honey. An easy, impressive appetizer guaranteed to be a crowd-pleaser.
Ingredients
- 20 slices of salami
- 1/2 cup caramelized onions
- 1/2 cup sundried tomatoes (drained)
- 1/2 cup pitted olives (e.g., Kalamata)
- 3.5oz (100g) feta cheese, crumbled
- A handful of fresh thyme leaves
- 1 tablespoon honey (or hot honey sauce or sweet chilli jam for a kick)
Instructions
- Make the crispy salami cups: Heat your oven to 400°F (200°C fan). Press the salami slices into your mini muffin pan to create small cups. Use a shot glass or the back of a small spoon to help if needed. Transfer to the oven and bake for 10 minutes, until the salami edges are crispy. Remove from the oven, then transfer the salami cups to a wire rack to cool completely (they will crisp up further as they cool).
- Mix the filling: While the salami cups bake, finely chop the caramelized onions, sundried tomatoes, and olives. Add them to a small bowl. Crumble in the feta cheese and add most of the thyme leaves, reserving some for garnish. Mix well to combine all ingredients.
- Assemble the cups: Once the salami cups have cooled, spoon the filling into them. The easiest way to do this is to pick up a cup and spoon a heaped tablespoon of filling over the filling bowl, allowing any fallen bits to drop back into the bowl. Gently press the filling into the cups with a spoon.
- Garnish and serve: Arrange the filled bites on a serving platter. Drizzle with the honey and scatter over the remaining fresh thyme leaves. Serve immediately.
Notes
PREP AHEAD: You can prepare both the salami cups and the filling up to five days in advance. Store the cooled salami cups at room temperature (or in the fridge if very humid) and the filling in an airtight container in the fridge. Assemble just before serving. If salami cups soften, re-crisp them in an air fryer or oven for a few minutes at 350°F (180°C).
INGREDIENT NOTES: Feel free to customize the filling! Swap feta for goat’s cheese or cream cheese. If you’re not an olive fan, use jarred artichokes or roasted red peppers instead. For the sweet element, a jam, relish, or another chutney (like a fig and tamarind chutney) can replace caramelized onions to balance the saltiness.
- Prep Time: 10 minutes
- Cook Time: 15 minutes
- Category: Appetizers
- Method: Oven
- Cuisine: American
Nutrition Information (per 3 bites serving)
- Serving Size: 3 bites
- Calories: 215
- Sugar: 5.4g
- Sodium: 940mg
- Fat: 16.5g
- Saturated Fat: 7.7g
- Carbohydrates: 7.5g
- Fiber: 0.9g
- Protein: 9.8g
- Cholesterol: 52mg
*Nutritional values are estimates and may vary based on specific ingredients and preparation methods.